

ELK之elasticsearch5.6的安装和head插件的安装
这里选择的elasticsearch为5.6的新版本,根据官方文档有几种暗装方式:
https://www.elastic.co/guide/en/elasticsearch/reference/current/install-elasticsearch.html
这里选择rpm包安装https://www.elastic.co/guide/en/elasticsearch/reference/current/rpm.html
1、wget https://artifacts.elastic.co/downloads/elasticsearch/elasticsearch-5.6.1.rpm
2、查看有哪些配置文件
[root@node1 ~]# cd /etc/elasticsearch/
[root@node1 elasticsearch]# ll
总用量 20
-rw-rw----. 1 root elasticsearch 3024 9月  19 14:00 elasticsearch.yml
-rw-rw----. 1 root elasticsearch 3123 9月  18 10:38 jvm.options
-rw-rw----. 1 root elasticsearch 4456 9月   7 11:12 log4j2.properties
drwxr-x---. 2 root elasticsearch 4096 9月   7 11:12 scripts
elasticsearch常用配置在elasticsearch.yml文件中,关于jvm的一些配置在jvm.options文件中,日志的配置在log4j2.properties文件中
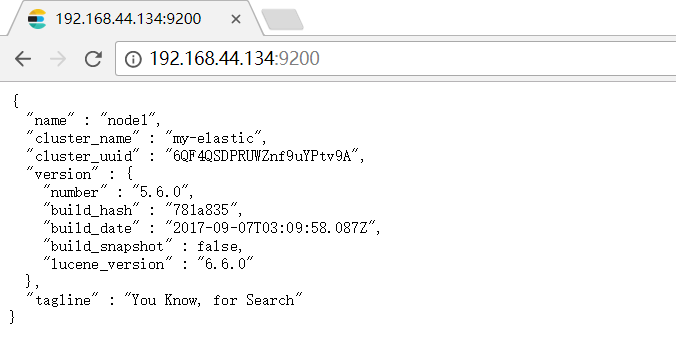
[root@node1 elasticsearch]# grep -v "^#" /etc/elasticsearch/elasticsearch.yml
cluster.name: my-elastic
node.name: node1
network.host: 0.0.0.0
http.port: 9200
简单配置之后然后启动服务:/etc/init.d/elasticsearch start
默认日志文件为/var/log/elasticsearch/目录下,启动有报错都可以根据报错解决
这里将一些遇到的报错及解决方法列一些出来:
[root@node1 elasticsearch]# cat /etc/security/limits.d/90-nproc.conf
# Default limit for number of user's processes to prevent
# accidental fork bombs.
# See rhbz #432903 for reasoning.

*          soft    nproc     2048
root       soft    nproc     unlimited
[root@node1 elasticsearch]# grep -v "^#" /etc/elasticsearch/elasticsearch.yml
cluster.name: my-elastic
node.name: node1
bootstrap.system_call_filter: false
network.host: 0.0.0.0
http.port: 9200
重新启动elasticsearch服务,查看日志是否报错,如没有报错,浏览器进行访问是否有效:
现在为elasticsearch安装上插件head,利用github找到head插件:

https://github.com/mobz/elasticsearch-head,根据文中说明:
There are multiple ways of running elasticsearch-head.
Running with built in server
git clone git://github.com/mobz/elasticsearch-head.gitcd elasticsearch-headnpm installnpm run start
This will start a local webserver running on port 9100 serving elasticsearch-head
Running as a plugin of Elasticsearch (deprecated)
- for Elasticsearch 5.x: site plugins are not supported. Run as a standalone server
elasticsearch5.x以上需要安装head插件需要作为一个单独的服务,步骤如上,于是开始安装:
如果没有npm命令需要首先安装上:
git clone git://github.com/mobz/elasticsearch-head.git
cd elasticsearch-head
npm install
npm run start
默认监听在0.0.0.0,不需要修改监听地址
这里有两种启动方式:
1、npm run start(仓库拉取下来的elasticsearch-head目录下执行)
2、[root@node1 elasticsearch-head]# ./node_modules/grunt/bin/grunt server
启动后都是如下效果:
[root@node1 elasticsearch-head]# ./node_modules/grunt/bin/grunt server
Loading "watch.js" tasks...ERROR
>> Error: Cannot find module 'http-parser-js'

Running "connect:server" (connect) task
Waiting forever...
Started connect web server on http://localhost:9100
查看日志:
[2017-09-19T13:50:36,288][INFO ][o.e.p.PluginsService ] [node1] no plugins loaded
[2017-09-19T13:50:38,401][INFO ][o.e.d.DiscoveryModule ] [node1] using discovery type [zen]
[2017-09-19T13:50:39,079][INFO ][o.e.n.Node ] [node1] initialized
[2017-09-19T13:50:39,079][INFO ][o.e.n.Node ] [node1] starting ...
[2017-09-19T13:50:39,239][INFO ][o.e.t.TransportService ] [node1] publish_address {192.168.44.134:9300}, bound_addresses {[::]:9300}
9100端口已经监听了,访问浏览器http://192.168.44.134:9100却依然连接不到集群,然后谷歌到需要进行设置:
check http.cors.enabled and http.cors.allow-origin are set in config/elasticsearch.yml in order to enable cors.
Reference : https://www.elastic.co/guide/en/elasticsearch/reference/current/modules-http.html
然后配置elastic,具体配置如下:
[root@node1 elasticsearch]# grep -v "^#" /etc/elasticsearch/elasticsearch.yml
cluster.name: my-elastic
node.name: node1
bootstrap.system_call_filter: false
http.cors.enabled: true
http.cors.allow-origin: "*"
network.host: 0.0.0.0
http.port: 9200
重启服务之后,浏览器访问
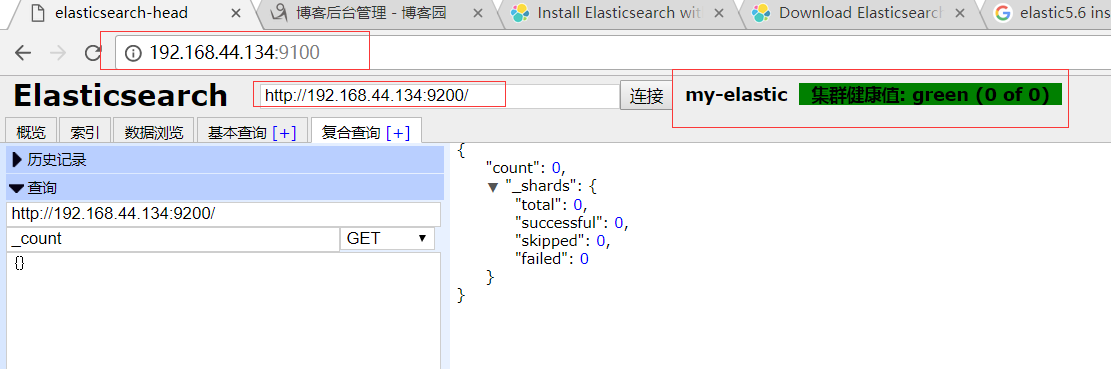
至此elasticsearch5.6版本安装head插件成功!!!
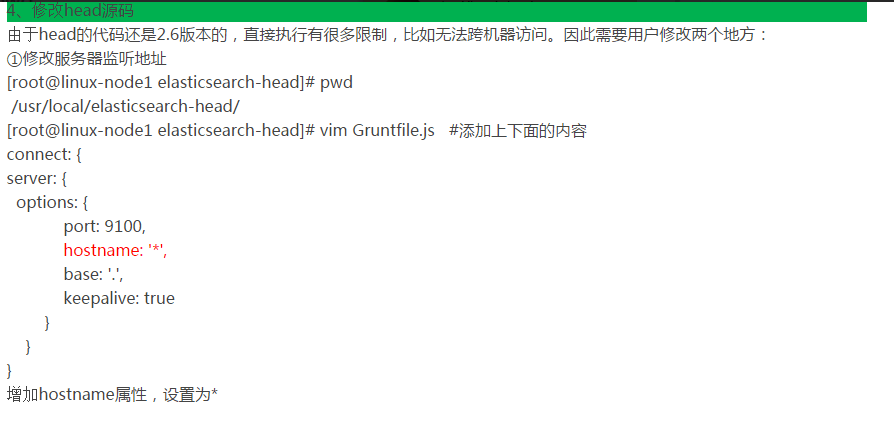
插件head的一些配置,如果node1不是监听在0.0.0.0而是ip:
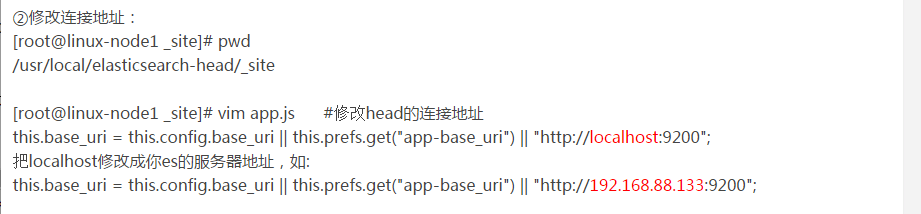
还有一个配置文件:(我这里没有hostname这个选项)

 浙公网安备 33010602011771号