
ceph dashbord和监控 day3
一、部署RaowsGW服务
1.1 安装radosgw服务并初始化
 1 ceph@ceph-node2:~$ sudo apt install -y radosgw
 2 ceph@ceph-node3:~$ sudo apt install -y radosgw
 3 ceph@ceph-node1:~/ceph-cluste$ ceph-deploy rgw create ceph-node2
 4 ceph@ceph-node1:~/ceph-cluste$ ceph-deploy rgw create ceph-node3
 5 ceph-s ## 查看 rgw: 2 daemons active (2 hosts, 1 zones)
 6
 7 ceph@ceph-node1:~/ceph-cluste$
 8 ceph@ceph-node1:~/ceph-cluste$ ceph osd pool ls
 9 device_health_metrics
10 myrbd1
11 .rgw.root  ##rgw自动创建的资源池,
12 default.rgw.log  #存储日志信息
13 default.rgw.control  #系统控制池
14 default.rgw.meta  #元数据存储池
15 ceph-metadata
16 cephfs-data
17 mypool
18 rdb-data
1.2 在ceph-node2安装haporoxy,做负载均衡
[root@node01 ~]# yum install -y haproxy
[root@node01 ~]# vim /etc/haproxy/haproxy.cfg
#---------------------------------------------------------------------
# main frontend which proxys to the backends
#---------------------------------------------------------------------
listen ceph-rgw
  bind 0.0.0.0:80
  mode tcp
  server rgw1 192.168.1.10:7480 check inter 3s fall 3 rise 5
  server rgw2 192.168.1.30:7480 check inter 3s fall 3 rise 5
"/etc/haproxy/haproxy.cfg" 67L, 2381C
[root@node01 ~]# systemctl restart haproxy.service
ceph@ceph-node1:~/ceph-cluste$ radosgw-admin --help

1.3 验证 RGW zone 信息
ceph@ceph-node1:~/ceph-cluste$ sudo radosgw-admin zone get --rgw-zone=default
{
    "id": "fe17e71b-2bc6-4636-bd9c-53b6f4de8a9d",
    "name": "default",
    "domain_root": "default.rgw.meta:root",
    "control_pool": "default.rgw.control",
    "gc_pool": "default.rgw.log:gc",
    "lc_pool": "default.rgw.log:lc",
    "log_pool": "default.rgw.log",
    "intent_log_pool": "default.rgw.log:intent",
    "usage_log_pool": "default.rgw.log:usage",
    "roles_pool": "default.rgw.meta:roles",
    "reshard_pool": "default.rgw.log:reshard",
    "user_keys_pool": "default.rgw.meta:users.keys",
    "user_email_pool": "default.rgw.meta:users.email",
    "user_swift_pool": "default.rgw.meta:users.swift",
    "user_uid_pool": "default.rgw.meta:users.uid",
    "otp_pool": "default.rgw.otp",
    "system_key": {
        "access_key": "",
        "secret_key": ""
    },
    "placement_pools": [
        {
            "key": "default-placement",
            "val": {
                "index_pool": "default.rgw.buckets.index",
                "storage_classes": {
                    "STANDARD": {
                        "data_pool": "default.rgw.buckets.data"
                    }
                },
                "data_extra_pool": "default.rgw.buckets.non-ec",
                "index_type": 0
            }
        }
    ],
    "realm_id": "",
    "notif_pool": "default.rgw.log:notif"
}
1.4 radosgw http 高可用
ceph@ceph-node1:~/ceph-cluste$ cat ceph.conf
[global]
fsid = 9794f4ef-1914-431b-b775-e85038312e18
public_network = 192.168.1.0/24
cluster_network = 192.168.2.0/24
mon_initial_members = ceph-node2
mon_host = 192.168.1.20
auth_cluster_required = cephx
auth_service_required = cephx
auth_client_required = cephx
[client.rgw.ceph-node1]
rgw_host = ceph-node1
rgw_frontends = civetweb port 9900
[client.rgw.ceph-node3]
rgw_host = ceph-node3
rgw_frontends = civetweb port 9900

ceph@ceph-node1:~/ceph-cluste$ ceph-deploy config push ceph-node3
root@ceph-node3:/# systemctl restart ceph-radosgw@rgw.ceph-node3.service
1.5 创建证书
root@ceph-node3:/# cd /etc/ceph/
root@ceph-node3:/etc/ceph# mkdir certs
root@ceph-node3:/etc/ceph# cd certs/
root@ceph-node3:/etc/ceph/certs# openssl genrsa -out civetweb.key 2048
Generating RSA private key, 2048 bit long modulus (2 primes)
...................................................................................................................................................................................................+++++
.............................+++++
e is 65537 (0x010001)
root@ceph-node3:/etc/ceph/certs# ls
civetweb.key

root@ceph-node3:/etc/ceph/certs# openssl req -new -x509 -key civetweb.key -out civetweb.crt -subj "/CN=rgw.magedu.net"
Can't load /root/.rnd into RNG
140456774357440:error:2406F079:random number generator:RAND_load_file:Cannot open file:../crypto/rand/randfile.c:88:Filename=/root/.rnd
root@ceph-node3:/etc/ceph/certs# ls
civetweb.crt  civetweb.key

root@ceph-node3:/etc/ceph/certs# cat civetweb.key civetweb.crt >civetweb.pem
root@ceph-node3:/etc/ceph/certs# ls
civetweb.crt  civetweb.key  civetweb.pem
1.6 创建用户并授权
ceph@ceph-node1:~/ceph-cluste$ radosgw-admin user create --uid="ymed" --display-name  "ymedu"
{
    "user_id": "ymed",
    "display_name": "ymedu",
    "email": "",
    "suspended": 0,
    "max_buckets": 1000,
    "subusers": [],
    "keys": [
        {
            "user": "ymed",
            "access_key": "VGYL31EA0JM6OBQM585L",
            "secret_key": "eEg5wXYAzGNflN7nBbXX2z7kHhn79i7myLF4qqAo"
        }
    ],
    "swift_keys": [],
    "caps": [],
    "op_mask": "read, write, delete",
    "default_placement": "",
    "default_storage_class": "",
    "placement_tags": [],
    "bucket_quota": {
        "enabled": false,
        "check_on_raw": false,
        "max_size": -1,
        "max_size_kb": 0,
        "max_objects": -1
    },
    "user_quota": {
        "enabled": false,
        "check_on_raw": false,
        "max_size": -1,
        "max_size_kb": 0,
        "max_objects": -1
    },
    "temp_url_keys": [],
    "type": "rgw",
    "mfa_ids": []
}

从上面的输出可以看到access_key,secret_key,同时也能够看到关于bucket,user配额相关的内容

    1、radosgw-admin user modify 修改用户信息;
    2、radosgw-admin user rm 删除用户;
    3、radosgw-admin user enable,radosgw-admin user suspend 启用和禁用用户。

此时用户已经创建完毕,我们可以配置 s3cmd 访问集群了,访问集群的时候需要用到RGW的访问域名。如果在企业中最好设置DNS解析,当前为了测试直接写hosts文件的方式实现:

    注:当前集群有多个radosgw,指向任意一个均可以,生产环境应该指向radosgw的VIP地址
1.7安装s3cmd工具
#在客户端安装c3scmd工具
ceph@ceph-node1:~/ceph-cluste$ sudo apt install -y s3cmd
#查看用户信息能不能正常访问
ceph@ceph-node1:~/ceph-cluste$ radosgw-admin user info --uid ymed
{
"user_id": "ymed",
"display_name": "ymedu",
"email": "",
"suspended": 0,
"max_buckets": 1000,
"subusers": [],
"keys": [
{
"user": "ymed",
"access_key": "VGYL31EA0JM6OBQM585L",
"secret_key": "eEg5wXYAzGNflN7nBbXX2z7kHhn79i7myLF4qqAo"
}
],
"swift_keys": [],
"caps": [],
"op_mask": "read, write, delete",
"default_placement": "",
"default_storage_class": "",
"placement_tags": [],
"bucket_quota": {
"enabled": false,
"check_on_raw": false,
"max_size": -1,
"max_size_kb": 0,
"max_objects": -1
},
"user_quota": {
"enabled": false,
"check_on_raw": false,
"max_size": -1,
"max_size_kb": 0,
"max_objects": -1
},
"temp_url_keys": [],
"type": "rgw",
"mfa_ids": []
}
#配置c3cmd
ceph@ceph-node1:~/ceph-cluste$ s3cmd --configure
Enter new values or accept defaults in brackets with Enter.
Refer to user manual for detailed description of all options.
Access key and Secret key are your identifiers for Amazon S3. Leave them empty for using the env variables.
Access Key: VGYL31EA0JM6OBQM585L
Secret Key: eEg5wXYAzGNflN7nBbXX2z7kHhn79i7myLF4qqAo
Default Region [US]:
Use "s3.amazonaws.com" for S3 Endpoint and not modify it to the target Amazon S3.
S3 Endpoint [s3.amazonaws.com]: 192.168.1.20:7480
Use "%(bucket)s.s3.amazonaws.com" to the target Amazon S3. "%(bucket)s" and "%(location)s" vars can be used
if the target S3 system supports dns based buckets.
DNS-style bucket+hostname:port template for accessing a bucket [%(bucket)s.s3.amazonaws.com]: 192.168.1.20:7480[%(bucket)s
Encryption password is used to protect your files from reading
by unauthorized persons while in transfer to S3
Encryption password:
Path to GPG program [/usr/bin/gpg]:
When using secure HTTPS protocol all communication with Amazon S3
servers is protected from 3rd party eavesdropping. This method is
slower than plain HTTP, and can only be proxied with Python 2.7 or newer
Use HTTPS protocol [Yes]: False
On some networks all internet access must go through a HTTP proxy.
Try setting it here if you can't connect to S3 directly
HTTP Proxy server name:
New settings:
Access Key: VGYL31EA0JM6OBQM585L
Secret Key: eEg5wXYAzGNflN7nBbXX2z7kHhn79i7myLF4qqAo
Default Region: US
S3 Endpoint: 192.168.1.20:7480
DNS-style bucket+hostname:port template for accessing a bucket: 192.168.1.20:7480[%(bucket)s
Encryption password:
Path to GPG program: /usr/bin/gpg
Use HTTPS protocol: False
HTTP Proxy server name:
HTTP Proxy server port: 0
Test access with supplied credentials? [Y/n] y
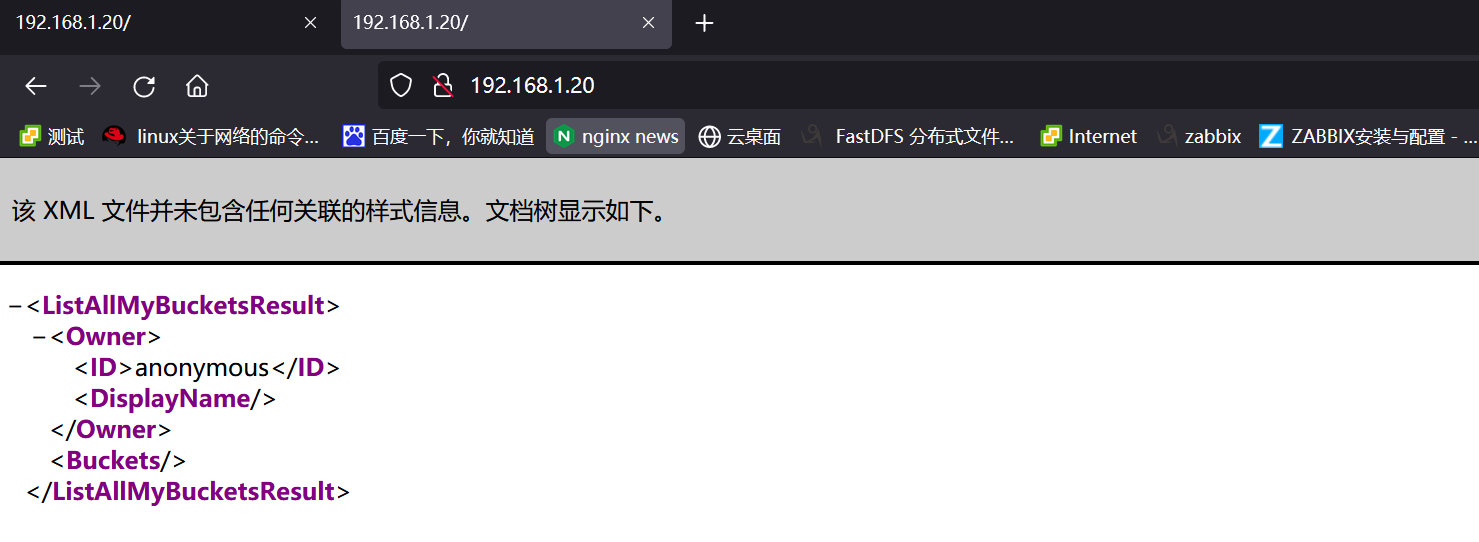
Please wait, attempting to list all buckets...
Success. Your access key and secret key worked fine :-)
Now verifying that encryption works...
Not configured. Never mind.
Save settings? [y/N] y
Configuration saved to '/var/lib/ceph/.s3cfg'
1.8 通过s3cmd工具测试
#测试访问
ceph@ceph-node1::~# s3cmd mb s3://z0ukun-rgw-bucket
ERROR: S3 error: 403 (SignatureDoesNotMatch)
#修改版本启用V2
ceph@ceph-node1::~# sed -i '/signature_v2/s/False/True/g' /root/.s3cfg
#创建 bucket
ceph@ceph-node1::~# s3cmd mb s3://z0ukun-rgw-bucket
Bucket 's3://z0ukun-rgw-bucket/' created
#查看
ceph@ceph-node1::~# s3cmd ls
2021-09-20  s3://z0ukun-rgw-bucket
#上传
ceph@ceph-node1:~# s3cmd put /etc/fstab s3://z0ukun-rgw-bucket/fstab
upload: '/etc/fstab' -> 's3://z0ukun-rgw-bucket/fstab'  [1 of 1]
 678 of 678   100% in    3s   207.87 B/s  done
#查看是否有文件
ceph@ceph-node1::~# s3cmd ls s3://z0ukun-rgw-bucket
2021-09-20 08:36       678   s3://z0ukun-rgw-bucket/fstab
#查看详细信息
ceph@ceph-node1::~# s3cmd info s3://z0ukun-rgw-bucket
s3://z0ukun-rgw-bucket/ (bucket):
   Location:  default
   Payer:     BucketOwner
   Expiration Rule: none
   Policy:    none
   CORS:      none
   ACL:       user1: FULL_CONTROL
#测试下载
ceph@ceph-node1:~# s3cmd get  s3://z0ukun-rgw-bucket/fstab  test-fstab
download: 's3://z0ukun-rgw-bucket/fstab' -> 'test-fstab'  [1 of 1]
 678 of 678   100% in    0s    80.99 kB/s  done
ceph@ceph-node1:~# ls
test-fstab

除了这几个常见的基本功能之外,s3cmd还提供了sync,cp,mv,setpolicy,multipart等功能,我们可以通过s3cmd --help获取更多的命令帮助
二、ceph dashboard 和监控
2.1 启用dashaboard插件
#dashboard要在mgr得活跃节点安装
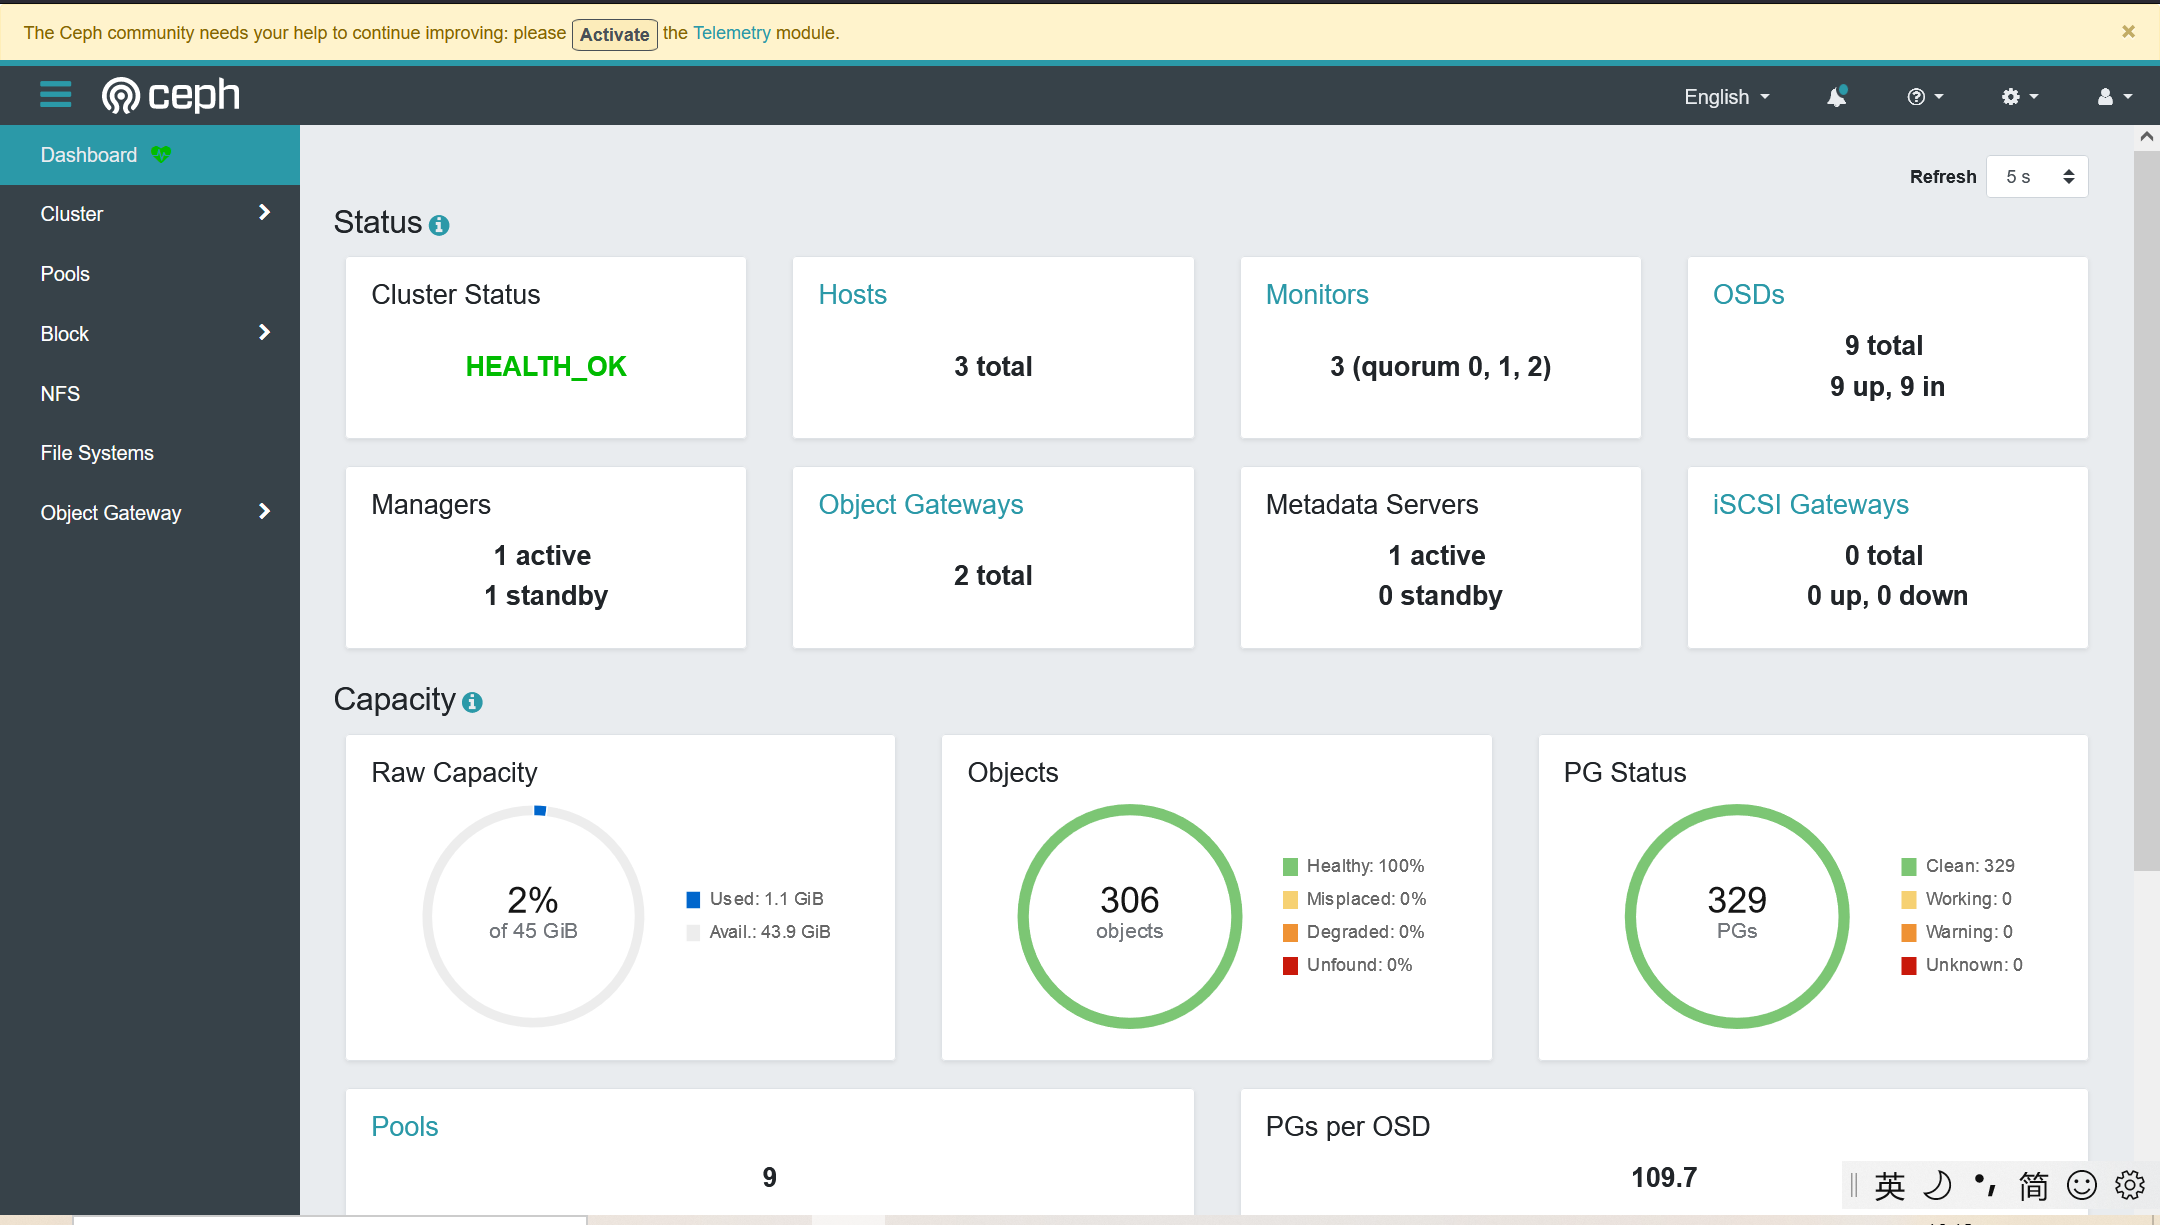
ceph@ceph-node1:~$ ceph -s
cluster:
id: 9794f4ef-1914-431b-b775-e85038312e18
health: HEALTH_OK
services:
mon: 3 daemons, quorum ceph-node2,ceph-node1,ceph-node3 (age 51m)
mgr: ceph-node3(active, since 51m), standbys: ceph-node2
mds: 1/1 daemons up
osd: 9 osds: 9 up (since 51m), 9 in (since 3w)
rgw: 2 daemons active (2 hosts, 1 zones)
data:
volumes: 1/1 healthy
pools: 9 pools, 329 pgs
objects: 306 objects, 300 MiB
usage: 1.1 GiB used, 44 GiB / 45 GiB avail
pgs: 329 active+clean
#安装dashboard
root@ceph-node3:/home/long# apt install ceph-mgr-dashboard
#启用dashboard功能
ceph@ceph-node1:~$ ceph mgr module enable dashboard
注:模块启用后还不能直接访问,需要配置关闭 SSL 或启用 SSL 及指定监听地址。
ceph@ceph-node1:~$ ceph mgr module enable dashboard
ceph@ceph-node1:~$ ceph config set mgr mgr/dashboard/ssl false
ceph@ceph-node1:~$ ceph config set mgr mgr/dashboard/ceph-node3/server_addr 192.168.1.30
ceph@ceph-node1:~$ ceph config set mgr mgr/dashboard/ceph-node3/server_port 9009
#mgr需要重启一下,才能看到端口起来
root@ceph-node3:/home/long#
root@ceph-node3:/home/long# lsof -i:9009
COMMAND PID USER FD TYPE DEVICE SIZE/OFF NODE NAME
ceph-mgr 1119 ceph 30u IPv4 35744 0t0 TCP ceph-node3:9009 (LISTEN)
#需要创建用户账号才能登录
ceph@ceph-node1:~$ touch pass.txt
ceph@ceph-node1:~$ echo "123123" > pass.txt
ceph@ceph-node1:~$ ceph dashboard set-login-credentials xiaolong -i pass.txt
******************************************************************
*** WARNING: this command is deprecated. ***
*** Please use the ac-user-* related commands to manage users. ***
******************************************************************
Username and password updated
2.2 安装prometheus
root@ceph-node2:~# mkdir  /apps
root@ceph-node2:/apps# ls
alertmanager-0.21.0.linux-amd64.tar.gz  node_exporter-1.0.1.linux-amd64.tar.gz
grafana-7.3.6-1.x86_64.rpm              prometheus-2.23.0.linux-amd64.tar.gz
root@ceph-node2:/apps# tar  xvf prometheus-2.23.0.linux-amd64.tar.gz
prometheus-2.23.0.linux-amd64/
prometheus-2.23.0.linux-amd64/LICENSE
prometheus-2.23.0.linux-amd64/consoles/
prometheus-2.23.0.linux-amd64/consoles/node-cpu.html
prometheus-2.23.0.linux-amd64/consoles/prometheus-overview.html
prometheus-2.23.0.linux-amd64/consoles/node-overview.html
prometheus-2.23.0.linux-amd64/consoles/node.html
prometheus-2.23.0.linux-amd64/consoles/node-disk.html
prometheus-2.23.0.linux-amd64/consoles/index.html.example
prometheus-2.23.0.linux-amd64/consoles/prometheus.html
prometheus-2.23.0.linux-amd64/prometheus
prometheus-2.23.0.linux-amd64/console_libraries/
prometheus-2.23.0.linux-amd64/console_libraries/prom.lib
prometheus-2.23.0.linux-amd64/console_libraries/menu.lib
prometheus-2.23.0.linux-amd64/prometheus.yml
prometheus-2.23.0.linux-amd64/promtool
prometheus-2.23.0.linux-amd64/NOTICE
root@ceph-node2:/apps# ls
alertmanager-0.21.0.linux-amd64.tar.gz  node_exporter-1.0.1.linux-amd64.tar.gz  prometheus-2.23.0.linux-amd64.tar.gz
grafana-7.3.6-1.x86_64.rpm              prometheus-2.23.0.linux-amd64
root@ceph-node2:/apps# ln -sv  /apps/prometheus-2.23.0.linux-amd64  /apps/prometheus
'/apps/prometheus' -> '/apps/prometheus-2.23.0.linux-amd64'
root@ceph-node2:/apps# ls
alertmanager-0.21.0.linux-amd64.tar.gz  node_exporter-1.0.1.linux-amd64.tar.gz  prometheus-2.23.0.linux-amd64
grafana-7.3.6-1.x86_64.rpm              prometheus                              prometheus-2.23.0.linux-amd64.tar.gz
root@ceph-node2:/apps#  vim  /etc/systemd/system/prometheus.service
[Unit]
Description=Prometheus Server
Documentation=https://prometheus.io/docs/introduction/overview/
After=network.target

[Service]
Restart=on-failure
WorkingDirectory=/apps/prometheus/
ExecStart=/apps/prometheus/prometheus --config.file=/apps/prometheus/prometheus.yml

[Install]
WantedBy=multi-user.target

root@ceph-node2:/apps# systemctl daemon-reload
root@ceph-node2:/apps# systemctl restart prometheus.service
root@ceph-node2:/apps# systemctl enable prometheus.service
Created symlink /etc/systemd/system/multi-user.target.wants/prometheus.service → /etc/systemd/system/prometheus.service.

root@ceph-node2:/apps#   lsof -i:9090
COMMAND    PID USER   FD   TYPE DEVICE SIZE/OFF NODE NAME
prometheu 5209 root   10u  IPv6  49824      0t0  TCP *:9090 (LISTEN)
prometheu 5209 root   11u  IPv6  50844      0t0  TCP localhost:60360->localhost:9090 (ESTABLISHED)
prometheu 5209 root   12u  IPv6  49841      0t0  TCP localhost:9090->localhost:60360 (ESTABLISHED)
2.2 安装node_exporter
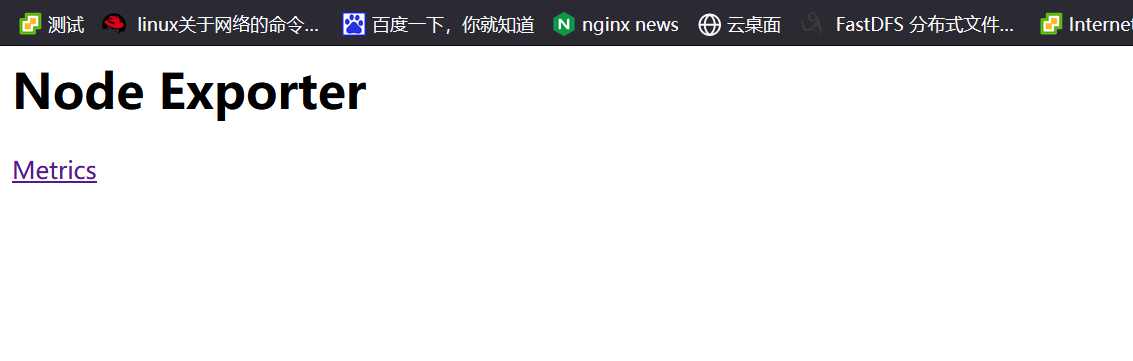
#各节点安装node_expoter
root@ceph-node2:/apps# tar xvf node_exporter-1.0.1.linux-amd64.tar.gz
node_exporter-1.0.1.linux-amd64/
node_exporter-1.0.1.linux-amd64/NOTICE
node_exporter-1.0.1.linux-amd64/node_exporter
node_exporter-1.0.1.linux-amd64/LICENSE
root@ceph-node2:/apps# ln  -sv /apps/node_exporter-1.0.1.linux-amd64 /apps/node_exporter
'/apps/node_exporter' -> '/apps/node_exporter-1.0.1.linux-amd64'
root@ceph-node2:/apps#  vim /etc/systemd/system/node-exporter.service
[Unit]
Description=Prometheus Node Exporter
After=network.target

[Service]
ExecStart=/apps/node_exporter/node_exporter

[Install]
WantedBy=multi-user.target
root@ceph-node2:/apps# systemctl daemon-reload
root@ceph-node2:/apps# systemctl restart node-exporter
root@ceph-node2:/apps# systemctl enable node-exporter
Created symlink /etc/systemd/system/multi-user.target.wants/node-exporter.service → /etc/systemd/system/node-exporter.service.
root@ceph-node2:/apps# ss -tnl | grep 9100
LISTEN   0         128                       *:9100                   *:*
2.3 配置prometheus server 并且验证
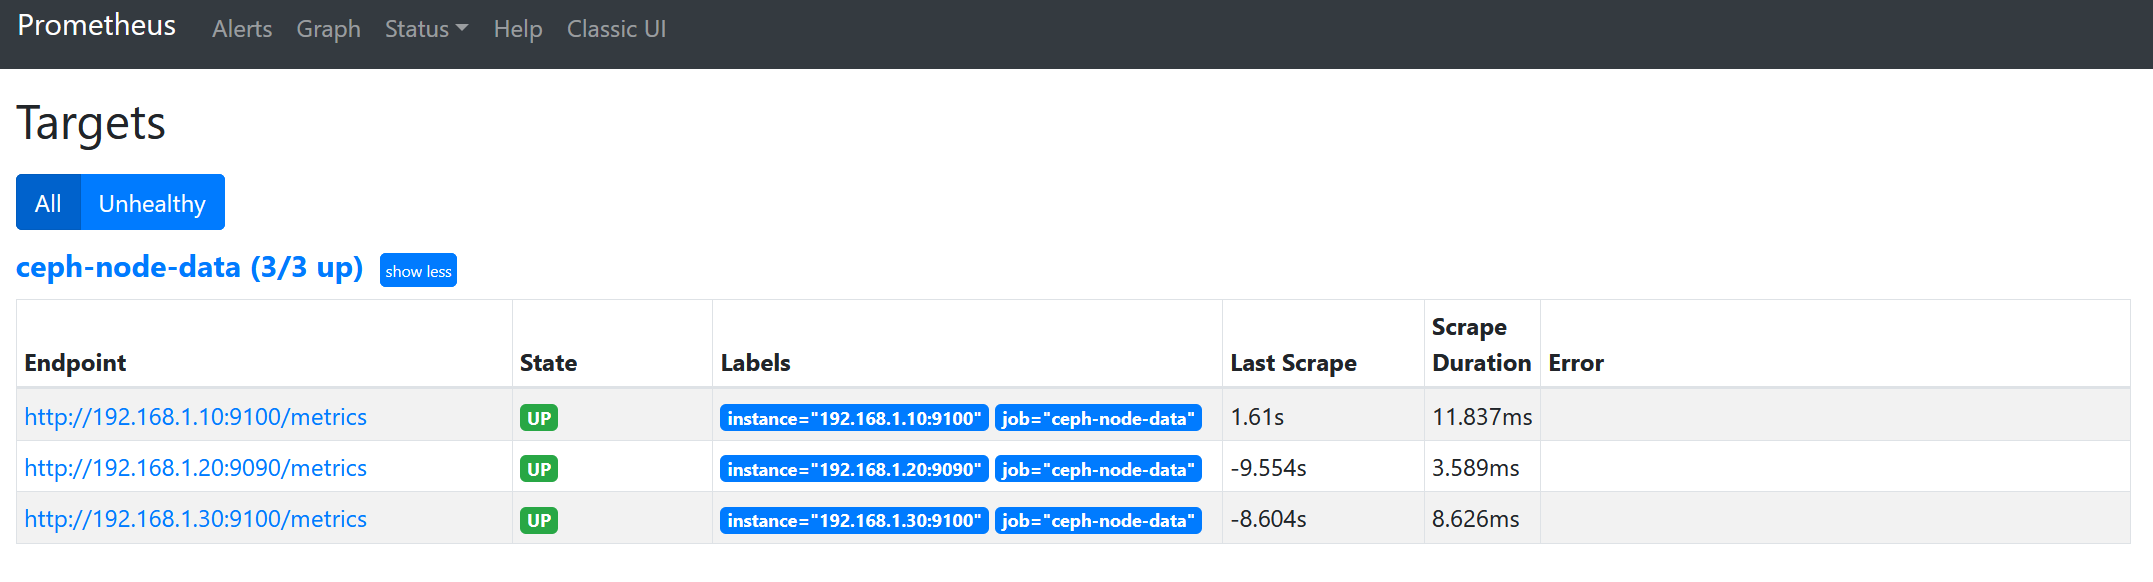
 1 root@ceph-node2:/apps# vim /apps/prometheus/prometheus.yml
 2 scrape_configs:
 3   # The job name is added as a label `job=<job_name>` to any timeseries scraped from this config.
 4   - job_name: 'ceph-node-data'
 5
 6     # metrics_path defaults to '/metrics'
 7     # scheme defaults to 'http'.
 8
 9     static_configs:
10             - targets: ['192.168.1.10:9100','192.168.1.20:9090','192.168.1.30:9100']
11 root@ceph-node2:/apps# systemctl restart prometheus.service
2.4 通过prometheus 监控ceph
1 Ceph manager 内部的模块中包含了 prometheus 的监控模块,并监听在每个 manager 节点的 9283 端口,该端口用于将采集到的信息通过 http 接口向 prometheus 提供数据。
2
3 https://docs.ceph.com/en/mimic/mgr/prometheus/?highlight=prometheus
4
5 root@ceph-node2:/apps# ceph mgr  module enable  prometheus
6 root@ceph-node2:/apps# ss  -tnl | grep  9283
7 LISTEN   0         5                         *:9283

2.5 配置prometheus 采集数据
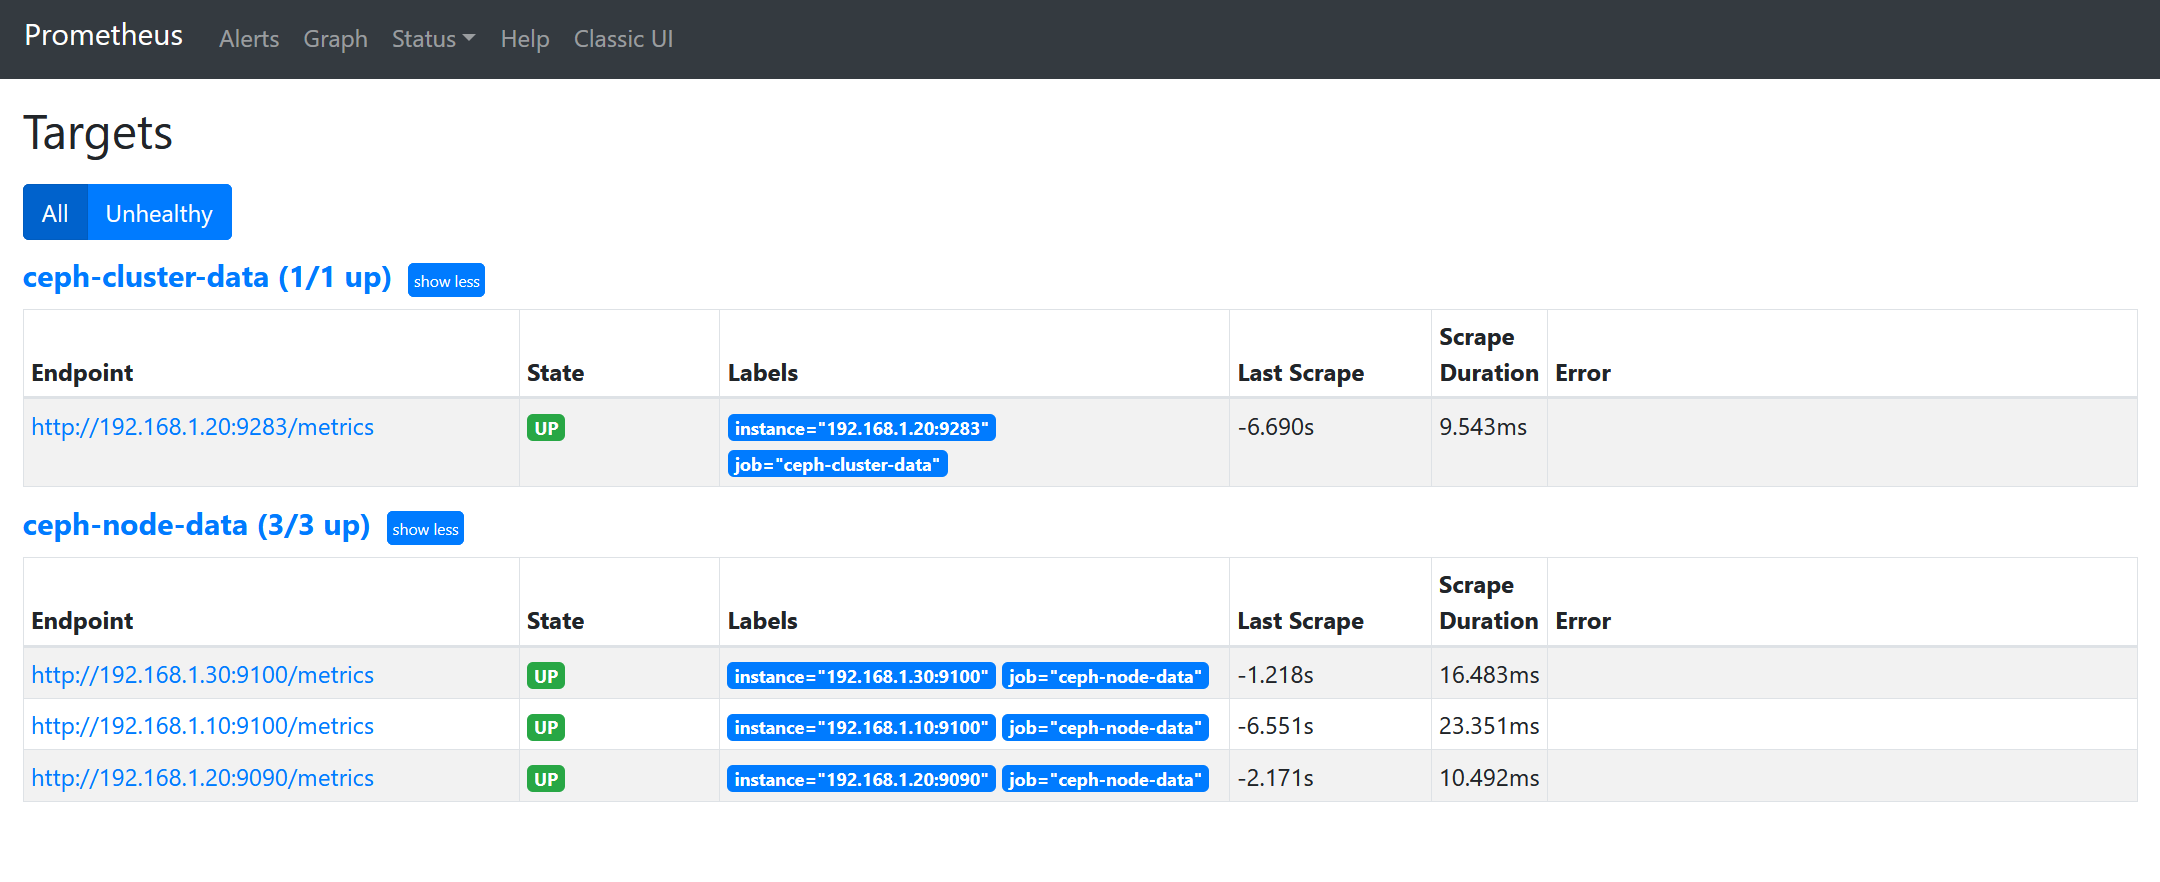
 1 root@ceph-node2:/apps# vim /apps/prometheus/prometheus.yml
 2   - job_name: 'ceph-node-data'
 3
 4     # metrics_path defaults to '/metrics'
 5     # scheme defaults to 'http'.
 6
 7     static_configs:
 8             - targets: ['192.168.1.10:9100','192.168.1.20:9090','192.168.1.30:9100']
 9     job_name: 'ceph-cluster-data'
10
11      # metrics_path defaults to '/metrics'
12      #     # scheme defaults to 'http'.
13      #
14      static_configs:
15              - targets: ['192.168.1.20:9283']
16 root@ceph-node2:/apps# systemctl restart prometheus.service
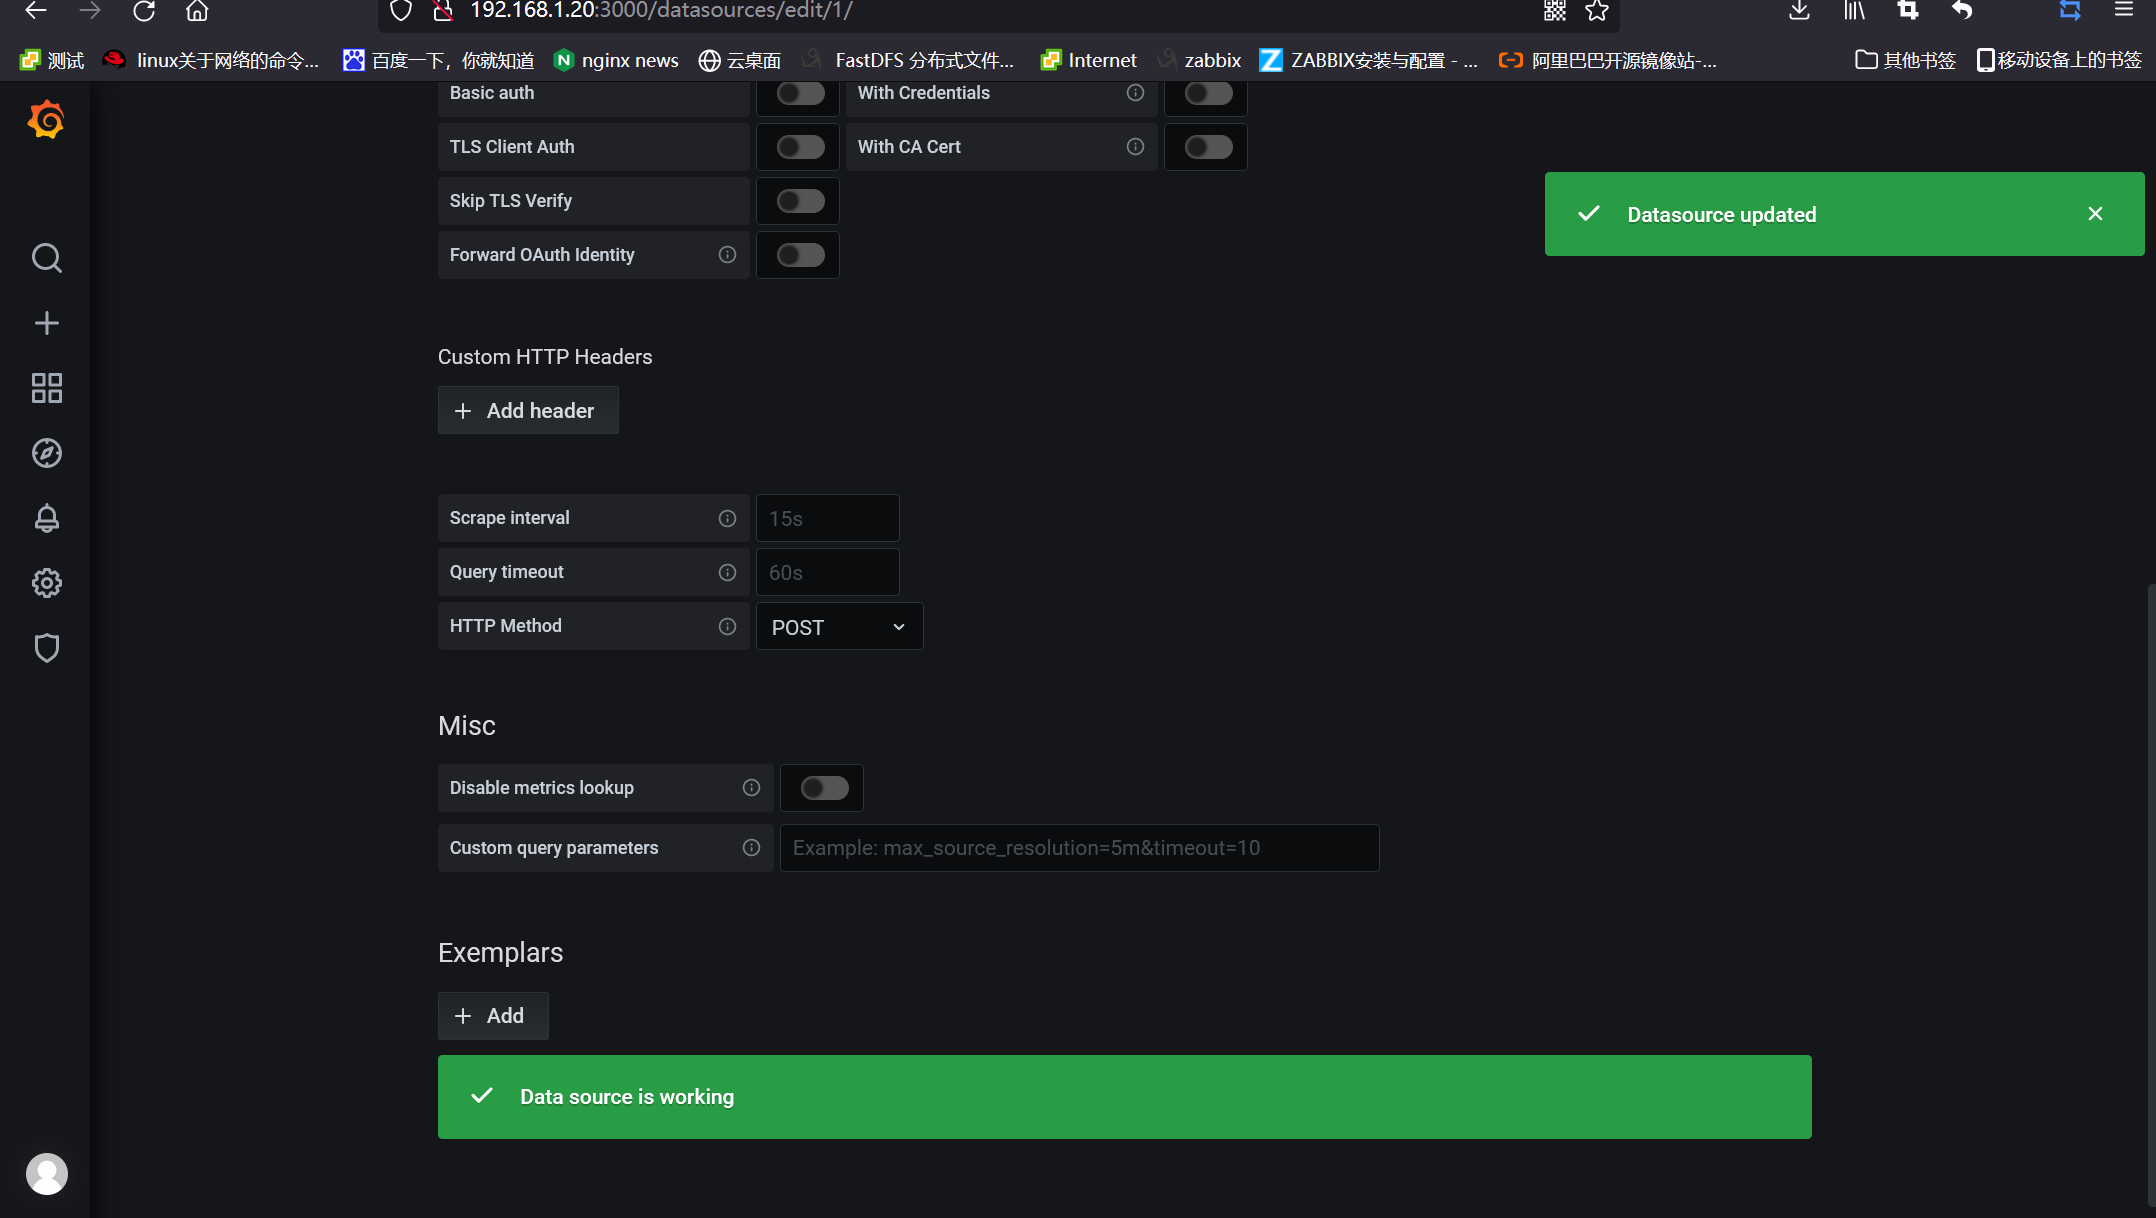
2.6 通过grafana显示数据
 1 root@ceph-node2:/apps# apt-get install -y adduser libfontconfig1
 2 Reading package lists... Done
 3 Building dependency tree
 4 Reading state information... Done
 5 adduser is already the newest version (3.116ubuntu1).
 6 libfontconfig1 is already the newest version (2.12.6-0ubuntu2).
 7 libfontconfig1 set to manually installed.
 8 0 upgraded, 0 newly installed, 0 to remove and 162 not upgraded.
 9
10 root@ceph-node2:/apps# wget https://dl.grafana.com/oss/release/grafana_7.5.1_amd64.deb
11 --2021-09-20 11:19:48--  https://dl.grafana.com/oss/release/grafana_7.5.1_amd64.deb
12 Resolving dl.grafana.com (dl.grafana.com)... 151.101.54.217, 2a04:4e42:d::729
13 Connecting to dl.grafana.com (dl.grafana.com)|151.101.54.217|:443... connected.
14 HTTP request sent, awaiting response... 200 OK
15 Length: 55597840 (53M) [application/vnd.debian.binary-package]
16 Saving to: ‘grafana_7.5.1_amd64.deb’
17
18 grafana_7.5.1_amd64.deb             100%[================================================================>]  53.02M  2.86MB/s    in 20s
19
20 2021-09-20 11:20:10 (2.61 MB/s) - ‘grafana_7.5.1_amd64.deb’ saved [55597840/55597840]
21
22 root@ceph-node2:/apps# dpkg -i grafana_7.5.9_amd64.deb
23 dpkg: error: cannot access archive 'grafana_7.5.9_amd64.deb': No such file or directory
24 root@ceph-node2:/apps# ls
25 1                                       node_exporter                           prometheus-2.23.0.linux-amd64
26 alertmanager-0.21.0.linux-amd64.tar.gz  node_exporter-1.0.1.linux-amd64         prometheus-2.23.0.linux-amd64.tar.gz
27 grafana-7.3.6-1.x86_64.rpm              node_exporter-1.0.1.linux-amd64.tar.gz
28 grafana_7.5.1_amd64.deb                 prometheus
29 root@ceph-node2:/apps# dpkg -i grafana_7.5.1_amd64.deb
30 Selecting previously unselected package grafana.
31 (Reading database ... 83133 files and directories currently installed.)
32 Preparing to unpack grafana_7.5.1_amd64.deb ...
33 Unpacking grafana (7.5.1) ...
34 Setting up grafana (7.5.1) ...
35 Adding system user `grafana' (UID 117) ...
36 Adding new user `grafana' (UID 117) with group `grafana' ...
37 Not creating home directory `/usr/share/grafana'.
38 ### NOT starting on installation, please execute the following statements to configure grafana to start automatically using systemd
39  sudo /bin/systemctl daemon-reload
40  sudo /bin/systemctl enable grafana-server
41 ### You can start grafana-server by executing
42  sudo /bin/systemctl start grafana-server
43 Processing triggers for ureadahead (0.100.0-21) ...
44 Processing triggers for systemd (237-3ubuntu10.42) ...
45 root@ceph-node2:/apps# systemctl start grafana-server
46 root@ceph-node2:/apps# systemctl enable grafana-server
47 Synchronizing state of grafana-server.service with SysV service script with /lib/systemd/systemd-sysv-install.
48 Executing: /lib/systemd/systemd-sysv-install enable grafana-server
49 Created symlink /etc/systemd/system/multi-user.target.wants/grafana-server.service → /usr/lib/systemd/system/grafana-server.service.
50 root@ceph-node2:/apps#  ss -tnl | grep 3000
51 LISTEN   0         128                       *:3000                   *:*
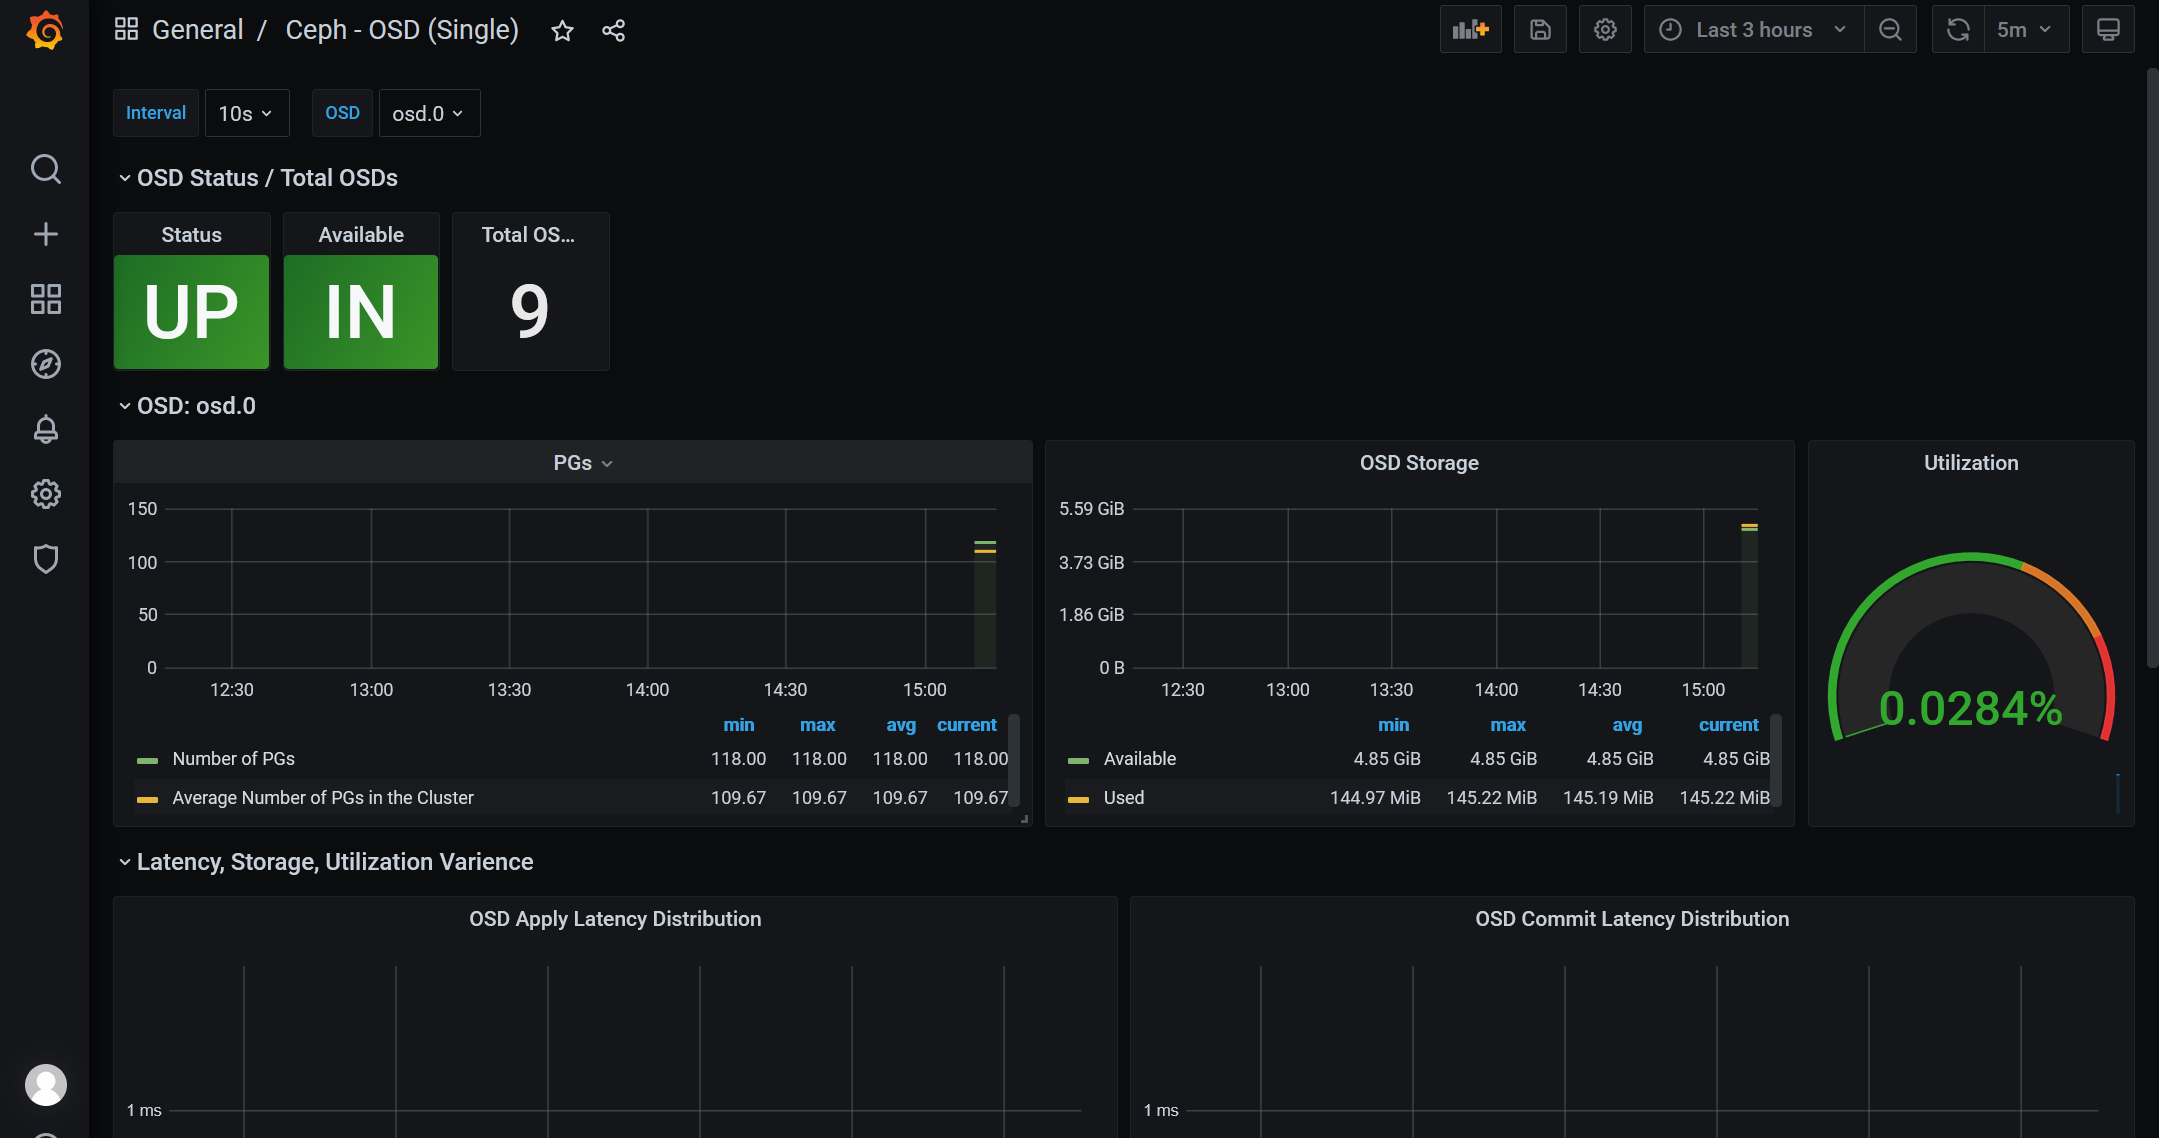
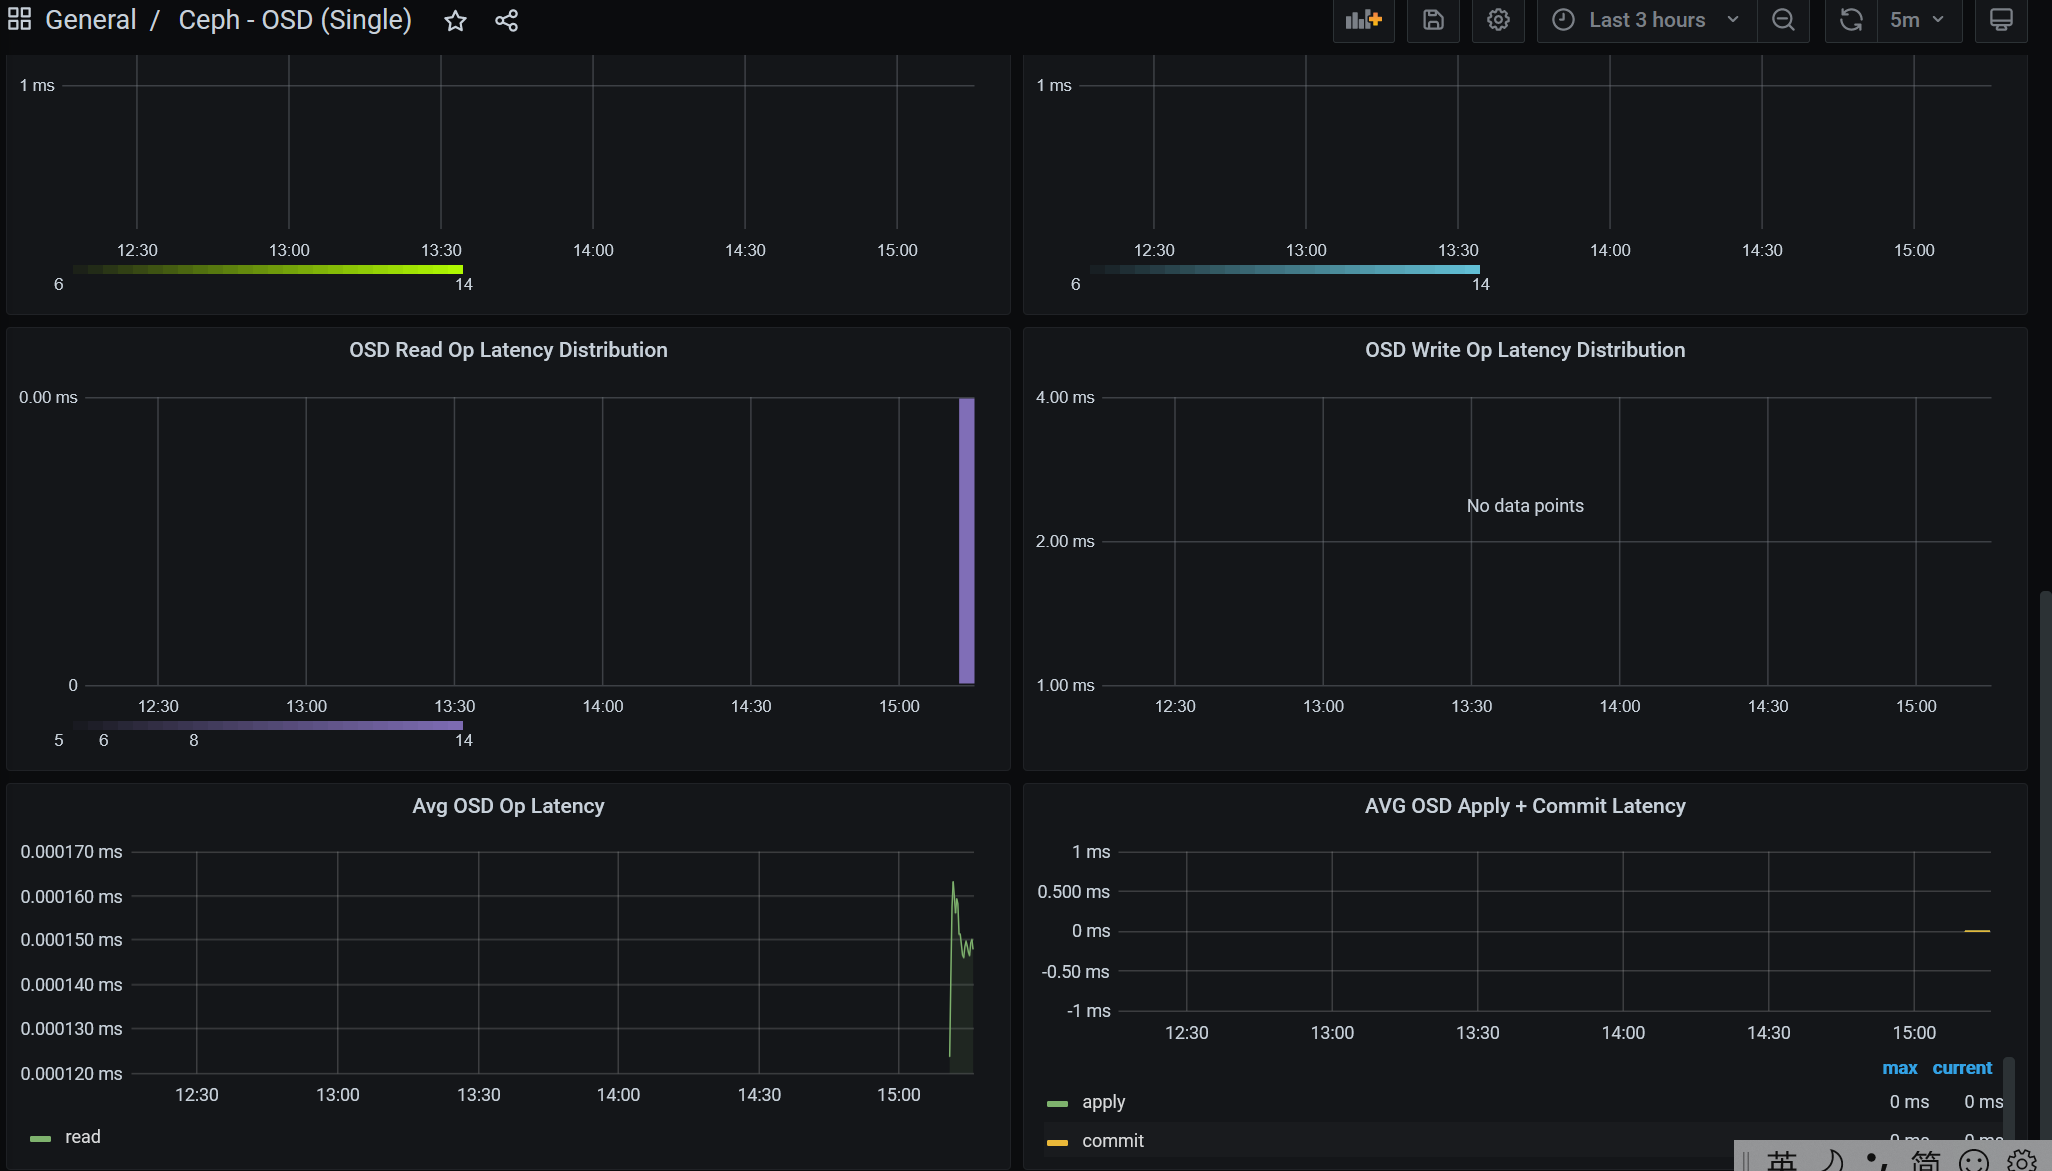
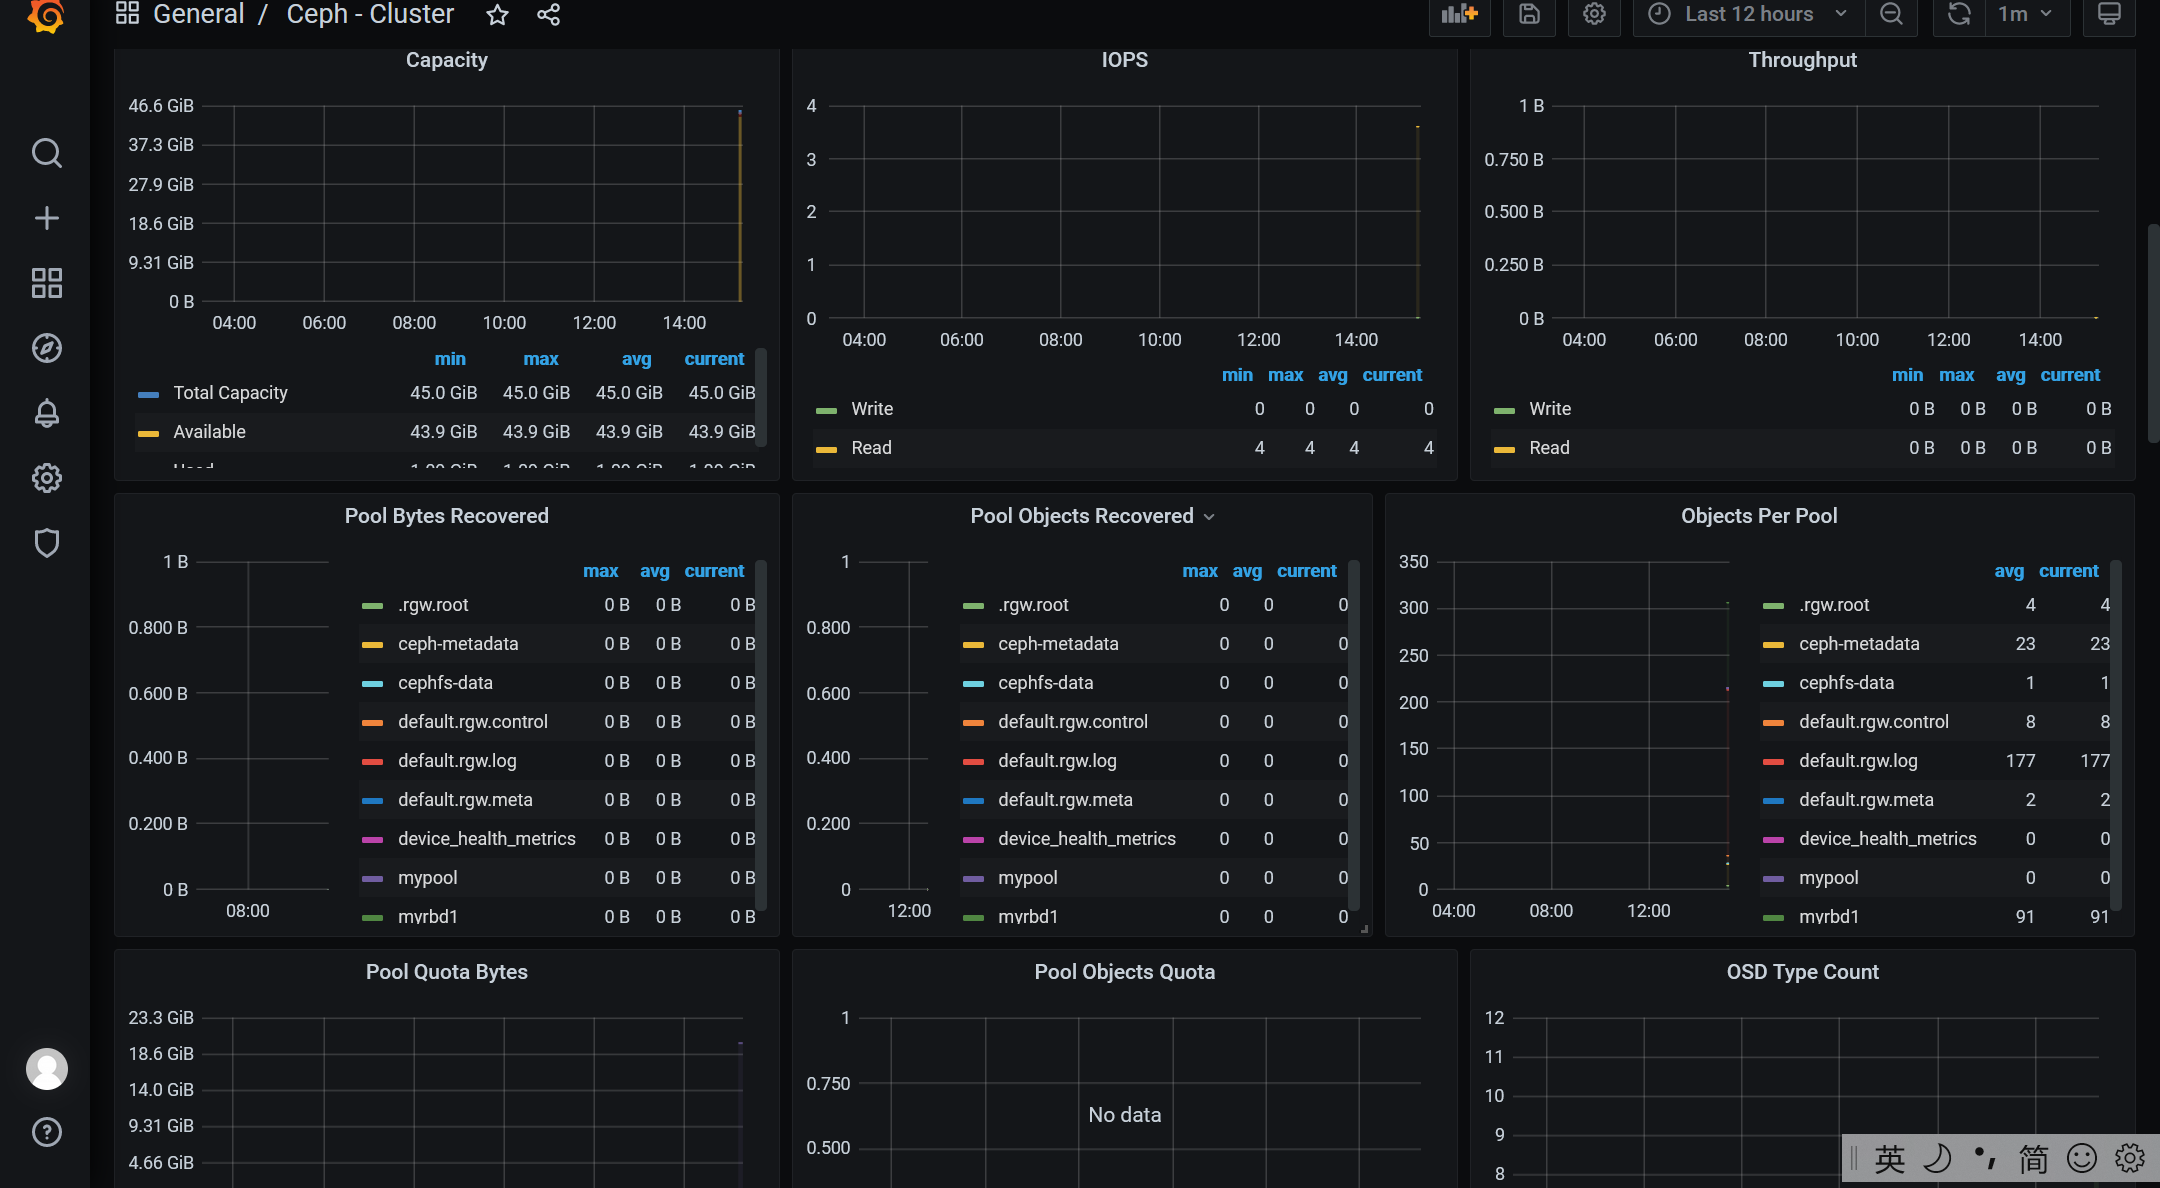
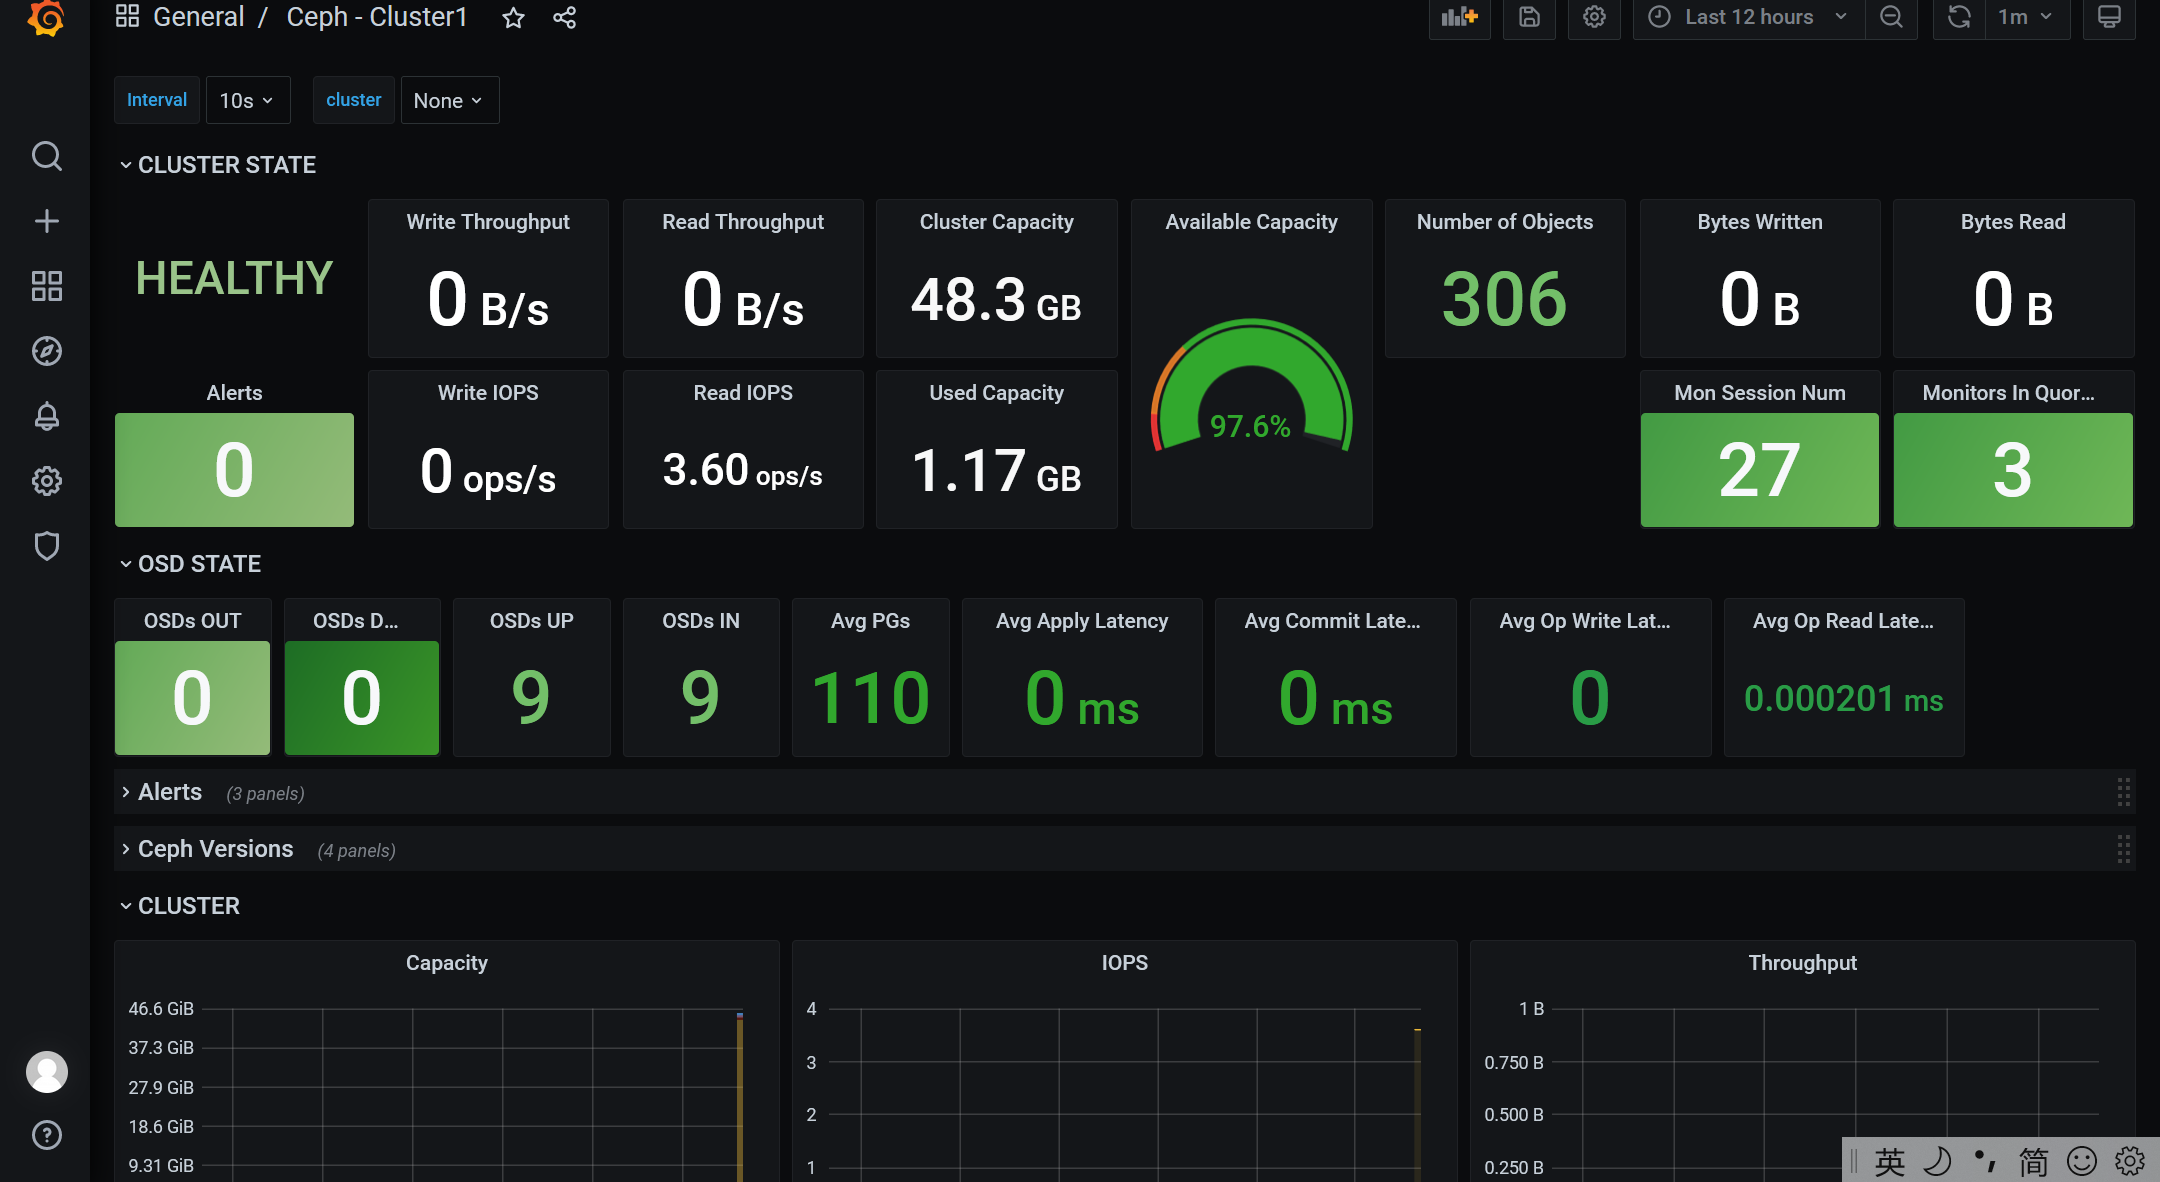
https://grafana.com/grafana/dashboards/7056 #ceph cluser

2021-09-2415:13:26
ok!

 浙公网安备 33010602011771号