mpvue + 微信小程序 picker 实现自定义多级联动 超简洁
微信小程序官网只提供了省市区的三级联动,实际开发中更多的是自定义的多级联动:
依照微信小程序官网提供的自定义多级联动,需要使用到picker 的多列选择器,即设置 mode = multiSelector
https://developers.weixin.qq.com/miniprogram/dev/component/picker.html
在网上也找了资料,代码都太繁琐,并且对于频繁变化的数据,非常不好维护;
代码在git上有:https://github.com/jonyellow/code-diary/blob/master/%E5%B0%8F%E7%A8%8B%E5%BA%8F/picker/index.vue
直接上代码,便于大家用:
1 html代码:
<view class="section">
<view class="section__title">多列选择器</view>
<picker mode="multiSelector" @columnchange="changeNextCol" :value="mulIndex" :range="mulArr">
<view class="picker">
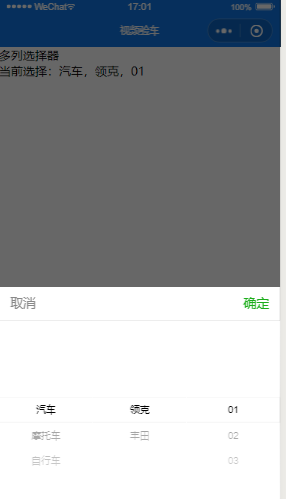
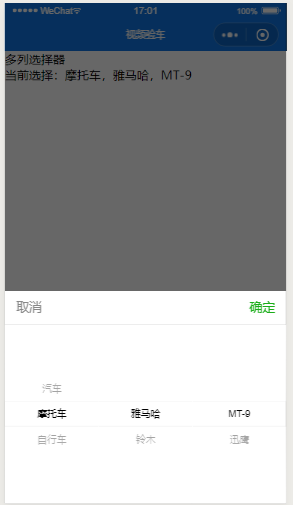
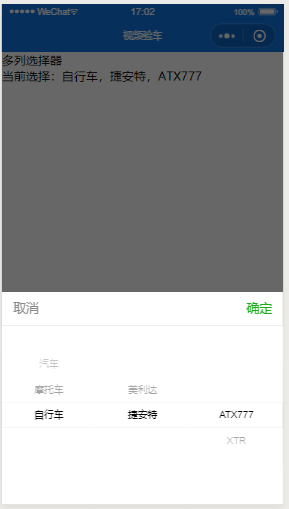
当前选择:{{mulArr[0][mulIndex[0]]}},{{mulArr[1][mulIndex[1]]}},{{mulArr[2][mulIndex[2]]}}
</view>
</picker>
</view>
2 data中return的数据
mulIndex: [0,0,0],
mulArr:[],
// 假设json为后端返回的数据
json: [{type:'汽车', brand:[{name:'领克',cars:['01', '02', '03']},
{name:'丰田',cars:['汉兰达','凯美瑞', '卡罗拉']}]},
{type:'摩托车',brand:[{name:'雅马哈',cars:['MT-9','迅鹰']},
{name:'铃木',cars:['钻豹','gw250']}]},
{type:'自行车',brand:[{name:'美利达',cars:['挑战者300', '挑战者900']},
{name:'捷安特',cars:['ATX777','XTR']}]}]
3 由于 mulArr中没有数据,页面加载后是没有选项的,所以需要在onLoad是给mulArr加入数据
onLoad () {
// 初始化picker默认值
this.mulArr[0] = this.json.map(function(v){return v.type});
this.mulArr[1] = this.json[this.mulIndex[0]].brand.map(function(v){return v.name});
this.mulArr[2] = this.json[this.mulIndex[0]].brand[this.mulIndex[1]].cars;
}
4 关键的地方在于监听用户对列的改变 changeNextCol 函数
changeNextCol(e){
// 列的值改变时触发 我这里是三列:车子类型 品牌名称 车型
console.log('修改的列', e.target.column, '值为', e.target.value);
// 监听用户操作,改变mulIndex的值
this.mulIndex[e.target.column] = e.target.value;
// mulArr[0]的值是不会随用户操作变更的,因此不需要改变
// mulArr[1]的值是由 mulIndex[0]的值决定的
this.mulArr.splice(1,1,this.json[this.mulIndex[0]].brand.map(function(v){return v.name}));
// mulArr[2]的值是由 muIndex[1]的值决定的
this.mulArr.splice(2,1,this.json[this.mulIndex[0]].brand[this.mulIndex[1]].cars);
}
实际效果:


