前端之旅一:vscode调试web配置
vscode调试web配置
第一步:安装vscode,并启动(vscode的安装包自行到其官网上下载)

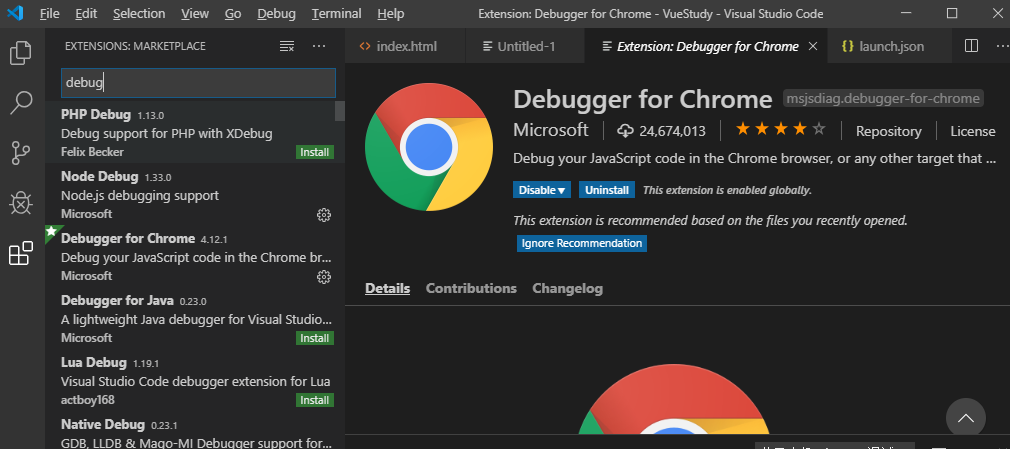
第二步:在vscode上安装chrome插件
第三步:配置,启动调试
配置信息
{
    // Use IntelliSense to learn about possible attributes.
    // Hover to view descriptions of existing attributes.
    // For more information, visit: https://go.microsoft.com/fwlink/?linkid=830387
    "version": "0.2.0",
    "configurations": [
        {
            // "type": "chrome",
            // "request": "launch",
            // "name": "Launch Chrome against localhost",
            // "url": "http://localhost:8080",
            // "webRoot": "${workspaceFolder}"

                "name": "使用本机 Chrome 调试",
                "type": "chrome",
                "request": "launch",
                 "file": "${workspaceRoot}/index.html",
            //  "url": "http://website.com/index.html", //使用外部服务器时,请注释掉 file, 改用 url, 并将 useBuildInServer 设置为 false "http://website.com/index.html
                "runtimeExecutable": "C:\\Program Files (x86)\\Google\\Chrome\\Application\\chrome.exe", // 改成您的 Chrome 安装路径
                "sourceMaps": true,
                "webRoot": "${workspaceRoot}",
            //  "preLaunchTask":"build",
                "userDataDir":"${tmpdir}",
                "port":5558

        }
    ]
}
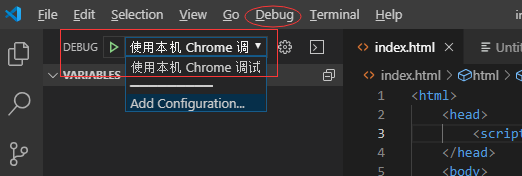
并且调试时选择使用本机Chrome调试
调试启动效果


 浙公网安备 33010602011771号