Android全局桌面宠物 Unity方案实现
转载:https://blog.csdn.net/xssdmx/article/details/107315493
Android全局桌面宠物 Unity方案实现
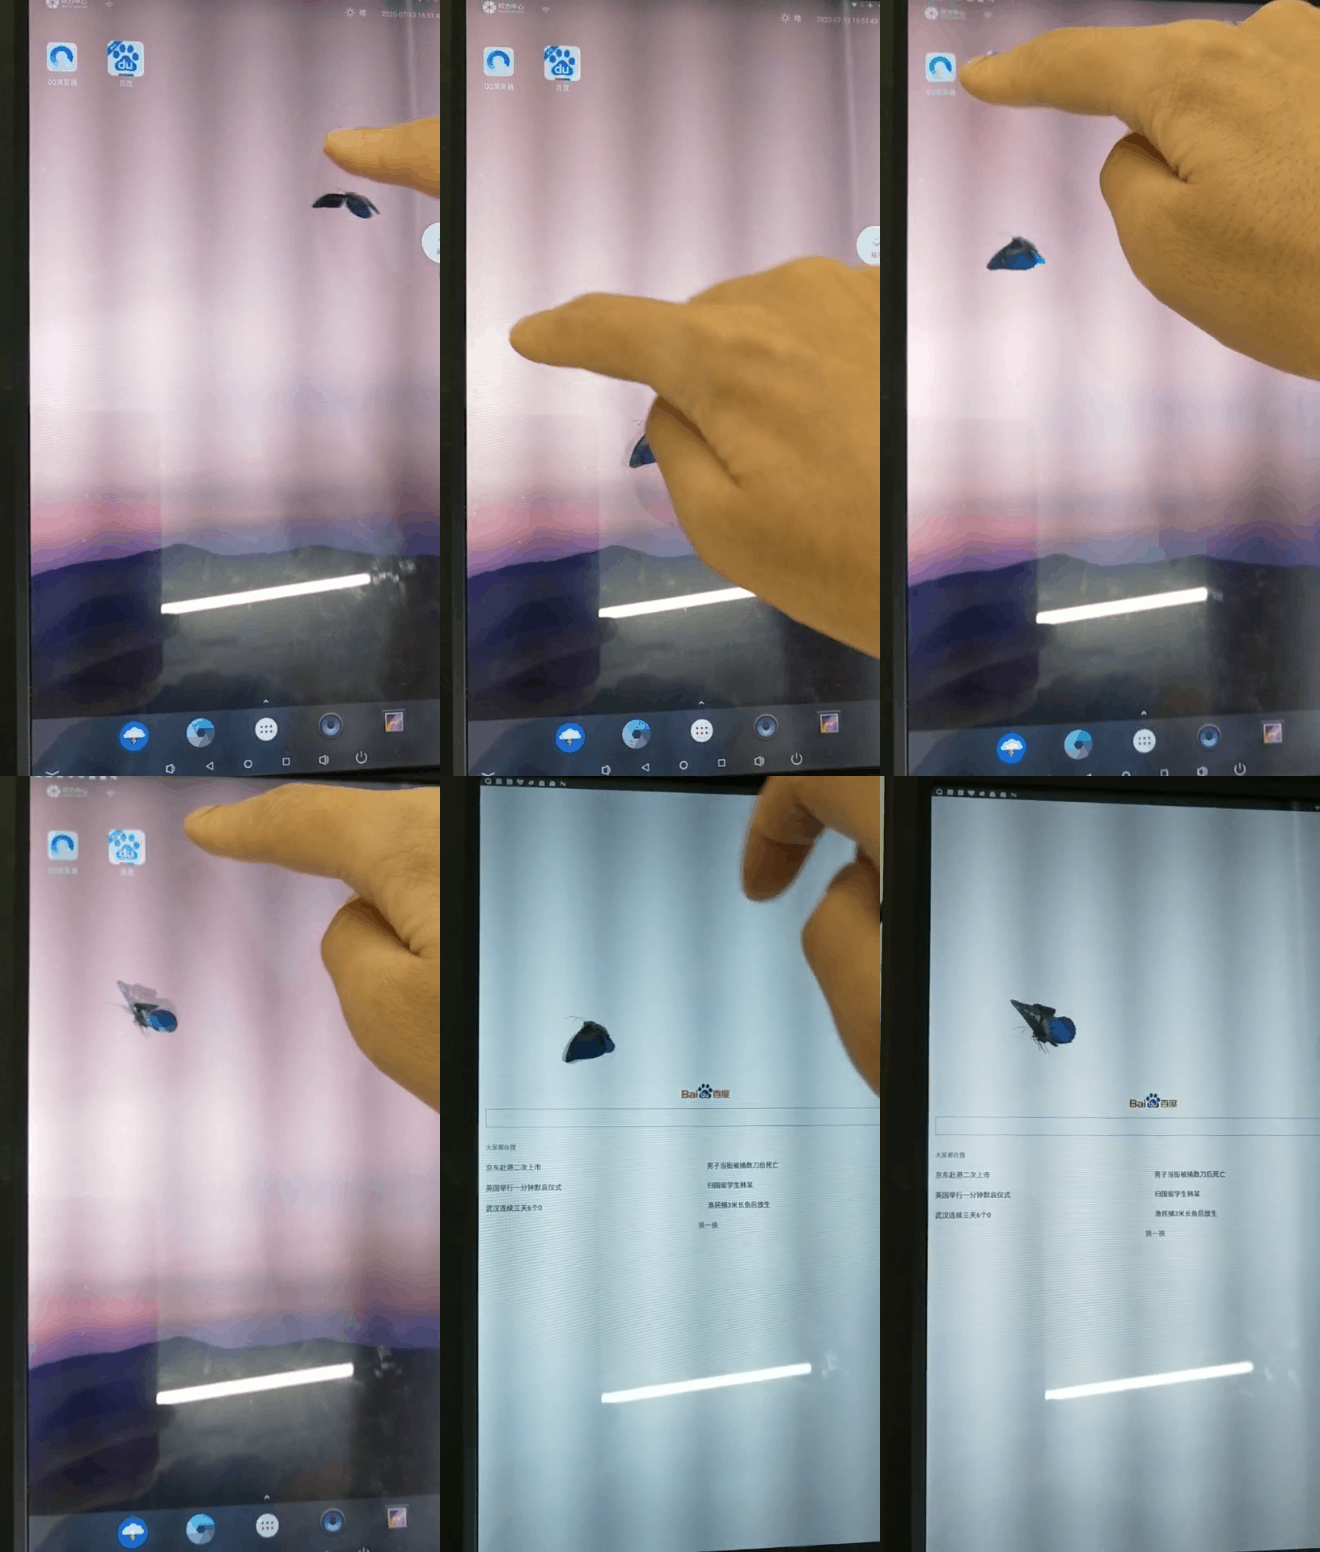
最近接到一个任务是Android设备上实现一个全局的指引动画,开始想着就用普通动画控件或者svga、lottie控件实现,最近正好在学习Unity,所以试着用unity实现。经过三天努力,居然实现了。话不多说,马上开始:
1、准备素材
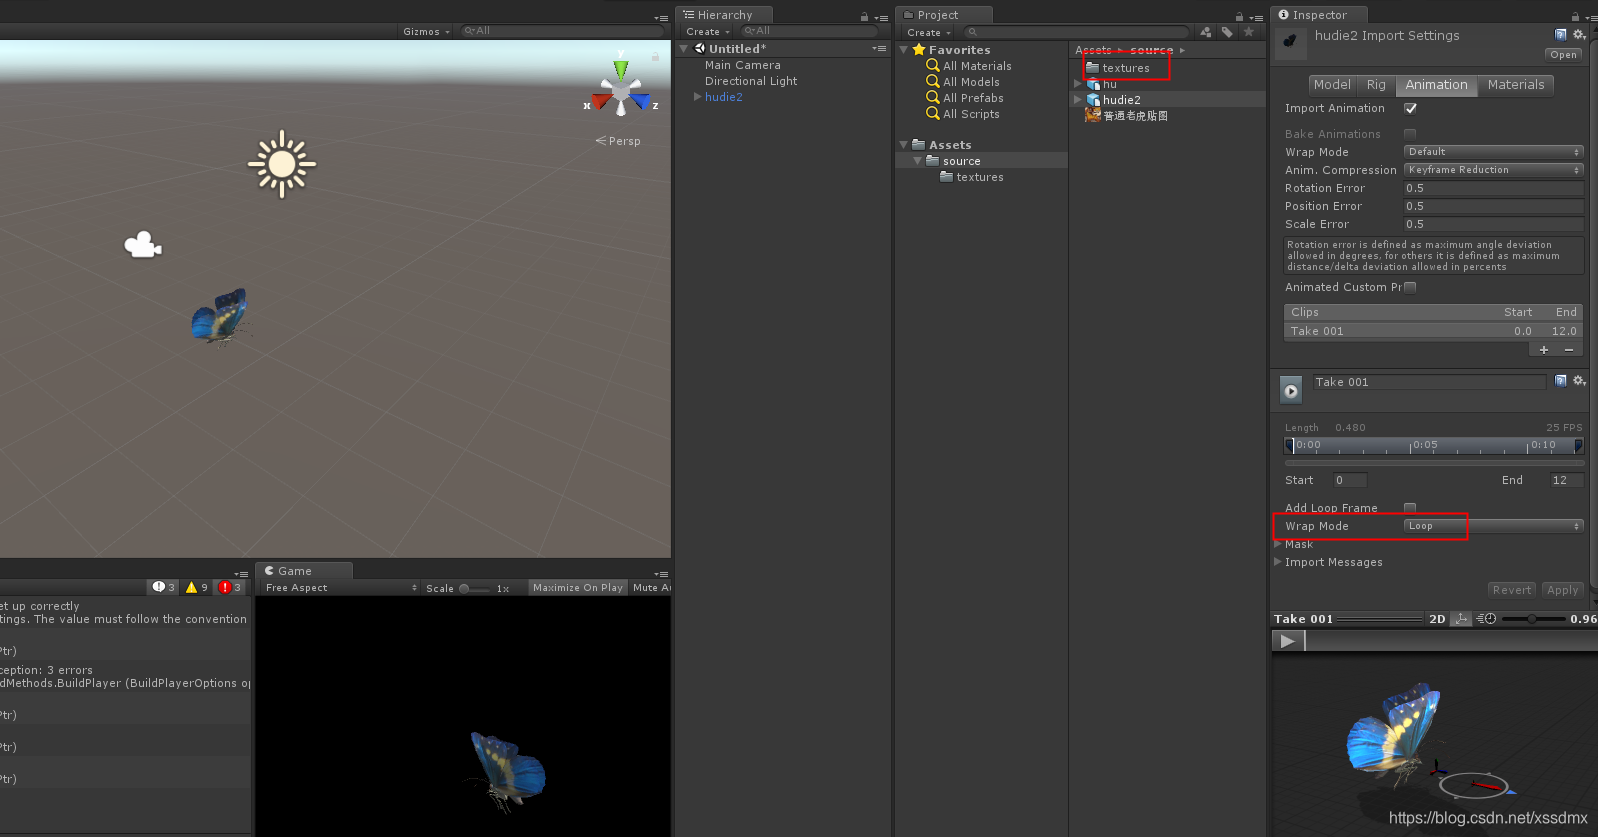
在爱给网找到一个蝴蝶3D模型,然后通过3Dmax导出为FBX模型,然后倒入到unity里,具体操作相对比较简单,只是说明一下,模型纹理需要跟导出文件放在一起,否者到unity里面没有纹理皮肤。然后就是在unity修改Animation Type为Legacy,以及动画循环设置:Wrap Mode设置为Loop。
模型下载地址:http://www.aigei.com/3d/model/lactation/

2、导出透明Unity工程
Unity导出透明应用比较麻烦,耗时最多,找了很久只有这个文章有提及:
https://www.jianshu.com/p/a67f77cd2e62
也看了英文原地址:
https://forum.unity.com/threads/unity3d-export-to-android-with-transparent-background.512129/
于是开始尝试,按照文档所说,只需要修改两个地方就能实现:
1、修改Main Camera 的背景颜色为 Solid Color,并且透明度设置为0。
2、导出设置勾选preserveFramebufferAlpha。
我装的Unity 5.5.0f3 (64-bit)和Unity 2019.1.0a8 (64-bit),没有找到文档所说的preserveFramebufferAlpha选项,按文档所说的2018.1版本可以,我又装了Unity 2018.1.1f1 (64-bit),选项是有了,但是按照设置导出还是不透明。
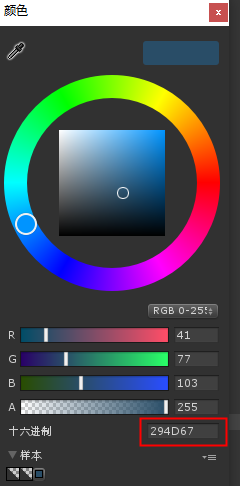
反复排查和对比,发现我的颜色设置透明度不起作用,只显示6位颜色,而没有透明度显示:

只能尝试下载其他版本。
找到官方操作手册,发现这个版本也有设置选项
https://docs.unity3d.com/cn/2017.4/Manual/class-PlayerSettingsAndroid.html
于是尝试下了Unity 2017.4.2f2 (64-bit)版本,看到了8位的颜色值,心里大喜:

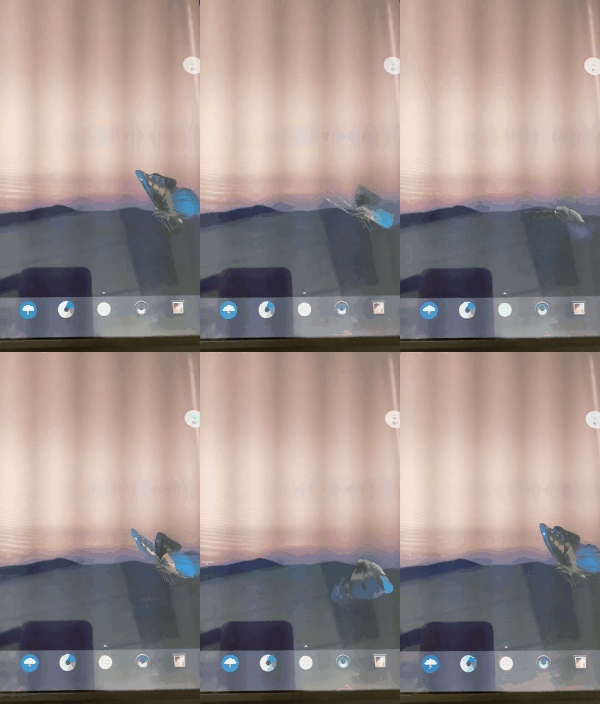
本来想着直接导出apk运行,但是一直报错,导出失败,怀疑是版本比较旧,尝试更换了旧版本NDKK和jdk版本,以及自定义了Gradle,都不行。最后只好导出工程,然后自己创建Android工程编译。还算顺利很快运行实现了效果。
中间还出现个小问题,就是渲染的图像颜色不对,有点过曝光。后来发现是camera颜色值问题,设置成#00000000后解决。

3、做全局window窗口
Unity直接导出的工程是activity显示动画,要做全局widow,需要把UnityPlayer放service里生成。我直接拷贝相关方法,放到service里生成,然后放入系统window,结果什么都不显示。
看UnityPlayer生成传入的context居然是activity类型,顿时心的都凉了。
我不会轻易放弃,我通过Application保存了全局的activity和UnityPlayer,然后从window里面获取,验证可行性,多次尝试都是显示空白。
public class MainApp extends Application {

    private static Activity mActivity;
    static UnityPlayer mUnityPlayer;

    public static Application app;
    @Override
    public void onCreate() {
        super.onCreate();
        app = this;
    }

    public static Activity getActivity() {
        return mActivity;
    }

    public static void setActivity(Activity activity) {
        mActivity = activity;
    }

    public static UnityPlayer getUnityPlayer() {
        return mUnityPlayer;
    }

    public static void setUnityPlayer(UnityPlayer unityPlayer) {
        mUnityPlayer = unityPlayer;
    }
}
偶然间发现,UnityPlayer在activity里面生成,并且生命周期全部放activity,只是把UnityPlayer加载到window窗口,居然可以实现。只是activity不能切换后台,切换到后台动画就暂停了。
尝试各参数,最后发现是 mUnityPlayer.windowFocusChanged(true);这句对显示有关键作用。
于是推到重来,new UnityPlayer用了getApplicationContext,成功!
所以改变service全部生成,结果成功。
代码如下:
package com.Company.bgTest;

import android.app.Service;
import android.content.Context;
import android.content.Intent;
import android.graphics.PixelFormat;
import android.os.IBinder;
import android.util.Log;
import android.view.Gravity;
import android.view.LayoutInflater;
import android.view.MotionEvent;
import android.view.View;
import android.view.WindowManager;
import android.widget.LinearLayout;
import android.widget.RelativeLayout;

import com.unity3d.player.UnityPlayer;

/**
 * @author hardy
 * @name My Application
 * @class name:com.Company.bgTest
 * @class describe:
 * @time 2020/7/10 15:47
 * @change
 * @chang time
 * @class describe
 */
public class MainService extends Service {
    //Log用的TAG
    private static final String TAG = "MainService";

    //要引用的布局文件.
    LinearLayout toucherLayout;
    //布局参数.
    WindowManager.LayoutParams params;
    //实例化的WindowManager.
    WindowManager windowManager;

    //状态栏高度.(接下来会用到)
    int statusBarHeight = -1;

    protected UnityPlayer mUnityPlayer;

    @Override
    public IBinder onBind(Intent intent) {
        return null;
    }


    @Override
    public void onCreate() {
        super.onCreate();
        Log.i(TAG, "MainService Created");
        //OnCreate中来生成悬浮窗.
        createToucher();
    }


    private void createToucher() {
        //赋值WindowManager&LayoutParam.
        params = new WindowManager.LayoutParams();
        windowManager = (WindowManager) getApplication().getSystemService(Context.WINDOW_SERVICE);
        //设置type.系统提示型窗口,一般都在应用程序窗口之上.
        params.type = WindowManager.LayoutParams.TYPE_SYSTEM_ALERT;
        //设置效果为背景透明.
        params.format = PixelFormat.RGBA_8888;
        //设置flags.不可聚焦及不可使用按钮对悬浮窗进行操控.
        params.flags = WindowManager.LayoutParams.FLAG_NOT_FOCUSABLE;

        //设置窗口初始停靠位置.
        params.gravity = Gravity.LEFT | Gravity.TOP;
        params.x = 0;
        params.y = 0;

        //设置悬浮窗口长宽数据.
        //注意,这里的width和height均使用px而非dp.这里我偷了个懒
        //如果你想完全对应布局设置,需要先获取到机器的dpi
        //px与dp的换算为px = dp * (dpi / 160).
        params.width = 400;
        params.height = 600;

        LayoutInflater inflater = LayoutInflater.from(getApplication());
        //获取浮动窗口视图所在布局.
        toucherLayout = (LinearLayout) inflater.inflate(R.layout.pet_window, null);
        //添加toucherlayout
        windowManager.addView(toucherLayout, params);

        Log.i(TAG, "toucherlayout-->left:" + toucherLayout.getLeft());
        Log.i(TAG, "toucherlayout-->right:" + toucherLayout.getRight());
        Log.i(TAG, "toucherlayout-->top:" + toucherLayout.getTop());
        Log.i(TAG, "toucherlayout-->bottom:" + toucherLayout.getBottom());

        //主动计算出当前View的宽高信息.
        toucherLayout.measure(View.MeasureSpec.UNSPECIFIED, View.MeasureSpec.UNSPECIFIED);

        //用于检测状态栏高度.
        int resourceId = getResources().getIdentifier("status_bar_height", "dimen", "android");
        if (resourceId > 0) {
            statusBarHeight = getResources().getDimensionPixelSize(resourceId);
        }
        Log.i(TAG, "状态栏高度为:" + statusBarHeight);

        mUnityPlayer =  new UnityPlayer(this.getApplicationContext());
//        mUnityPlayer = MainApp.getUnityPlayer();
        ((RelativeLayout) toucherLayout.findViewById(R.id.rl_pet)).addView(mUnityPlayer);
        mUnityPlayer.start();
        mUnityPlayer.resume();

        mUnityPlayer.setOnTouchListener(new View.OnTouchListener() {
            @Override
            public boolean onTouch(View v, MotionEvent event) {
                //ImageButton我放在了布局中心,布局一共300dp
                params.x = (int) event.getRawX() - 150;
                //这就是状态栏偏移量用的地方
                params.y = (int) event.getRawY() - 150 - statusBarHeight;
                windowManager.updateViewLayout(toucherLayout,params);
                return false;
            }
        });
    }

    @Override
    public int onStartCommand(Intent intent, int flags, int startId) {


        mUnityPlayer.windowFocusChanged(true);

        return super.onStartCommand(intent, flags, startId);
    }

    // Quit Unity
    @Override public void onDestroy ()
    {
        mUnityPlayer.pause();
        mUnityPlayer.stop();
        mUnityPlayer.quit();
        super.onDestroy();
    }
}

另外值得一提的是全局悬浮窗需要设置权限,参考 https://www.jianshu.com/p/ac63c57d2555:
  <uses-permission android:name="android.permission.SYSTEM_ALERT_WINDOW"/>
    <uses-permission android:name="android.permission.SYSTEM_OVERLAY_WINDOW"/>
以及代码判断用户手动开启:
//当AndroidSDK>=23及Android版本6.0及以上时,需要获取OVERLAY_PERMISSION. //使用canDrawOverlays用于检查,下面为其源码。其中也提醒了需要在manifest文件中添加权限. /** * Checks if the specified context can draw on top of other apps. As of API * level 23, an app cannot draw on top of other apps unless it declares the * {@link android.Manifest.permission#SYSTEM_ALERT_WINDOW} permission in its * manifest, <em>and</em> the user specifically grants the app this * capability. To prompt the user to grant this approval, the app must send an * intent with the action * {@link android.provider.Settings#ACTION_MANAGE_OVERLAY_PERMISSION}, which * causes the system to display a permission management screen. * */ if (Build.VERSION.SDK_INT >= 23) { if (Settings.canDrawOverlays(UnityPlayerActivity.this)) { Intent intent = new Intent(UnityPlayerActivity.this, MainService.class);Toast.makeText(UnityPlayerActivity.this, "已开启Toucher", Toast.LENGTH_SHORT).show();// startService(intent);
// finish();// moveTaskToBack(true);
} else {
//若没有权限,提示获取.
Intent intent = new Intent(Settings.ACTION_MANAGE_OVERLAY_PERMISSION);
Toast.makeText(UnityPlayerActivity.this, "需要取得权限以使用悬浮窗", Toast.LENGTH_SHORT).show();
startActivity(intent);
}
} else {
//SDK在23以下,不用管.
Intent intent = new Intent(UnityPlayerActivity.this, MainService.class);startService(intent); moveTaskToBack(true);
// finish();
}


