Vue + ElementUI的电商管理系统实例11 商品分类
1、创建商品分类分支goods_cate并push到远程
查看分支:
git branch
创建分支:
git checkout -b goods_cate
推送到远程:(以前码云中没有该分支,所以要加-u,如果码云中有该分支,则不需要加-u)
git push -u origin goods_cate
2、通过路由加载商品分类组件
新建goods文件夹和Cate.vue文件:
<template>
<div>
  <h3>商品分类组件</h3>
</div>
</template>

<script>
export default {
}
</script>

<style lang="less" scoped>

</style>
添加路由:
import Cate from '../components/goods/Cate.vue'

const routes = [
  { path: '/', redirect: '/login' }, // 重定向
  { path: '/login', component: Login },
  {
    path: '/home',
    component: Home,
    redirect: '/welcome', // 重定向
    children: [ // 子路由
      { path: '/welcome', component: Welcome },
      { path: '/users', component: Users }, // 用户列表
      { path: '/rights', component: Rights }, // 权限列表
      { path: '/roles', component: Roles }, // 角色列表
      { path: '/categories', component: Cate } // 商品分类
    ]
  }
]
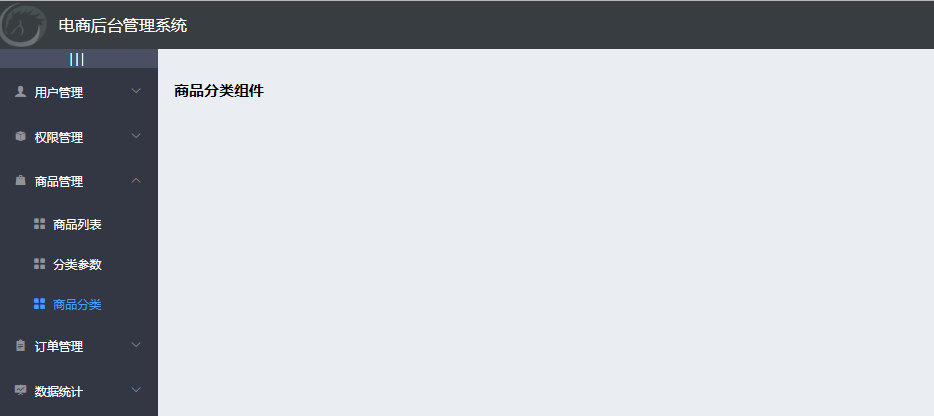
点击左侧菜单的商品分类的效果如图:
3、绘制商品分类组件的基本布局
还是面包屑和card视图:
<template>
<div>
  <!--面包屑导航区域-->
    <el-breadcrumb separator-class="el-icon-arrow-right">
      <el-breadcrumb-item :to="{ path: '/home' }">首页</el-breadcrumb-item>
      <el-breadcrumb-item>商品管理</el-breadcrumb-item>
      <el-breadcrumb-item>商品分类</el-breadcrumb-item>
    </el-breadcrumb>
    <!--卡片视图区域-->
    <el-card>
      <!--添加角色按钮区域-->
      <el-row>
        <el-col>
          <el-button type="primary">添加分类</el-button>
        </el-col>
      </el-row>
      <!--分类列表区域-->
      <!--分页区域-->
    </el-card>
</div>
</template>

<script>
export default {
}
</script>

<style lang="less" scoped>

</style>
4、调用api接口获取商品分类列表数据
请求参数
type [1,2,3] 值:1,2,3 分别表示显示一层二层三层分类列表 【可选参数】如果不传递,则默认获取所有级别的分类
pagenum 当前页码值 【可选参数】如果不传递,则默认获取所有分类
pagesize 每页显示多少条数据 【可选参数】如果不传递,则默认获取所有分类
<script>
export default {
  data() {
    return {
      // 查询条件
      queryInfo: {
        type: 3,
        pagenum: 1,
        pagesize: 5
      },
      cateList: [], // 商品分类列表数据
      total: 0 // 总数据条数
    }
  },
  created() {
    this.getCateList()
  },
  methods: {
    // 获取商品分类数据
    async getCateList() {
      const { data: res } = await this.$http.get('categories', { params: this.queryInfo })
      if (res.meta.status !== 200) {
        return this.$message.error('获取商品分类失败')
      }
      console.log(res.data)
      this.cateList = res.data.result
      // 带参数请求,返回的数据多一层result,还有总数total,当前页pagenum,当然页条数pagesize
      this.total = res.data.total
    }
  }
}
</script>
注意:这里请求接口时记得带参数,否则会返回一个总数据的data,而没有total、pagenum,pagesize参数。
5、使用vue-table-with-tree-grid树形表格组件
element没有相应的组件,要通过第三方插件来实现
打开vue ui面板,找到依赖项,点击安装依赖,在弹出的对话框中,搜索:vue-table-with-tree-grid,进行安装。
然后查看文档,有两种用法:
import Vue from 'vue'
import ZkTable from 'vue-table-with-tree-grid'

Vue.use(ZkTable)

// 或者

import Vue from 'vue'
import ZkTable from 'vue-table-with-tree-grid'

Vue.component(ZkTable.name, ZkTable)
打开入口文件main.js,导入插件:
import TreeTable from 'vue-table-with-tree-grid'

Vue.component('tree-table', TreeTable)
参考官方文档给的示例代码,重新回到Cate.vue文件,使用插件:
<!--分类列表区域-->
<tree-table :data="cateList" :columns="columns" :selection-type="false" :expand-type="false"
       show-index index-text="#" border :show-row-hover="false"></tree-table>
columns 表格各列的配置(具体见下文:Columns Configs)
selection-type 是否为多选类型表格
expand-type 是否为展开行类型表格(为 True 时,需要添加名称为 '$expand' 的作用域插槽, 它可以获取到 row, rowIndex)
show-index 是否显示数据索引
index-text 数据索引名称
border 是否显示纵向边框
show-row-hover 鼠标悬停时,是否高亮当前行
定义columns:
// 为table表格各列的配置定义
columns: [
      {
          label: '分类名称', // 列标题名称
          prop: 'cat_name' // 对应列内容的属性名
      },
      {
          label: '是否有效'
      },
      {
          label: '排序'
      },
      {
          label: '操作'
      }
]
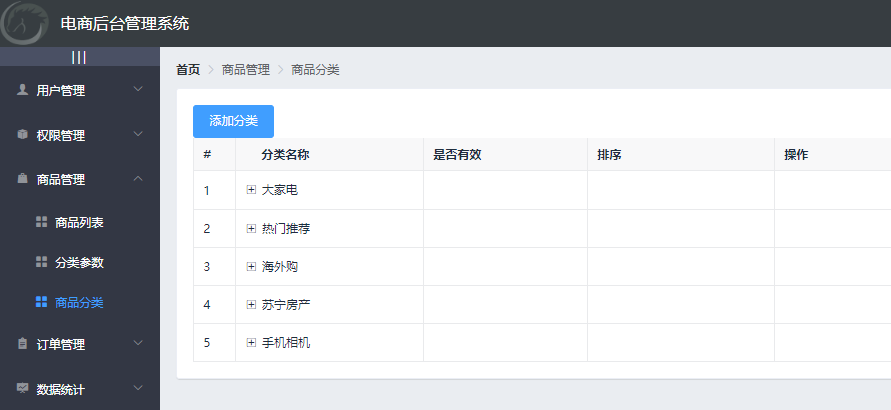
此时效果图:
6、使用自定义模板渲染表格数据
先自定义是否有效模板:
// 为table表格各列的配置定义
columns: [
      {
          label: '分类名称', // 列标题名称
          prop: 'cat_name' // 对应列内容的属性名
      },
      {
          label: '是否有效',
          type: 'template', // 表示:把当前列定义为模板列
          template: 'isok' // 表示当前这列使用的模板名称
      },
      {
          label: '排序'
      },
      {
          label: '操作'
      }
]
添加到表格:
<!--分类列表区域-->
<tree-table :data="cateList" :columns="columns" :selection-type="false" :expand-type="false"
       show-index index-text="#" border :show-row-hover="false">
      <template slot="isok" scope="scope">
          <i v-if="!scope.row.cat_deleted" class="el-icon-success"></i>
          <i v-else class="el-icon-error"></i>
      </template>
</tree-table>

<style lang="less" scoped>
.el-icon-success{color: lightgreen;}
.el-icon-error{color:red;}
</style>
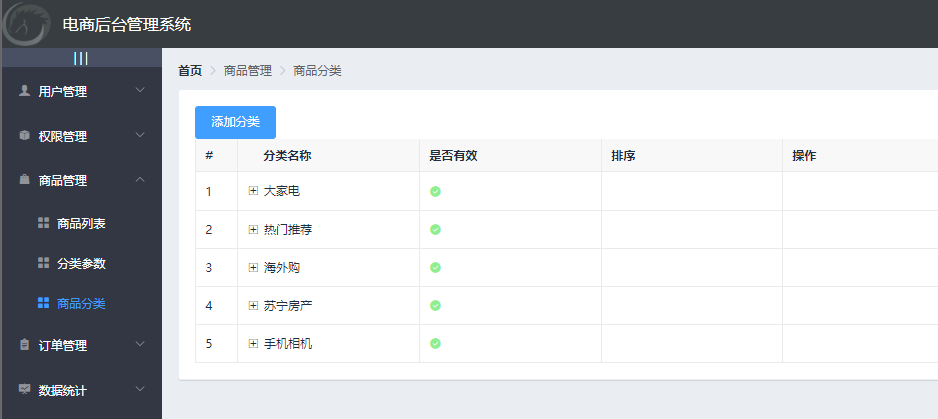
此时效果图:
7、 渲染排序和操作对应的UI
columns:
// 为table表格各列的配置定义
columns: [
      {
          label: '分类名称', // 列标题名称
          prop: 'cat_name' // 对应列内容的属性名
      },
      {
          label: '是否有效',
          type: 'template', // 表示:把当前列定义为模板列
          template: 'isok' // 表示当前这列使用的模板名称
      },
      {
          label: '排序',
          type: 'template', // 表示:把当前列定义为模板列
          template: 'order' // 表示当前这列使用的模板名称
      },
      {
          label: '操作',
          type: 'template', // 表示:把当前列定义为模板列
          template: 'operate' // 表示当前这列使用的模板名称
      }
]
排序和操作列代码:
<!--排序的作用域插槽-->
<template slot="order" scope="scope">
        <el-tag v-if="scope.row.cat_level == 0">一级</el-tag>
        <el-tag v-else-if="scope.row.cat_level == 1" type="success">二级</el-tag>
        <el-tag v-else type="warning">三级</el-tag>
</template>

<!--操作的作用域插槽-->
<template slot="operate" scope="scope">
        <el-button size="mini" type="primary" icon="el-icon-edit">编辑</el-button>
        <el-button size="mini" type="danger" icon="el-icon-delete">删除</el-button>
</template>
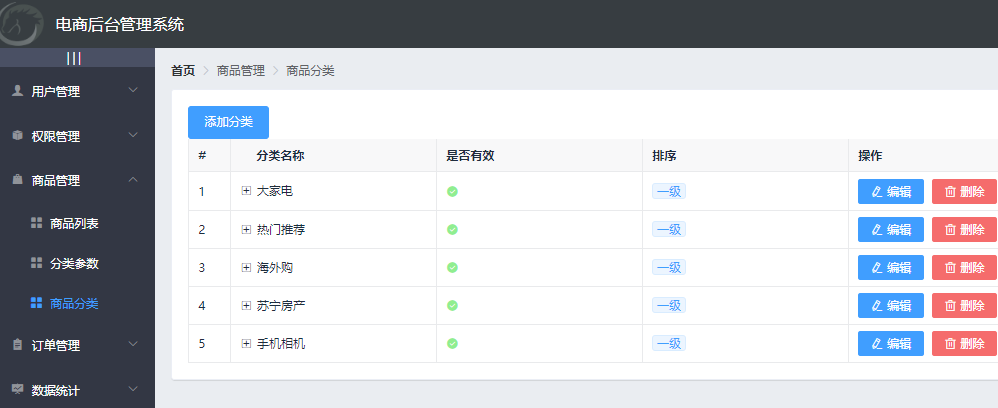
此时效果图:
8、实现分页功能
添加分页代码:
<!--分页区域-->
<el-pagination
        @size-change="handleSizeChange"
        @current-change="handleCurrentChange"
        :current-page="queryInfo.pagenum"
        :page-sizes="[3, 5, 10, 15]"
        :page-size="queryInfo.pagesize"
        layout="total, sizes, prev, pager, next, jumper"
        :total="total"
></el-pagination>
添加handleSizeChange和handleCurrentChange:
// 监听 pagesize 改变
handleSizeChange(newSize) {
    this.queryInfo.pagesize = newSize
    this.getCateList()
},
 // 监听pagenum 改变
handleCurrentChange(newPage) {
    this.queryInfo.pagenum = newPage
    this.getCateList()
}
给添加分类按钮和表格之间添加间距:
<!--分类列表区域-->
<tree-table class="treeTable" :data="cateList" :columns="columns" :selection-type="false" :expand-type="false"
       show-index index-text="#" border :show-row-hover="false">

<style lang="less" scoped>
.el-icon-success{color: lightgreen;}
.el-icon-error{color:red;}
.treeTable{margin-top:15px;}
</style>
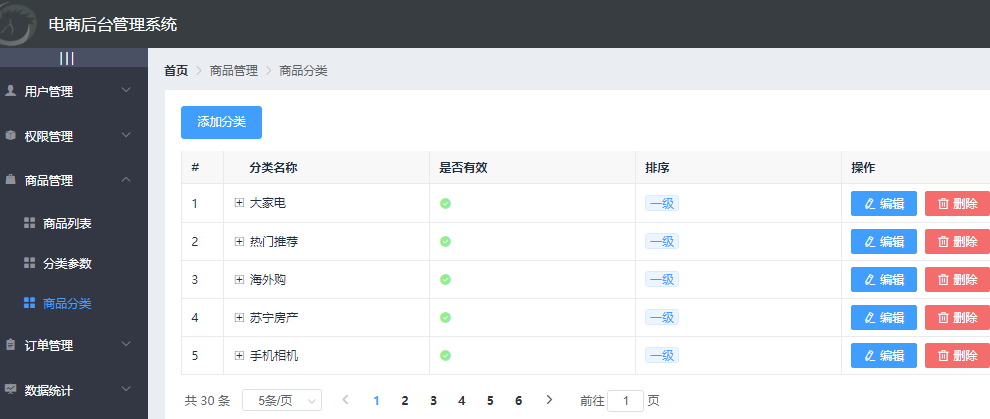
此时效果图:
9、添加分类的对话框和表单
添加分类按钮添加点击事件:
<!--添加分类按钮区域-->
<el-row>
      <el-col>
          <el-button type="primary" @click="showAddCateDialog">添加分类</el-button>
      </el-col>
</el-row>

<script>
export default {
  。。。
  methods: {
    // 点击按钮 弹出添加分类对话框
    showAddCateDialog() {
      this.addCateDialogVisible = true
    }
  }
}
</script>
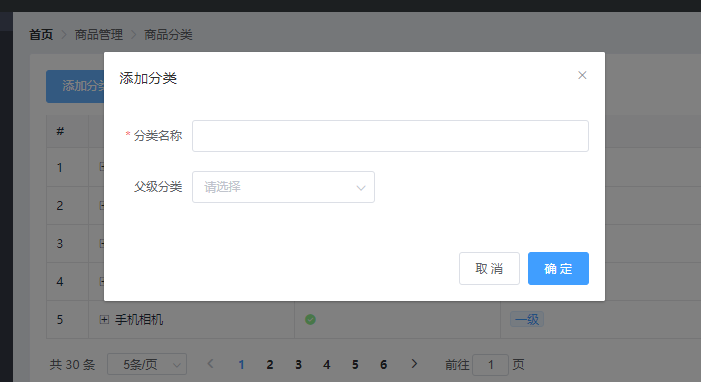
添加对话框代码:
<!--添加分类的对话框-->
<el-dialog title="添加分类" :visible.sync="addCateDialogVisible" width="50%" >
      <!--添加分类表单区域-->
      <el-form :model="addCateForm" :rules="addCateFormRules" ref="addCateFormRef" label-width="90px">
        <el-form-item label="分类名称" prop="cat_name">
          <el-input v-model="addCateForm.cat_name"></el-input>
        </el-form-item>
        <el-form-item label="父级分类">
        </el-form-item>
      </el-form>
      <!--底部按钮区域-->
      <span slot="footer" class="dialog-footer">
        <el-button @click="addCateDialogVisible = false">取 消</el-button>
        <el-button type="primary" @click="addCateDialogVisible = false">确 定</el-button>
      </span>
</el-dialog>

<script>
export default {
  data() {
    return {
      addCateDialogVisible: false, // 控制添加分类对话框是否显示
      // 添加分类的表单数据对象
      addCateForm: {
        cat_name: '', // 将要添加的分类名称
        cat_pid: 0, // 父分类的ID
        cat_level: 0 // 要添加分类的等级,默认要添加的是一级分类
      },
      // 添加分类表单的验证规则对象
      addCateFormRules: {
        cat_name: [
          { required: true, message: '请输入分类名称', trigger: 'blur' }
        ]
      }
    }
  }
}
</script>
此时效果图:
10、获取父级分类的数据列表
添加代码获取父级分类数据:
parentCateList: [] // 父级分类列表数据

// 点击按钮 弹出添加分类对话框
showAddCateDialog() {
      // 获取父级分类的数据列表
      this.getParentCateList()
      this.addCateDialogVisible = true
},
// 获取父级分类的数据列表
async getParentCateList() {
      const { data: res } = await this.$http.get('categories', { params: { type: 2 } })
      console.log(res)
      if (res.meta.status !== 200) {
        return this.$message.error('获取父级分类数据失败')
      }
      this.parentCateList = res.data
}
11、通过级联选择器渲染数据
Cascader 级联选择器
当一个数据集合有清晰的层级结构时,可通过级联选择器逐级查看并选择。
先导入到element.js里,这里就不写了。
value / v-model 选中项绑定值,数组
options 可选项数据源,键名可通过 Props 属性配置
props 配置选项,具体见下表
clearable 是否支持清空选项
expandTrigger 次级菜单的展开方式
checkStrictly 是否严格的遵守父子节点不互相关联
value 指定选项的值为选项对象的某个属性值
label 指定选项标签为选项对象的某个属性值
children 指定选项的子选项为选项对象的某个属性值
添加代码:
<el-form-item label="父级分类">
        <!--级联选择器-->
        <!-- options用来指定数据源  props用来指定配置对象-->
        <el-cascader
            v-model="selectedKeys"
            :options="parentCateList"
            :props="cascaderProps"
            @change="parentCateChanged" clearable></el-cascader>
</el-form-item>

<script>
export default {
  data() {
    return {
      parentCateList: [], // 父级分类列表数据
      // 指定级联选择器的配置对象
      cascaderProps: {
        expandTrigger: 'hover', // 次级菜单的展开方式 click / hover
        checkStrictly: true, // 允许选择任意一级的选项
        value: 'cat_id', // 指定选中值的属性
        label: 'cat_name', // 指定选中标签的名称
        children: 'children' // 指定父子嵌套的属性
      },
      // 选中的父级分类的ID数组
      selectedKeys: []
    }
  },
  methods: {
    // 选择项发生变化时触发这个函数
    parentCateChanged() {
      console.log(this.selectedKeys)
    }
  }
}
</script>

<style lang="less" scoped>
.el-cascader{width: 100%;}
</style>
还要记得在全局样式global.css里添加:
.el-cascader-panel{height:200px;}
否则选项框会超长。
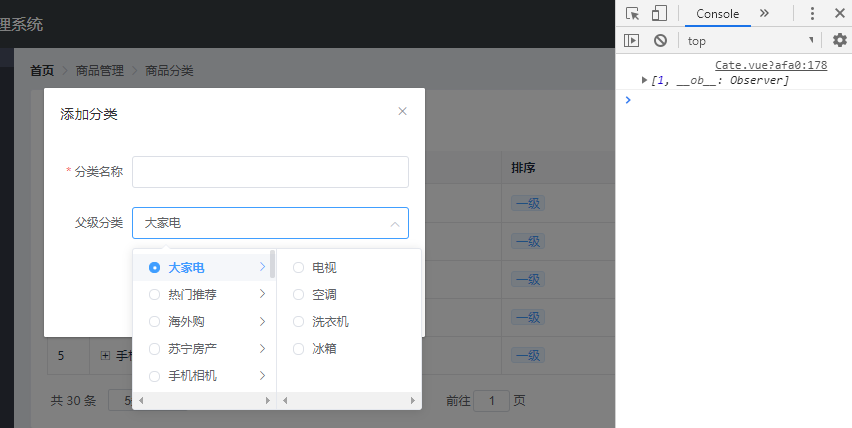
注意:是否允许选择任意一级的选项(例如只选第一级),以前版本的element是添加change-on-select,新版本是在props里添加checkStrictly: 'true'。
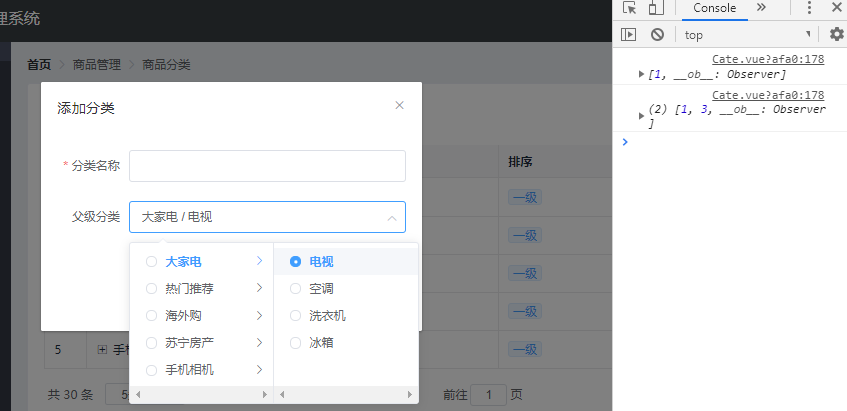
此时效果图:
新版bug问题
- 点击圆圈后理想是自动收起下拉,但是他这个也没有
- 而且只能点击圆圈才能选中,点击文字 label 没有效果
去百度找了一些资料,终于解决了这两个问题:
<el-cascader v-model="selectedKeys" :options="parentCateList" :props="cascaderProps"
            @change="parentCateChanged" clearable ref="cascaderRef"
            @expand-change="cascaderClick" @visible-change="cascaderClick"></el-cascader>
cascadderClick函数:
// 解决bug:点击圆圈后是自动收起下拉;点击文字label同样实现效果
cascaderClick() {
      let that = this
      setTimeout(function() {
        document.querySelectorAll('.el-cascader-node__label').forEach(el => {
          el.onclick = function() {
            this.previousElementSibling.click()
            that.$refs.cascaderRef.dropDownVisible = false
          }
        })
        document
          .querySelectorAll('.el-cascader-panel .el-radio')
          .forEach(el => {
            el.onclick = function() {
              that.$refs.cascaderRef.dropDownVisible = false
            }
          })
      }, 100)
}
OK,现在可以完美实现效果。
12、根据父分类的变化处理表单中的数据
// 添加分类的表单数据对象
addCateForm: {
        cat_name: '', // 将要添加的分类名称
        cat_pid: 0, // 父分类的ID
        cat_level: 0 // 要添加分类的等级,默认要添加的是一级分类
},
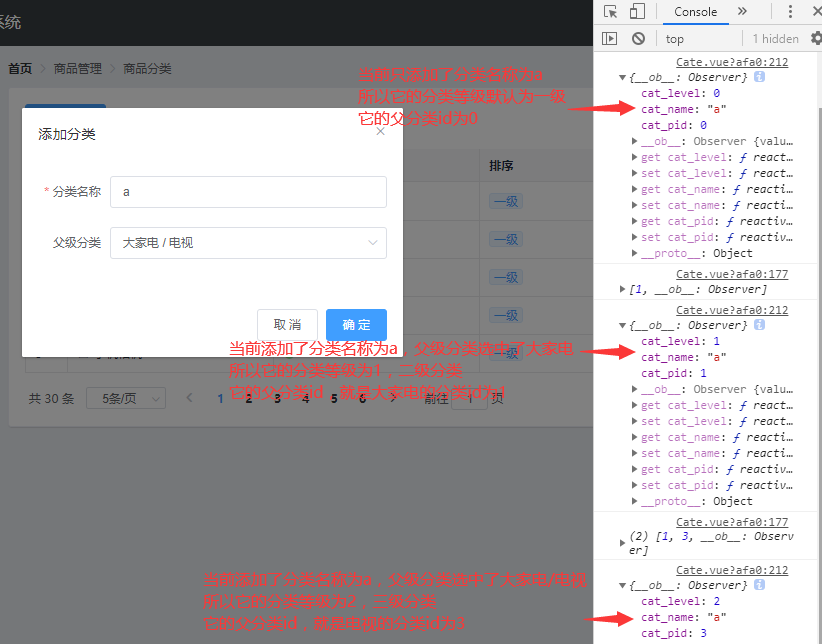
根据刚才建立的表单数据对象分析:如果在表单中只添加分类名称 ,那么父分类id是0,当前要添加分类的等级是0,默认添加的是一级分类;如果选中了一级分类,那么父分类id就是选中的分类id值,当前要添加分类的等级是1,添加的是二级分类;如果选中了一级和二级分类,那么父分类id就是选中的数组中二级分类id的值,当前要添加的分类的等级是2,添加的是三级分类。说的有点绕,具体看代码吧。。
// 选择项发生变化时触发这个函数
parentCateChanged() {
      console.log(this.selectedKeys)
      // 如果 selectedKeys 数据中的 length 大于0,则证明选中了父级分类
      // 反之,就说明没有选中任何父级分类
      if (this.selectedKeys.length > 0) {
        // 选择最后一项当作父分类ID赋值
        this.addCateForm.cat_pid = this.selectedKeys[this.selectedKeys.length - 1]
        // 为当前要添加的分类的等级赋值
        this.addCateForm.cat_level = this.selectedKeys.length
        return
      } else {
        // 父分类ID赋值
        this.addCateForm.cat_pid = 0
        // 为当前要添加的分类的等级赋值
        this.addCateForm.cat_level = 0
      }
      console.log(this.addCateForm)
}
此时三种情况的打印结果分别为:
13、在对话框添加close事件,重置表单数据
给对话框添加colse关闭事件:
<!--添加分类的对话框-->
<el-dialog title="添加分类" :visible.sync="addCateDialogVisible" width="50%" @close="addCateDialogClosed">
// 监听 添加分类对话框的关闭事件
addCateDialogClosed() {
      // 表单内容重置为空
      this.$refs.addCateFormRef.resetFields() // 通过ref引用调用resetFields方法
      // 选中的父级分类的ID数组 重置为空
      this.selectedKeys = []
      // 父分类id 和 当前分类等级 重置为空
      this.addCateForm.cat_pid = 0
      this.addCateForm.cat_level = 0
}
14、完成添加分类的操作
调用api的添加分类接口,请求路径:categories,请求方法:post,
请求参数
cat_pid 分类父 ID 不能为空,如果要添加1级分类,则父分类Id应该设置为 `0`
cat_name 分类名称 不能为空
cat_level 分类层级 不能为空,`0`表示一级分类;`1`表示二级分类;`2`表示三级分类
继续完善addCate函数:请求参数前面已经定义过了addCateForm
// 点击按钮,添加新的分类
addCate() {
    // console.log(this.addCateForm)
    this.$refs.addCateFormRef.validate(async valid => {
        if (!valid) return
        // 可以发起添加分类的网络请求
        const { data: res } = await this.$http.post('categories', this.addCateForm)
        if (res.meta.status !== 201) {
          this.$message.error('添加商品分类失败!')
        }
        this.$message.success('添加商品分类成功!')
        this.getCateList()
        this.addCateDialogVisible = false
    })
}
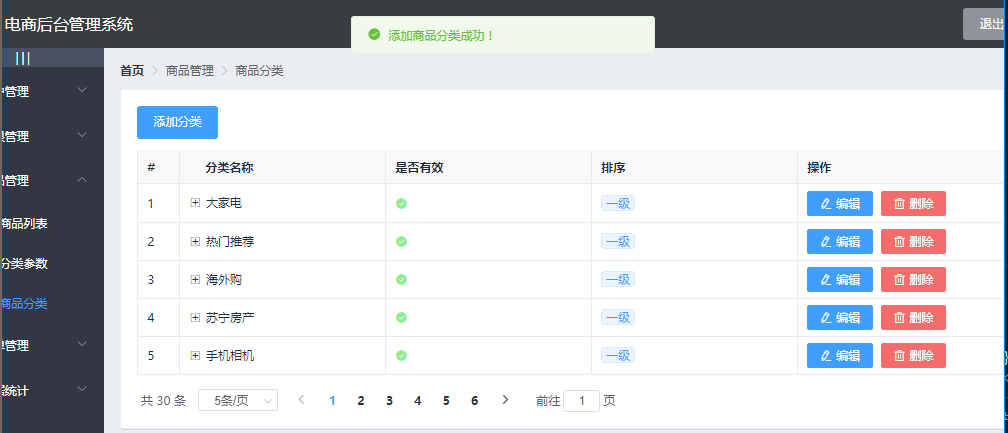
此时效果图:
15、实现编辑分类功能操作
先给编辑按钮添加点击事件:
<el-button size="mini" type="primary" icon="el-icon-edit"
           @click="editCateDialog(scope.row.cat_id)">编辑</el-button>
添加编辑对话框代码:
打开对话框是请求根据 id 查询分类的接口,请求路径:categories/:id,请求方法:get
然后把查询到的数据赋值给编辑分类的表单数据
<!--编辑商品分类的对话框-->
<el-dialog
      title="编辑分类信息"
      :visible.sync="editDialogVisible"
      width="50%"
      @close="editDialogClosed"
    >
      <!--内容主体区域-->
      <el-form :model="editForm" :rules="addCateFormRules" ref="editFormRef" label-width="90px">
        <el-form-item label="分类名称" prop="cat_name">
          <el-input v-model="editForm.cat_name"></el-input>
        </el-form-item>
      </el-form>
      <!--底部按钮区域-->
      <span slot="footer" class="dialog-footer">
        <el-button @click="editDialogVisible = false">取 消</el-button>
        <el-button type="primary" @click="editCateInfo">确 定</el-button>
      </span>
</el-dialog>

<script>
export default {
  data() {
     return {
        editDialogVisible: false, // 控制编辑分类的对话框是否显示
        // 编辑分类信息的表单数据
        editForm: {
          cat_name: ''
        }
     }
  },
  methods: {
     // 监听 编辑分类对话框
    async editCateDialog(id) {
      // 发起根据 id 查询分类的网络请求
      const { data: res } = await this.$http.get('categories/' + id)
      if (res.meta.status !== 200) {
        this.$message.error('查询分类信息失败')
      }
      this.editForm = res.data
      this.editDialogVisible = true
    },
    // 监听 编辑分类信息对话框的关闭事件
    editDialogClosed() {
      // 表单内容重置为空
      this.$refs.editFormRef.resetFields() // 通过ref引用调用resetFields方法
    }
  }
}
</script>
添加确定按钮绑定点击事件,完成用户信息的修改:
先预校验,然后调用api的编辑提交分类接口,请求路径:categories/:id,请求方法:put,请求参数:cat_name 分类名称 不能为空
// 点击按钮 修改角色信息
editRoleInfo() {
      this.$refs.editFormRef.validate(async valid => {
        if (!valid) return
        // 可以发起修改用户信息的网络请求
        const { data: res } = await this.$http.put('categories/' + this.editForm.cat_id,
          { cat_name: this.editForm.cat_name })
        if (res.meta.status !== 200) {
          return this.$message.error('编辑商品分类失败!')
        }
        this.$message.success('编辑商品分类成功!')
        this.getCateList()
        this.editDialogVisible = false
      })
}
ok,测试已经可以编辑分类名称:

16、实现删除分类功能操作
给删除按钮添加点击事件:根据id
<el-button size="mini" type="danger" icon="el-icon-delete"
           @click="delCateDialog(scope.row.cat_id)">删除</el-button>
根据分类id,调用api的删除分类接口,请求路径:categories/:id,请求方法:delete
// 监听 删除分类对话框
async delCateDialog(id) {
      console.log(id)
      // 弹框 询问用户是否删除
      const confirmResult = await this.$confirm('此操作将永久删除该分类, 是否继续?', '提示', {
        confirmButtonText: '确定',
        cancelButtonText: '取消',
        type: 'warning'
      }).catch(err => err)

      // 如果用户确认删除,则返回值为字符串 confirm
      // 如果用户取消删除,则返回值为字符串 cancel
      // console.log(confirmResult)
      if (confirmResult !== 'confirm') {
        return this.$message.info('已取消删除')
      }
      // console.log('确认删除')
      const { data: res } = await this.$http.delete('categories/' + id)
      if (res.meta.status !== 200) {
        return this.$message.error('删除分类失败!')
      }
      this.$message.success('删除分类成功!')
      this.getCateList()
}
完成效果图:

17、将goods_cate提交到远程仓库
先查看分支:
git branch
查看当前文件状态:
git status
然后提交到暂存区:
git add .
把当前提交到goods_cate分支:
git commit -m "完成了商品分类功能的开发"
推送到云端goods_cate分支:
git push
把goods_cate分支合并到master:
git checkout master
git merge goods_cate
git push
ok,完成!


