
代码地址
https://github.com/mrdoob/three.js/blob/master/examples/webgl_effects_anaglyph.html
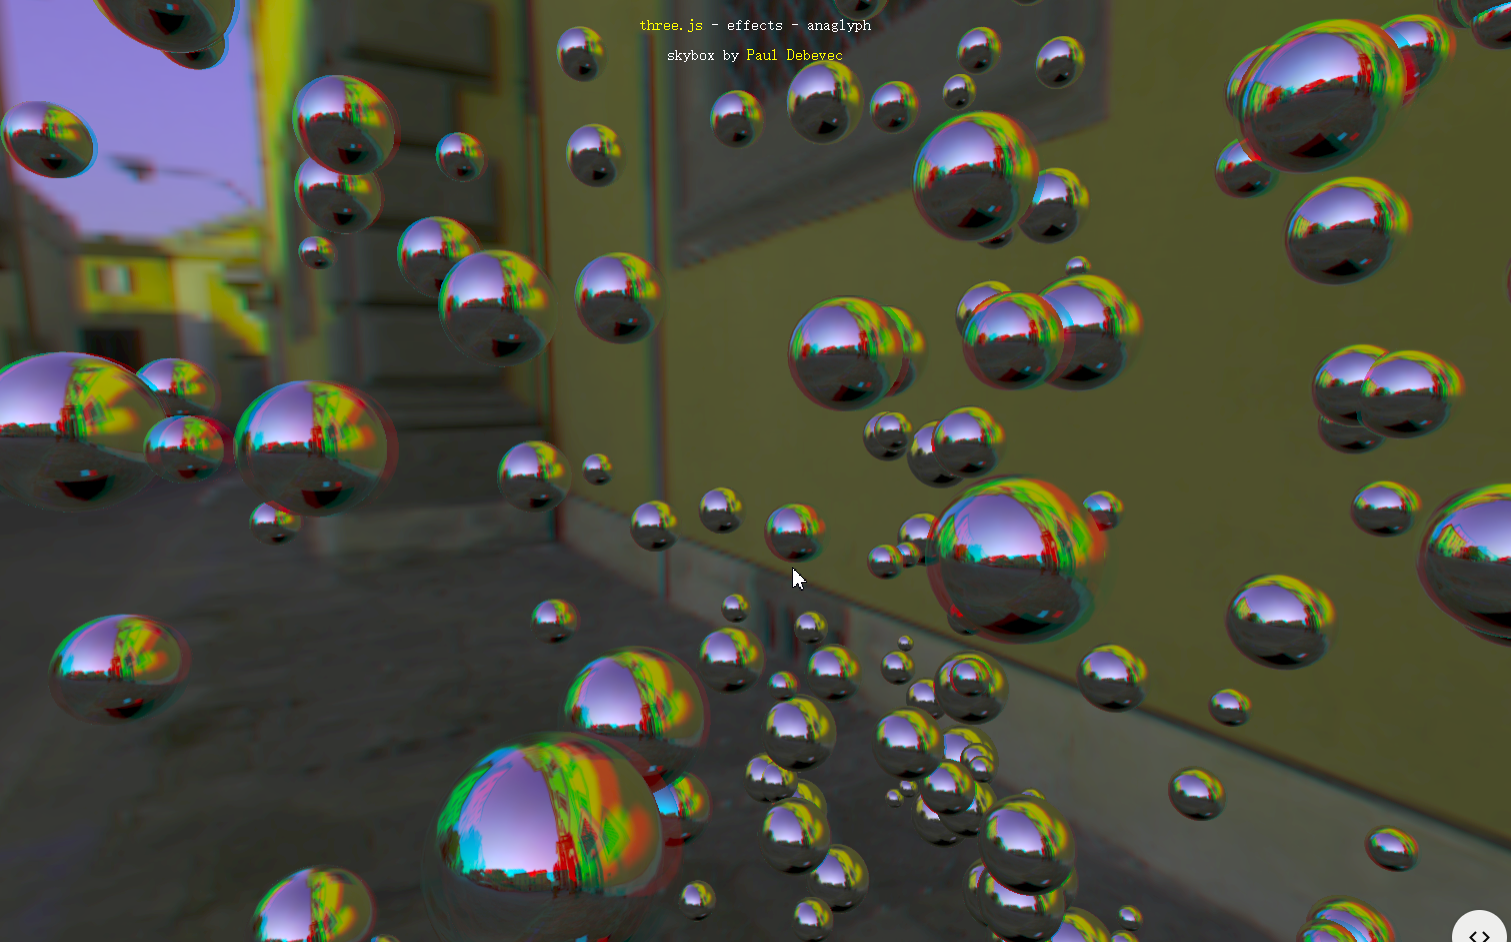
效果
https://threejs.org/examples/#webgl_effects_anaglyph
代码分析
这段Three.js代码创建了一个具有立体视觉效果(Anaglyph Effect)的3D场景,并使用立方体纹理(Cube Texture)作为环境映射。以下是对代码的详细解释:
HTML部分
<!DOCTYPE html>
<html lang="en">
<head>
    <title>three.js webgl - effects - anaglyph</title>
    <meta charset="utf-8">
    <meta name="viewport" content="width=device-width, user-scalable=no, minimum-scale=1.0, maximum-scale=1.0">
    <link type="text/css" rel="stylesheet" href="main.css">
</head>
<body>
    <div id="info">
        <a href="https://threejs.org" target="_blank" rel="noopener">three.js</a> - effects - anaglyph<br/>
        skybox by <a href="https://www.pauldebevec.com/" target="_blank" rel="noopener">Paul Debevec</a>
    </div>

    <script type="importmap">
        {
            "imports": {
                "three": "../build/three.module.js",
                "three/addons/": "./jsm/"
            }
        }
    </script>

    <script type="module">
        // JavaScript code goes here
    </script>
</body>
</html>
<title>: 设置页面标题。<meta>: 设置视口和缩放比例,确保页面在移动设备上显示正常。<link>: 引入外部CSS文件(假设有一个main.css文件用于样式设置)。<div id="info">: 显示一些信息,包括Three.js链接和天空盒作者链接。<script type="importmap">: 定义模块导入映射,使得可以直接使用three和three/addons/路径来加载Three.js及其插件。
JavaScript部分
变量初始化
let container, camera, scene, renderer, effect;

const spheres = [];

let mouseX = 0;
let mouseY = 0;

let windowHalfX = window.innerWidth / 2;
let windowHalfY = window.innerHeight / 2;
- 初始化全局变量,包括容器、相机、场景、渲染器和特效对象。
spheres数组用于存储生成的球体对象。mouseX和mouseY用于跟踪鼠标位置。windowHalfX和windowHalfY用于计算鼠标相对于窗口中心的位置。
事件监听
document.addEventListener('mousemove', onDocumentMouseMove);
- 监听鼠标移动事件,更新
mouseX和mouseY。
初始化函数
init();
- 调用
init()函数来初始化整个场景。
init()函数
function init() {
    container = document.createElement('div');
    document.body.appendChild(container);

    camera = new THREE.PerspectiveCamera(60, window.innerWidth / window.innerHeight, 0.01, 100);
    camera.position.z = 3;

    const path = 'textures/cube/pisa/';
    const format = '.png';
    const urls = [
        path + 'px' + format, path + 'nx' + format,
        path + 'py' + format, path + 'ny' + format,
        path + 'pz' + format, path + 'nz' + format
    ];

    const textureCube = new THREE.CubeTextureLoader().load(urls);

    scene = new THREE.Scene();
    scene.background = textureCube;

    const geometry = new THREE.SphereGeometry(0.1, 32, 16);
    const material = new THREE.MeshBasicMaterial({ color: 0xffffff, envMap: textureCube });

    for (let i = 0; i < 500; i++) {
        const mesh = new THREE.Mesh(geometry, material);

        mesh.position.x = Math.random() * 10 - 5;
        mesh.position.y = Math.random() * 10 - 5;
        mesh.position.z = Math.random() * 10 - 5;

        mesh.scale.x = mesh.scale.y = mesh.scale.z = Math.random() * 3 + 1;

        scene.add(mesh);

        spheres.push(mesh);
    }

    renderer = new THREE.WebGLRenderer();
    renderer.setPixelRatio(window.devicePixelRatio);
    renderer.setAnimationLoop(animate);
    container.appendChild(renderer.domElement);

    const width = window.innerWidth || 2;
    const height = window.innerHeight || 2;

    effect = new AnaglyphEffect(renderer);
    effect.setSize(width, height);

    window.addEventListener('resize', onWindowResize);
}
- 创建一个
div容器并将其添加到文档中。 - 创建透视相机并设置其位置。
- 使用
CubeTextureLoader加载立方体纹理,并将其设置为场景背景。 - 创建球体几何体和材质,材质使用了前面加载的立方体纹理作为环境贴图。
- 循环创建500个随机位置和大小的球体,并将它们添加到场景中。
- 创建WebGL渲染器,并设置其像素比和动画循环。
- 创建立体视觉效果(Anaglyph Effect),并设置其尺寸。
- 监听窗口调整大小事件,以便动态调整相机和渲染器的尺寸。
onWindowResize()函数
function onWindowResize() {
    windowHalfX = window.innerWidth / 2;
    windowHalfY = window.innerHeight / 2;

    camera.aspect = window.innerWidth / window.innerHeight;
    camera.updateProjectionMatrix();

    effect.setSize(window.innerWidth, window.innerHeight);
}
- 更新窗口中心位置。
- 更新相机的宽高比和投影矩阵。
- 更新立体视觉效果的尺寸。
onDocumentMouseMove()函数
function onDocumentMouseMove(event) {
    mouseX = (event.clientX - windowHalfX) / 100;
    mouseY = (event.clientY - windowHalfY) / 100;
}
- 根据鼠标位置更新
mouseX和mouseY。
animate()函数
function animate() {
    render();
}
- 调用
render()函数进行渲染。
render()函数
function render() {
    const timer = 0.0001 * Date.now();

    camera.position.x += (mouseX - camera.position.x) * .05;
    camera.position.y += (-mouseY - camera.position.y) * .05;

    camera.lookAt(scene.position);

    for (let i = 0, il = spheres.length; i < il; i++) {
        const sphere = spheres[i];

        sphere.position.x = 5 * Math.cos(timer + i);
        sphere.position.y = 5 * Math.sin(timer + i * 1.1);
    }

    effect.render(scene, camera);
}
- 获取当前时间作为计时器。
- 根据鼠标位置平滑地更新相机位置。
- 让相机看向场景中心。
- 更新每个球体的位置,使其沿圆形轨迹运动。
- 使用立体视觉效果渲染场景和相机。
总结
这段代码实现了一个带有立体视觉效果的3D场景,其中包含多个随机分布和大小的球体。这些球体使用立方体纹理作为环境贴图,提供了逼真的反射效果。用户可以通过移动鼠标来控制相机的位置,从而获得更加沉浸式的体验。
CubeTextureLoader 立方体纹理
CubeTextureLoader 是 Three.js 中用于加载立方体纹理(也称为环境贴图或天空盒)的类。立方体纹理由六个单独的图像组成,分别对应立方体的六个面:正面、背面、左面、右面、顶面和底面。这些纹理通常用于实现环境映射、背景渲染等效果,以增强3D场景的真实感。
主要用途
-
环境映射:
- 为物体表面提供反射效果。
- 使用
envMap属性将立方体纹理应用到材质上。
-
背景渲染(天空盒):
- 作为场景的背景,创建全景视图。
- 使用
scene.background属性设置场景背景。
-
光照估算:
- 在基于物理的渲染(PBR)中,帮助更真实地模拟光线与材料的交互。
基本使用方法
以下是 CubeTextureLoader 的基本使用步骤:
1. 创建 CubeTextureLoader 实例
const cubeTextureLoader = new THREE.CubeTextureLoader();
2. 加载立方体纹理
const textureCube = cubeTextureLoader.load([
    'textures/cubemap/px.png', // 右面
    'textures/cubemap/nx.png', // 左面
    'textures/cubemap/py.png', // 上面
    'textures/cubemap/ny.png', // 下面
    'textures/cubemap/pz.png', // 后面
    'textures/cubemap/nz.png'  // 前面
]);
3. 应用立方体纹理
作为环境映射
const material = new THREE.MeshStandardMaterial({
    envMap: textureCube,
    metalness: 1, // 提高金属度以增强反射效果
    roughness: 0.1 // 减少粗糙度使表面更加光滑
});
作为背景(天空盒)
scene.background = textureCube;
示例代码解析
你提供的代码示例展示了如何使用 CubeTextureLoader 来加载并应用立方体纹理,以下是对关键部分的详细解释:
HTML结构
<!DOCTYPE html>
<html lang="en">
<head>
    <title>three.js webgl - effects - anaglyph</title>
    <meta charset="utf-8">
    <meta name="viewport" content="width=device-width, user-scalable=no, minimum-scale=1.0, maximum-scale=1.0">
    <link type="text/css" rel="stylesheet" href="main.css">
</head>
<body>
    <div id="info">
        <a href="https://threejs.org" target="_blank" rel="noopener">three.js</a> - effects - anaglyph<br/>
        skybox by <a href="https://www.pauldebevec.com/" target="_blank" rel="noopener">Paul Debevec</a>
    </div>

    <script type="importmap">
        {
            "imports": {
                "three": "../build/three.module.js",
                "three/addons/": "./jsm/"
            }
        }
    </script>

    <script type="module">
        // JavaScript code goes here
    </script>
</body>
</html>
- 设置页面标题和元数据。
- 引入样式表和模块导入映射。
JavaScript部分
初始化函数
function init() {
    container = document.createElement('div');
    document.body.appendChild(container);

    camera = new THREE.PerspectiveCamera(60, window.innerWidth / window.innerHeight, 0.01, 100);
    camera.position.z = 3;

    const path = 'textures/cube/pisa/';
    const format = '.png';
    const urls = [
        path + 'px' + format, path + 'nx' + format,
        path + 'py' + format, path + 'ny' + format,
        path + 'pz' + format, path + 'nz' + format
    ];

    const textureCube = new THREE.CubeTextureLoader().load(urls);

    scene = new THREE.Scene();
    scene.background = textureCube;

    const geometry = new THREE.SphereGeometry(0.1, 32, 16);
    const material = new THREE.MeshBasicMaterial({ color: 0xffffff, envMap: textureCube });

    for (let i = 0; i < 500; i++) {
        const mesh = new THREE.Mesh(geometry, material);

        mesh.position.x = Math.random() * 10 - 5;
        mesh.position.y = Math.random() * 10 - 5;
        mesh.position.z = Math.random() * 10 - 5;

        mesh.scale.x = mesh.scale.y = mesh.scale.z = Math.random() * 3 + 1;

        scene.add(mesh);

        spheres.push(mesh);
    }

    renderer = new THREE.WebGLRenderer();
    renderer.setPixelRatio(window.devicePixelRatio);
    renderer.setAnimationLoop(animate);
    container.appendChild(renderer.domElement);

    const width = window.innerWidth || 2;
    const height = window.innerHeight || 2;

    effect = new AnaglyphEffect(renderer);
    effect.setSize(width, height);

    window.addEventListener('resize', onWindowResize);
}
- 创建一个
div容器并将其添加到文档中。 - 创建透视相机并设置其位置。
- 使用
CubeTextureLoader加载立方体纹理,并将其设置为场景背景。 - 创建球体几何体和材质,材质使用了前面加载的立方体纹理作为环境贴图。
- 循环创建500个随机位置和大小的球体,并将它们添加到场景中。
- 创建WebGL渲染器,并设置其像素比和动画循环。
- 创建立体视觉效果(Anaglyph Effect),并设置其尺寸。
- 监听窗口调整大小事件,以便动态调整相机和渲染器的尺寸。
渲染函数
function render() {
    const timer = 0.0001 * Date.now();

    camera.position.x += (mouseX - camera.position.x) * .05;
    camera.position.y += (-mouseY - camera.position.y) * .05;

    camera.lookAt(scene.position);

    for (let i = 0, il = spheres.length; i < il; i++) {
        const sphere = spheres[i];

        sphere.position.x = 5 * Math.cos(timer + i);
        sphere.position.y = 5 * Math.sin(timer + i * 1.1);
    }

    effect.render(scene, camera);
}
- 获取当前时间作为计时器。
- 根据鼠标位置平滑地更新相机位置。
- 让相机看向场景中心。
- 更新每个球体的位置,使其沿圆形轨迹运动。
- 使用立体视觉效果渲染场景和相机。
总结
CubeTextureLoader 是一个强大的工具,用于加载立方体纹理并在Three.js场景中应用。通过将其应用于材质的 envMap 属性或设置为场景的背景,可以显著提升3D场景的真实感和视觉效果。在你的示例代码中,它被用来创建一个具有立体视觉效果的3D场景,并且所有球体都带有环境反射效果,使得整个场景看起来更加逼真。
前端工程师、程序员
标签:
threejs


【推荐】国内首个AI IDE,深度理解中文开发场景,立即下载体验Trae
【推荐】编程新体验,更懂你的AI,立即体验豆包MarsCode编程助手
【推荐】抖音旗下AI助手豆包,你的智能百科全书,全免费不限次数
【推荐】轻量又高性能的 SSH 工具 IShell:AI 加持,快人一步
· TypeScript + Deepseek 打造卜卦网站:技术与玄学的结合
· 阿里巴巴 QwQ-32B真的超越了 DeepSeek R-1吗?
· 【译】Visual Studio 中新的强大生产力特性
· 【设计模式】告别冗长if-else语句:使用策略模式优化代码结构
· 10年+ .NET Coder 心语 ── 封装的思维:从隐藏、稳定开始理解其本质意义
2018-03-05 centos 支持安装libsodium