SpringBoot(四):java从配置文件中取值的方式
一、SpringBoot项目中取yaml配置文件中的值
application.yaml
test:
  url: localhost:8080
  name: root
  password: 123456
  val:
    a: 1
    b: 2
    c: 3
TestConfig.class
@Component
@ConfigurationProperties(prefix = "test")
public class TestConfig {
    private String url;
    private String name;
    private String password;
    private Map<String, Object> val;

    public TestConfig() {
    }

    public TestConfig(String url, String name, String password, Map<String, Object> val) {
        this.url = url;
        this.name = name;
        this.password = password;
        this.val = val;
    }

    public String getUrl() {
        return url;
    }

    public void setUrl(String url) {
        this.url = url;
    }

    public String getName() {
        return name;
    }

    public void setName(String name) {
        this.name = name;
    }

    public String getPassword() {
        return password;
    }

    public void setPassword(String password) {
        this.password = password;
    }

    public Map<String, Object> getVal() {
        return val;
    }

    public void setVal(Map<String, Object> val) {
        this.val = val;
    }

    @Override
    public String toString() {
        return "TestConfig{" +
                "url='" + url + '\'' +
                ", name='" + name + '\'' +
                ", password='" + password + '\'' +
                ", val=" + val +
                '}';
    }
}
测试类:
@SpringBootTest
class Springboot02ConfigApplicationTests {
    private TestConfig testConfig;

    @Autowired
    public void setTestConfig(TestConfig testConfig) {
        this.testConfig = testConfig;
    }
    @Test
    void contextLoads() {
        System.out.println(testConfig);
    }

}
测试结果:

在SpringBoot项目中取得yaml配置文件的内容,核心就是@ConfigurationProperties注解。
二、取properties配置文件中的值
jms.properties
url=localhost:8081
name=root1
password=1234567
TestConfig.class
@Component
@PropertySource("classpath:jms.properties")
public class TestConfig {
    @Value("${url}")
    private String url;
    @Value("${name}")
    private String name;
    @Value("${password}")
    private String password;
    private Map<String, Object> val;

    public TestConfig() {
    }

    public TestConfig(String url, String name, String password, Map<String, Object> val) {
        this.url = url;
        this.name = name;
        this.password = password;
        this.val = val;
    }

    public String getUrl() {
        return url;
    }

    public void setUrl(String url) {
        this.url = url;
    }

    public String getName() {
        return name;
    }

    public void setName(String name) {
        this.name = name;
    }

    public String getPassword() {
        return password;
    }

    public void setPassword(String password) {
        this.password = password;
    }

    public Map<String, Object> getVal() {
        return val;
    }

    public void setVal(Map<String, Object> val) {
        this.val = val;
    }

    @Override
    public String toString() {
        return "TestConfig{" +
                "url='" + url + '\'' +
                ", name='" + name + '\'' +
                ", password='" + password + '\'' +
                ", val=" + val +
                '}';
    }
}
测试结果:

核心注解@Value,这里用到@propertySource是为了不不使用默认的application配置文件,若为application.properties,可不使用此注解。
三、普通项目中得到properties配置文件中的值
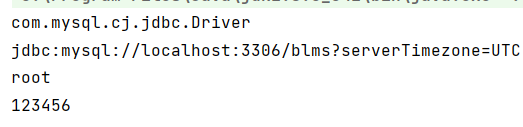
jdbc.properties
driver=com.mysql.cj.jdbc.Driver
url=jdbc:mysql://localhost:3306/blms?serverTimezone=UTC
name=root
password=123456
测试类
public class test {
    public static void main(String[] args) {
        ResourceBundle bundle = ResourceBundle.getBundle("jdbc");
        String driver = bundle.getString("driver");
        String url = bundle.getString("url");
        String name = bundle.getString("name");
        String password = bundle.getString("password");
        System.out.println(driver + "\n" + url + "\n" + name + "\n" + password);
    }
}
(本文仅作个人学习用,如有纰漏敬请指正)

 浙公网安备 33010602011771号