红帽虚拟化RHEV-安装RHEV-M
2016-03-26 17:29 云物互联 阅读(593) 评论(0) 收藏 举报目录
前言
在红帽虚拟化RHEV-架构简介 篇中介绍了RHEV-M是红帽虚拟化平台的管理中心,本篇主要介绍如何在企业服务器中安装和配置RHEV-M 。本篇使用了Redhat官方收费的RHEV版本,如果有兴趣的话建议可以使用RHEV的开源版——ovrit 。点这里下载ovrit
软件环境
- 系统
- RHEL 6.4
- 软件
- RHEV-M
- rhel server supplementory
- JBoss
时间同步
可以说所有的企业集群服务平台都需要时间同步服务器的支持。
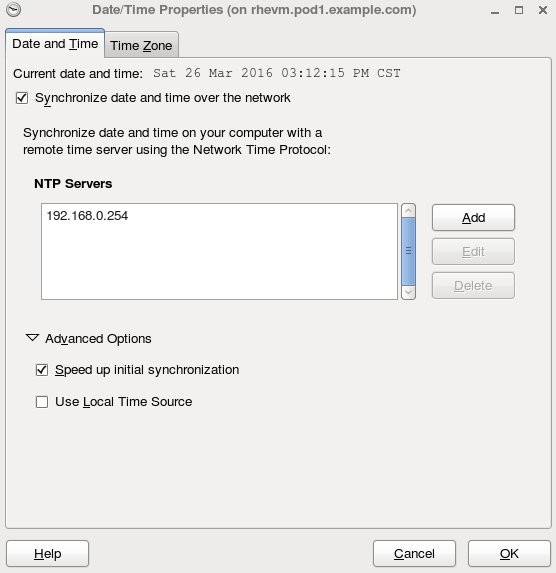
打开时间同步服务界面
system-config-data
Click OK to sync the date
更新系统
确保RHEL是最新的软件环境
yum update -y ; reboot安装并配置RHEV-M
安装
yum install -y rhevm rhevm-reports配置rhevm
rhevm-setup# Output as below:
Welcome to RHEV Manager setup utility
In order to proceed the installer must stop the ovirt-engine service
Would you like to stop the ovirt-engine service? (yes|no): yes #是否重启JBoss,ovirt-engine是JBoss的服务别名
Stopping ovirt-engine service... RHEV Manager uses httpd to proxy requests to the application server.
It looks like the httpd installed locally is being actively used.
The installer can override current configuration .
Alternatively you can use JBoss directly (on ports higher than 1024)
Do you wish to override current httpd configuration and restart the service? ['yes'| 'no'] [yes] : yes #是否改变HTTP服务配置并重启服务? 默认为Yes,可以重新设定HTTP、HTTPS的端口。再设定之后,还需要到HTTP的配置文件中修改成一直的Port号。
HTTP Port [80] :
HTTPS Port [443] :
Host fully qualified domain name. Note: this name should be fully resolvable [rhevm.pod1.example.com] : #设定RHEV-M主机的FQDN
Enter a password for an internal RHEV Manager administrator user (admin@internal) : #设定管理平台的Admin账户的密码
Warning: Weak Password.
Confirm password :
Organization Name for the Certificate [pod1.example.com] :
The default storage type you will be using ['NFS'| 'FC'| 'ISCSI'| 'POSIXFS'] [NFS] : ISCSI #选择RHEV存储方式
Enter DB type for installation ['remote'| 'local'] [local] : #选择PostgreSQL的安装类型,这里选择本地。如果条件允许可以将PostgreSQL安装到独立的服务器中,会更加的安全。
Enter a password for a local RHEV Manager DB admin user (engine) : #设定PostgreSQL管理员的密码
Warning: Weak Password.
Confirm password :
Configure NFS share on this server to be used as an ISO Domain? ['yes'| 'no'] [yes] : #ISO镜像存储域是否使用NFS
Local ISO domain path [/var/lib/exports/iso] : #设定ISO镜像存储路径
Firewall ports need to be opened.
The installer can configure iptables automatically overriding the current configuration. The old configuration will be backed up.
Alternately you can configure the firewall later using an example iptables file found under /etc/ovirt-engine/iptables.example
Configure iptables ? ['yes'| 'no']: no #是否配置iptables
RHEV Manager will be installed using the following configuration:
=================================================================
override-httpd-config: yes
http-port: 80
https-port: 443
host-fqdn: rhevm.pod1.example.com
auth-pass: ********
org-name: pod1.example.com
default-dc-type: ISCSI
db-remote-install: local
db-local-pass: ********
nfs-mp: /var/lib/exports/iso
config-nfs: yes
override-iptables: no
Proceed with the configuration listed above? (yes|no): yes #是否确定上述配置
Installing:
Configuring RHEV Manager... [ DONE ]
Configuring JVM... [ DONE ]
Creating CA... [ DONE ]
Updating ovirt-engine service... [ DONE ]
Setting Database Configuration... [ DONE ]
Setting Database Security... [ DONE ]
Creating Database... [ DONE ]
Updating the Default Data Center Storage Type... [ DONE ]
Editing RHEV Manager Configuration... [ DONE ]
Editing Postgresql Configuration... [ DONE ]
Configuring the Default ISO Domain... [ DONE ]
Configuring Firewall (iptables)... [ DONE ]
Starting ovirt-engine Service... [ DONE ]
Configuring HTTPD... [ DONE ]
*** Installation completed successfully ******
(Please allow
RHEV Manager a few moments to start up.....)Setup Done
添加域并为用户授权远程登陆
为了安全,RHEV-M的默认只允许admin管理员账户在本地登陆。为了让其他管理账户能够从远程登陆管理平台,需要在RHEV-M中指定。
rhevm-manage-domains -action=add -domain=example.com -user=rhevadmin -provider=IPA -interactive
service ovirt-engine restart    #任何对RHEV-M的配置都需要重启JBoss生效
进入Web管理平台为远程登陆的用户授权
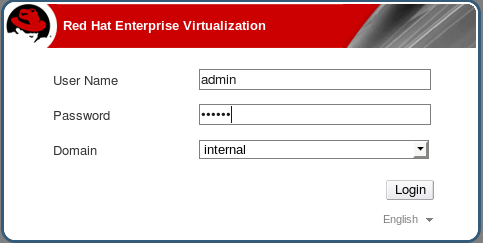
先在DOMAIN internal以admin的账号登陆
点击Configure进入角色授予界面–>
点击System permissions选项–>
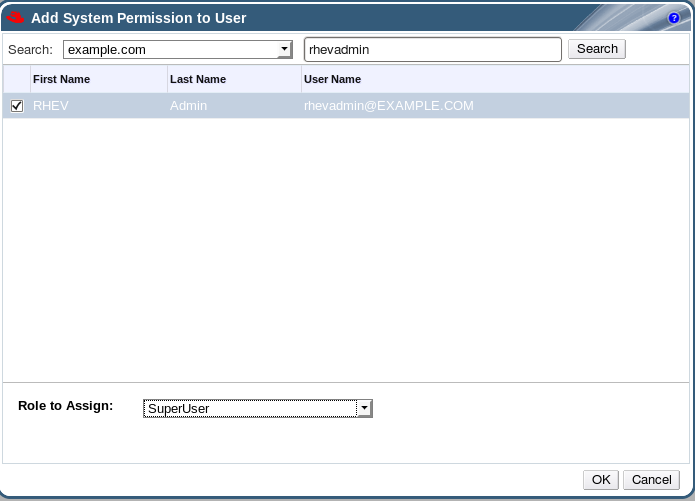
点击Add –>
为DOMAIN example.com中的USER rhevadmin授予SuperUser的角色。

这样就可以使用rhevadmin的账户从远程登陆到Web管理平台中,当然要注意的是DOMAIN应该选择example.com
安装rhevm报告
rhevm-dwh-setup
rhevm-reports-setup注意:rhevm-reports的登陆账号为rhevm-admin
安装Spice协议
Spice协议是用户连接到RHEV-H端中VM的通讯协议,比VNC拥有着更加快的传输率。
**注意:**Spice是浏览器的插件,所以你需要在远程连接的HOST中安装,而不是仅仅在RHEV-M中安装。
yum intall -y spice-xpi最后
至此RHEV-M按安装和配置就基本上完事了,但RHEV-M只是作为RHEV中的一个组件。安装好M端后还需要安装H端才能够感受到红帽虚拟化的功能。


 浙公网安备 33010602011771号