

Say hello to x86_64 Assembly [part 8]
http://0xax.blogspot.sg/2014/12/say-hello-to-x8664-assembly-part-8.html
Floating point numbers
It is eight and final part of Say hello to x86_64 Assembly and here we will take a look on how to work with non-integer numbers in assembler. There are a couple of ways how to work with floating point data:
First of all let's look how floating point number stored in memory. There are three floating point data types:
- single-precision
- double-precision
- double-extended precision
As Intel's 64-ia-32-architecture-software-developer-vol-1-manual described:
The data formats for these data types correspond directly to formats specified in the IEEE Standard 754 for Binary Floating-Point Arithmetic.
Single-precision floating-point float point data presented in memory:
- sign - 1 bit
- exponent - 8 bits
- mantissa - 23 bits
So for example if we have following number:
| sign | exponent | mantissa |
|---|---|---|
| 0 | 00001111 | 110000000000000000000000 |
Exponent is either an 8 bit signed integer from −128 to 127 or an 8 bit unsigned integer from 0 to 255. Sign bit is zero, so we have positive number. Exponent is 00001111b or 15 in decimal. For single-precision displacement is 127, it means that we need to calculate exponent - 127 or 15 - 127 = -112. Since the normalized binary integer part of the mantissa is always equal to one, then in the mantissa is recorded only its fractional part, so mantissa or our number is1,110000000000000000000000. Result value will be:
value = mantissa * 2^-112
Double precision number is 64 bit of memory where:
- sign - 1 bit
- exponent - 11 bit
- mantissa - 52 bit
Result number we can get by:
value = (-1)^sign * (1 + mantissa / 2 ^ 52) * 2 ^ exponent - 1023)
Extended precision is 80 bit numbers where:
- sign - 1 bit
- exponent - 15 bit
- mantissa - 112 bit
Read more about it - here. Let's look at simple example.
x87 FPU
The x87 Floating-Point Unit (FPU) provides high-performance floating-point processing. It supports the floating-point, integer, and packed BCD integer data types and the floating-point processing algorithms. x87 provides following instructions set:
- Data transfer instructions
- Basic arithmetic instructions
- Comparison instructions
- Transcendental instructions
- Load constant instructions
- x87 FPU control instructions
Of course we will not see all instructions here provided by x87, for additional information see 64-ia-32-architecture-software-developer-vol-1-manual Chapter 8. There are a couple of data transfer instructions:
- FDL - load floating point
- FST - store floating point (in ST(0) register)
- FSTP - store floating point and pop (in ST(0) register)
Arithmetic instructions:
- FADD - add floating point
- FIADD - add integer to floating point
- FSUB - subtract floating point
- FISUB - subtract integer from floating point
- FABS - get absolute value
- FIMUL - multiply integer and floating point
- FIDIV - device integer and floating point
and etc... FPU has eight 10 byte registers organized in a ring stack. Top of the stack - register ST(0), other registers are ST(1), ST(2) ... ST(7). We usually uses it when we are working with floating point data. For example:
| section .data | |
| x dw 1.0 | |
| fld dword [x] |
pushes value of x to this stack. Operator can be 32bit, 64bit or 80bit. It works as usual stack, if we push another value withfld, x value will be in ST(1) and new value will be in ST(0). FPU instructions can use these registers, for example:
| ;; | |
| ;; adds st0 value to st3 and saves it in st0 | |
| ;; | |
| fadd st0, st3 | |
| ;; | |
| ;; adds x and y and saves it in st0 | |
| ;; | |
| fld dword [x] | |
| fld dword [y] | |
| fadd |
Let's look on simple example. We will have circle radius and calculate circle square and print it:
| extern printResult | |
| section .data | |
| radius dq 1.7 | |
| result dq 0 | |
| SYS_EXIT equ 60 | |
| EXIT_CODE equ 0 | |
| global _start | |
| section .text | |
| _start: | |
| fld qword [radius] | |
| fld qword [radius] | |
| fmul | |
| fldpi | |
| fmul | |
| fstp qword [result] | |
| mov rax, 0 | |
| movq xmm0, [result] | |
| call printResult | |
| mov rax, SYS_EXIT | |
| mov rdi, EXIT_CODE | |
| syscall |
Let's try to understand how it works: First of all there is data section with predefined radius data and result which we will use for storing result. After this 2 constants for calling exit system call. Next we see entry point of program - _start. There we stores radius value in st0 and st1 with fld instruction and multiply this two values with fmul instruction. After this operations we will have result of radius on radius multiplication in st0 register. Next we load The number π with fldpiinstruction to the st0 register, and after it radius * radius value will be in st1 register. After this execute multiplication withfmul on st0 (pi) and st1 (value of radius * radius), result will be in st0 register. Ok, now we have circle square in st0 register and can extract it with fstp instruction to the result. Next point is to pass result to the C function and call it. Remember we call C function from assembly code in previous blog post. We need to know x86_64 calling convention. In usual way we pass function parameters through registers rdi (arg1), rsi (arg2) and etc..., but here is floating point data. There is special registers: xmm0 - xmm15 provided by sse. First of all we need to put number of xmmN register to rax register (0 for our case), and put result to xmm0 register. Now we can call C function for printing result:
| #include <stdio.h> | |
| extern int printResult(double result); | |
| int printResult(double result) { | |
| printf("Circle radius is - %f\n", result); | |
| return 0; | |
| } |
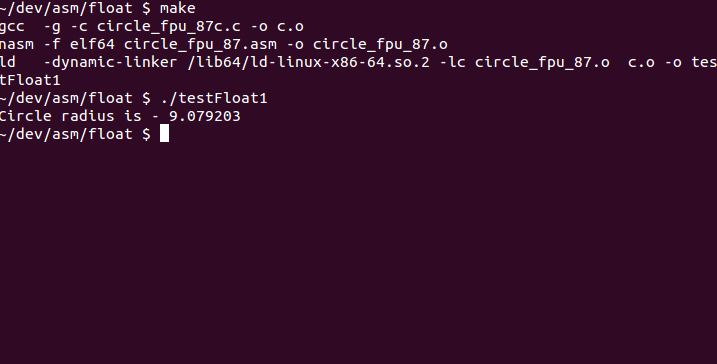
We can build it with:
| build: | |
| gcc -g -c circle_fpu_87c.c -o c.o | |
| nasm -f elf64 circle_fpu_87.asm -o circle_fpu_87.o | |
| ld -dynamic-linker /lib64/ld-linux-x86-64.so.2 -lc circle_fpu_87.o c.o -o testFloat1 | |
| clean: | |
| rm -rf *.o | |
| rm -rf testFloat1 |
And run:
Conclusion
It was a eight part of series 'say hello to x64 assembly'. Here we saw how to work with floating point number in assembly. if you will have a questions/suggestions write me a comment or ping me at twitter for discussing. If you're interesting in some additional themes about assembly and x86_64 programming write me a comment and I will try to write blog post about it in near time. It was a last part of this series, at least in regular way. I'm starting to write new series of blog post about linux kernel internals. If there will be something new in the kernel or somewhere else about x86_64 or assembler generally, i will write post about it.
All another parts you can find - here.
All source code you can find as every time - here.

 浙公网安备 33010602011771号