Elasticsearch循序渐进
前言
Elasticsearch是一个基于Lucene的搜索服务器。它提供了一个分布式多用户能力的全文搜索引擎,基于RESTful web接口。Elasticsearch是用Java语言开发的,并作为Apache许可条款下的开放源码发布,是一种流行的企业级搜索引擎。Elasticsearch用于云计算中,能够达到实时搜索,稳定,可靠,快速,安装使用方便
规划
1、主机信息
| 节点名称 | 节点IP | 软件版本 | OS版本 |
|---|---|---|---|
| server50 | 192.168.4.50 | elasticsearch-8.5.3、cerebro-0.9.4 | coentos 4.19 |
| server51 | 192.168.4.51 | elasticsearch-8.5.3 | coentos 4.19 |
| server52 | 192.168.4.52 | elasticsearch-8.5.3 | coentos 4.19 |
2、软件版本
- elasticsearch:8.5.3
- cerebro:v0.9.4
地址:https://artifacts.elastic.co/downloads
地址:https://github.com/lmenezes/cerebro/releases
部署
1、系统初始化
1、修改/etc/security/limits.conf
vi /etc/security/limits.conf
* soft nofile 65536
* hard nofile 65535
* soft nproc 65535
* hard nproc 65535
* soft memlock unlimited
* hard memlock unlimited
2、修改/etc/systemd/system.conf
vi /etc/systemd/system.conf
DefaultLimitNOFILE=65535
DefaultLimitNPROC=65535
3、修改/etc/sysctl.conf
vi /etc/sysctl.conf
vm.max_map_count=655360

sysctl -p
4、关闭防火墙和selinux
systemctl stop firewalld
setenforce 0
sed -i 's/=enforcing/=disabled/g' /etc/selinux/config
2、下载安装
useradd  elasticsearch
echo "111111" | passwd elasticsearch --stdin
mkdir /data/app/
wget https://artifacts.elastic.co/downloads/elasticsearch/elasticsearch-8.5.3-linux-x86_64.tar.gz
tar -xvf elasticsearch-8.5.3-linux-x86_64.tar.gz -C /data/app/
chown -R elasticsearch:elasticsearch /data/app/elasticsearch-8.5.3
3、修改配置文件
1、主机50
cd /data/app/elasticsearch-8.5.3/config
cp elasticsearch.yml  elasticsearch.yml.bak
vim elasticsearch.yml
cluster.name: cluster_prd_es
node.name: server50
bootstrap.memory_lock: true
network.host: 192.168.4.50
http.port: 9200
discovery.seed_hosts: ["192.168.4.50:9300", "192.168.4.51:9300", "192.168.4.52"]
cluster.initial_master_nodes: ["server50"]
2、主机51
cd /data/app/elasticsearch-8.5.3/config
cp elasticsearch.yml  elasticsearch.yml.bak
vim elasticsearch.ymlvim elasticsearch.yml
cluster.name: cluster_prd_es
node.name: server51
bootstrap.memory_lock: true
network.host: 192.168.4.51
http.port: 9200
discovery.seed_hosts: ["192.168.4.50:9300", "192.168.4.51:9300", "192.168.4.52"]
cluster.initial_master_nodes: ["server50"]
3、主机52
cd /data/app/elasticsearch-8.5.3/config
cp elasticsearch.yml  elasticsearch.yml.bak
vim elasticsearch.yml
cluster.name: cluster_prd_es
node.name: server52
bootstrap.memory_lock: true
network.host: 192.168.4.52
http.port: 9200
discovery.seed_hosts: ["192.168.4.50:9300", "192.168.4.51:9300", "192.168.4.52"]
cluster.initial_master_nodes: ["server50"]
4、修改jvm
vi jvm.options
-Xms512m
-Xmx512m
4、启动&查看集群状态
su - elasticsearch
cd /data/app/elasticsearch-8.5.3
./bin/elasticsearch -d
查看集群状态
```[root@server50 ~]# curl -XGET "http://192.168.4.50:9200/_cluster/health?pretty"
{
  "cluster_name" : "cluster_prd_es",
  "status" : "green",
  "timed_out" : false,
  "number_of_nodes" : 3,
  "number_of_data_nodes" : 3,
  "active_primary_shards" : 0,
  "active_shards" : 0,
  "relocating_shards" : 0,
  "initializing_shards" : 0,
  "unassigned_shards" : 0,
  "delayed_unassigned_shards" : 0,
  "number_of_pending_tasks" : 0,
  "number_of_in_flight_fetch" : 0,
  "task_max_waiting_in_queue_millis" : 0,
  "active_shards_percent_as_number" : 100.0
}
监控
1、部署
tar -xvf cerebro-0.9.4.tgz -C /data/app/
cd /data/app/cerebro-0.9.4
nohup bin/cerebro 2>&1 >/dev/null &
注意:默认cerebro监听的端口是9000,如果出现端口冲突,需要修改cerebro监控的端口。
在启动cerebro的时候可以通过http.port参数指定端口号,如下命令:
bin/cerebro -Dhttp.port=1234
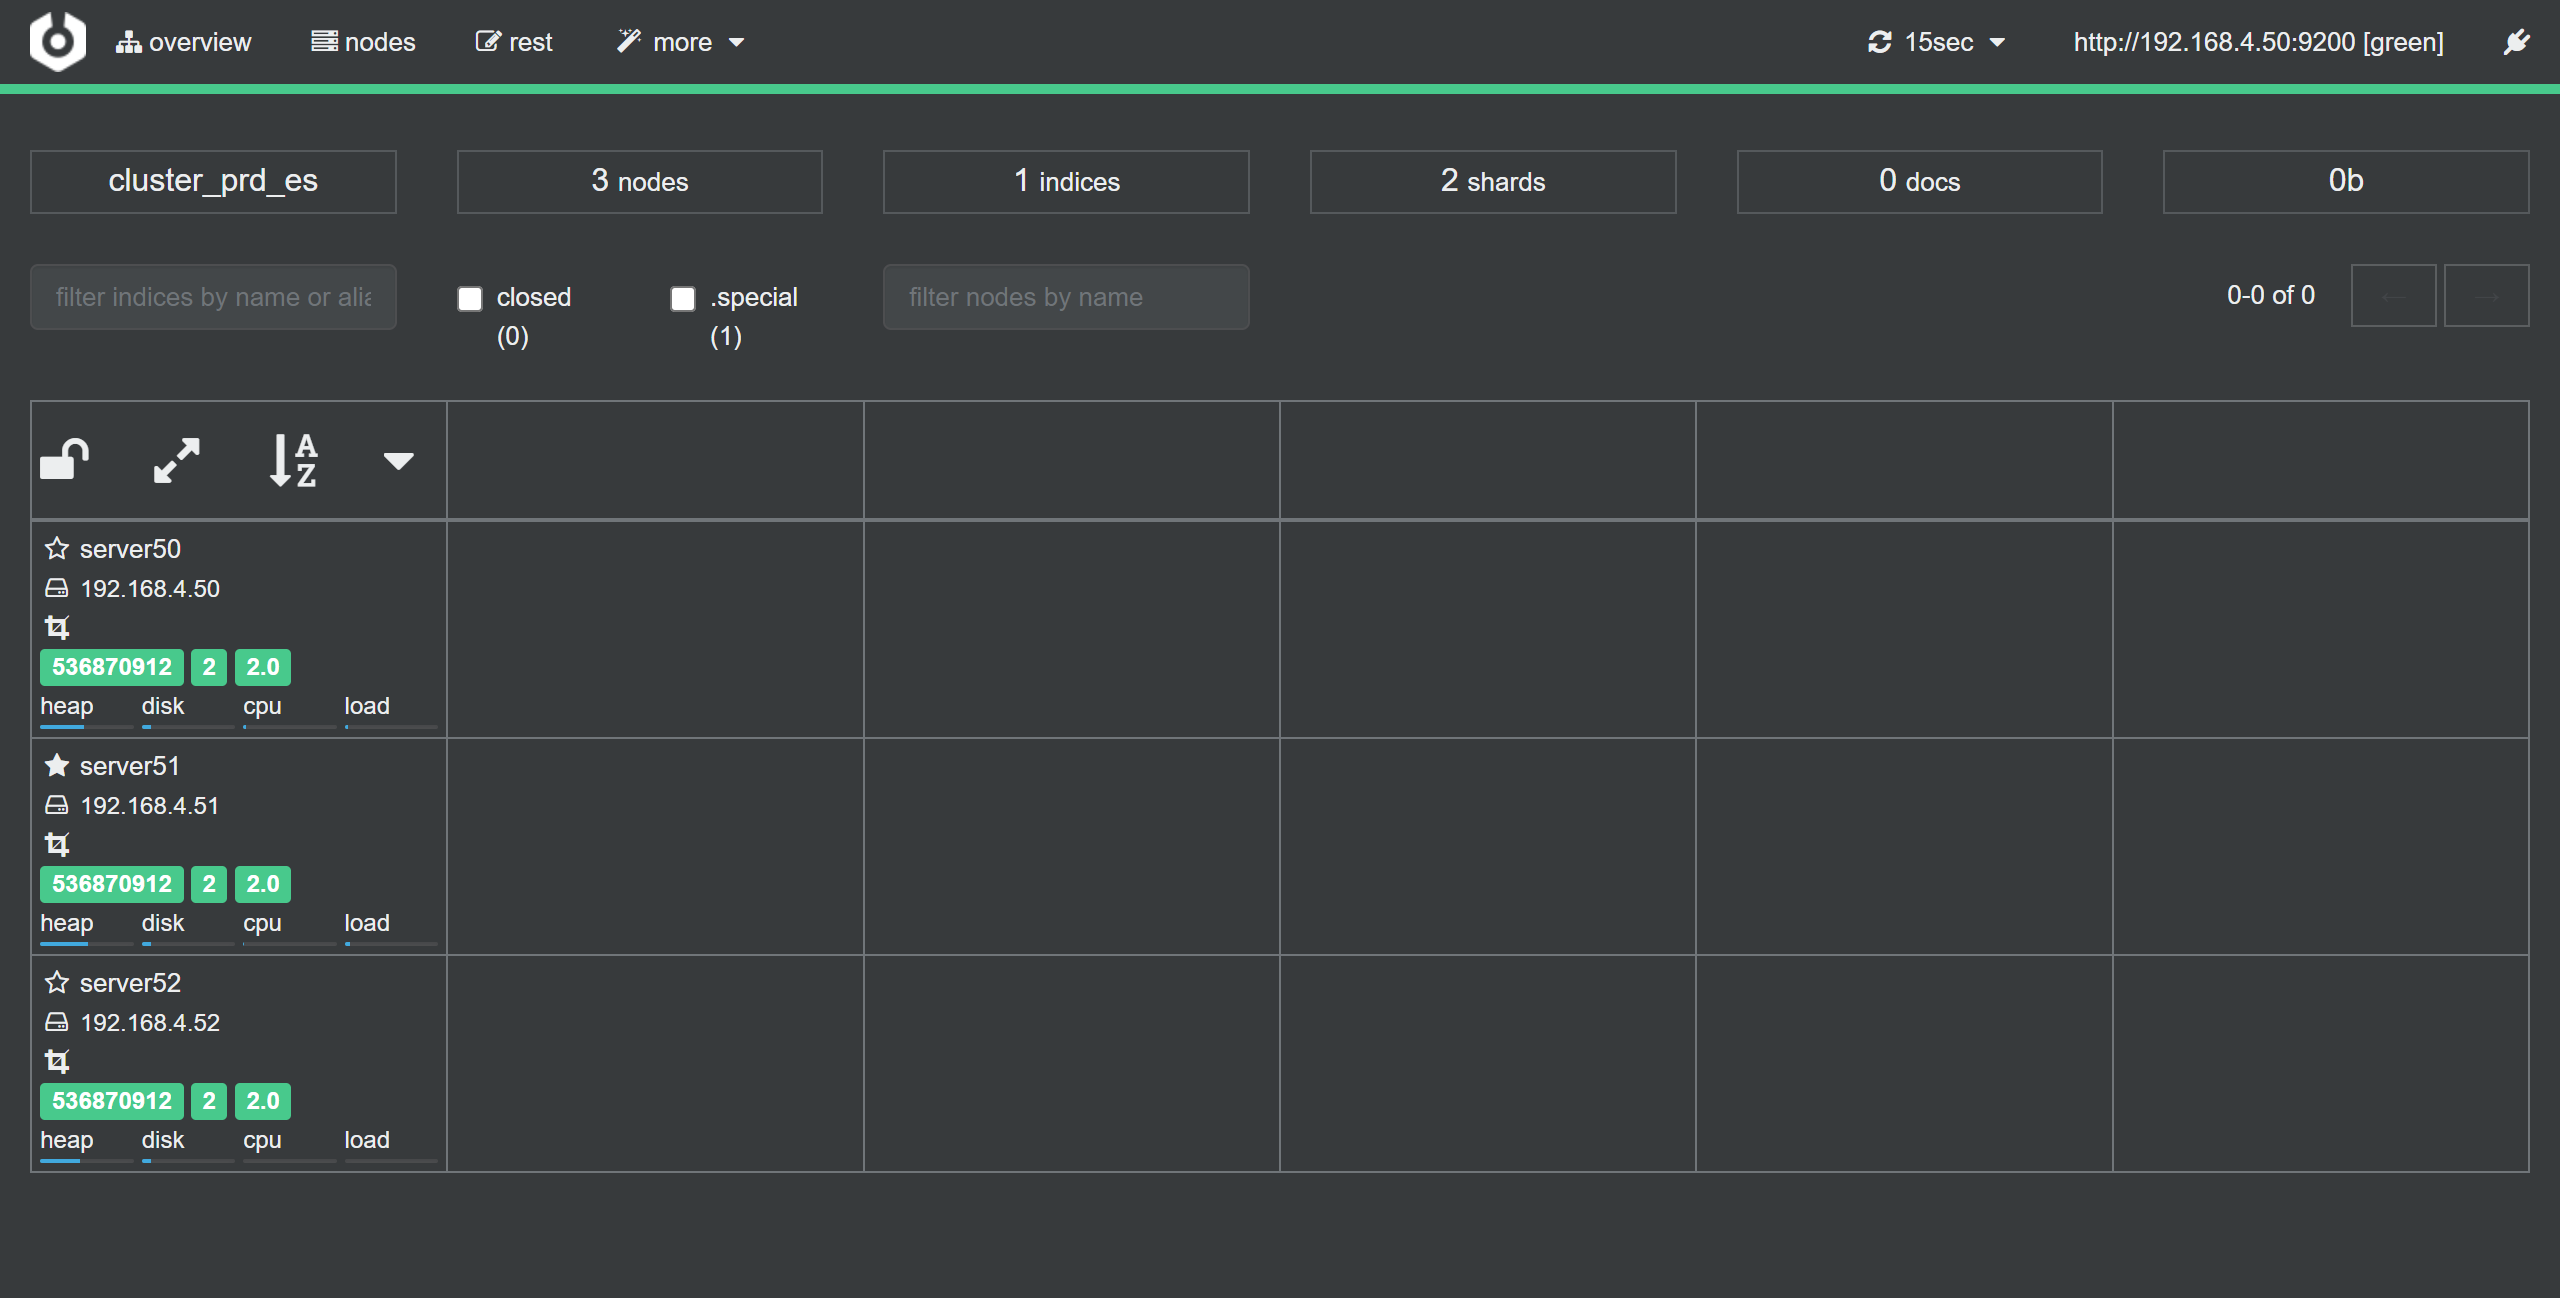
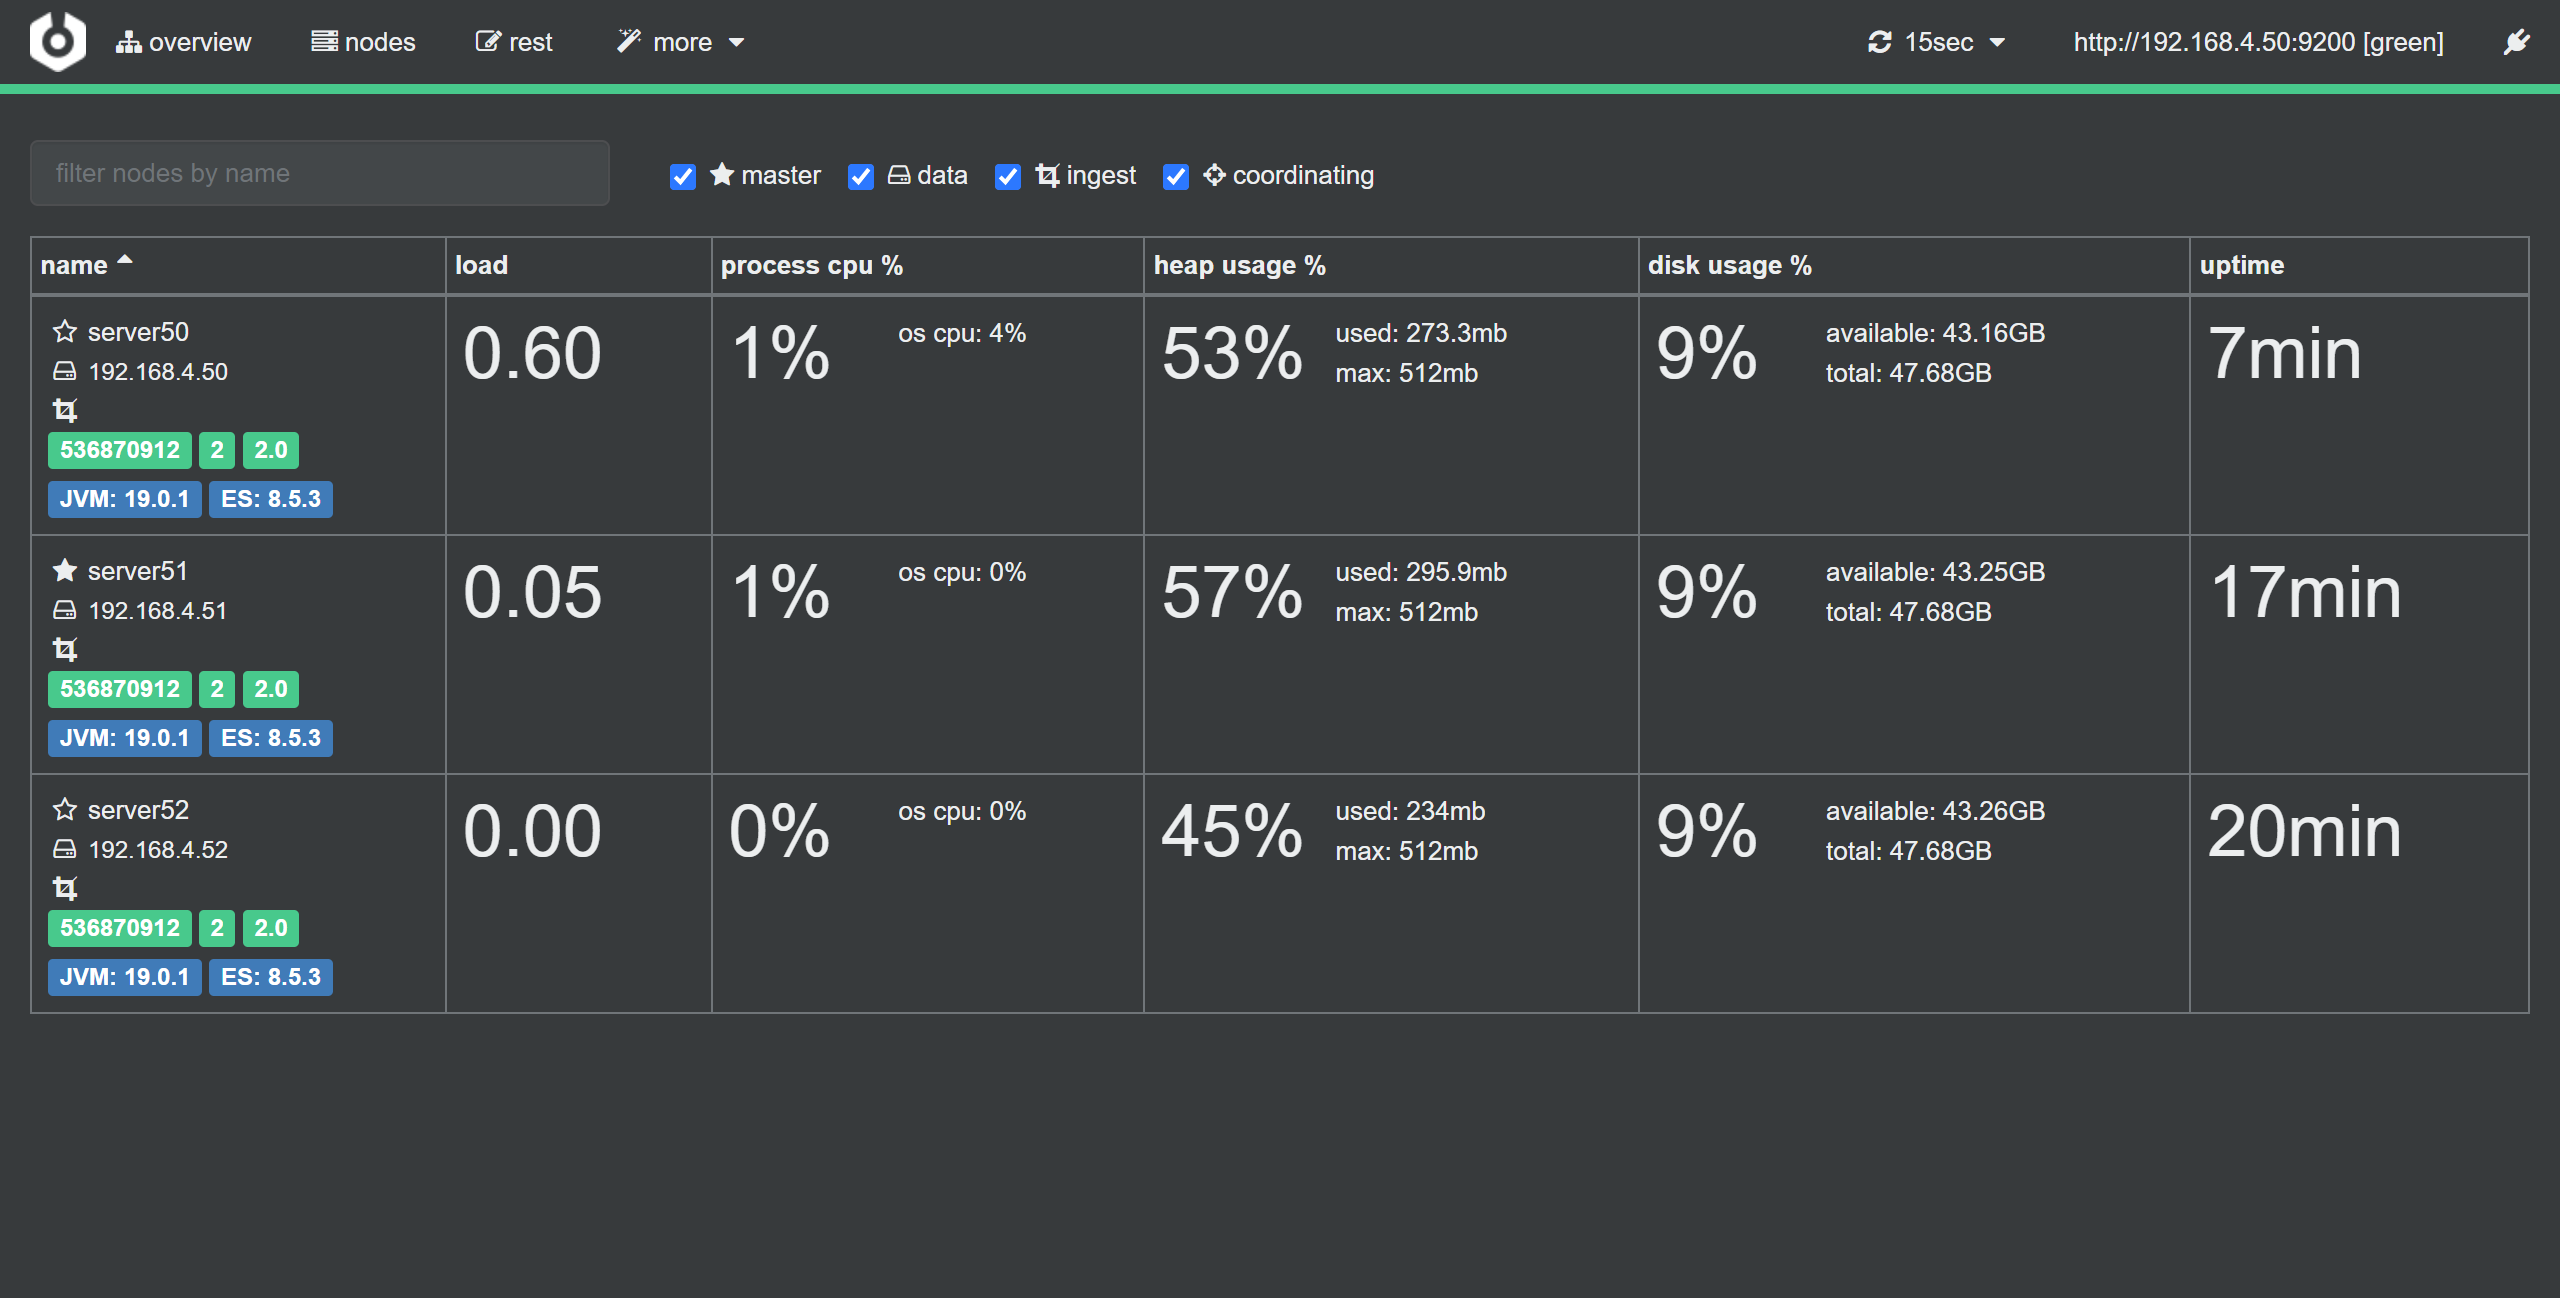
2、访问
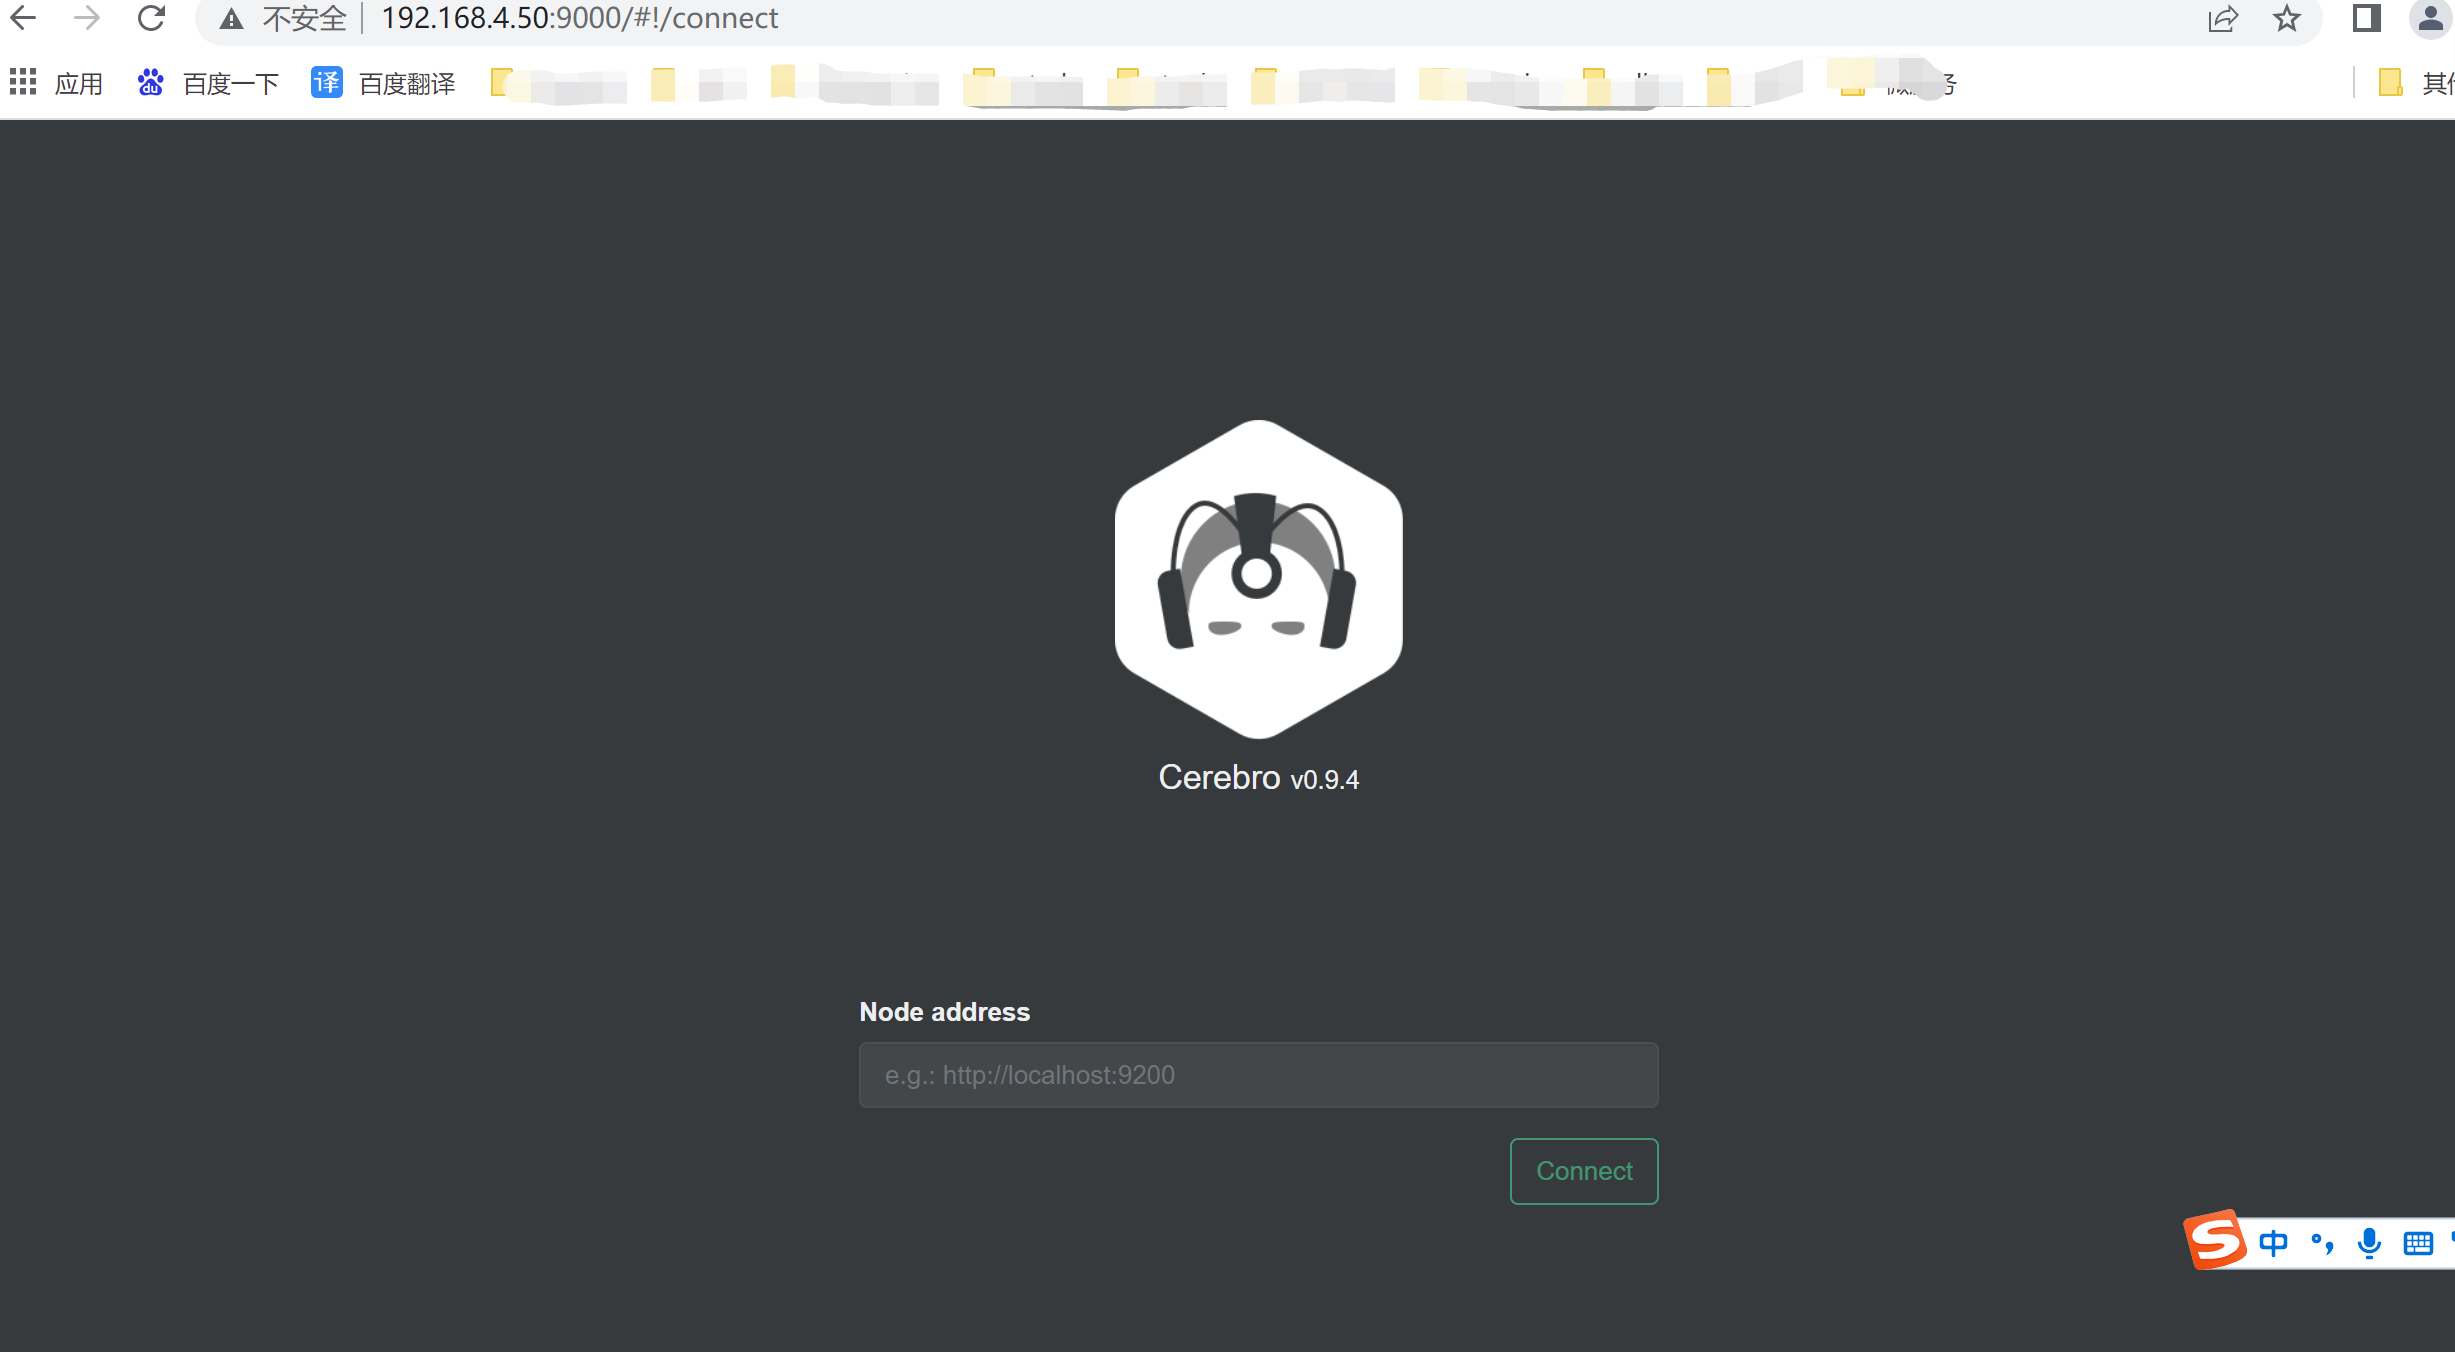
3、配置es地址

常见命令
1、集群检查
- 查询集群状态命令:
curl -XGET "http://ip:port/_cluster/health?pretty"
- 查询Es全局状态:
curl -XGET "http://ip:port/_cluster/stats?pretty"
- 查询集群设置
curl -XGET "http://ip:port/_cluster/settings?pretty"
- 查看集群文档总数
curl -XGET "http://ip:port/_cat/count?v"
- 查看集群文档总数
curl -XGET "http://ip:port/_cat/count?v"
- 查看集群别名组
curl -XGET "http://ip:port/_cat/aliases"
6.查看当前集群索引分片信息
curl -XGET "http://ip:port/_cat/shards?v"
注:查看某一个索引可用shards/索引名?v
7.查看集群实例存储详细信息
curl -XGET "http://ip:port/_cat/allocation?v"
8.查看当前集群的所有实例
curl -XGET "http://ip:port/_cat/nodes?v"
9.查看某索引分片转移进度
curl -XGET "http://ip:port/_cat/recovery/索引名?v"
10.查看当前集群等待任务
curl -XGET "http://ip:port/_cat/pending_tasks?v"
11.查看集群写入线程池任务
curl -XGET "http://ip:port/_cat/thread_pool/bulk?v"
12.查看集群查询线程池任务
curl -XGET "http://ip:port/_cat/thread_pool/search?v"
13.查看分片未分配的原因
curl -XGET "http://127.0.0.1:24100/_cat/shards?v&h=index,shard,prirep,state,node,unassigned.reason" | grep UNASSIGNED
2、集群设置
- 设置集群分片恢复参数
curl -XPUT "http://ip:httpport/_cluster/settings" -H 'Content-Type: application/json' -d' { "transient": { "cluster.routing.allocation.node_initial_primaries_recoveries":60, "cluster.routing.allocation.node_concurrent_recoveries":30, "cluster.routing.allocation.cluster_concurrent_rebalance":30 } }'
- 根据实例名称使EsNodeX实例下线:
curl -XPUT "http://ip:httpport/_cluster/settings" -H 'Content-Type: application/json' -d' { "transient": { "cluster.routing.allocation.exclude._name": "EsNode2@ip" } }'
- 根据ip使ES数据节点下线:
curl -XPUT "http://ip:httpport/_cluster/settings" -H 'Content-Type: application/json' -d' { "transient": { "cluster.routing.allocation.exclude._ip": "ip1,ip2,ip3" } }'
- 设置分片恢复过程中的最大带宽速度:
curl -XPUT "http://127.0.0.1:24100/_cluster/settings" -H 'Content-Type: application/json' -d'{ "transient":{ "indices.recovery.max_bytes_per_sec":"500mb" }}'
- 重新分片为空的主分片
curl -XPOST "http://127.0.0.1:24100/_cluster/reroute?pretty" -H 'Content-Type:application/json' -d '{ "commands": [{ "allocate_empty_primary": { "index": "indexname", "shard": 2, "node": "EsNode1@81.20.5.24", "accept_data_loss":true } }]}'
- 重新分配主分片,会尝试将过期副本分片分片为主。
curl -XPOST "http://127.0.0.1:24100/_cluster/reroute?pretty" -H 'Content-Type:application/json' -d '{ "commands": [{ "allocate_stale_primary": { "index": "index1", "shard": 2, "node": "EsNode1@189.39.172.103", "accept_data_loss":true } }]}'
- 清理ES所有缓存
curl -XPOST "http://ip:port/_cache/clear"
8.关闭分片自动平衡
curl -XPUT "http://ip:port/_cluster/settings" -H 'Content-Type:application/json' -d '{ "transient":{ "cluster.routing.rebalance.enable":"none" }}'
9.手动刷新未分配的分片
curl -XPOST "http://127.0.0.1:24100/_cluster/reroute?retry_failed=true"
3、索引查看
- 查询索引mapping和settings
curl -XGET --tlsv1.2 --negotiate -k -u : 'https://ip:port/my_index_name?pretty'
- 查询索引settings
curl -XGET--tlsv1.2 --negotiate -k -u : 'https://ip:port/my_index_name/_settings?pretty'
3.查看分片未分配详细命令
curl -XGET "http://127.0.0.1:24100/_cluster/allocation/explain?pretty" -H 'Content-Type:application/json' -d '{"index": "indexname","shard": 17,"primary": true}'
4.修改索引只读字段属性为null,放开写入
curl -XPUT "http://127.0.0.1:24100/*/_settings" -H 'Content-Type: application/json' -d '{"index.blocks.read_only_allow_delete": null}'
4、索引设置
1.关闭索引
curl -XPOST 'http://ip:port/my_index/_close?pretty'
2.打开索引
curl -XPOST 'http://ip:port/my_index/_open?pretty'
3.修改索引刷新时间:
curl -XPUT 'http://ip:port/my_index/_settings?pretty' -H 'Content-Type: application/json' -d'{"refresh_interval" : "60s"}'
4.修改translog文件保留时长,默认为12小时
curl -XPUT 'http://ip:port/my_index/_settings?pretty' -H 'Content-Type: application/json' -d'{"index.translog.retention.age" : "30m"}'
5.设置索引副本:
curl -XPUT 'http://ip:port/my_index/_settings?pretty' -H 'Content-Type: application/json' -d'{"number_of_replicas" : 1}'
6.执行refresh,将内存数据刷新到磁盘缓存
curl -XPOST 'http://ip:port/myindex/_refresh'
7.执行flush,将磁盘缓存刷新到文件系统
curl -XPOST 'https://ip:port/myindex/_flush'
8.执行synced flush,生成syncid
curl -XPOST 'http://ip:port/_flush/synced'
- 强制执行段合并
curl -XPOST 'http://ip:httpport/myindex/_forcemerge?only_expunge_deletes=false&max_num_segments=1&flush=true&pretty'
10.设置索引在每个esnode上的分片个数
curl -XPUT 'http://ip:httpport/myindex/_settings?pretty' -H 'Content-Type: application/json' -d'{"index.routing.allocation.total_shards_per_node" : "2"}'
- 配置控制段合并的refresh、merge线程数等
curl -XPUT "http://ip:port/my_index/_settings?pretty" -H 'Content-Type: application/json' -d'{"refresh_interval": "60s","merge":{"scheduler":{"max_merge_count" : "100","max_thread_count" : "1"},"policy":{"segments_per_tier" : "100","floor_segment" : "1m","max_merged_segment" : "2g"}}}'
12.设置索引的刷新时间和translog配置参数
注意:设置translog参数,必须先关闭索引,设置完成后再打开
代表设置所有索引,如果要设置具体某个索引,可以将替换为具体的索引名称
curl -XPUT "http://ip:httpport/*/_settings" -H 'Content-Type: application/json' -d'{ "index":{ "refresh_interval" : "60s","translog":{ "flush_threshold_size": "1GB", "sync_interval": "120s", "durability": "async"}}}'
13.限制每个索引在每个实例上的分片个数
curl -XPUT 'http://ip:httpport/myindex/_settings?pretty' -H 'Content-Type:application/json' -d '{"index.routing.allocation.total_shards_per_node":"2"}'
5、实例检查
1.查看实例安装插件
curl -XGET "http://ip:port/_cat/aliases"
2.查询指定ES实例的jvm参数:
curl -XGET 'http://ip:port/_nodes/EsNode1*/stats/jvm?pretty'curl -XGET 'http://ip:port/_nodes/EsNode1@12.40.16.156/stats/jvm?pretty'
6、设置默认分片和副本数
curl -XPUT 'http://127.0.0.1:9200/_template/template_http_request_record' -H 'Content-Type: application/json' -d '{"index_patterns": ["*"],"settings": {"number_of_shards": 1,"number_of_replicas": 0}}'
FAQ
1、Transport SSL must be enabled if security is enabled.
现象:
bootstrap check failure [1] of [1]: Transport SSL must be enabled if security is enabled. Please set [xpack.security.transport.ssl.enabled] to [true] or disable security by setting [xpack.security.enabled] to [false]
ERROR: Elasticsearch did not exit normally - check the logs at /data/app/elasticsearch-8.5.3/logs/cluster_prd_es.log
[2022-12-27T15:17:05,020][INFO ][o.e.n.Node               ] [server50] stopping ...
[2022-12-27T15:17:05,134][INFO ][o.e.n.Node               ] [server50] stopped
[2022-12-27T15:17:05,135][INFO ][o.e.n.Node               ] [server50] closing ...
[2022-12-27T15:17:05,160][INFO ][o.e.n.Node               ] [server50] closed
[2022-12-27T15:17:05,166][INFO ][o.e.x.m.p.NativeController] [server50] Native controller process has stopped - no new native processes can be started

ERROR: [1] bootstrap checks failed. You must address the points described in the following [1] lines before starting Elasticsearch.
解决:
xpack.security.enabled: false
xpack.security.transport.ssl.enabled: false

 浙公网安备 33010602011771号