
安装部署dify
先说明:这里使用的是centos7虚拟机部署的,需要提前装docker和git,docker配置了加速地址(不需要魔法),如果环境不一致的话,可以绕道避免浪费时间。
访问dify官网下载dify安装包
dify在githu的仓库地址是 https://github.com/langgenius/dify
进去之后,先复制 仓库的https地址

开始下载dify
源地址是
https://github.com/langgenius/dify.git,我这里使用github镜像站githubfast加速下载(将github替换为githubfast)。
[root@192 桌面]# git clone https://githubfast.com/langgenius/dify.git                     # 这里需要安装有git
正克隆到 'dify'...
remote: Enumerating objects: 144101, done.
remote: Counting objects: 100% (217/217), done.
remote: Compressing objects: 100% (95/95), done.
remote: Total 144101 (delta 179), reused 122 (delta 122), pack-reused 143884 (from 5)
接收对象中: 100% (144101/144101), 76.77 MiB | 1.87 MiB/s, done.
处理 delta 中: 100% (105701/105701), done.
[root@192 桌面]#
安装dify
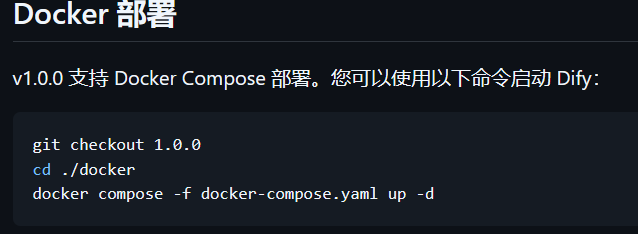
访问最新释放的1.0.0版本,按照部署步骤一步一步安装(就两步)
[root@192 桌面]# cd dify/
[root@192 dify]# git checkout 1.0.0                                             # 切换到1.0.0版本
Note: checking out '1.0.0'.

You are in 'detached HEAD' state. You can look around, make experimental
changes and commit them, and you can discard any commits you make in this
state without impacting any branches by performing another checkout.

If you want to create a new branch to retain commits you create, you may
do so (now or later) by using -b with the checkout command again. Example:

  git checkout -b new_branch_name

HEAD 目前位于 c0358d8... release/1.0.0 (#14478)
[root@192 dify]# cd ./docker

[root@192 dify]# cp .env.example .env                                     # 复制一份默认的配置文件,把.env.example  复制为 .env

[root@192 docker]# docker compose -f docker-compose.yaml up -d                    # 使用docker compose方式安装
WARN[0000] The "DB_DATABASE" variable is not set. Defaulting to a blank string.
WARN[0000] The "DB_USERNAME" variable is not set. Defaulting to a blank string.
WARN[0000] The "DB_PASSWORD" variable is not set. Defaulting to a blank string.
WARN[0000] The "DB_DATABASE" variable is not set. Defaulting to a blank string.
WARN[0000] The "DB_USERNAME" variable is not set. Defaulting to a blank string.
WARN[0000] The "DB_PASSWORD" variable is not set. Defaulting to a blank string.
WARN[0000] The "DB_USERNAME" variable is not set. Defaulting to a blank string.
WARN[0000] The "DB_DATABASE" variable is not set. Defaulting to a blank string.
WARN[0000] The "DB_PASSWORD" variable is not set. Defaulting to a blank string.
WARN[0000] The "DB_DATABASE" variable is not set. Defaulting to a blank string.
WARN[0000] The "DB_PASSWORD" variable is not set. Defaulting to a blank string.
WARN[0000] The "DB_USERNAME" variable is not set. Defaulting to a blank string.
WARN[0000] The "CERTBOT_EMAIL" variable is not set. Defaulting to a blank string.
WARN[0000] The "CERTBOT_DOMAIN" variable is not set. Defaulting to a blank string.
[+] Running 80/32
 ✔ redis Pulled                                                                                             56.6s
 ✔ plugin_daemon Pulled                                                                                    255.0s
 ✔ api Pulled                                                                                              254.1s
 ✔ worker Pulled                                                                                           254.1s
 ✔ ssrf_proxy Pulled                                                                                       167.2s
 ✔ sandbox Pulled                                                                                           54.4s
 ✔ nginx Pulled                                                                                            249.7s
 ✔ db Pulled                                                                                                86.3s
 ✔ web Pulled                                                                                              252.0s
 ✔ weaviate Pulled                                                                                          44.6s

[+] Running 12/12
 ✔ Network docker_ssrf_proxy_network  Created                                                                0.1s
 ✔ Network docker_default             Created                                                                0.1s
 ✔ Container docker-web-1             Started                                                                2.3s
 ✔ Container docker-plugin_daemon-1   Started                                                                2.6s
 ✔ Container docker-sandbox-1         Started                                                                2.6s
 ✔ Container docker-weaviate-1        Started                                                                2.0s
 ✔ Container docker-db-1              Started                                                                2.3s
 ✔ Container docker-redis-1           Started                                                                2.2s
 ✔ Container docker-ssrf_proxy-1      Started                                                                2.3s
 ✔ Container docker-api-1             Started                                                                3.5s
 ✔ Container docker-worker-1          Started                                                                3.5s
 ✔ Container docker-nginx-1           Started                                                                4.7s
[root@192 docker]#
登录dify
此时我们还不知道dify web端口绑到了宿主机的那个端口,可以看一下容器信息,找web服务器的端口映射
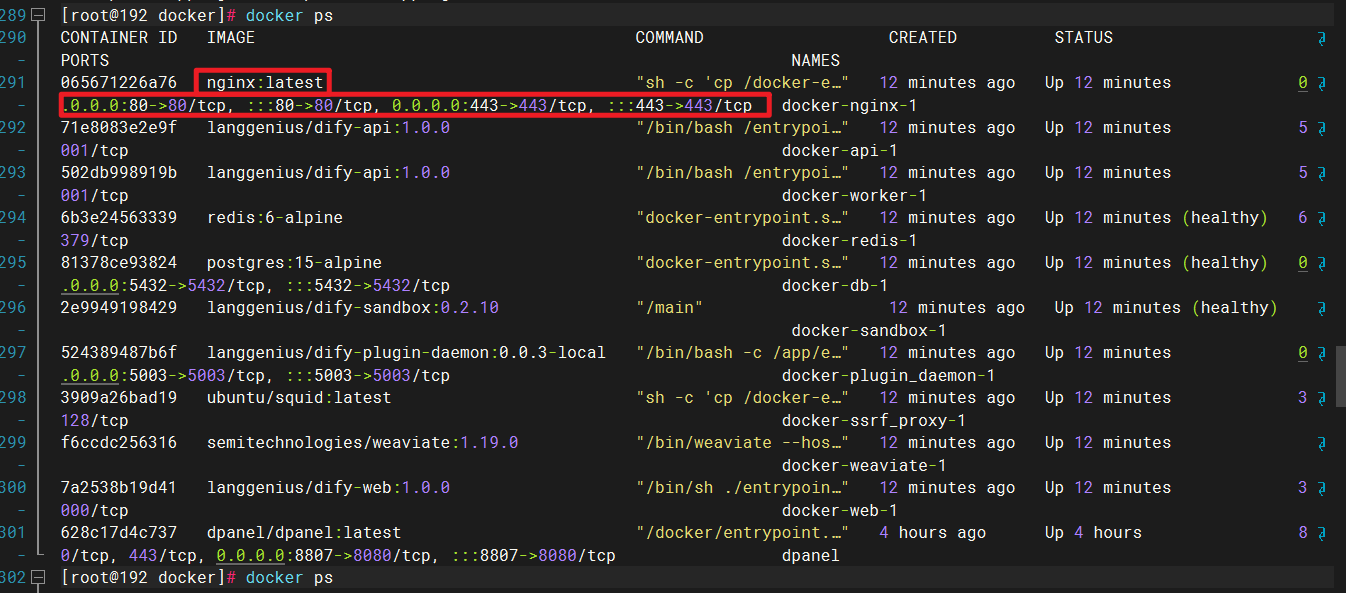
可以看到web服务器也就是这里的ngnix的端口是宿主机的80绑到容器的80,所以直接通过http协议访问宿主机的ip即可。
安装报错
端口冲突
安装过程中,如果有端口冲突可以修改 .env 文件
EXPOSE_NGINX_PORT=80
EXPOSE_NGINX_SSL_PORT=443

# HTTP port
NGINX_PORT=80
# SSL settings are only applied when HTTPS_ENABLED is true
NGINX_SSL_PORT=443
dify跨域
在本地电脑上,通过vmware安装dify使用时,没有遇到这个问题。
部署dify之后,在添加模型的API-key的时候,一直添加不上,没有反应。打开控制台报错截图如下:
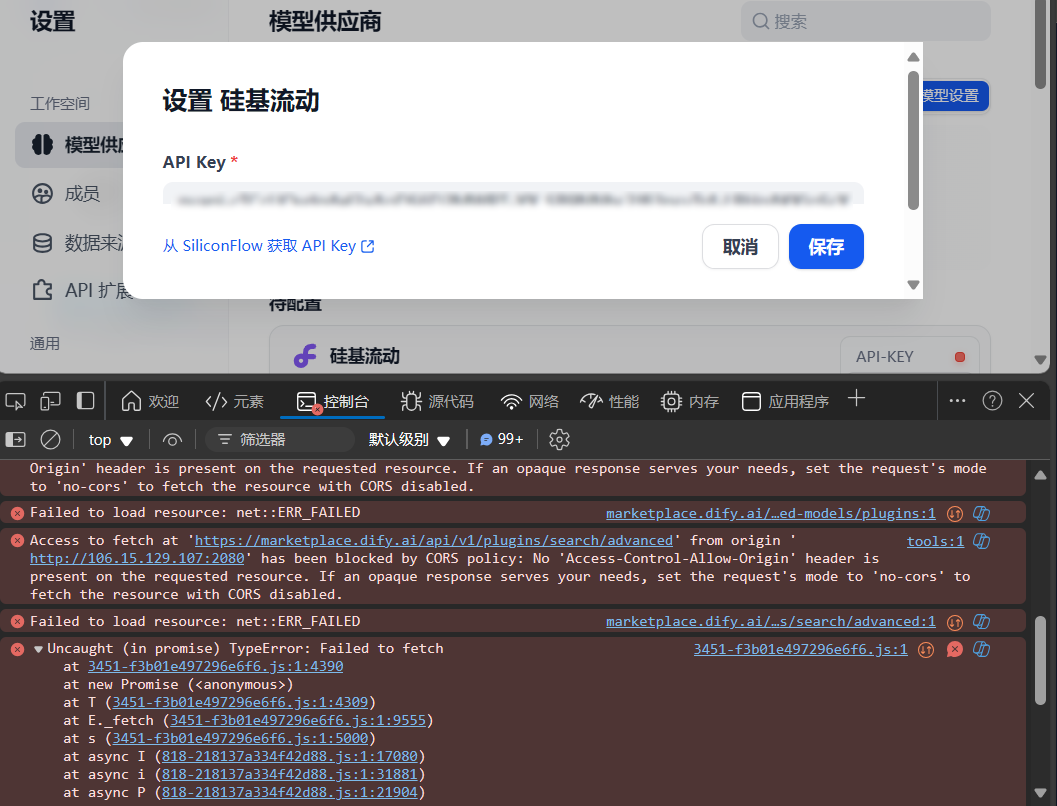
报错信息
- Access to fetch at 'https://marketplace.dify.ai/api/v1/plugins/search/advanced' from origin 'http://106.15.129.107:2080' has been blocked by CORS policy: No 'Access-Control-Allow-Origin' header is present on the requested resource. If an opaque response serves your needs, set the request's mode to 'no-cors' to fetch the resource with CORS disabled.
错误消息表示浏览器阻止了从http://106.15.129.107:2080域向https://marketplace.dify.ai/api/v1/collections/latest-tools/plugins域的跨域请求。这是因为请求的资源没有返回 Access-Control-Allow-Origin 头。
CORS(跨域资源共享)是一个浏览器安全功能,防止来自不同源的网页获取彼此的资源,除非响应头中明确允许。
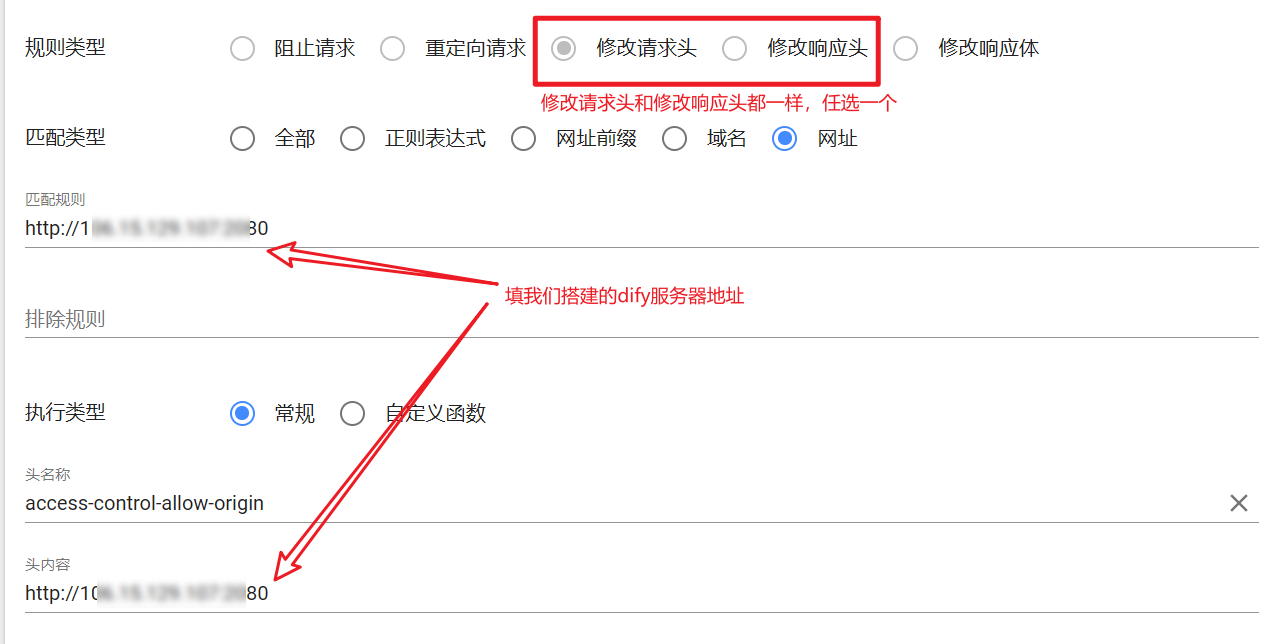
方法一:浏览器插件(header editor )
缺少请求头很简单,浏览器上装个 header editor 插件把缺少的报请求头Access-Control-Allow-Origin加上就行了。
方式二:代理服务器
可以设置一个代理服务器来中转请求。前端向代理服务器发请求,代理服务器再向目标服务器发请求,从而避免跨域问题。
先创建一个nginx服务器(如果是和其他服务同机部署,记得端口号不要冲突)
docker run -d -v /root/proxy/nginx/conf.d:/etc/nginx/conf.d -p 3080:80 -p 3443:443 --restart always --name=proxy_nginx nginx:latest
然后创建nginx的配置文件,配置反向代理
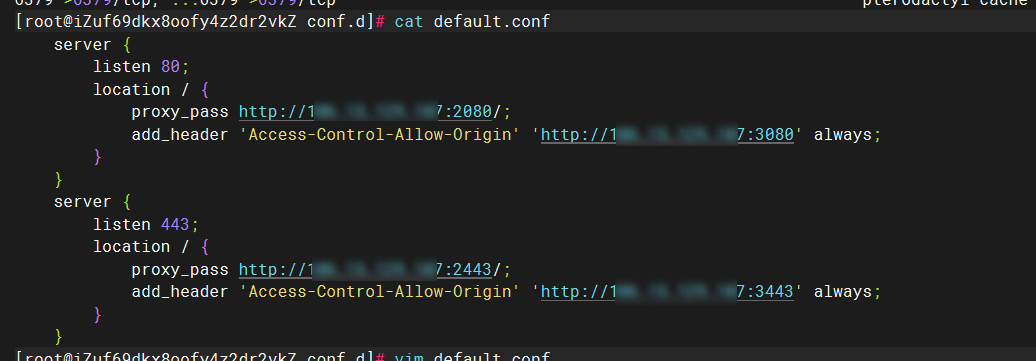
上传文件提示失败
上传文件报错,提示上传失败
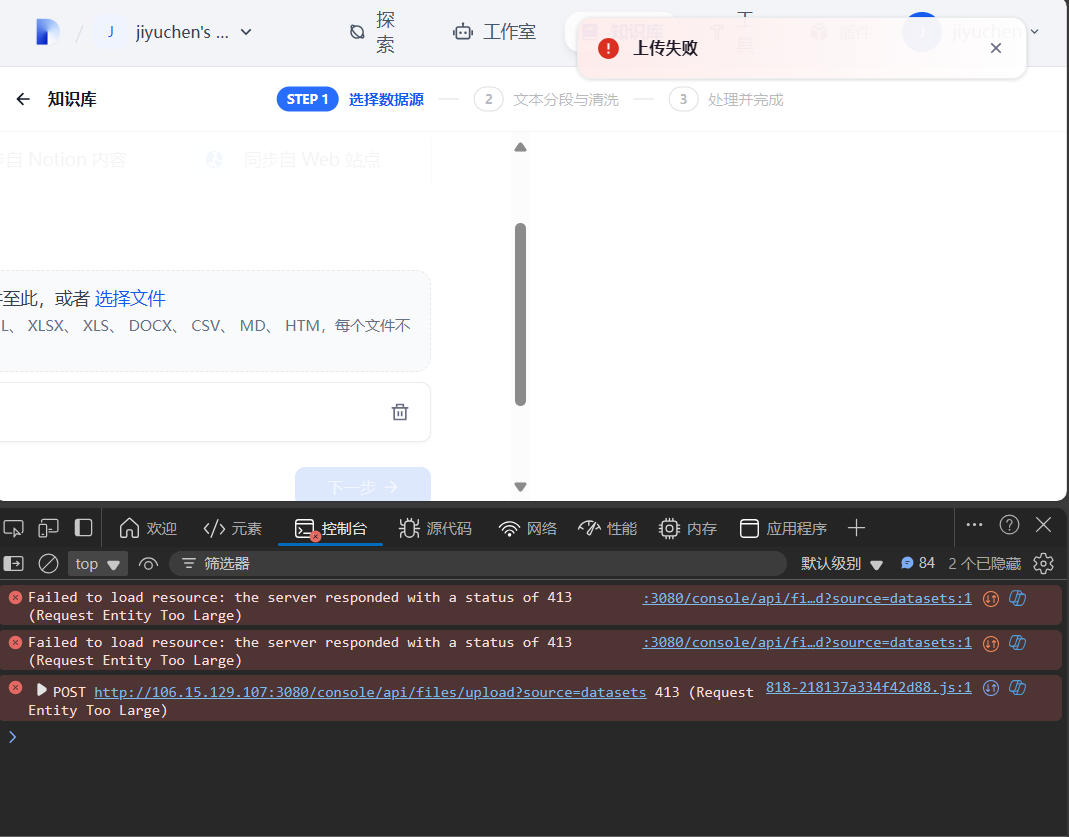
控制台打印如下:
Failed to load resource: the server responded with a status of 413 (Request Entity Too Large)
服务器返回了 HTTP 状态码 413 (Request Entity Too Large),这表示客户端发出的请求实体大小超出了服务器允许的范围。
但是界面显示文件大小限制是15M,上传的文件大小远远不到15M。这个问题在没有使用代理服务器的时候不会出现,所以应该是代理服务器的问题。通过在配置文件中添加了 client_max_body_size 参数之后解决。


 浙公网安备 33010602011771号