hexo next8.20.0 主题美化
Hexo-Next 主题博客个性化配置超详细,超全面(两万字)_hexo next 记录访问了ip-CSDN博客
next主题项目:next-theme/hexo-theme-next: 🎉 Elegant and powerful theme for Hexo. (github.com)
cd blog-demo     //cd 到博客目录
git clone https://github.com/next-theme/hexo-theme-next themes/next
一、配置文件说明
为了描述方便,在以下说明中,将前者称为 站点配置文件, 后者称为 主题配置文件
/hexo/_config.yml

/hexo/themes/next/_config.yml
二、修改语言
打开站点配置文件,搜索 language,找到如下代码
author:
language:
timezone:
在 language 后面输入 zh-CN。
三、新建标签及分类界面
打开 主题配置文件,搜索 menu,找到如下代码:
menu:
  home: / || home
  #about: /about/ || user
  #tags: /tags/ || tags
  #categories: /categories/ || th
  archives: /archives/ || archive
  #schedule: /schedule/ || calendar
  #sitemap: /sitemap.xml || sitemap
  #commonweal: /404/ || heartbeat
把 tags 和 categories 前面的 # 删除
四、切换主题
next 主题自带四种样式。在主题配置文件/next/_config.yml中查找:scheme,找到如下代码:
# Schemes
#scheme: Muse
#scheme: Mist
#scheme: Pisces
scheme: Gemini
选择你喜欢的一种样式,去掉前面的 #,其他主题前加上 # 即可。
五、隐藏网页底部 powered By Hexo / 强力驱动

打开 themes/next/layout/_partials/footer.swig 找到:

把这段代码首尾分别加上:<!-- 和-->,或者直接删除。
六、浏览页面显示当前浏览进度
打开 themes/next/_config.yml,搜索关键字 scrollpercent,把 false 改为 true。

七、Local Search本地搜索
安装插件hexo-generator-searchdb,执行以下命令:
npm install hexo-generator-searchdb --save
修改hexo/_config.yml站点配置文件,新增以下内容到任意位置:
search:
path: search.xml
field: post
format: html
limit: 10000
编辑 主题配置文件,启用本地搜索功能:
# Local search
local_search:
enable: true
八、设置网站图标
在 EasyIcon 中找一张(32 * 32)的 ico 图标,或者去别的网站下载或者制作,并将图标名称改为 favicon.ico,然后把图标放在 /themes/next/source/images 里,并且修改主题配置文件:
Put your favicon.ico into `hexo-site/source/` directory.
favicon: /favicon.ico
九、修改文章底部的#号的标签,改为图标
修改模板/themes/next/layout/_macro/post.swig
搜索 rel=“tag”>#,将 # 换成<i class="fa fa-tag"></i> 修改如下:
<a href="{{ url_for(tag.path) }}" <i class="fa fa-tag"></i> {{ tag.name }}</a>

十、文章置顶功能
移除默认安装的插件:
npm uninstall hexo-generator-index --save
安装新插件:
npm install hexo-generator-index-pin-top --save
最后编辑有这需求的相关文章时,在Front-matter(文件最上方以--分隔的区域)加上一行:
top: true
如果你置顶了多篇,怎么控制顺序呢?设置top的值(大的在前面),比如:
# Post a.md
title: a
top: 1

# Post b.md
title: b
top: 10
文章 b 便会显示在文章 a 的前面
十一、设置置顶图标

打开/themes/next/layout/_macro/post.swig文件,在<div class="post-meta"> <span class="post-time">下方,插入如下代码:
        </{%- if is_index %}h2{% else %}h1{%- endif %}>

        <div class="post-meta">
          <span class="post-time">

  <!--  设置置顶图标  -->
          {% if post.top %}
              <i class="fa fa-thumb-tack"></i>
              <font color=7D26CD>置顶</font>
              <span class="post-meta-divider">|</span>
          {% endif %}
  <!--  设置置顶图标  -->
十二、修改链接文字样式
打开themes\next\source\css\_common\components\post\post-body.styl 最后添加以下代码:
.post-body p a{

 color: #0593d3;
 border-bottom: none;
 &:hover {
   color: #ff106c;
   text-decoration: underline;
 }
}
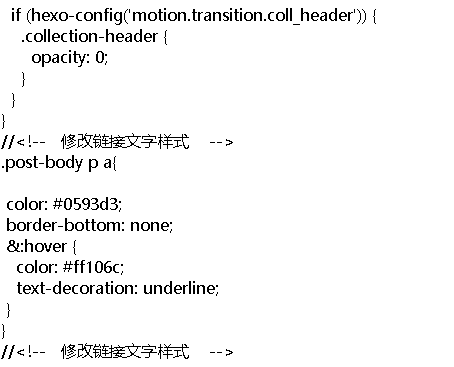 改后样式
改后样式
十三、头像设置圆形,停留旋转效果
修改 主题 配置文件 如下位置:
#侧边栏头像
avatar:  # 头像
  #替换默认头像并在此处设置url。
  url: /images/log.jpg   #avatar.gif
  #如果为真,头像将显示在圆圈中。
  rounded: true
  #如果为真,头像将随光标旋转。
  rotated: true

# 侧边栏中的帖子/类别/标签。
site_state: true

#社交链接
#用法:`关键字:固定链接||图标`    `Key: permalink || icon`
#Key是显示给最终用户的链接标签。
#分隔符“||”之前的值是目标永久链接,分隔符“||”之后的值是Font Awesome图标的名称。
social:  # 社交
  GitHub: https://github.com/jinwei26 || fab fa-github
  #E-Mail: mailto:yourname@gmail.com || fa fa-envelope
  #Weibo: https://weibo.com/yourname || fab fa-weibo
  #Google: https://plus.google.com/yourname || fab fa-google
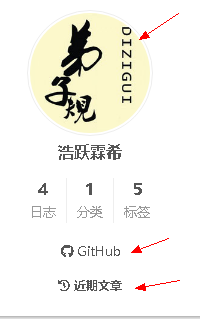
十四、近期文章 如上图
修改themes/next/layout/_macro/sidebar.swig 。找到theme.social板块代码,在该板块最后的endif后隔一行添加如下代码。
{# recent posts #}
{% if theme.recent_posts %}
  <div class="links-of-blogroll motion-element {{ "links-of-blogroll-" + theme.recent_posts_layout  }}">
    <div class="links-of-blogroll-title">
      <!-- modify icon to fire by szw -->
      <i class="fa fa-history fa-{{ theme.recent_posts_icon | lower }}" aria-hidden="true"></i>
      {{ theme.recent_posts_title }}
    </div>
    <ul class="links-of-blogroll-list">
      {% set posts = site.posts.sort('-date') %}
      {% for post in posts.slice('0', '5') %}
        <li class="recent_posts_li">
          <a href="{{ url_for(post.path) }}" title="{{ post.title }}" target="_blank">{{ post.title }}</a>
        </li>
      {% endfor %}
    </ul>
  </div>
{% endif %}

编辑themes\next\source\css\_common\outline\sidebar\sidebar-blogroll.styl 文章最后添加以下代码:
li.recent_posts_li {
    text-align: cengter;
    display: block;
    word-break: keep-all;
    white-space: nowrap;
    overflow: hidden;
    text-overflow: ellipsis;
}
在 themes/next/_config.yml 尾部添加下方代码:
# 近期文章设置
recent_posts_title: 近期文章
recent_posts_layout: block
recent_posts: true
十五、为博客加上妹子
Git输入下方代码
npm install -save hexo-helper-live2d
然后在在 hexo 的 _config.yml 文尾中添加代码:
live2d:
  enable: true
  scriptFrom: local
  pluginRootPath: live2dw/
  pluginJsPath: lib/
  pluginModelPath: assets/
  tagMode: false
  log: false
  model:
    use: live2d-widget-model-<你喜欢的模型名字>
  display:
    position: right
    width: 150
    height: 300
  mobile:
    show: true
可供选择模型:
live2d-widget-model-chitose
live2d-widget-model-epsilon2_1
live2d-widget-model-gf
live2d-widget-model-haru/01 (use npm install --save live2d-widget-model-haru)
live2d-widget-model-haru/02 (use npm install --save live2d-widget-model-haru)
live2d-widget-model-haruto
live2d-widget-model-hibiki
live2d-widget-model-hijiki
live2d-widget-model-izumi
live2d-widget-model-koharu
live2d-widget-model-miku
live2d-widget-model-ni-j
live2d-widget-model-nico
live2d-widget-model-nietzsche
live2d-widget-model-nipsilon
live2d-widget-model-nito
live2d-widget-model-shizuku
live2d-widget-model-tororo
live2d-widget-model-tsumiki
live2d-widget-model-unitychan
live2d-widget-model-wanko
live2d-widget-model-z16
新建配置文件
在站点目录下建文件夹live2d_models,
再在live2d_models下建文件夹<你喜欢的模型名字>,
再在<你喜欢的模型名字>下建json文件:<你喜欢的模型名字>.model.json
安装模型。
在命令行(即Git Bash)运行以下命令即可:
npm install --save live2d-widget-model-<你喜欢的模型名字>
复制你喜欢的模型名字:
Epsilon2.1 Gantzert_Felixander
 haru
haru miku
miku
ni-j nico
nico nietzche
 nipsilon
 nito
nito
shizuku tsumiki
 wanko
wanko z16
z16 hibiki
koharu haruto
 Unitychan
 tororo
 hijiki
十六、代码块复制选项
在 _config.next.yml 中搜索 codeblock,找到如下配置:自行修改
codeblock:  # 代码块
  #代码突出显示主题
  # 可用值: normal | night | night eighties | night blue | night bright | solarized | solarized dark | galactic
  #请参阅:https://github.com/chriskempson/tomorrow-theme
  highlight_theme: normal  # 高亮主题
  #在代码块上添加复制按钮
  copy_button:  # 复制按钮
    enable: true  # 启用
    #显示文本复制结果。
    show_result: true
    # 可用值: default | flat | mac
    style: mac  # 样式
十七、修改加载特效
由于网页不可能一直都秒进,总会等待一段时间的,所以可以设置顶部加载条。Next 已经集成了很多加载特效,可以在下面选项中在线调试测试一下。
搜索 pace,找到如下代码:
#页面加载过程中,顶部的进度条。页面加载过程中,顶部的进度条。
#依赖关系:https://github.com/theme-next/theme-next-pace
#更多信息:https://github.com/HubSpot/pace
pace:
  enable: true
  # 主题列表:
  # big-counter | bounce | barber-shop | center-atom | center-circle | center-radar | center-simple
  # corner-indicator | fill-left | flat-top | flash | loading-bar | mac-osx | material | minimal
  theme:  pace-theme-minimal     #默认设置,可以修改为上述任何一个
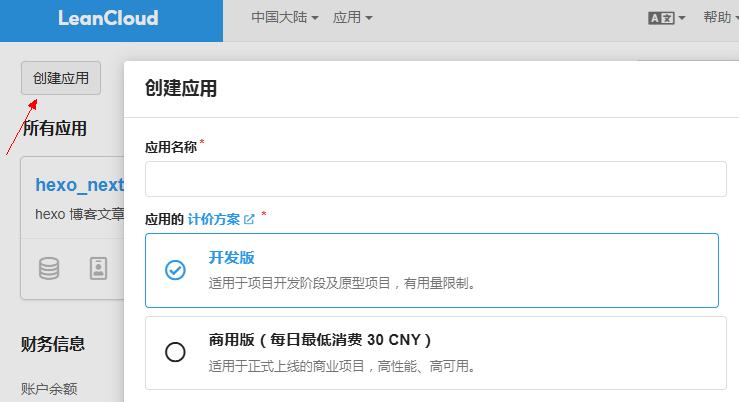
十八、评论 Valine 增强版
Valine 的配置不是很复杂。它基于 LeanCloud,所以得先在 LeanCloud 上注册一个账号。注册完可能要实名。
创建一个应用: 应用名称 可以 随便 填写
创建新的应用后,点击创建的 应用 --> 设置 --> 安全中心,设置一个安全域名,即你的博客所用的域名。Valine 有请求限制,即非安全域名对 LeanCloud 的请求都不会放行,即你不设置安全域名,到时候评论就用不了。

然后打开设置 - 应用凭证,复制 AppID 与 AppKey :
然后转到 NexT 的 _config.next.yml,找到 comments 一栏( Ctrl + F 搜索),将 active 改成 valine,nav 改成如图所示的样子:
#多评论系统支持
comments:
  #可用值: tabs | buttons   选项卡|按钮
  style: tabs   # 样式
  #选择默认显示的注释系统。
  # 可用值: changyan | disqus | disqusjs | gitalk | livere | valine
  active: valine    # 使用 valine 评论系统
  #设置“true”意味着记住访问者选择的评论系统。
  storage: true
  #Lazyload所有的评论系统。
  lazyload: false
  #修改任何导航的文本或顺序,这里有一些例子
  nav:
    valine:
      order: -1
    #disqus:
    #  text: Load Disqus
    #  order: -1
    #gitalk:
    #  order: -2
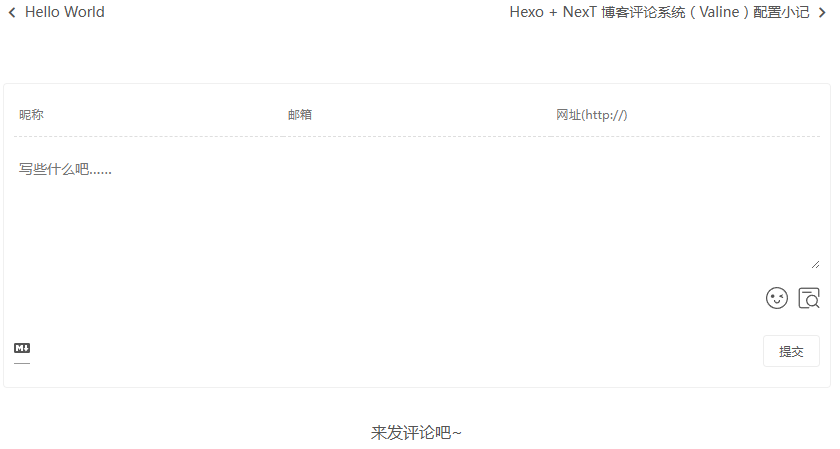
往下滑找到 valine,将 enable 改为 true,然后粘贴 appid 和 appkey:
#Valine评论Valine增强版
#更多信息:https://valine.js.org, https://github.com/xCss/Valine
valine:
  enable: true
  appid: sz #您的应用程序appid
  appkey: n0t #您的应用appkey
  notify: false #邮件提醒你文章被评论了,LeanCloud 的功能
  verify: false #验证码
  placeholder: "写些什么吧" #评论框的默认填充
  avatar: mm  #Gravatar风格
  guest_info: nick,mail,link #评论者可以填写的个人信息。nick 为名字,mail 为邮箱,link 为评论者博客的网址。举个例子,如果你填 nick,link,那就不能填写邮箱。
  pageSize: 10 #每一页显示的评论条数
  lang: zh-cn #语言,可用值:en,zh-cn    language
  visitor: true #统计文章被阅读过几次。这个功能有点牛,作为一个评论系统竟然实现了统计阅读次数功能~
  comment_count: true #是否在博客主页显示评论数
  recordIP: true #是否记录评论者IP
  serverURLs: #启用自定义域名后,请在此处填写(默认情况下会自动检测到,无需填写)
  #post_meta_order: 0

十九、侧栏加入网易云音乐
打开 网易云音乐 (163.com) 点击 生成外链播放器
 然后复制代码
将代码放到…/themes/hexo-theme-next/layout/_macro/sidebar.swig文件下:
<iframe frameborder="no" border="0" marginwidth="0" marginheight="0" width=330 height=86 src="//music.163.com/outchain/player?type=3&id=2499243966&auto=1&height=66"></iframe>
视频
1)直接用 HTML 的标签,写法如下:
复制
Your browser does not support the video tag.
2)用插件,可支持弹幕,首先在站点文件夹根目录安装插件:
复制
npm install hexo-tag-dplayer --save
然后文章中的写法:
复制
{% dplayer “url=https://什么什么什么.mp4” “https://封面图.jpg” “api=https://api.prprpr.me/dplayer/” “id=” “loop=false” %}
要使用弹幕,必须有api和id两项,并且若使用的是官方的 api 地址(即上面的),id 的值不能与这个列表的值一样。id 的值自己随便取,唯一要求就是前面这点。如果唯一要求难倒了你,可以使用这个工具将一段与众不同的文字?生成一段看起来毫无意义的哈希值,这样看起来是不是好多了。
当然,这个插件的功能还有很多,可以去 README 和这插件的「母亲」Dplayer 的官方文档看看。
十九、文章中图片点击实现全屏查看
使用第三方了图片浏览放大功能的fancybox插件 next主题已经集成了这个第三方插件 ,只须更改 next/_config.yml文件
fancybox: true
二十、修改hexo博客的字体大小 行间距
方法1、修改 themes\next\source\css\_variables 中的 base.styl 文件内容如下:
// Font size
$font-size-base           = (hexo-config('font.enable') and hexo-config('font.global.size') is a 'unit') ? unit(hexo-config('font.global.size'), em) : 1em;
$font-size-smallest       = .75em;
$font-size-smaller        = .8125em;
$font-size-small          = .875em;
$font-size-medium         = 1em;
$font-size-large          = 1.0em;       //这是新加行
//$font-size-large          = 1.125em;     //注释此行
$font-size-larger         = 1.25em;
$font-size-largest        = 1.5em;
方法2、以下是方法二:
在主题配置文件themes/next/_config.yml中使用Ctrl+F搜索“font settings”,按照需要修改。我的博客修改了以下部分:
font:
  enable: true
  host: https://fonts.googleapis.com

  # 正文使用:思源宋体
  posts:
    external: true
    family: Noto Serif SC

  # 代码块使用:Console
  codes:
    external: true
    family: Console
虽然在css目录下任意.styl下添加css样式代码可以生效,但是为了方便以后修改,最好创建一个新的.styl文件记录自己的修改。
在themes/next/source/css目录下创建_custom文件夹;
在目录themes/next/source/css/_custom下新建文件custom.styl。
在themes/next/source/css/main.styl最后加上:
@import "_custom/custom"
在custom.styl中添加css样式修改博客的css。
// 行距和首行缩进
p {
  margin-top: 15px;
  margin-bottom: 15px;
  text-indent: 4ex;
  line-height: 1.6;
}
// 字体大小
@media (min-width: 1200px) {
  .post-body {
    font-size: 1em;
  }
}
// 网站标题
.site-title {
  text-indent: 0;
}
// 昵称的缩进
.site-author-name {
  text-indent: 0;
}
// 按钮的margin
.post-button {
  margin-top: 10px;
}
// header的margin
.posts-expand .post-header {
  margin-bottom: 10px;
}
// 主题颜色
:root {
  --theme-color: #6495ed;
  --btn-default-color: #87CEFA;
  --btn-default-border-color: #87CEFA;
  --btn-default-hover-bg: #87CEFA;
  --btn-default-hover-border-color: #87CEFA;
}
// markdown引用块的首行缩进
blockquote > p {
  text-indent: 0;
}
// 序号块的首行缩进
ol > li > p {
  text-indent: 0;
}
在部署到网站时,经过尝试,发现只要每次删除public/css/main.css文件后再使用hexo g命令生成,便可成功修改main.css。于是只需使用以下命令部署,
在博客的根目录下Git Bash:
rm ./public/css/main.css
//推送更新上线
hexo cl; hexo g; hexo d
hexo-next主题配置css | 大水笔✰档案室 (zachary116699.github.io)


 浙公网安备 33010602011771号