SpringBoot Security入门
SpringBoot Security入门
SpringBoot Security 可以为我们项目提供认证、授权功能。
一、认证
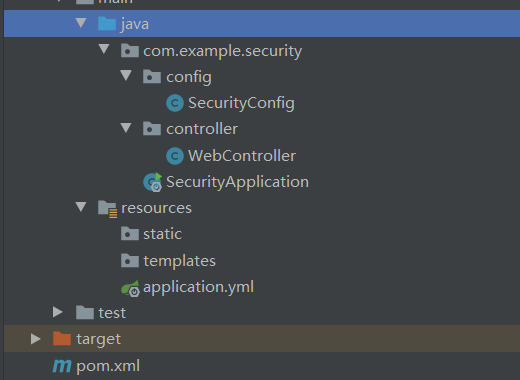
1、新建个工程

1.1 pom依赖
<!-- SpringBoot Security -->
<dependency>
    <groupId>org.springframework.boot</groupId>
    <artifactId>spring-boot-starter-security</artifactId>
</dependency>

<dependency>
    <groupId>org.springframework.boot</groupId>
    <artifactId>spring-boot-starter-web</artifactId>
</dependency>
1.2 写个测试接口
package com.example.security.controller;

import org.springframework.web.bind.annotation.RequestMapping;
import org.springframework.web.bind.annotation.RestController;

@RestController
public class WebController {

    @RequestMapping("/hello")
    public String hello(){
        return "hello world";
    }
}
1.3 访问接口
接下来什么事情都不用做,我们直接启动项目,访问接口。
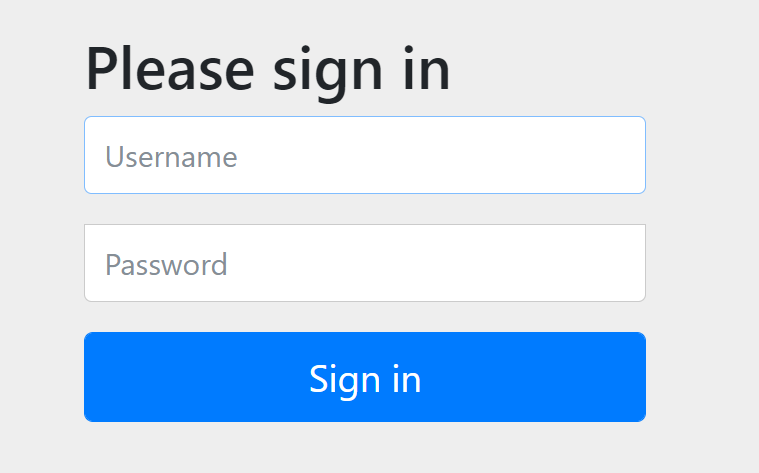
我们去访问 http://localhost:8080/hello 接口,结果被自动重定向到登陆页面了,这就是SpringBoot Security为我们提供的默认的认证功能的登录页。

其默认的用户名是user,密码在项目启动过程中,我们会看到如下一行日志:

这就是 Spring Security 为默认用户 user 生成的临时密码,是一个 UUID 字符串。
2、用户配置
2.1 方式一:配置文件配置
spring:
  security:
    user:
      name: jsh
      password: 111
这样默认的登录名和密码就会被覆盖掉。
2.2 方式二:配置类
package com.example.security.config;

import org.springframework.context.annotation.Bean;
import org.springframework.security.config.annotation.authentication.builders.AuthenticationManagerBuilder;
import org.springframework.security.config.annotation.web.configuration.EnableWebSecurity;
import org.springframework.security.config.annotation.web.configuration.WebSecurityConfigurerAdapter;
import org.springframework.security.crypto.bcrypt.BCryptPasswordEncoder;
import org.springframework.security.crypto.password.PasswordEncoder;

@EnableWebSecurity
public class SecurityConfig extends WebSecurityConfigurerAdapter {

    @Override
    protected void configure(AuthenticationManagerBuilder auth) throws Exception {
        // 可以配置多个用户
        auth.inMemoryAuthentication()  // 方便测试数据存于内存中
                .withUser("jsh") //用户名
                .password(new BCryptPasswordEncoder().encode("111111")) //密码,加个密
            	.roles("admin") //角色
                .and()
                .withUser("jsh2")
                .password(new BCryptPasswordEncoder().encode("222222"))
            	.roles("admin");
    }

    // 密码加密,官方推荐BCryptPasswordEncoder加密
    @Bean
    PasswordEncoder passwordEncoder(){
        return new BCryptPasswordEncoder();
    }
}
3、自定义登录页
我们一般不会使用Spring Security默认的登录页,我们需要配置自己的登录页。
重写 configure(HttpSecurity http)和configure(WebSecurity web)方法:
package com.example.security.config;

import org.springframework.context.annotation.Bean;
import org.springframework.security.config.annotation.authentication.builders.AuthenticationManagerBuilder;
import org.springframework.security.config.annotation.web.builders.HttpSecurity;
import org.springframework.security.config.annotation.web.builders.WebSecurity;
import org.springframework.security.config.annotation.web.configuration.EnableWebSecurity;
import org.springframework.security.config.annotation.web.configuration.WebSecurityConfigurerAdapter;
import org.springframework.security.crypto.bcrypt.BCryptPasswordEncoder;
import org.springframework.security.crypto.password.PasswordEncoder;

@EnableWebSecurity
public class SecurityConfig extends WebSecurityConfigurerAdapter {

    // 配置自定义登录页
    @Override
    protected void configure(HttpSecurity http) throws Exception {
        http.authorizeRequests()
                .anyRequest()
                .authenticated()
                .and() // and 方法表示结束当前标签,上下文回到HttpSecurity,开启新一轮的配置
                .formLogin()
                .loginPage("/login.html") // 自定义登录页路径
                .permitAll() // 登录相关的页面/接口不要被拦截。
                .and()
                .csrf().disable();
    }

    @Override
    public void configure(WebSecurity web) throws Exception {
        // 配置放行的 URL 地址
        web.ignoring().antMatchers("/css/**", "/js/**", "/fonts/**");
    }

    @Override
    protected void configure(AuthenticationManagerBuilder auth) throws Exception {
        // 可以配置多个用户
        auth.inMemoryAuthentication() // 方便测试数据存于内存中
                .withUser("jsh")
                .password(new BCryptPasswordEncoder().encode("111111"))
                .roles("admin")
                .and()
                .withUser("jsh2")
                .password(new BCryptPasswordEncoder().encode("222222"))
                .roles("admin");
    }

    // 密码加密,官方推荐BCryptPasswordEncoder加密
    @Bean
    PasswordEncoder passwordEncoder(){
        return new BCryptPasswordEncoder();
    }
}
这样就会跳转到我们自己的登录页了。
3.1登录接口
这里有个注意点:我们设置的登录页路径.loginPage("/login.html"),Spring Security也会自动帮我们注册一个 /login.html 的POST 接口,用来处理登录逻辑的,因此登录页form表单提交action属性需要为 /login.html
<form action="/login.html" method="post">
    <input type="text" class="form-control mb-3" name="username" placeholder="请输入">
    <input type="password" class="form-control mb-3" name="password" placeholder="请输入">
    <div class="mb-3">
        <label>
            <input type="checkbox" > 记住我
        </label>
    </div>
    <button class="btn btn-primary btn-block" type="submit">登录</button>
</form>
如果我们想要自定义登录接口要怎么做呢?还是可以添加配置.loginProcessingUrl(),同时前端登录页action属性也要跟着改
 http.authorizeRequests()
     .anyRequest()
     .authenticated()
     .and()
     .formLogin()
     .loginPage("/login.html") // 自定义登录页路径
     .loginProcessingUrl("/doLogin") // 自定义登录接口
     .permitAll()
     .and()
     .csrf().disable();
3.2 登陆参数
Spring Security的登录参数名默认是username和password,当然我们也可以通过配置修改
	.formLogin()
    .loginPage("/login.html")
    .loginProcessingUrl("/doLogin")
    .usernameParameter("name") // 自定义登陆参数
    .passwordParameter("pwd") // 自定义登陆参数
    .permitAll()
注意修改 input 的 name 属性值有,与此对应。
4、登录回调
4.1 登录成功回调
登录成功的回调这里有两个方法提供,defaultSuccessUrl()和successForwardUrl()
-
我们看下defaultSuccessUrl方法的源码,它有个重载方法
/* 默认第二个参数是false, 如果我们在 defaultSuccessUrl 中指定登录成功的跳转页面为 /index,此时分两种情况,如果你是直接在浏览器中输入的登录地址,登录成功后,就直接跳转到 /index,如果你是在浏览器中输入了其他地址,例如 http://localhost:8080/hello,结果因为没有登录,又重定向到登录页面,此时登录成功后,就不会来到 /index ,而是来到 /hello 页面 */ public final T defaultSuccessUrl(String defaultSuccessUrl) { return defaultSuccessUrl(defaultSuccessUrl, false); } /* 如果第二个参数设置true,则效果等同于successForwardUrl() */ public final T defaultSuccessUrl(String defaultSuccessUrl, boolean alwaysUse) { SavedRequestAwareAuthenticationSuccessHandler handler = new SavedRequestAwareAuthenticationSuccessHandler(); handler.setDefaultTargetUrl(defaultSuccessUrl); handler.setAlwaysUseDefaultTargetUrl(alwaysUse); this.defaultSuccessHandler = handler; return successHandler(handler); } -
successForwardUrl方法:表示不管你是从哪里来的,登录后一律跳转到 successForwardUrl 指定的地址。例如 successForwardUrl 指定的地址为
/index,你在浏览器地址栏输入http://localhost:8080/hello,结果因为没有登录,重定向到登录页面,当你登录成功之后,就会服务端跳转到/index页面;或者你直接就在浏览器输入了登录页面地址,登录成功后也是来到/index。
	.formLogin()
    .loginPage("/login.html")
    .loginProcessingUrl("/doLogin")
//    .defaultSuccessUrl("/index", true)
    .successForwardUrl("/index")
    .permitAll() // 登录相关的页面/接口不要被拦截。
注意:实际操作中,defaultSuccessUrl 和 successForwardUrl 只需要配置一个即可。
4.2 登录失败回调
与登录成功相似,登录失败也是有两个方法:
- failureForwardUrl 登录失败之后转发请求
- failureUrl 登录失败之后重定向
这两个方法在设置的时候也是设置一个即可
5、注销登录
注销登录的默认接口是 /logout,我们当然也可以进行一系列配置
	.and()
    .logout()
    .logoutUrl("/logout") // 默认注销的请求就是/logout,这里可以自定义,但这个请求是GET请求
    .logoutRequestMatcher(new AntPathRequestMatcher("/logout","POST")) // 如果注销需要使用POST请求,可以配置此项
    .logoutSuccessUrl("/index") // 注销成功后的回调
    .deleteCookies() // 注销后删除cookie,可以指定删除cookie的名称
    .clearAuthentication(true) // 注销后清除认证,可以不用配,因为其默认就是true
    .invalidateHttpSession(true) // 注销后清除认session,可以不用配,因为其默认就是true
    .permitAll()
6、前后端分离项目中的配置
对于前后端分离项目,我们只需要将处理结果以json形式传给前端处理就行了,不需要我们在服务端进行跳转或重定向。
6.1 登陆成功返回
配置successHandler方法就行了,其参数是一个 AuthenticationSuccessHandler 对象,这个对象中我们要实现的方法是 onAuthenticationSuccess。onAuthenticationSuccess 方法有三个参数,分别是:HttpServletRequest、HttpServletResponse、Authentication,其中 Authentication 参数则保存了我们刚刚登录成功的用户信息。
	.and()
    .formLogin()
    .successHandler((req, resp, authentication) -> {
        resp.setContentType("application/json;charset=utf-8");
        PrintWriter out = resp.getWriter();
        Object principal = authentication.getPrincipal(); // 获取的认证的身份信息,转json返回给前端
        out.write(new ObjectMapper().writeValueAsString(principal));
        out.flush();
        out.close();
    })
6.2 登录失败返回
失败的回调也是三个参数,HttpServletRequest、HttpServletResponse、AuthenticationException,第三个是一个exception异常类,我们可以将登录失败的原因通过 JSON 返回到前端。
	.and()
    .formLogin()
	.failureHandler((req, resp, e) -> {
        resp.setContentType("application/json;charset=utf-8");
        PrintWriter out = resp.getWriter();
        out.write(e.getMessage());
        out.flush();
        out.close();
    })
6.3 注销返回
	.and()
    .logout()
	.logoutSuccessHandler((req, resp, authentication) -> {
        resp.setContentType("application/json;charset=utf-8");
        PrintWriter out = resp.getWriter();
        out.write("注销成功");
        out.flush();
        out.close();
    })
6.4 未认证时的请求返回
	.and()
    .csrf().disable()
    // 前后端分离项目,未认证时的返回
    .exceptionHandling()
    .authenticationEntryPoint((req, resp, authException) -> {
        resp.setContentType("application/json;charset=utf-8");
        PrintWriter out = resp.getWriter();
        out.write("尚未登录,请先登录");
        out.flush();
        out.close();
    })
二、授权
授权就是当一个用户要去访问一个服务器资源,我们需要去判断该用户是否有访问这个资源的权限,有的话才让他访问。
1、设置用户角色
这里我设置了两个用户,一个是admin权限的用户jsh1,一个是user权限的用户jsh2,admin权限能访问所有资源,user权限除了不能访问admin权限的资源,其他资源都能访问。
还是在上文描述的SecurityConfig配置类中,我们可以有两种配置方式:
- 第一种:
@Override
protected void configure(AuthenticationManagerBuilder auth) throws Exception {
    // 可以配置多个用户
    auth.inMemoryAuthentication() // 方便测试数据存于内存中
        .withUser("jsh1")
        .password(new BCryptPasswordEncoder().encode("111111"))
        .roles("admin")
        .and()
        .withUser("jsh2")
        .password(new BCryptPasswordEncoder().encode("222222"))
        .roles("user");
}
-
第二种:
由于 Spring Security 支持多种数据源,例如内存、数据库、LDAP 等,这些不同来源的数据被共同封装成了一个 UserDetailService 接口,任何实现了该接口的对象都可以作为认证数据源。
因此我们还可以通过重写 WebSecurityConfigurerAdapter 中的 userDetailsService 方法来提供一个 UserDetailService 实例进而配置多个用户:
@Override
@Bean
protected UserDetailsService userDetailsService() {
    InMemoryUserDetailsManager manager = new InMemoryUserDetailsManager();
    manager.createUser(User.withUsername("jsh1").password("111111").roles("admin").build());
    manager.createUser(User.withUsername("jsh2").password("222222").roles("user").build());
    return manager;
}
2、设置资源权限
给不同的角色设置访问不同资源的权限:
@Override
protected void configure(HttpSecurity http) throws Exception {
    http.authorizeRequests()
        .antMatchers("/admin/**").hasRole("admin") // admin角色用户可以访问/admin/...路径下的接口资源
        .antMatchers("/user/**").hasRole("user") // user角色用户可以访问/user/...路径下的接口资源
        .anyRequest().authenticated() // 剩余的其他格式的请求路径,只需要认证(登录)后就可以访问
        .and()
        .formLogin()
        .loginPage("/login.html")
        .loginProcessingUrl("/doLogin")
        .csrf().disable();
}
注意:
-
拦截顺序是按照从上往下的顺序来匹配,一旦匹配到了就不继续匹配了
-
.anyRequest().authenticated()需要放在.antMatchers()之后,否则会报错。从语义上理解,anyRequest 放在最后,表示除了前面拦截规则之外,剩下的请求要如何处理。
3、设置角色继承
admin角色想要访问到user角色下的资源,则我们需要对其设置一个继承关系:
// 角色继承 admin 能后拥有 user 的权限
@Bean
RoleHierarchy roleHierarchy() {
    RoleHierarchyImpl hierarchy = new RoleHierarchyImpl();
    hierarchy.setHierarchy("ROLE_admin > ROLE_user");
    return hierarchy;
}
注意:角色前需要有ROLE_前缀。
4、写个测试Controller测试
package com.example.security.controller;

import org.springframework.web.bind.annotation.RequestMapping;
import org.springframework.web.bind.annotation.RestController;

@RestController
public class WebController {

    @RequestMapping("/hello")
    public String hello(){
        return "hello world";
    }

    @RequestMapping("/admin/hello")
    public String adminHello(){
        return "hello admin world";
    }

    @RequestMapping("/user/hello")
    public String userHello(){
        return "hello user world";
    }

}
测试结果:
jsh1用户可以访问到 /admin/hello, /user/hello, /hello三个接口;
jsh2用户可以访问到 /user/hello, /hello两个个接口;


