SpringSecurity---javaconfig:Hello Web Security
© 版权声明:本文为博主原创文章,转载请注明出处
本文根据官方文档加上自己的理解,仅供参考
介绍:

第一步是创建Spring Security的java配置。这个配置创建了一个Servlet过滤器被称为springSecurityFilterChain,它负责你的应用中所有的安全问题(保护应用程序的url,验证提交的用户名和密码,重定向到登录表单等等)。
你可以在下面找到Spring Security Java 配置最基础的例子:


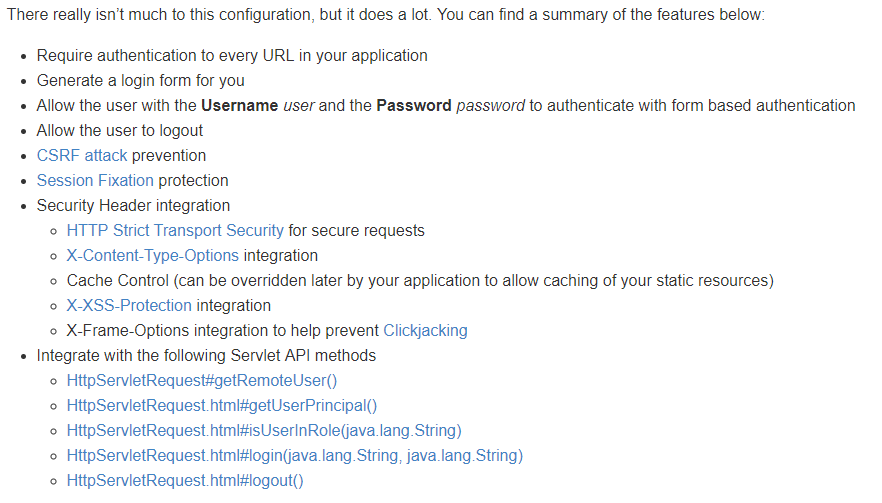
这个配置并没有太多东西,但是做了很多。你可以找到下面的特征摘要
- 需要验证您的应用程序中每个URL
- 为您生成一个登录表单
- 允许用户用username的用户名和password的密码进行基于表单的身份验证
- 允许用户注销
- 预防CSRF攻击
- Session Fixation保护
- 安全头集成
- 为了保护请求采用HTTP强制安全传输技术
- X-Content-Type-Options集成
- 缓存控制(可以由应用程序稍后重写,允许缓存静态资源)
- X-XSS-Protection集成
- X-Frame-Options集成去防止“点击劫持”
- 与下面的Servlet API方法集成
- HttpServletRequest#getRemoteUser()
- HttpServletRequest.html#getUserPrincipal()
- HttpServletRequest.html#isUserInRole(java.lang.String)
- HttpServletRequest.html#login(java.lang.String, java.lang.String)
- HttpServletRequest.html#logout()

下一步是注册springSecurityFilterChain到war中。在一个Servlet 3 +环境,可以使spring的webapplicationinitializer支持java的配置。毫无疑问的是,Spring Security提供一个基类AbstractSecurityWebApplicationInitializer
确保springSecurityFilterChain被注册,我们使用AbstractSecurityWebApplicationInitializer的方式是取决于我们已经使用了Spring还是Spring Security是我们应用中唯一的Spring组件
- 章节5.1.2,“AbstractSecurityWebApplicationInitializer不存在Spring” - 如果你没有使用Spring用这个说明
- 章节5.1.3,“AbstractSecurityWebApplicationInitializer存在Spring MVC” - 如果你已经使用Spring用这个说明

如果你没有使用Spring或Spring MVC,你将需要通过在WebSecurityConfig到父类确保配置被使用。你可以在下面找到一个例子:


这个SecurityWebApplicationInitializer将做到下面这些事情:
- 自动为你的应用中的每个URL注册springSecurityFilterChain过滤器
- 添加ContextLoaderListener加载WebSecurityConfig

如果我们已经在应用的其他地方使用了Spring,那么可能已经有了一个WebApplicationInitializer去加载我们的Spring配置。如果我们使用之前的配置可能会得到一个错误。相反,我们应该注册
Spring Security到已经存在的ApplicationContext。例如,如果我们使用Spring MVC我们的SecurityWebApplicationInitializer可能会像下面这样:


它很简单的为我们应用中的每个URL注册了springSecurityFilterChain过滤器,之后我们将确保WebSecurityConfig将被加载到已存在的ApplicationInitializer。例如:如果我们使用Spring MVC,
它将被添加在getRootConfigClasses()方法中

实例:
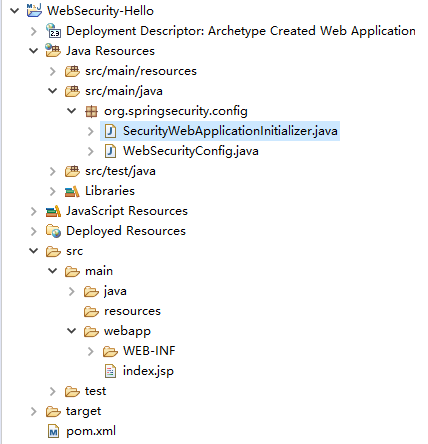
项目结构:

pom.xml

<project xmlns="http://maven.apache.org/POM/4.0.0" xmlns:xsi="http://www.w3.org/2001/XMLSchema-instance"
  xsi:schemaLocation="http://maven.apache.org/POM/4.0.0 http://maven.apache.org/maven-v4_0_0.xsd">
    <modelVersion>4.0.0</modelVersion>
    <groupId>org.springsecurity</groupId>
    <artifactId>WebSecurity</artifactId>
    <packaging>war</packaging>
    <version>0.0.1-SNAPSHOT</version>

    <dependencyManagement>
        <dependencies>
            <dependency>
                <groupId>org.springframework</groupId>
                <artifactId>spring-framework-bom</artifactId>
                <version>5.0.4.RELEASE</version>
                <type>pom</type>
                <scope>import</scope>
            </dependency>
        </dependencies>
    </dependencyManagement>

    <dependencies>
        <dependency>
            <groupId>junit</groupId>
            <artifactId>junit</artifactId>
            <version>4.12</version>
            <scope>test</scope>
        </dependency>
        <dependency>
            <groupId>javax.servlet</groupId>
            <artifactId>javax.servlet-api</artifactId>
            <version>3.1.0</version>
            <scope>provided</scope>
        </dependency>
        <dependency>
            <groupId>jstl</groupId>
            <artifactId>jstl</artifactId>
            <version>1.2</version>
        </dependency>
        <dependency>
            <groupId>org.springframework.security</groupId>
            <artifactId>spring-security-web</artifactId>
            <version>5.0.3.RELEASE</version>
        </dependency>
        <dependency>
            <groupId>org.springframework.security</groupId>
            <artifactId>spring-security-config</artifactId>
            <version>5.0.3.RELEASE</version>
        </dependency>
    </dependencies>

    <build>

          <finalName>WebSecurity</finalName>
          <plugins>
              <plugin>
                  <groupId>org.apache.maven.plugins</groupId>
                  <artifactId>maven-compiler-plugin</artifactId>
                  <version>3.7.0</version>
                  <configuration>
                      <source>1.8</source>
                      <target>1.8</target>
                  </configuration>
              </plugin>
          </plugins>
    </build>
</project>
WebSecurityConfig.java

package org.springsecurity.config;

import org.springframework.context.annotation.Bean;
import org.springframework.security.config.annotation.web.configuration.EnableWebSecurity;
import org.springframework.security.core.userdetails.User;
import org.springframework.security.core.userdetails.UserDetailsService;
import org.springframework.security.provisioning.InMemoryUserDetailsManager;

@EnableWebSecurity
public class WebSecurityConfig {

    @Bean
    @SuppressWarnings("deprecation")
    public UserDetailsService userDetailsService() {
        InMemoryUserDetailsManager manager = new InMemoryUserDetailsManager();
        manager.createUser(User.withDefaultPasswordEncoder()
                .username("username").password("password").roles("USER").build());
        return manager;
    }

}
SecurityWebApplicationInitializer.java

package org.springsecurity.config;

import org.springframework.security.web.context.AbstractSecurityWebApplicationInitializer;

public class SecurityWebApplicationInitializer extends AbstractSecurityWebApplicationInitializer {

    public SecurityWebApplicationInitializer() {
        super(WebSecurityConfig.class);
    }

}
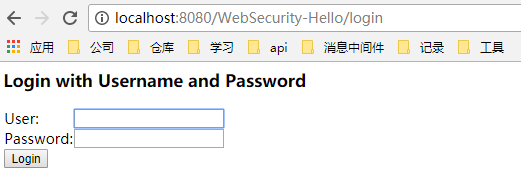
项目预览

说明
- 该项目只有两个java文件
- pom.xml中引入的依赖,也可以在官方文档中找到。地址:https://docs.spring.io/spring-security/site/docs/5.0.3.RELEASE/reference/htmlsingle/#maven
- 但是自动生成了登录界面,并可用WebSecurityConfig.java中配置的用户名username和密码password进行登录
- 登录完成后自动跳转到index.jsp,该页面是创建web项目时自动生成的


