Ubuntu Server 16.04服务器版配置图解教程11 - phpStorm + xdebug + php7.0远程调试环境配置!
1、更新源
sudo apt-get update

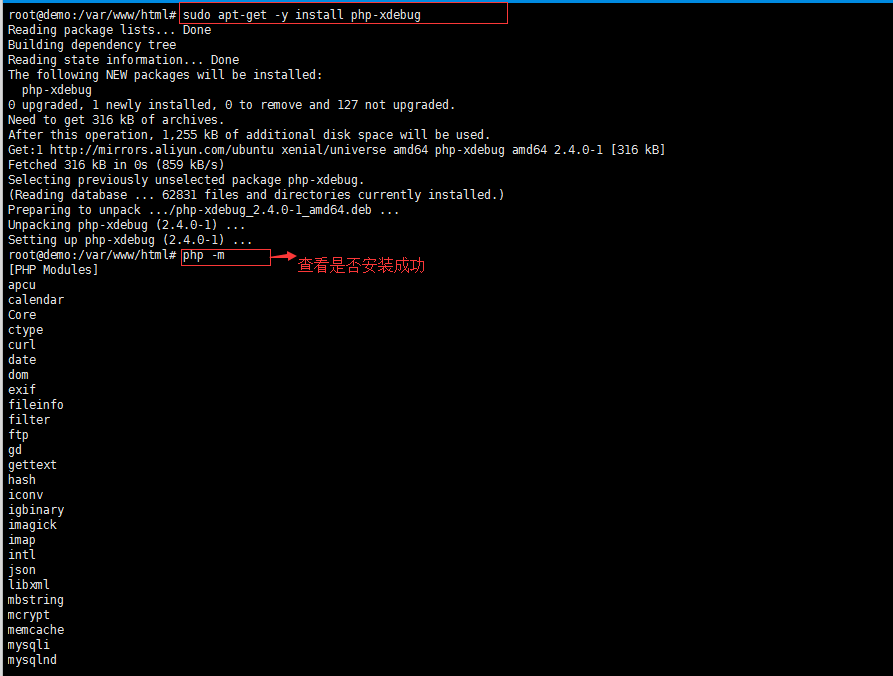
2、安装xdebug
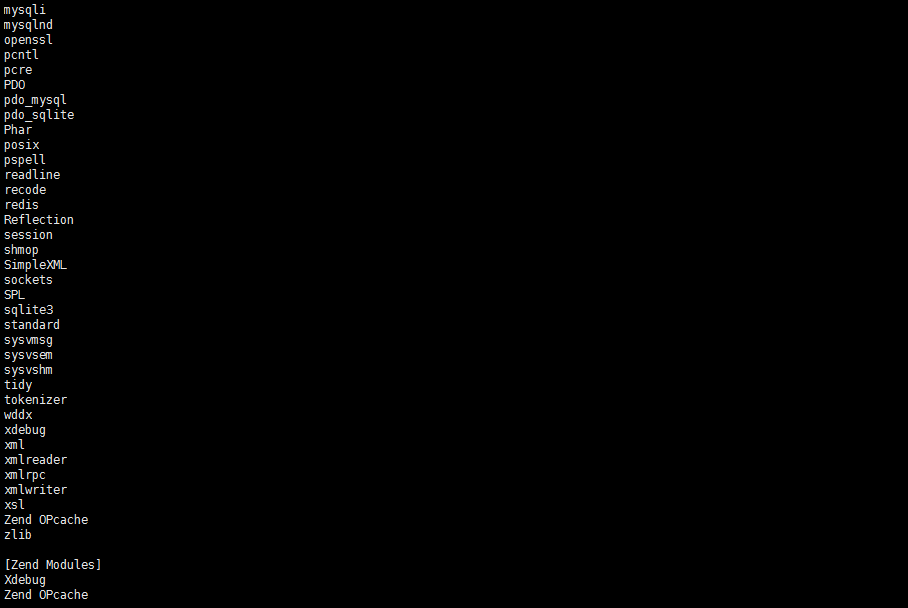
sudo apt-get -y install php-xdebug
3、配置xdebug配置信息
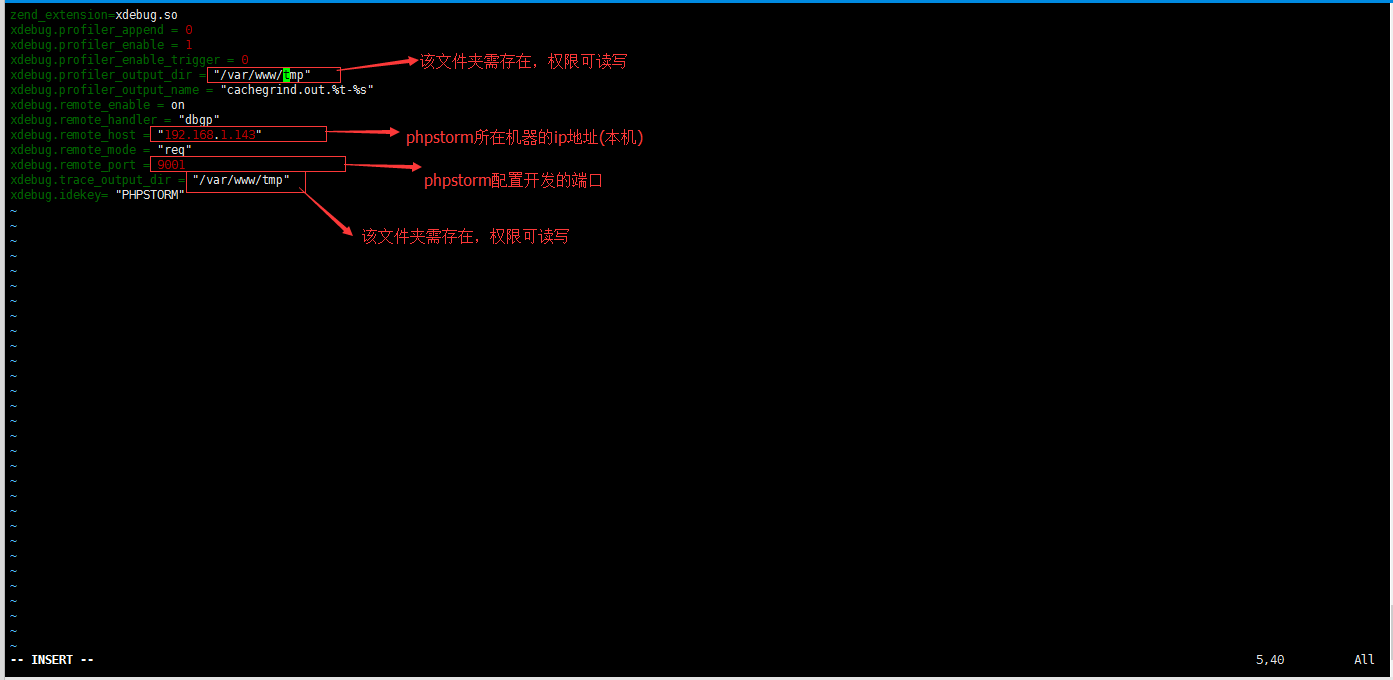
sudo vim /etc/php/7.0/mods-available/xdebug.ini
xdebug.profiler_append = 0
xdebug.profiler_enable = 1
xdebug.profiler_enable_trigger = 0
xdebug.profiler_output_dir = "/home/wwwroot/tmp"
xdebug.profiler_output_name = "cachegrind.out.%t-%s"
xdebug.remote_enable = on
xdebug.remote_handler = "dbgp"
xdebug.remote_host = "192.168.1.143"
xdebug.remote_mode = "req"
xdebug.remote_port = 9001
xdebug.trace_output_dir = "/home/wwwroot/tmp"
xdebug.idekey= "PHPSTOM"
fpm服务重启:
sudo service php7.0-fpm restart
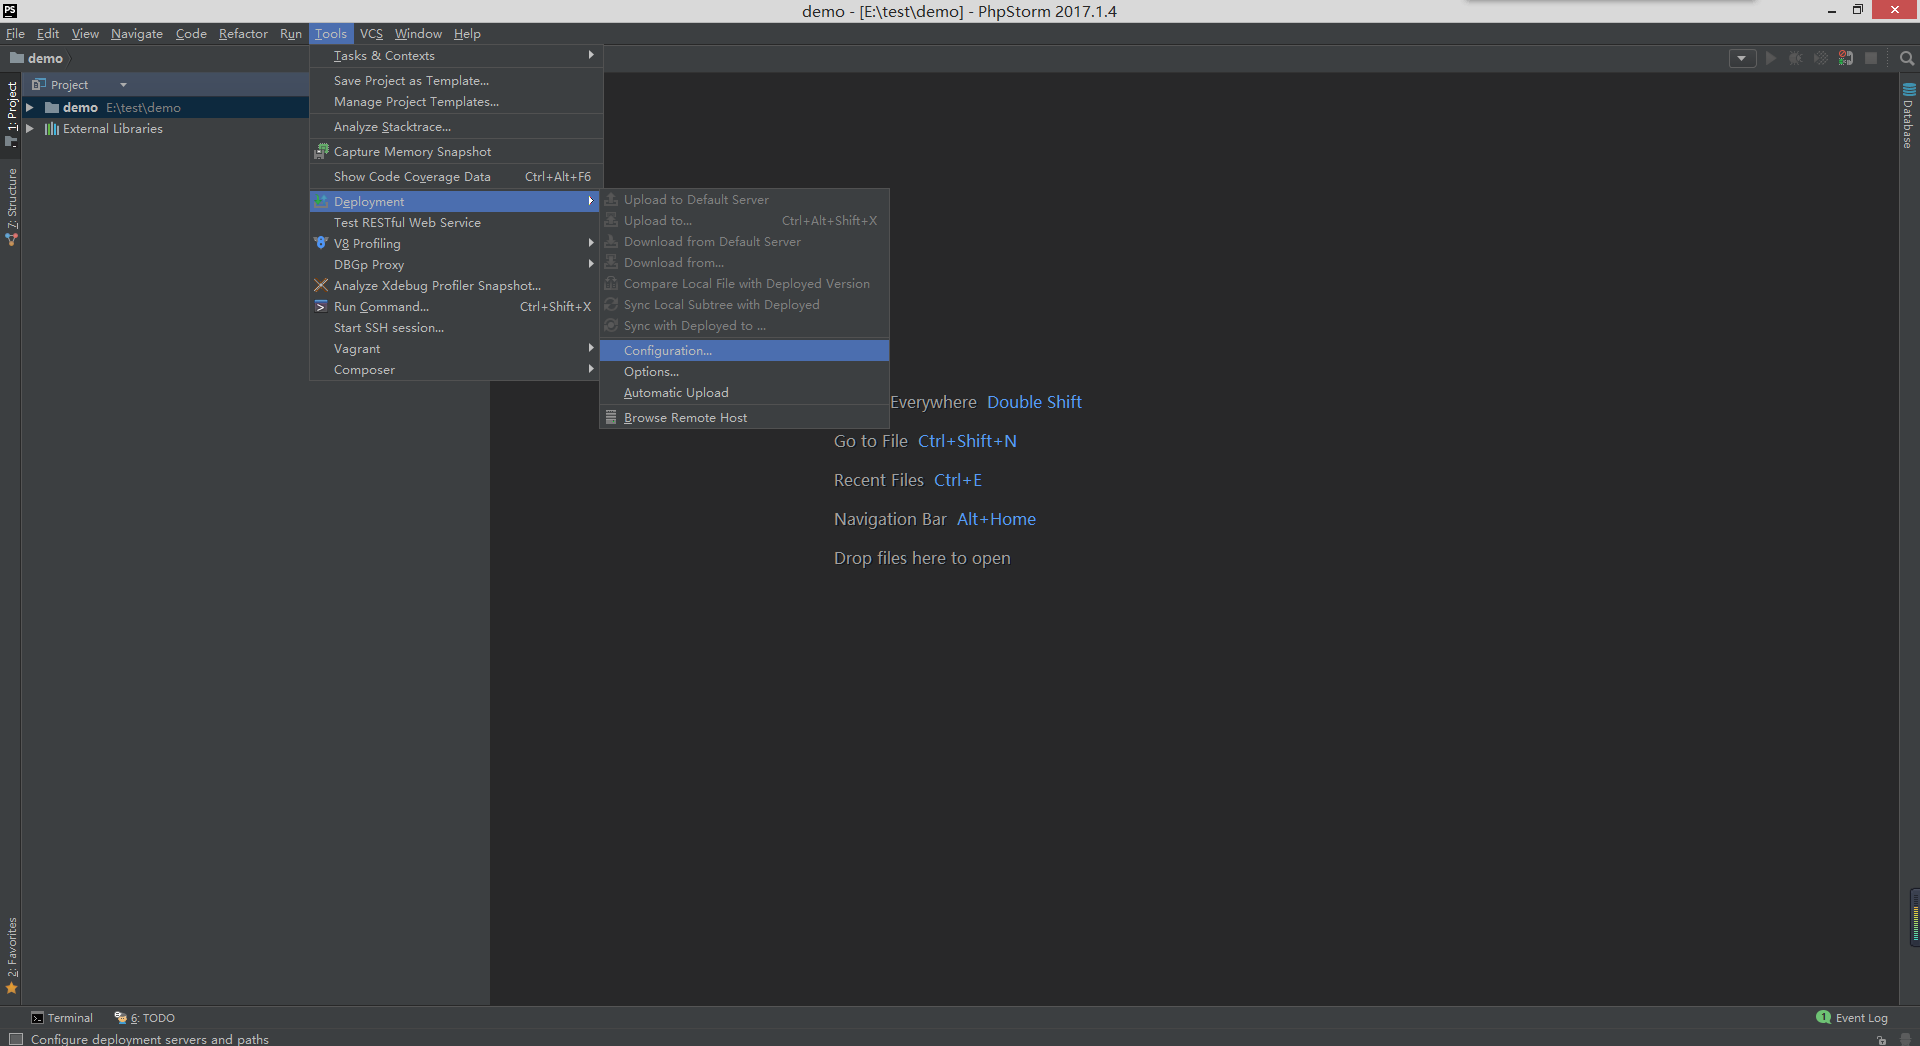
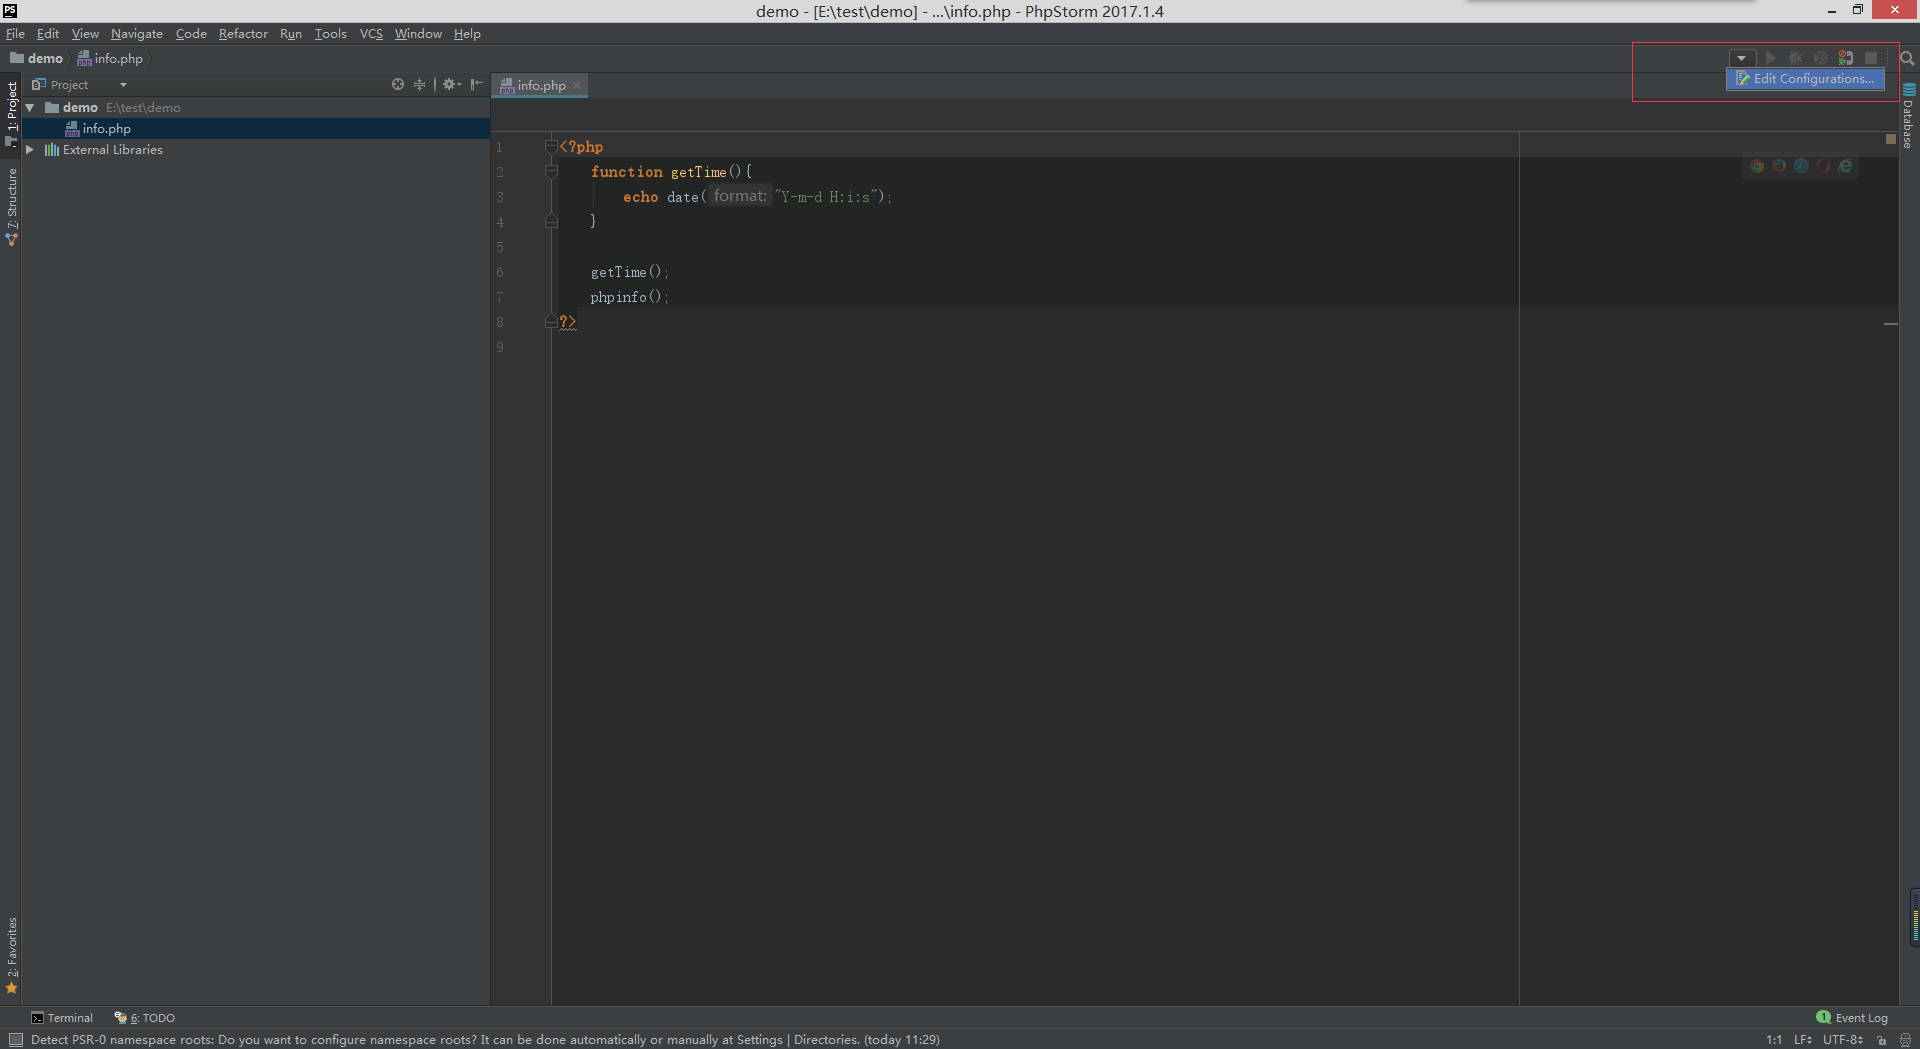
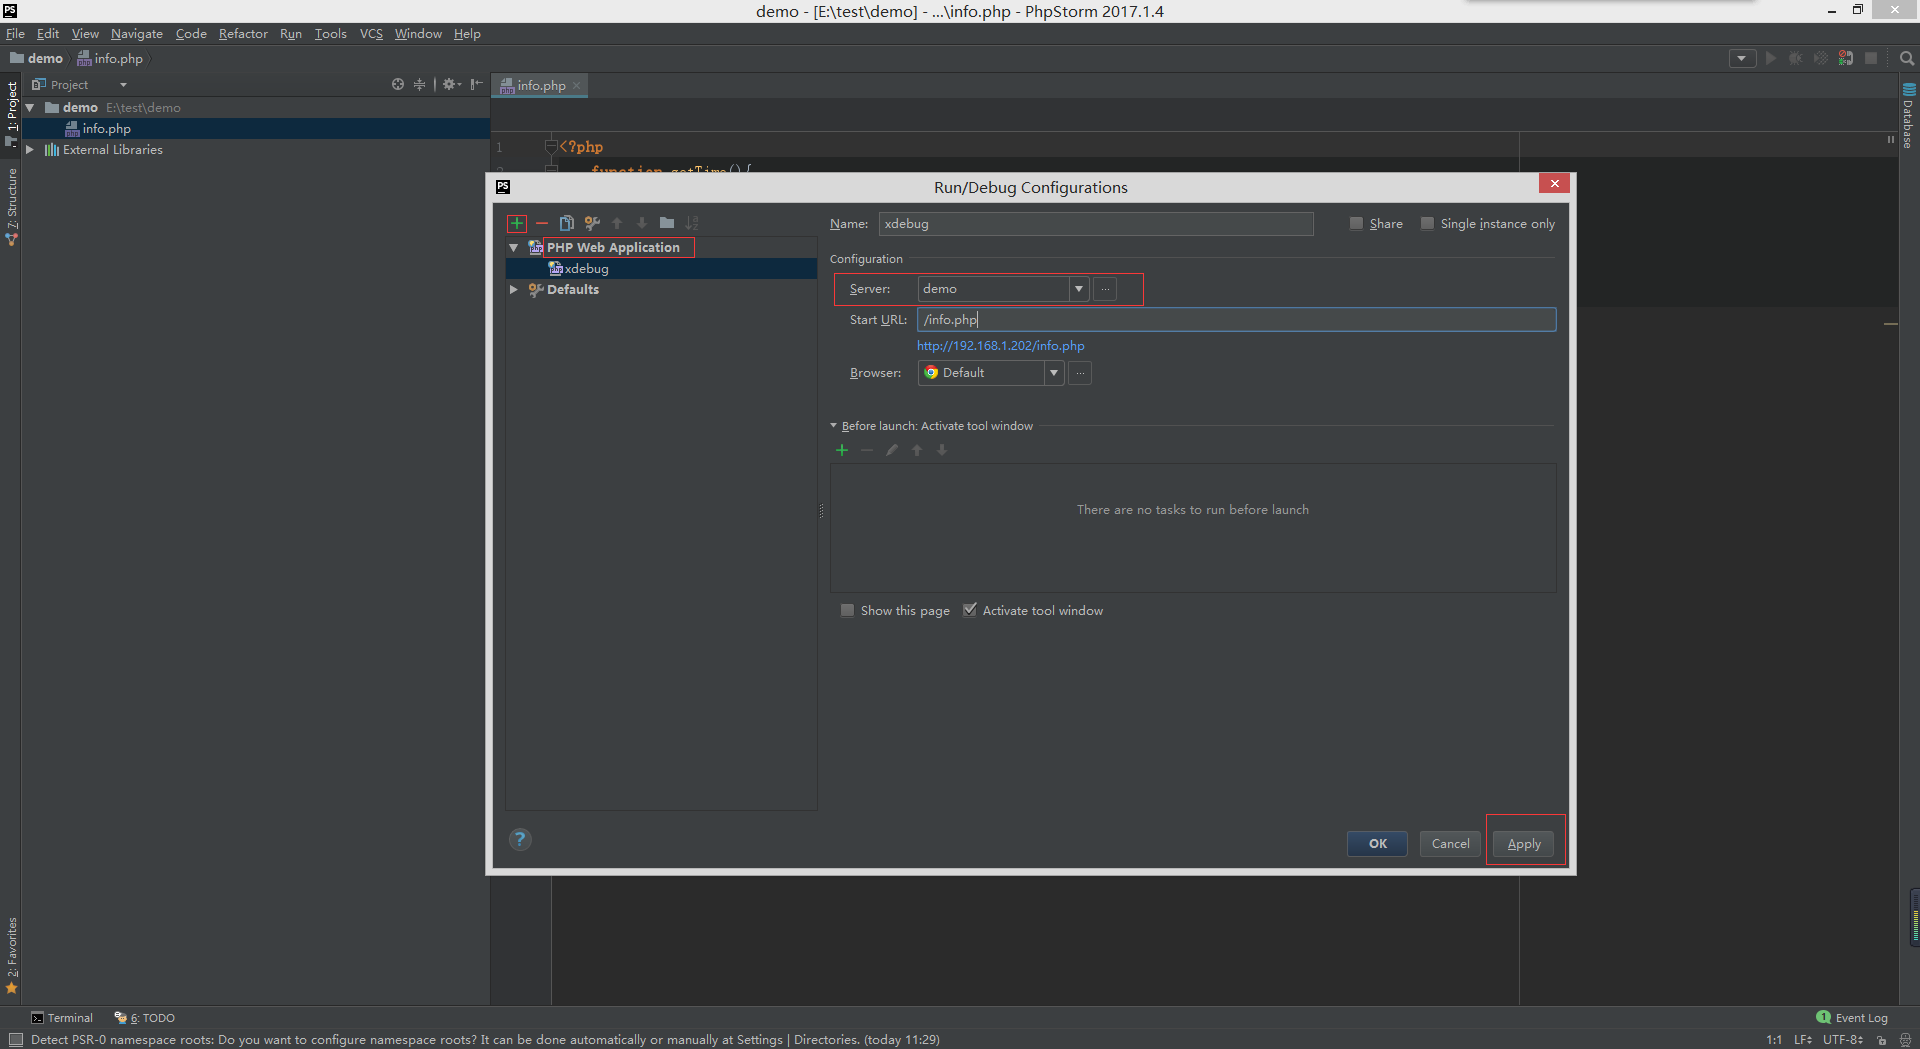
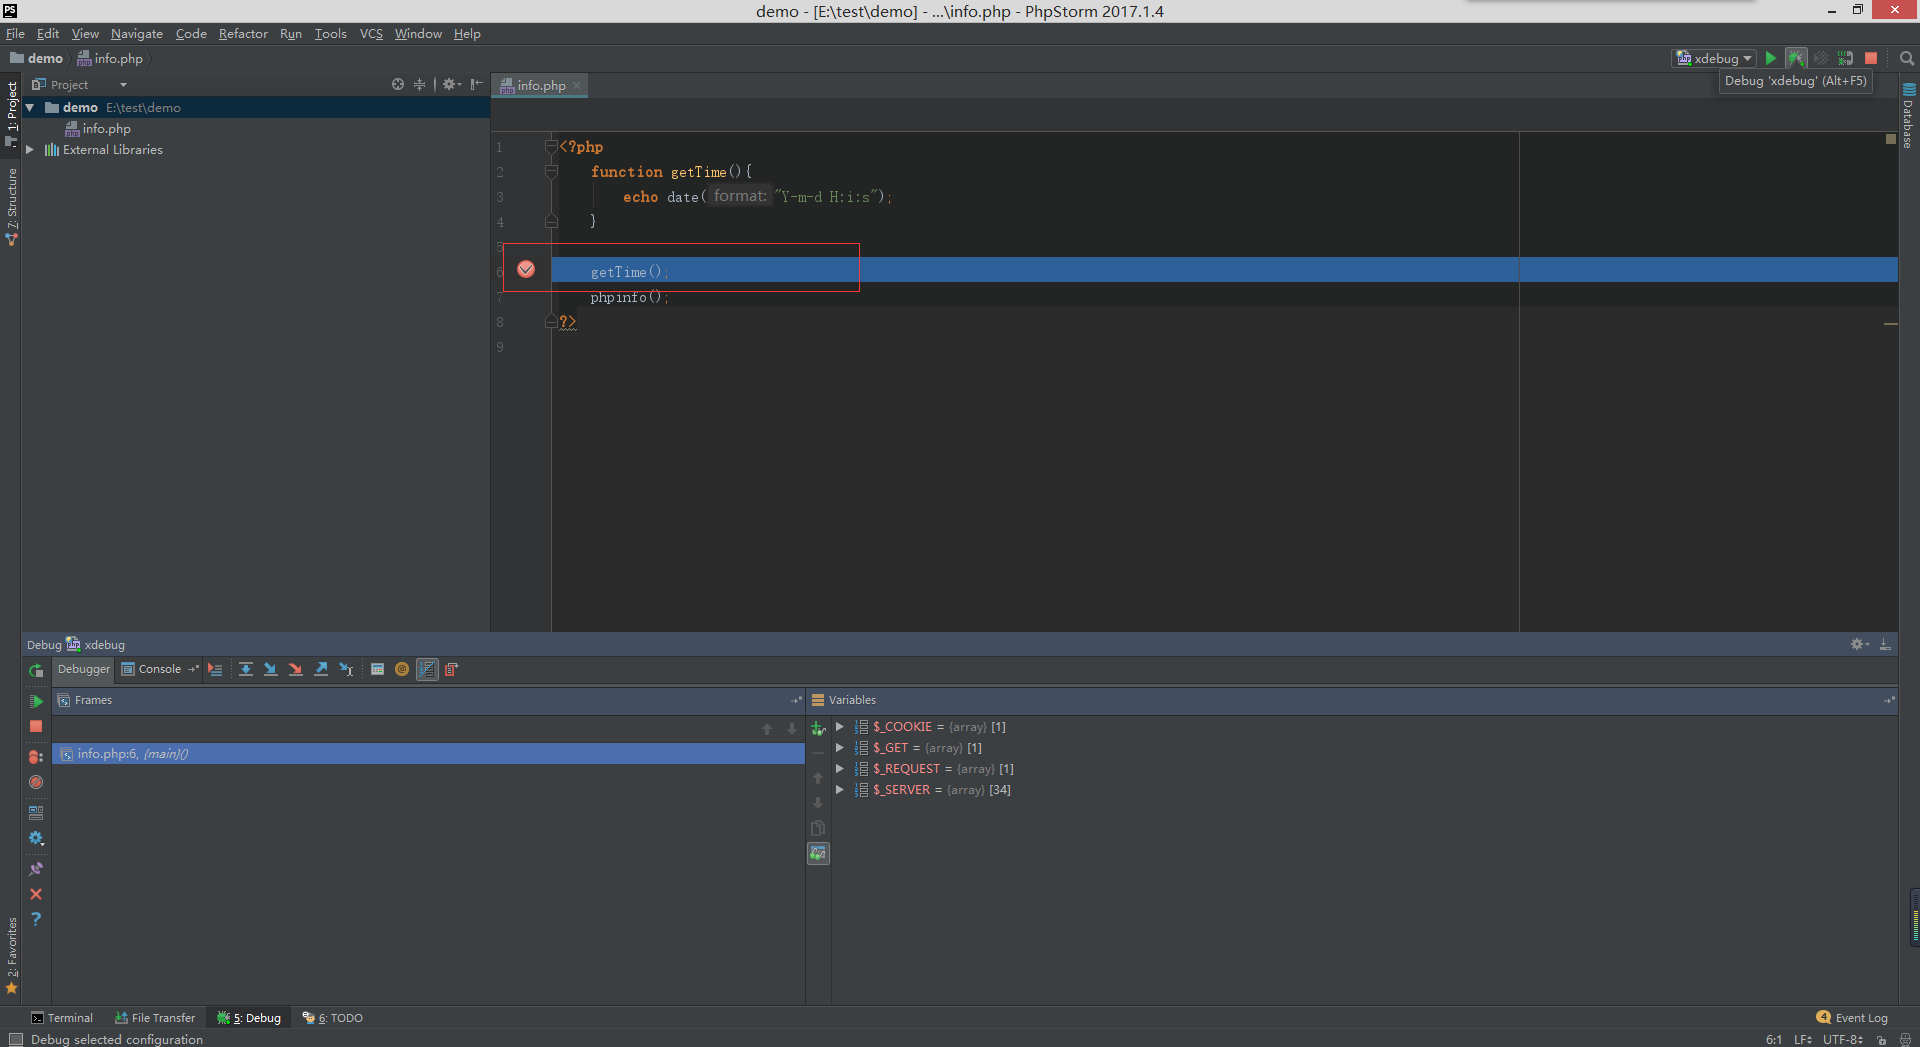
4、phpstorm配置
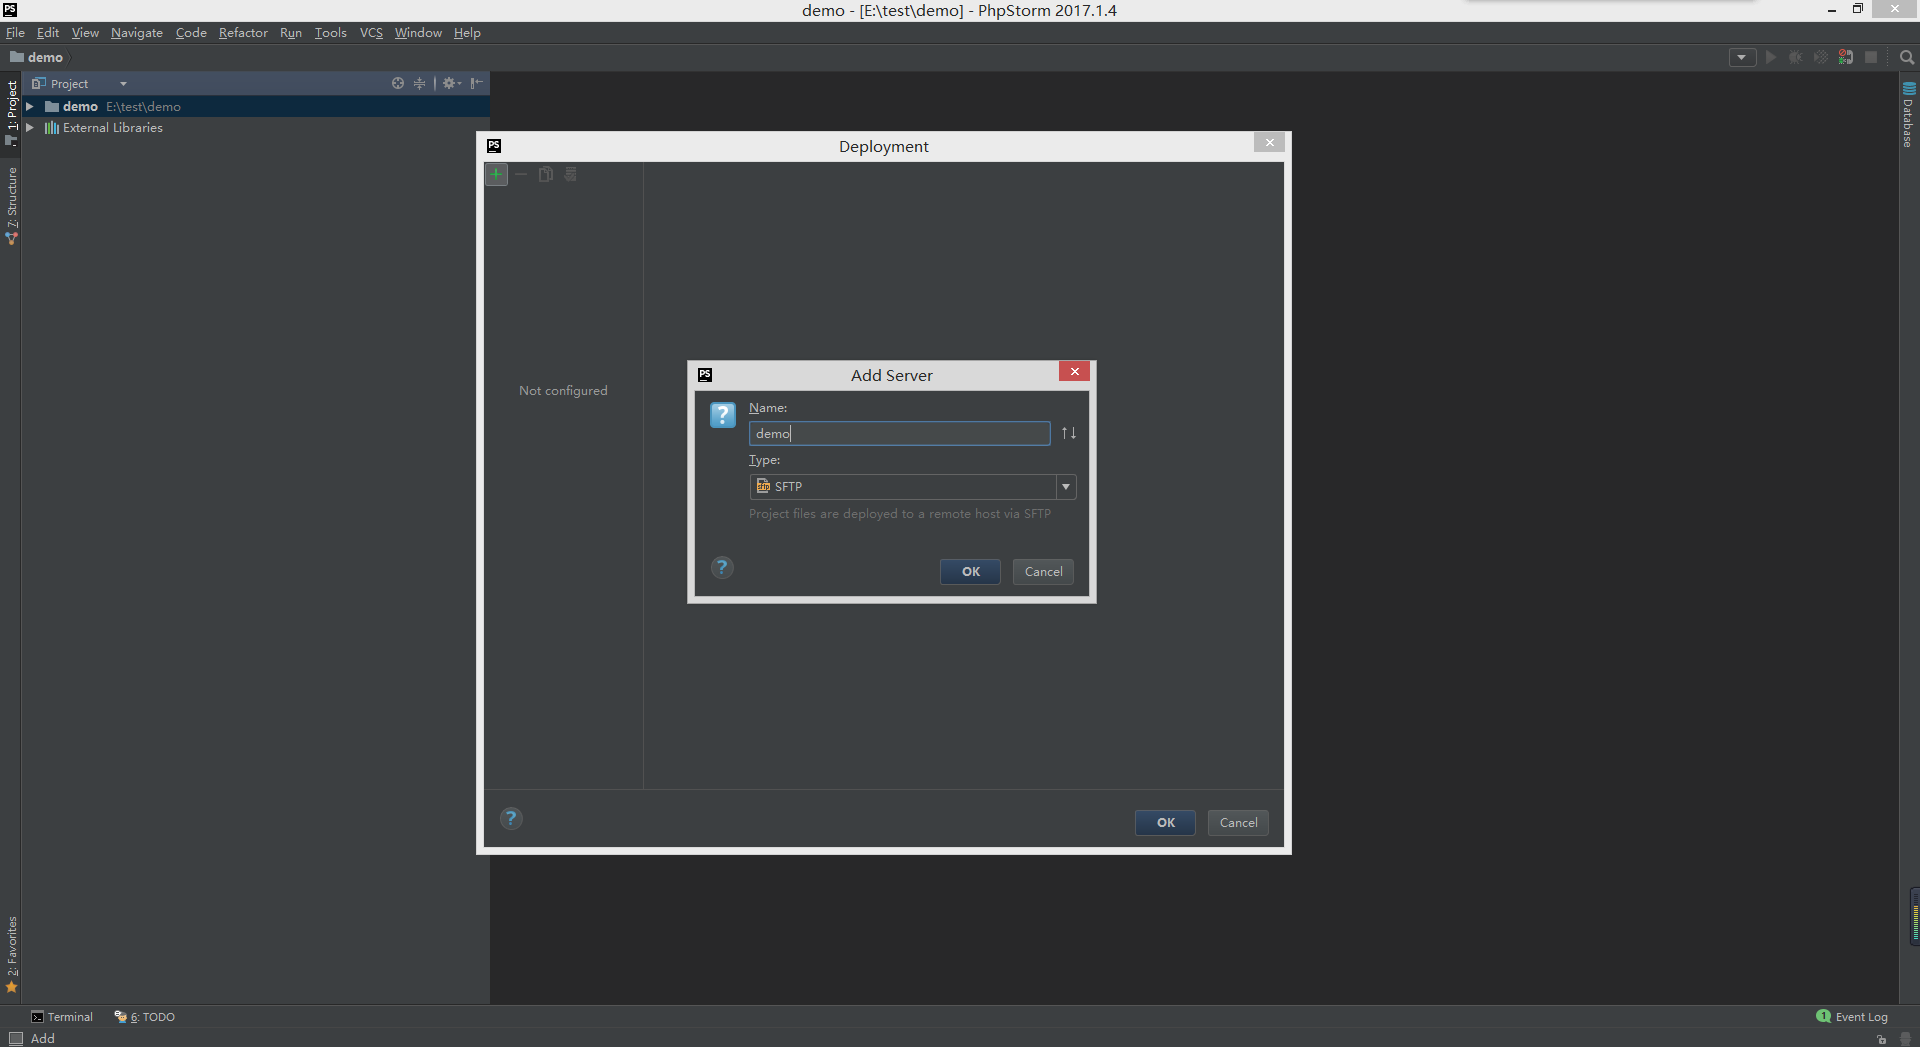
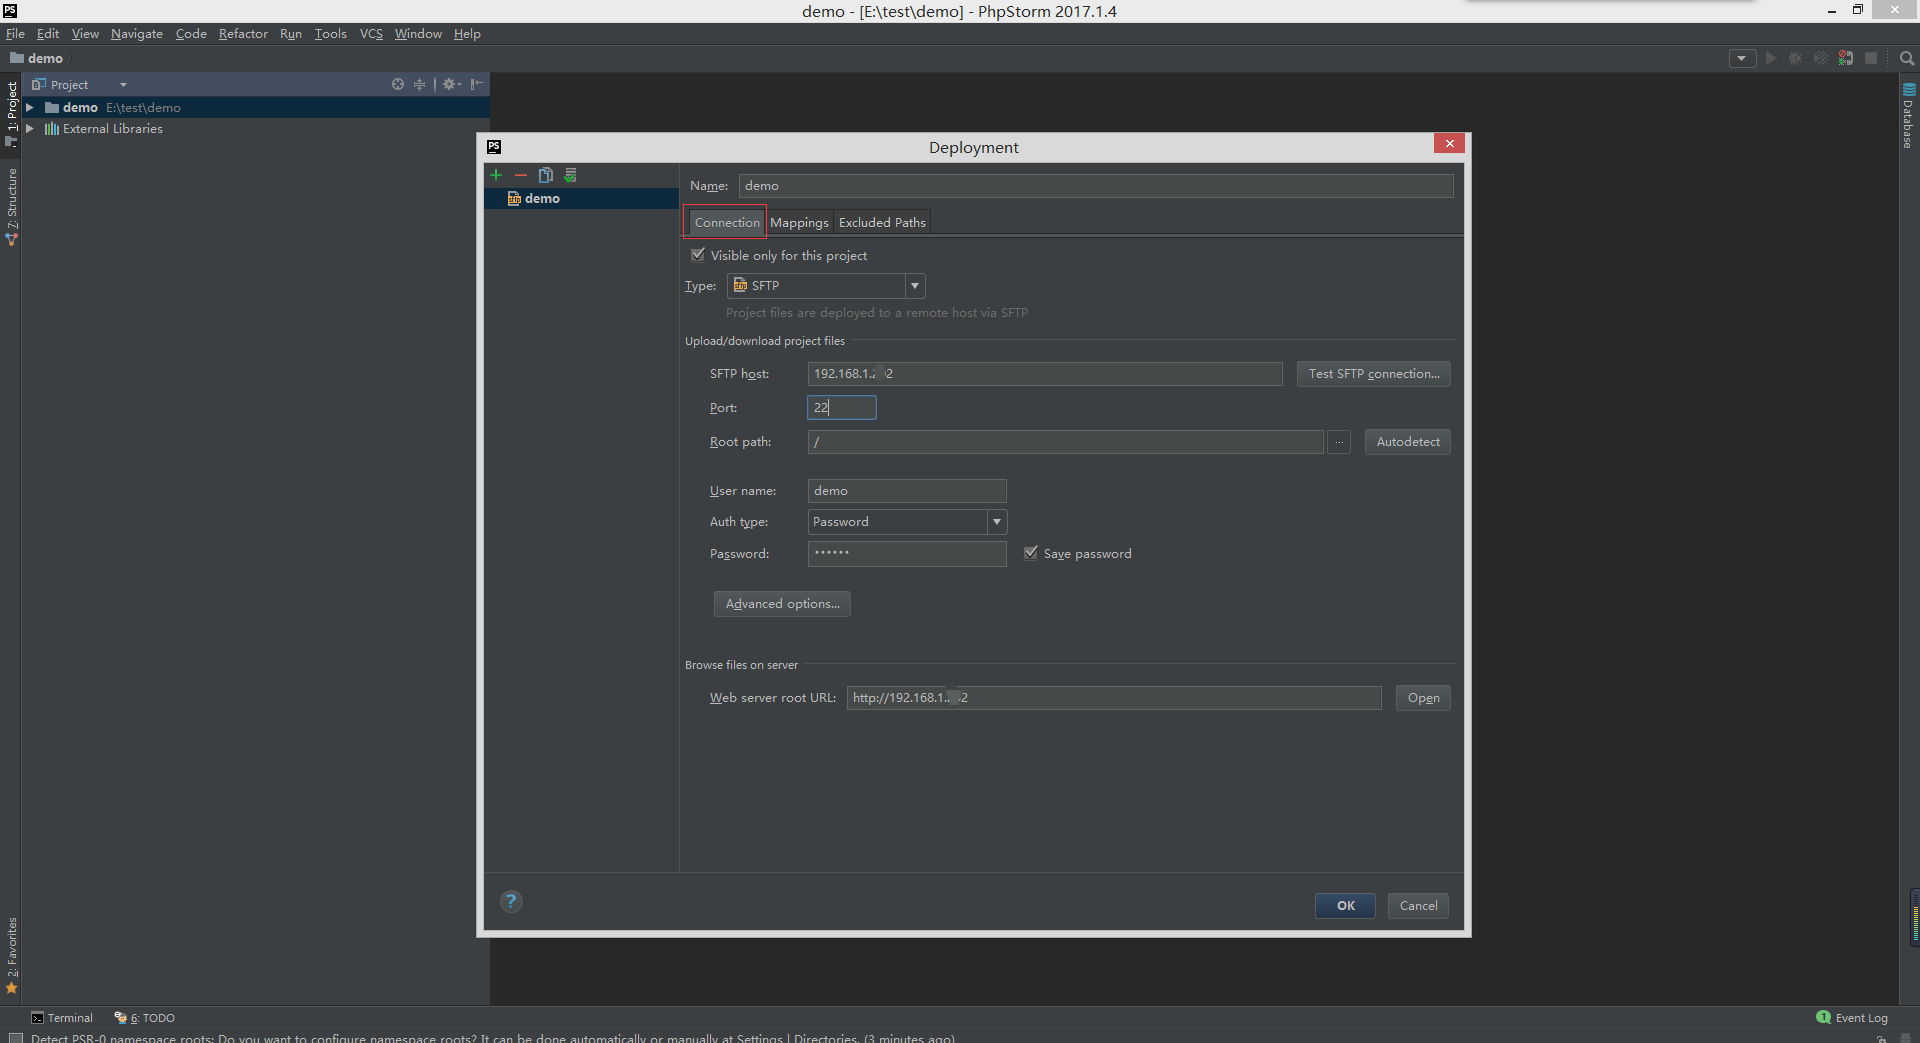
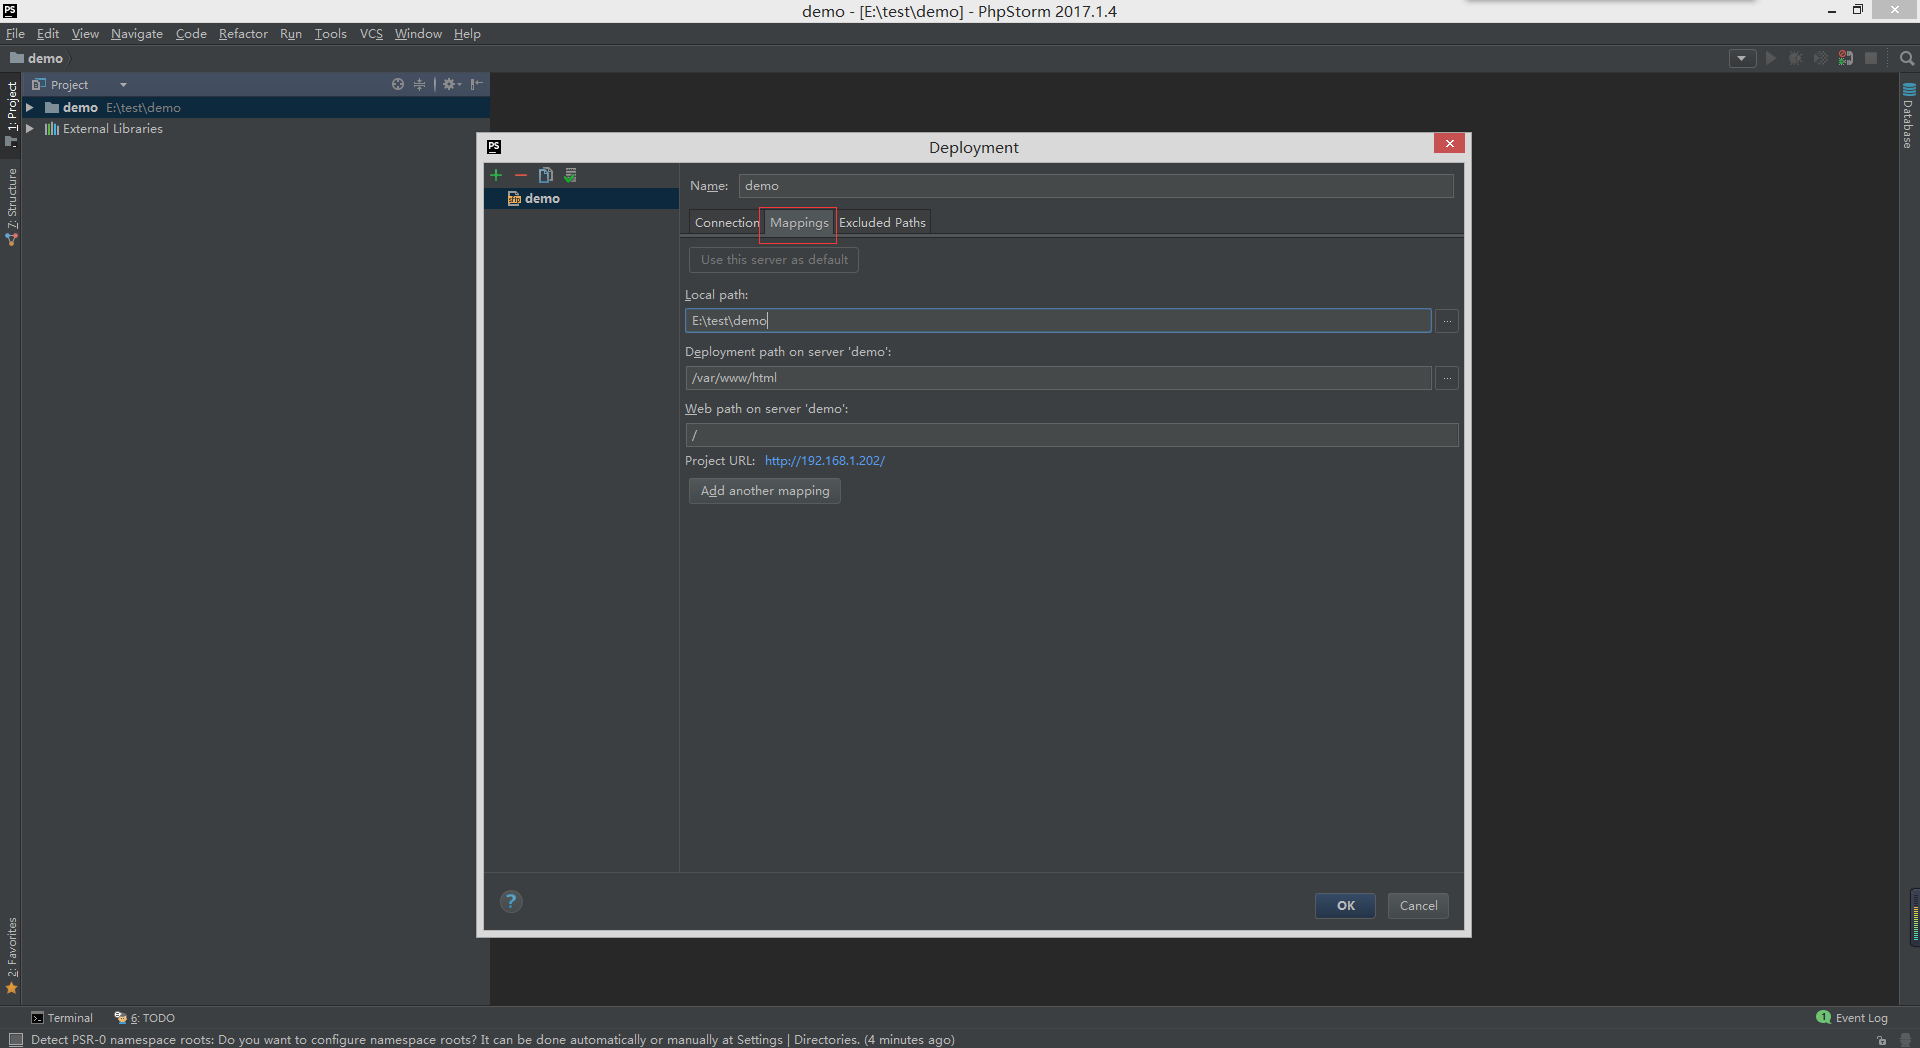
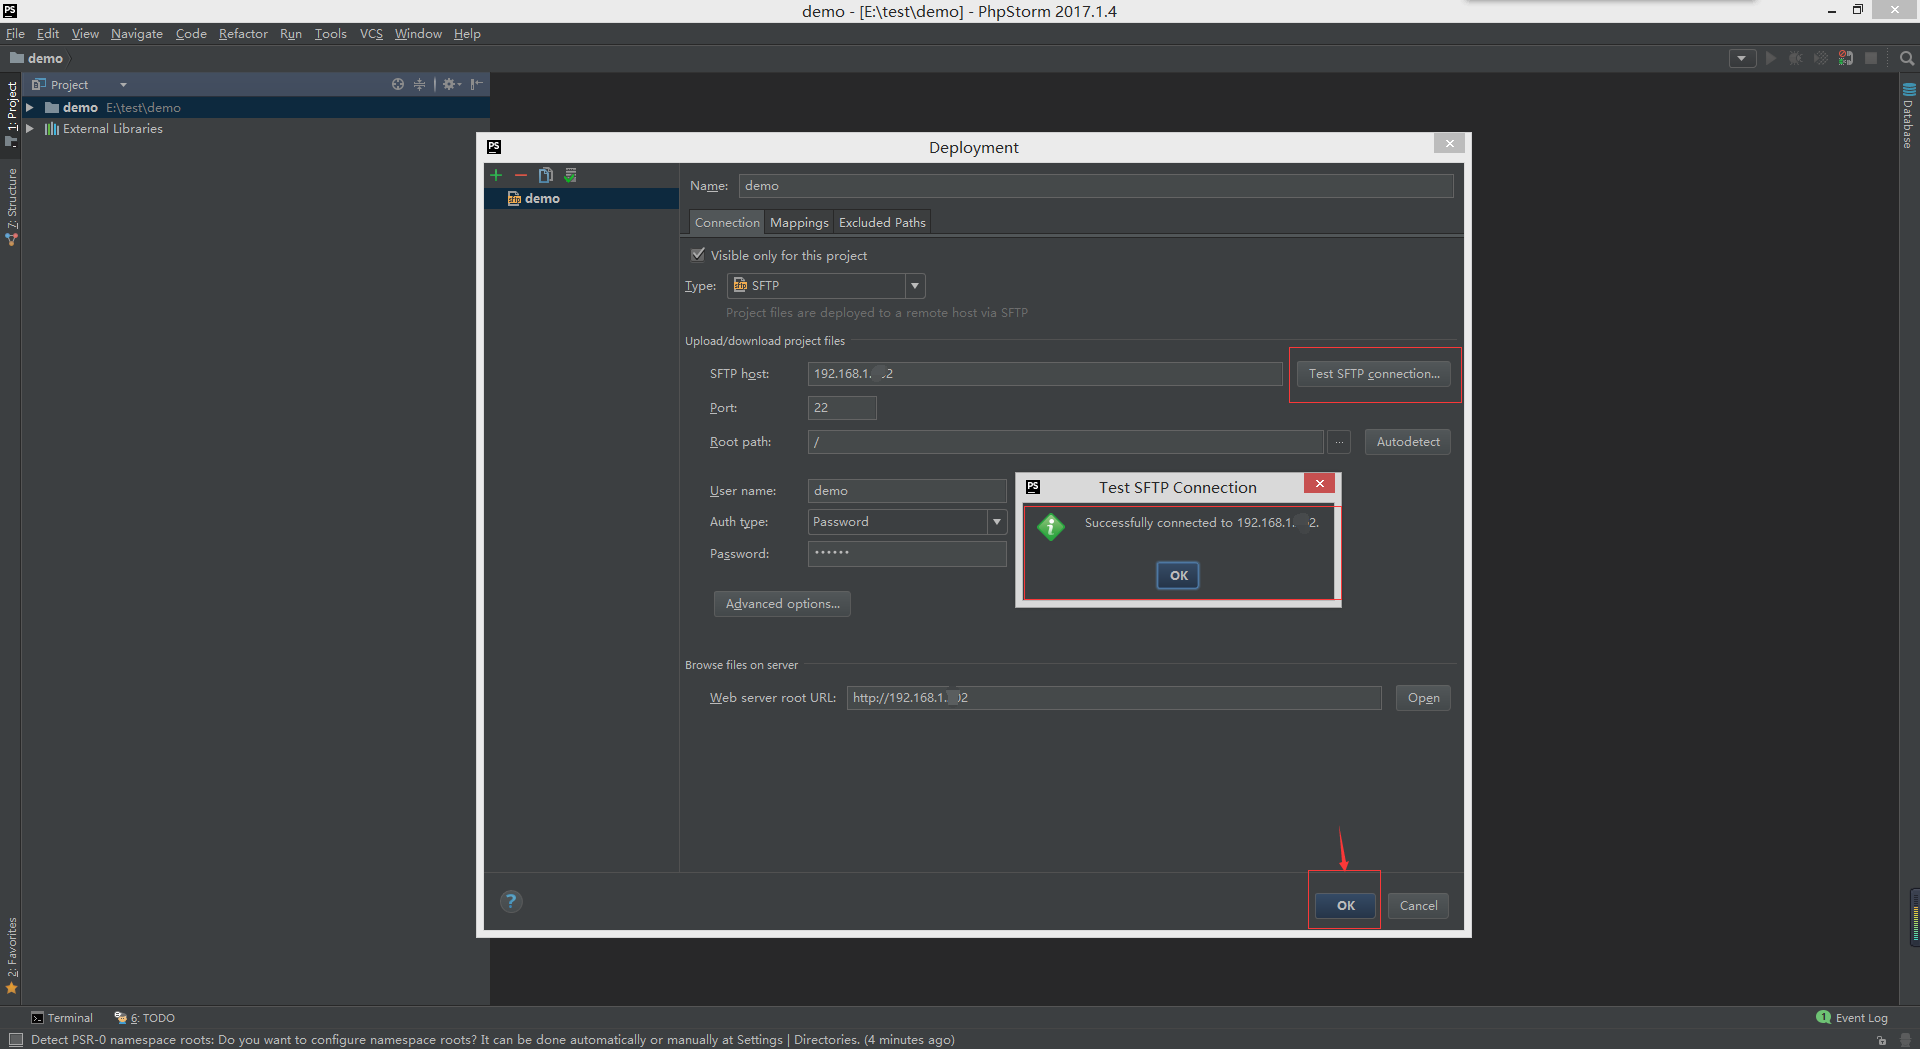

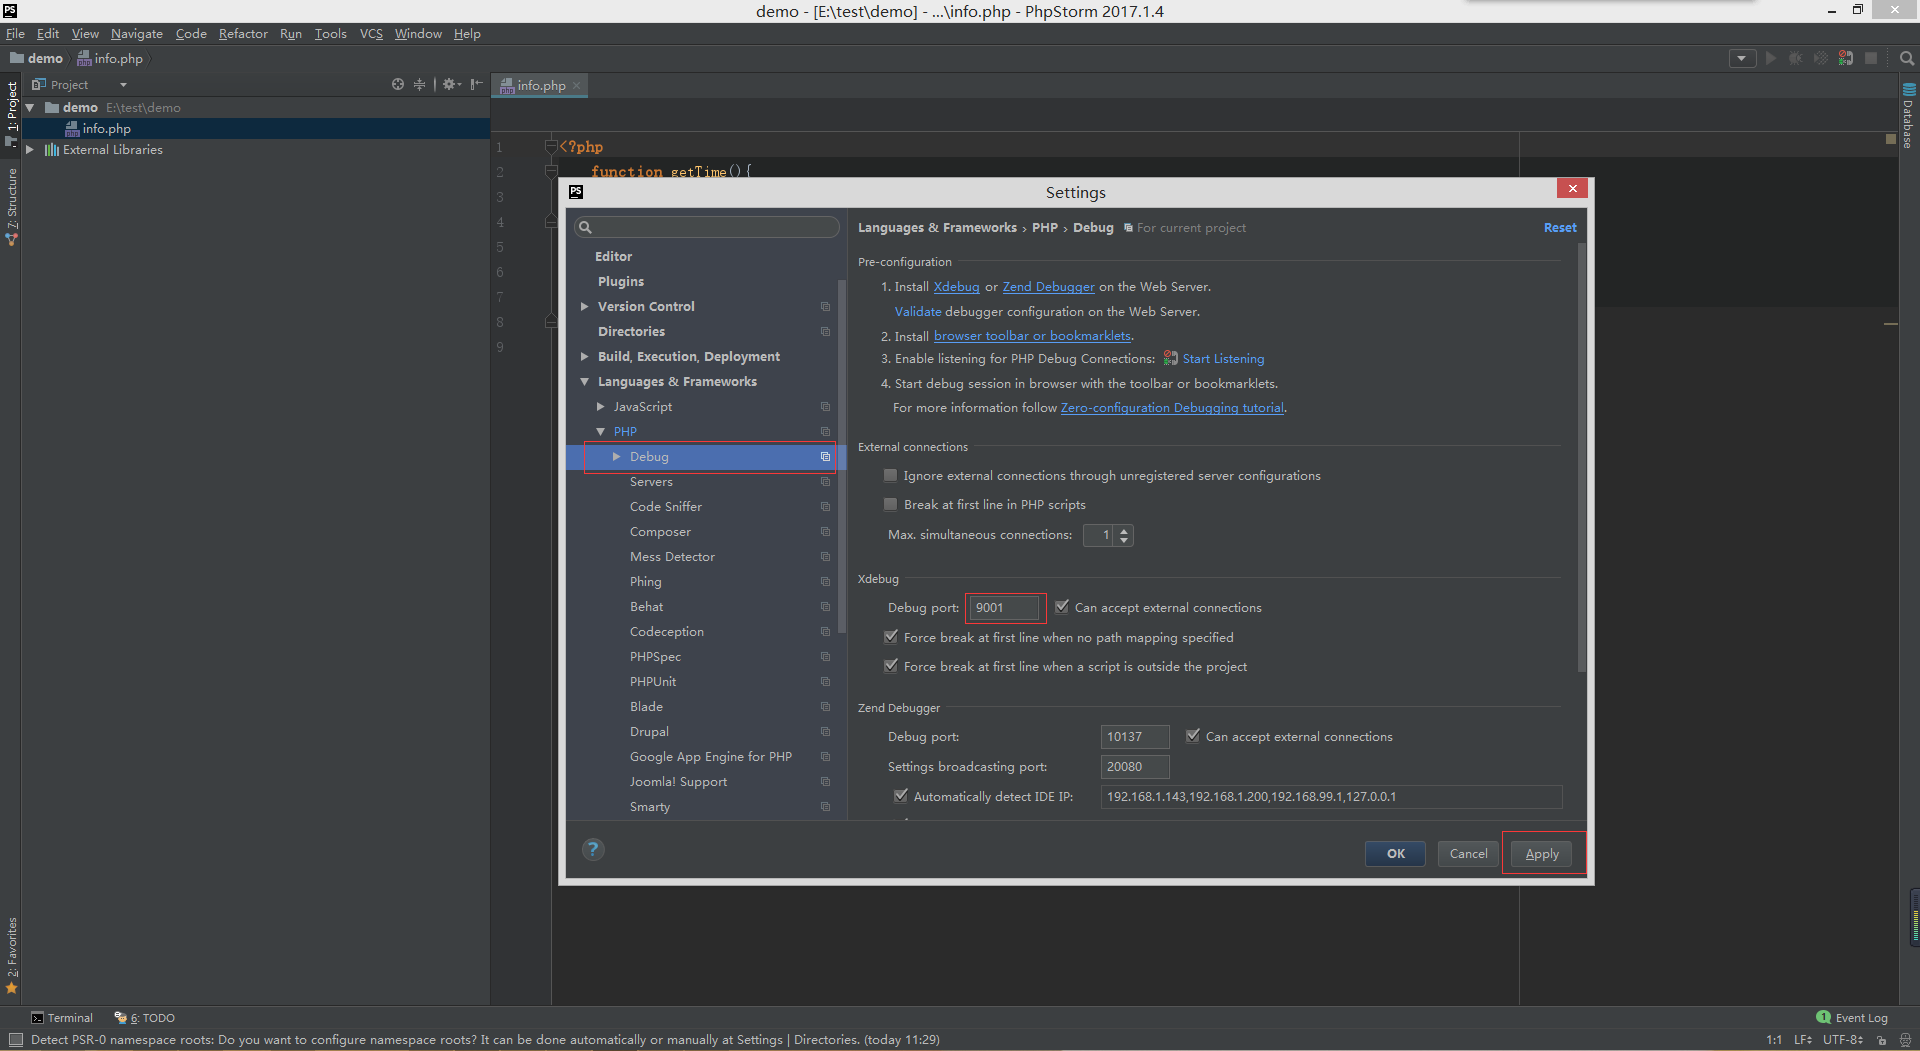
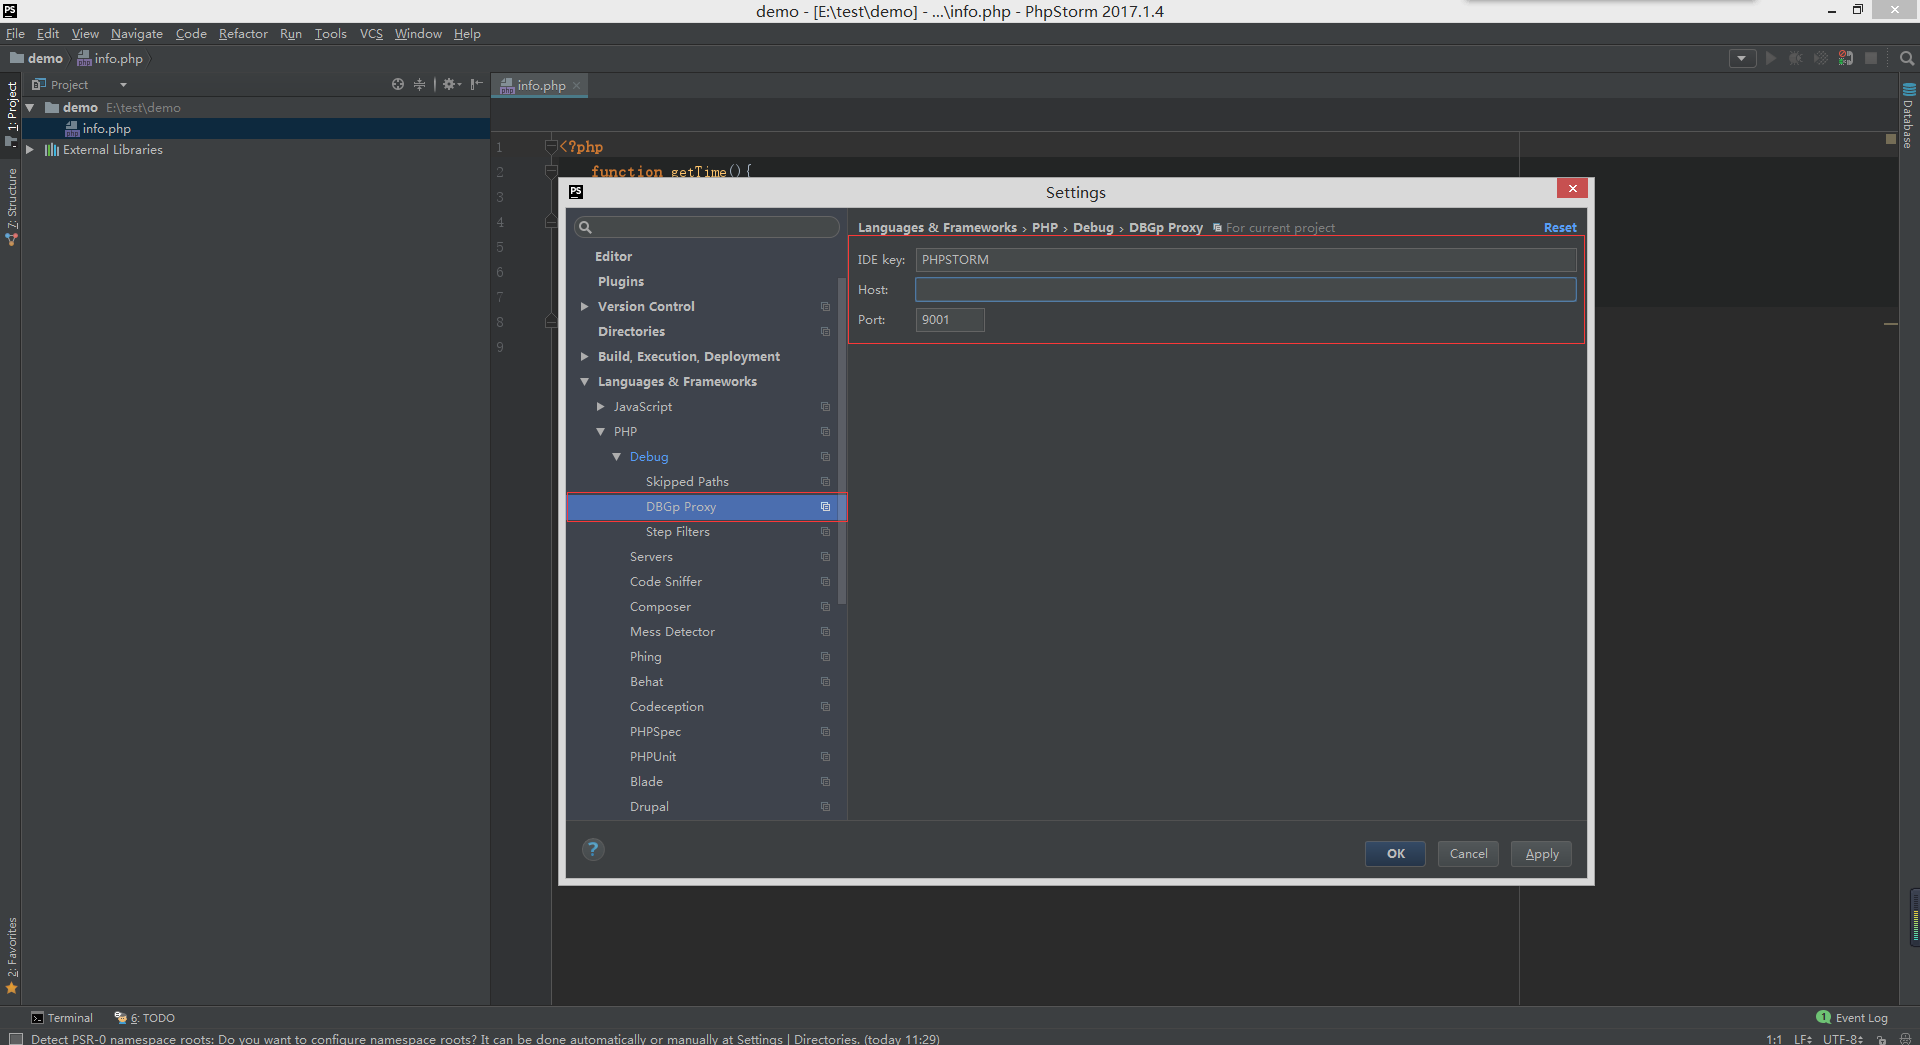
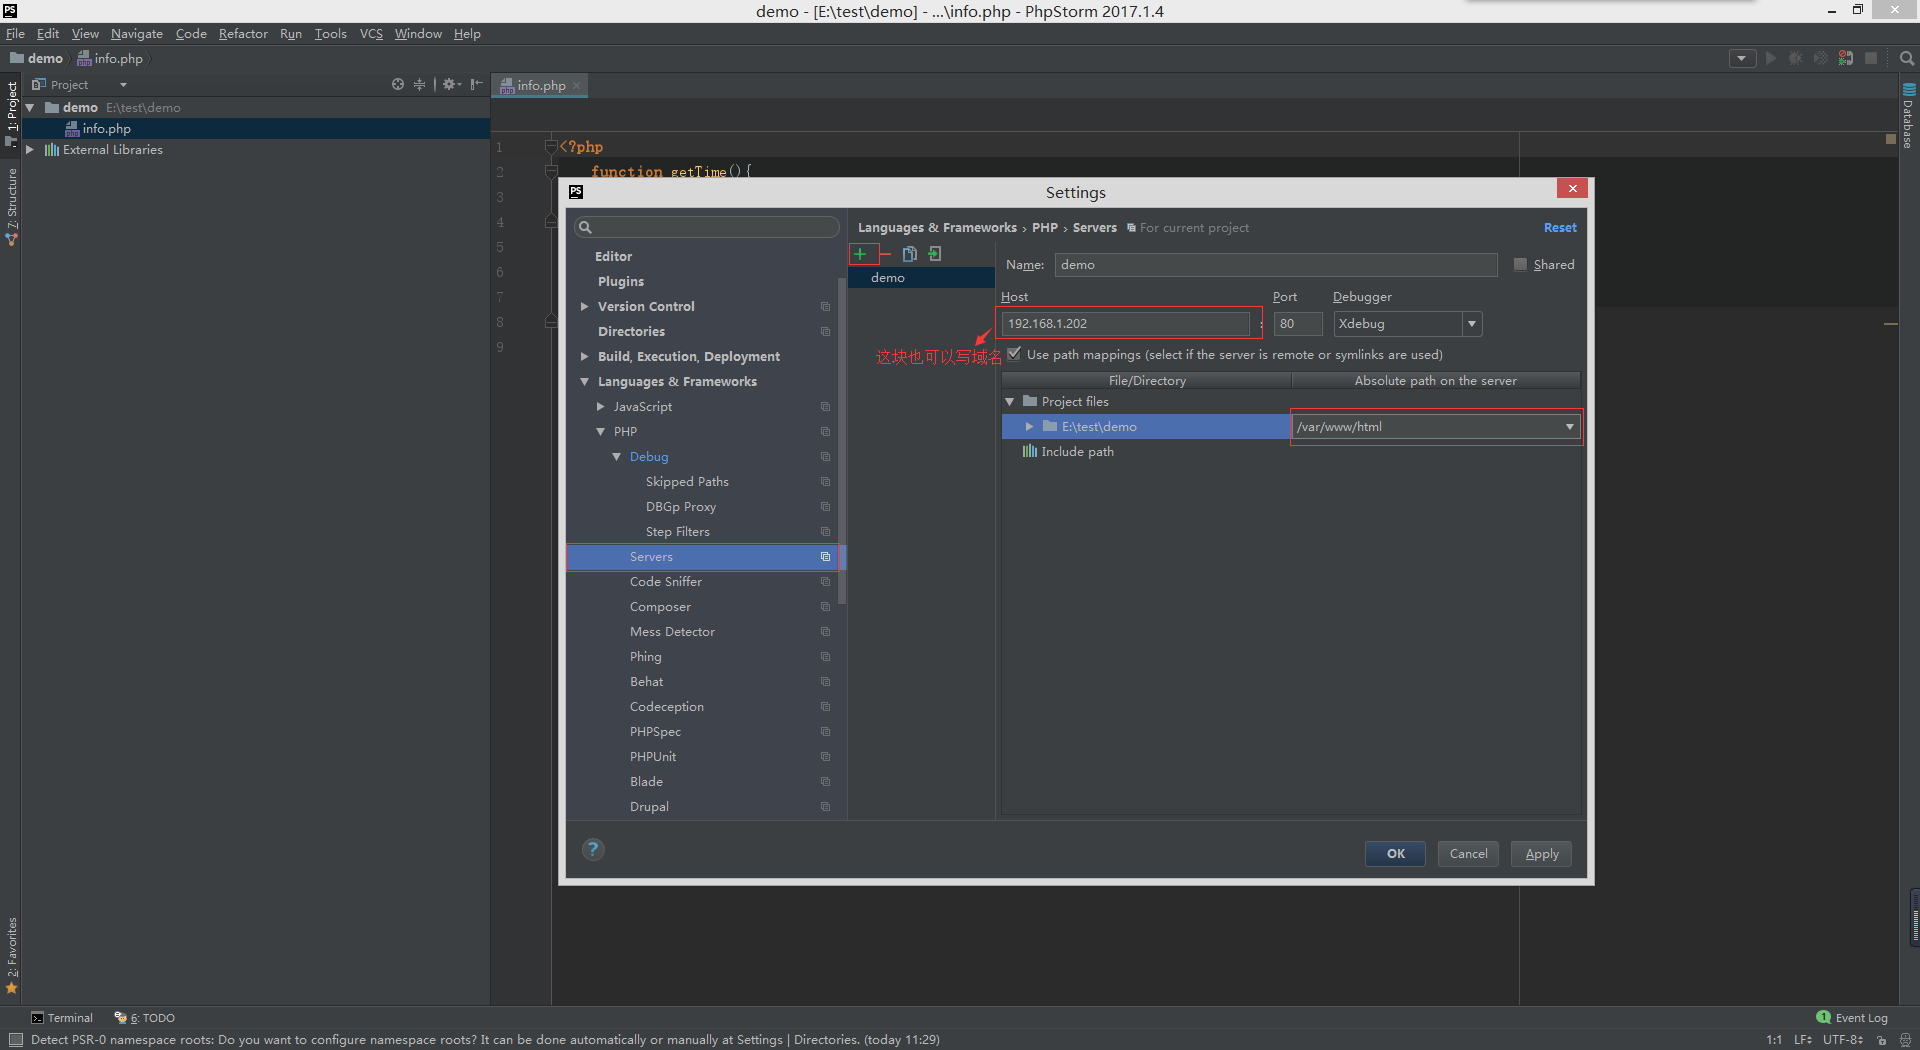
Debug配置:
浏览器选择chrome时,浏览器所需配置:
进入chrome扩展程序:chrome://extensions/
点击获取更多扩展程序,在Google商店里面搜索:jetbrain,然后安装JetBrains IDE Support插件!
当然这里多说一句,google的扩展商店可能中国未必能访问,如果遇到这种情况,你有两个选择:
一个是国内下载这个插件,http://pan.baidu.com/s/1hsI3Aw0,自行安装;
还有就是FQ了。
如图所示:

安装成功之后,会出现JB标志:

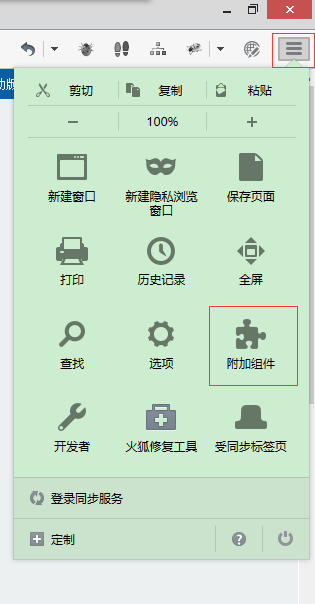
浏览器选择Firefox时,浏览器所需配置:

浏览器安装完毕后,继续配置phpstorm
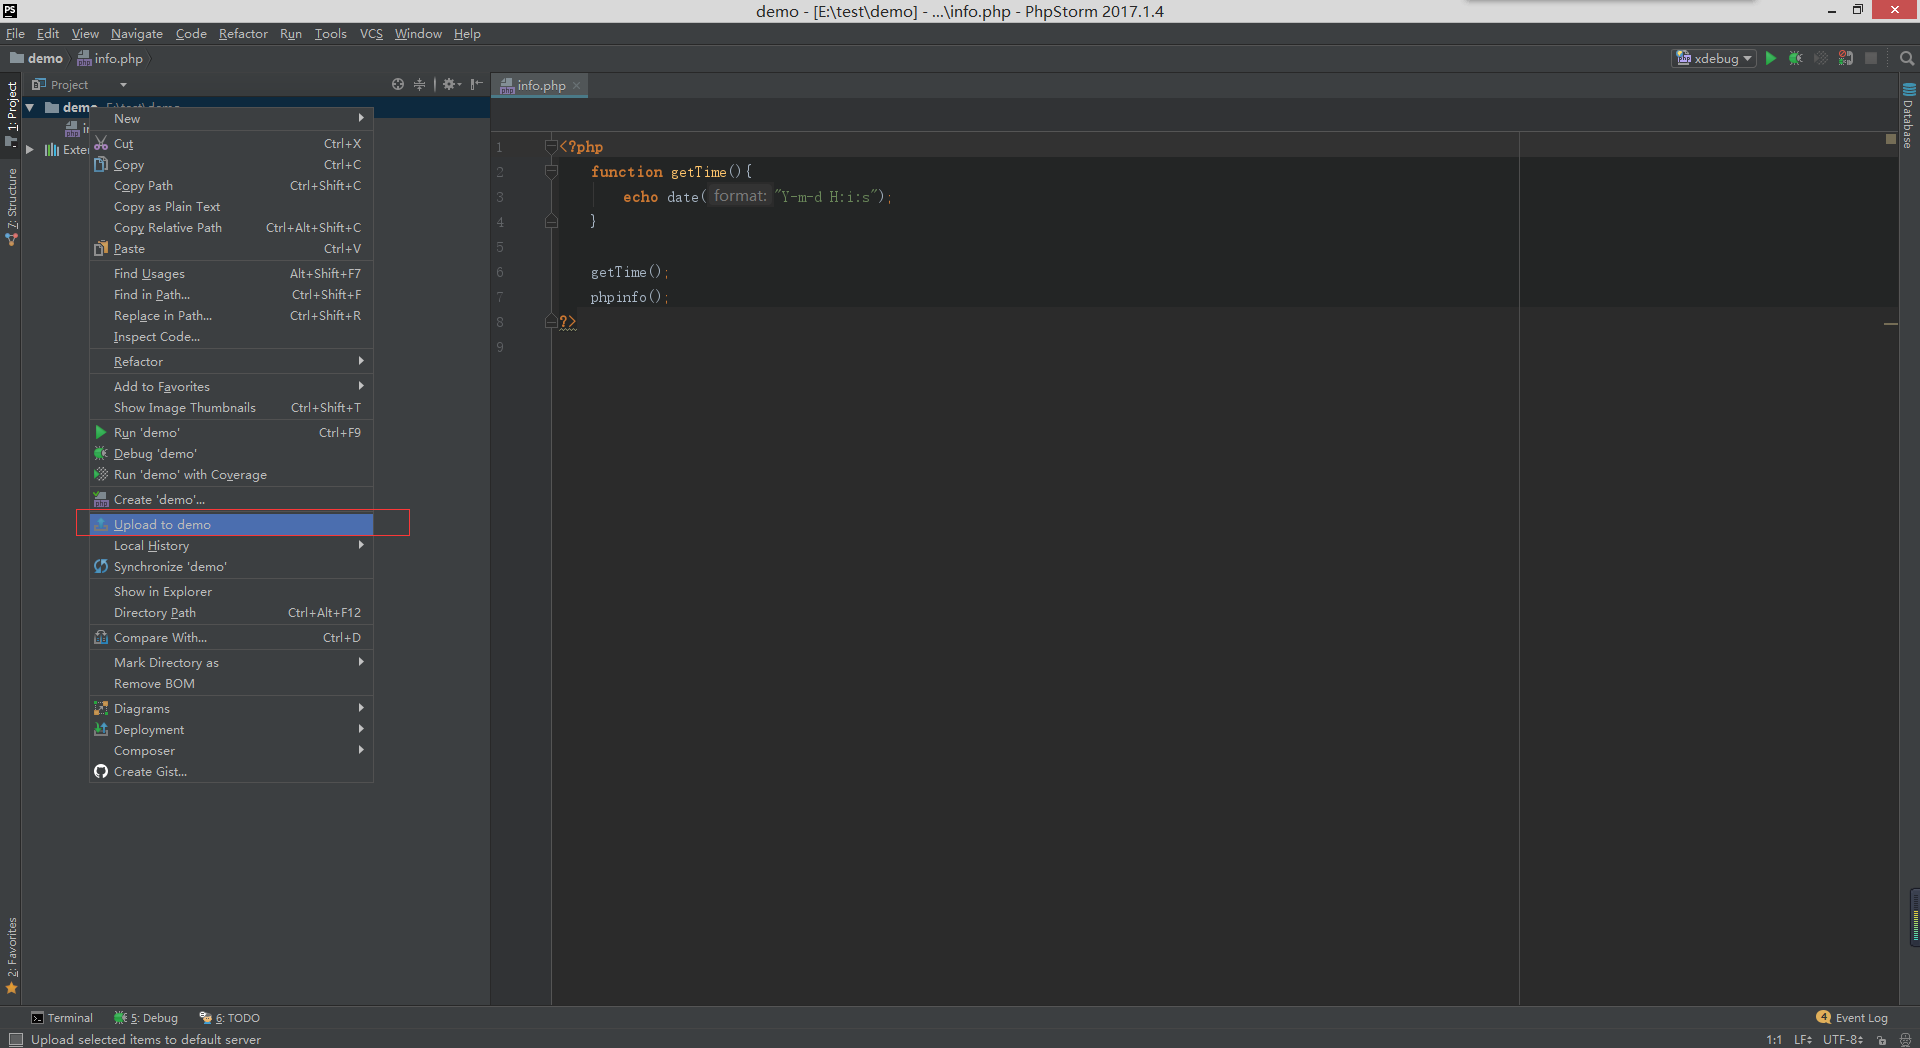
将最新代码上传到远程服务器
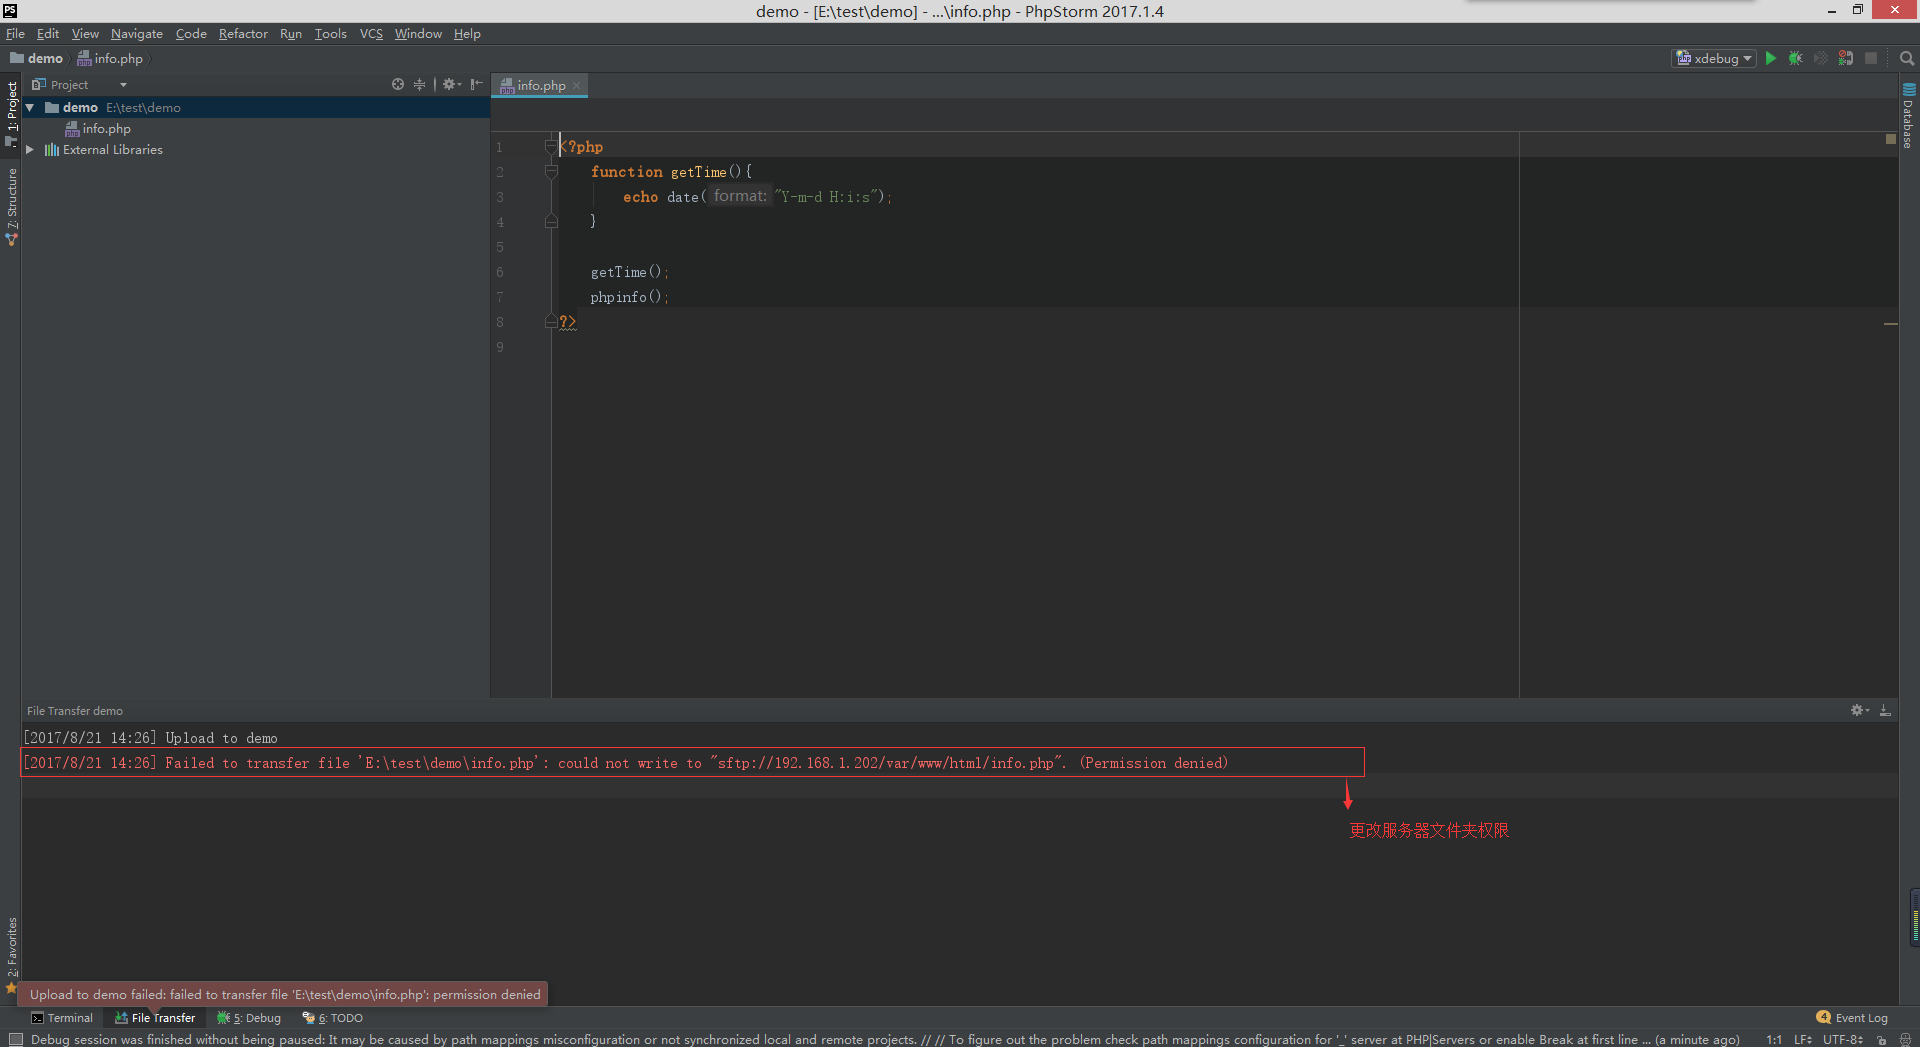
上传服务器时,报错。权限拒绝: 此时应该是服务器根目录文件(/var/www/html)夹读写权限问题。
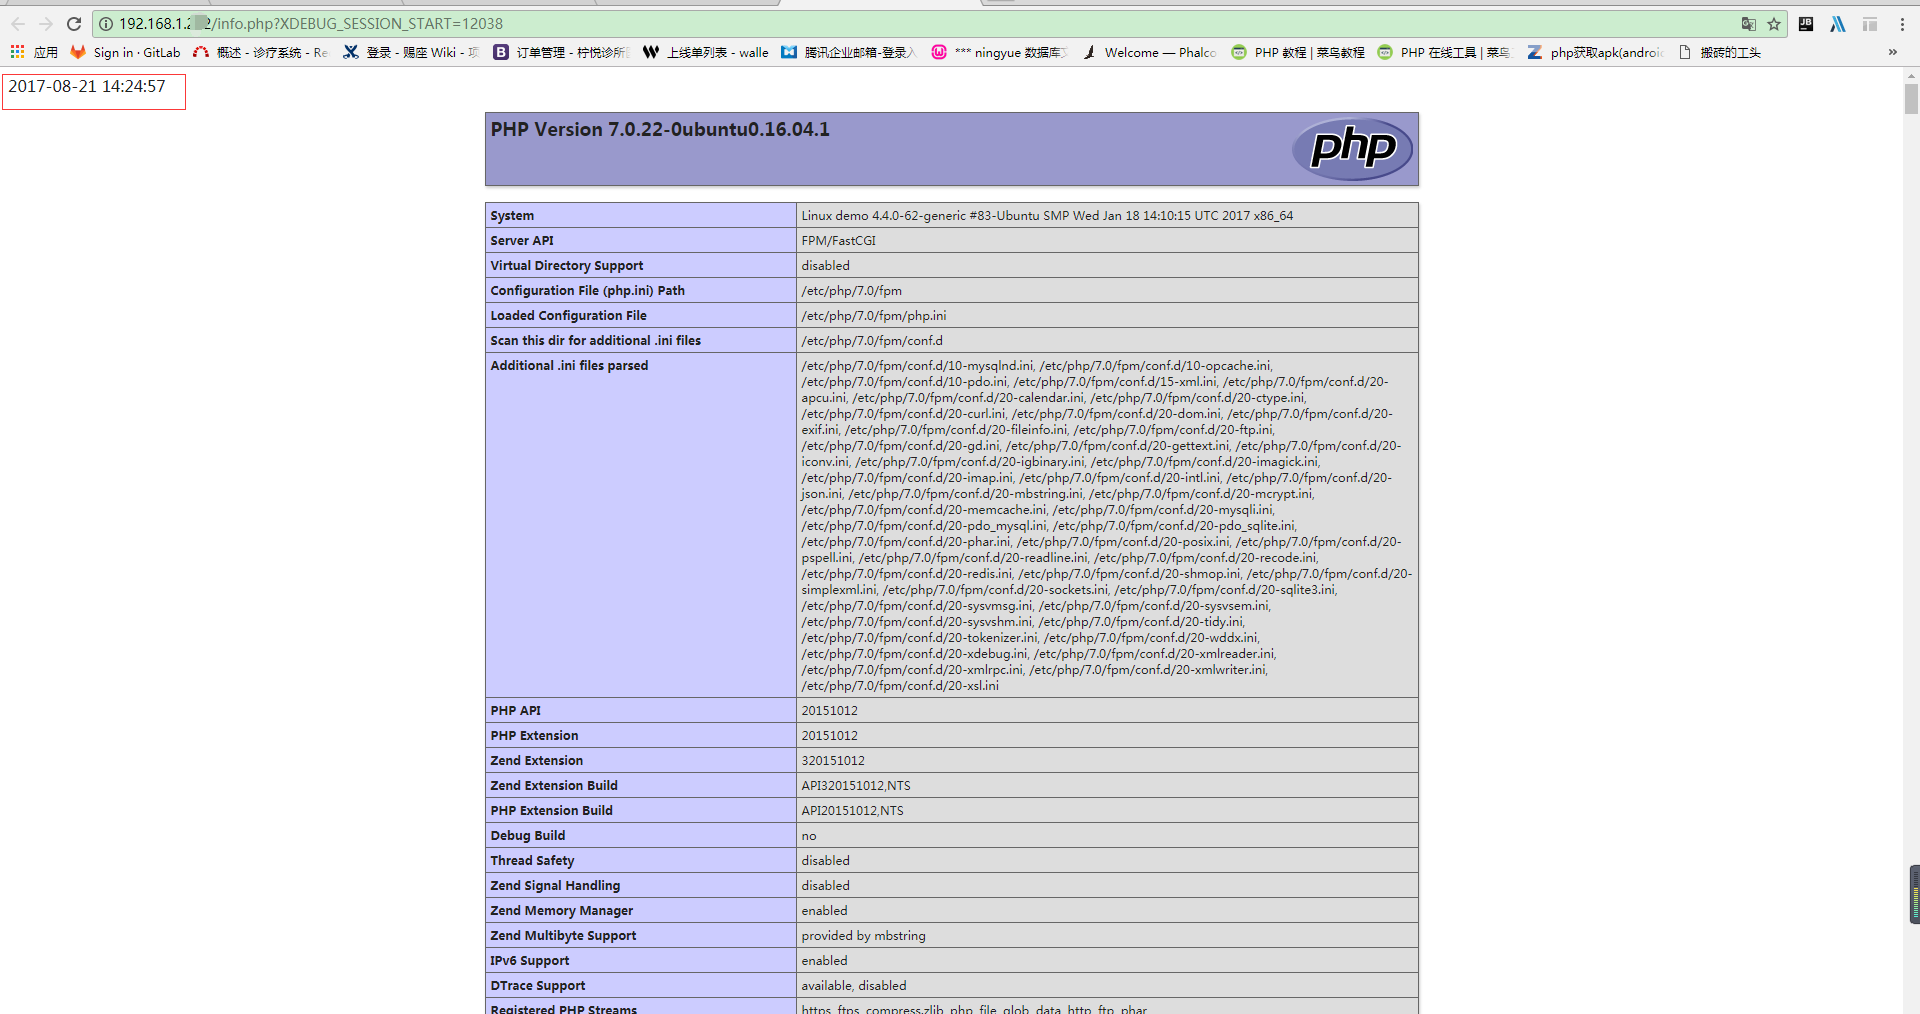
上传成功后点击debug按钮查看,是否代开页面时直接进入调试状态。

 浙公网安备 33010602011771号