从.Net到Java学习第十篇——Spring Boot文件上传和下载
图片上传
Spring Boot中的文件上传就是Spring MVC中的文件上传,将其集成进来了。
在模板目录创建一个新的页面 profile/uploadPage.html

<!DOCTYPE html>
<html xmlns:th="http://www.thymeleaf.org">
<head>
    <meta charset="UTF-8"/>
    <title>Title</title>
</head>
<body>
<h2 class="indigo-text center">Upload</h2>
<form th:action="@{/upload}" method="post" enctype="multipart/form-data" class="col m8 s12 offset-m2">
    <div class="input-field col s6">
        <input type="file" id="file" name="file"/>
    </div>
    <div class="col s6 center">
        <button class="btn indigo waves-effect waves-light"
                type="submit" name="save" >Submit
            <i class="mdi-content-send right"></i>
        </button>
    </div>
    <div class="col s12 center red-text" th:text="${error}" th:if="${error}">
        Error during upload
    </div>
    <div class="col m8 s12 offset-m2">
        <img th:src="@{${picturePath}}" width="100" height="100"/>
    </div>
</form>
</body>
</html>
除了表单中的 enctype 属性以外,并没有太多值得关注的。文件将会通过 POST 方法发送到 upload URL 上,新建控制器PictureUploadController
@Controller
@SessionAttributes("picturePath")
public class PictureUploadController {
    //跳转到上传文件的页面
    @RequestMapping("upload")
    public String uploadPage() {
        return "profile/uploadPage";
    }
    //处理文件上传
    @RequestMapping(value = "/upload", method = RequestMethod.POST)
    public String onUpload(MultipartFile file, HttpServletRequest request, RedirectAttributes redirectAttrs, Model model) throws IOException {
        if (file.isEmpty() || !isImage(file)) {
            redirectAttrs.addFlashAttribute("error", "Incorrect file.Please upload a picture.");
            return "redirect:/upload";
        }
        String filePath =  request.getSession().getServletContext().getRealPath("pictures/");
        Resource picturePath = copyFileToPictures(file,filePath);
        String _path="/pictures/"+picturePath.getFilename();
        model.addAttribute("picturePath",_path);
        return "profile/uploadPage";
    }

    private Resource copyFileToPictures(MultipartFile file,String filePath) throws IOException {
        String filename = file.getOriginalFilename();
        File tempFile = File.createTempFile("pic",
                getFileExtension(filename),  new FileSystemResource(filePath).getFile());
        try (InputStream in = file.getInputStream();
             OutputStream out = new FileOutputStream(tempFile)) {
            IOUtils.copy(in, out);
        }
        return new FileSystemResource(tempFile);
    }

    //判断上传文件的类型是否是图片
    private boolean isImage(MultipartFile file) {
        return file.getContentType().startsWith("image");
    }
    //获取上传文件的扩展名
    private static String getFileExtension(String name) {
        return name.substring(name.lastIndexOf("."));
    }
}
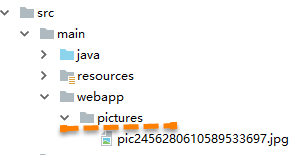
在项目的根目录下创建 pictures 目录 ,上述代码做的第一件事情是在 pictures 目录下创建一个临时文件,这个目录位于项目的根文件夹下,所以要确保该目录是存在的。在 Java 中,临时文件只是用来获取文件系统中唯一的文件标识符的,用户可以自行决定是否要删除它 。用户提交的文件将会以 MultipartFile 接口的形式注入到控制器中,这个接口提供了多个方法,用来获取文件的名称、大小及其内容 。try...with 代码块将会自动关闭流,即便出现异常也会如此,从而移除了finally 这样的样板式代码 。我们还可以定义上传文件的功能。
- multipart.maxFileSize:这定义了所允许上传文件的最大容量。尝试上传更大的文件将会出现 MultipartException,其默认值是 1Mb;
- multipart.maxRequestSize:这定义了整个 multipart 请求的最大容量,默认值是 10MB。
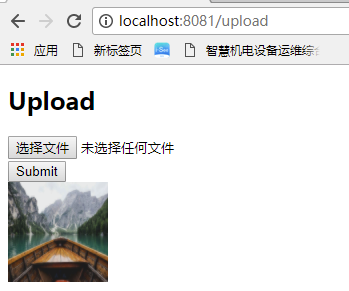
运行预览:
图片下载
修改控制器PictureUploadController,添加如下代码:
   //图片下载
    @RequestMapping(value = "/DownloadPic", method = RequestMethod.GET)
    public void Download(HttpServletRequest req,HttpServletResponse res) {
        String fileName = "pic2456280610589533697.jpg";
        res.setHeader("content-type", "application/octet-stream");
        res.setContentType("application/octet-stream");
        res.setHeader("Content-Disposition", "attachment;filename=" + fileName);
        byte[] buff = new byte[1024];
        BufferedInputStream bis = null;
        OutputStream os = null;
        try {
            os = res.getOutputStream();
            String filePath =  req.getSession().getServletContext().getRealPath("pictures/");
            bis = new BufferedInputStream(new FileInputStream(new File(filePath + fileName)));
            int i = bis.read(buff);
            while (i != -1) {
                os.write(buff, 0, buff.length);
                os.flush();
                i = bis.read(buff);
            }
        } catch (IOException e) {
            e.printStackTrace();
        } finally {
            if (bis != null) {
                try {
                    bis.close();
                } catch (IOException e) {
                    e.printStackTrace();
                }
            }
        }
        System.out.println("success");
    }
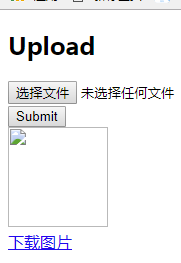
修改uploadPage.html,添加:
<a href="/DownloadPic">下载图片</a>
| 博客地址: | http://www.cnblogs.com/jiekzou/ | |
| 博客版权: | 本文以学习、研究和分享为主,欢迎转载,但必须在文章页面明显位置给出原文连接。 如果文中有不妥或者错误的地方还望高手的你指出,以免误人子弟。如果觉得本文对你有所帮助不如【推荐】一下!如果你有更好的建议,不如留言一起讨论,共同进步! 再次感谢您耐心的读完本篇文章。 |
|
| 其它: |
.net-QQ群4:612347965
java-QQ群:805741535
H5-QQ群:773766020 |

分类:
Java


【推荐】国内首个AI IDE,深度理解中文开发场景,立即下载体验Trae
【推荐】编程新体验,更懂你的AI,立即体验豆包MarsCode编程助手
【推荐】抖音旗下AI助手豆包,你的智能百科全书,全免费不限次数
【推荐】轻量又高性能的 SSH 工具 IShell:AI 加持,快人一步
· 如何编写易于单元测试的代码
· 10年+ .NET Coder 心语,封装的思维:从隐藏、稳定开始理解其本质意义
· .NET Core 中如何实现缓存的预热?
· 从 HTTP 原因短语缺失研究 HTTP/2 和 HTTP/3 的设计差异
· AI与.NET技术实操系列:向量存储与相似性搜索在 .NET 中的实现
· 周边上新:园子的第一款马克杯温暖上架
· Open-Sora 2.0 重磅开源!
· 分享 3 个 .NET 开源的文件压缩处理库,助力快速实现文件压缩解压功能!
· Ollama——大语言模型本地部署的极速利器
· DeepSeek如何颠覆传统软件测试?测试工程师会被淘汰吗?