

python Tkinter组件 - Label
Label
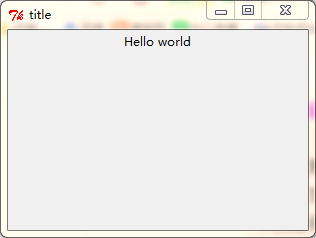
 1 #!/usr/bin/python
 2 # -*- coding:utf-8 -*-
 3
 4 from Tkinter import *
 5
 6 root = Tk()
 7 root.title('title')
 8 root.geometry('300x200')
 9 label = Label(root, text = 'Hello world')
10 label.pack()
11 root.mainloop()
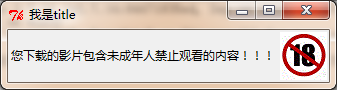
label 中增加图片的方法 :
使用image 属性,代码:
from Tkinter import *


root = Tk()
root.title('我是title')
#root.geometry()
label = Label(root,text='您下载的影片包含未成年人禁止观看的内容!!!' )

photo = PhotoImage(file='C:\\Users\\Administrator\\Desktop\\timg.gif')    #python 默认支持gif格式
imgLabel = Label(root,image = photo)
imgLabel.pack(side = RIGHT)
label.pack(side = LEFT)
root.mainloop()

#这种方法是创建两个 Label
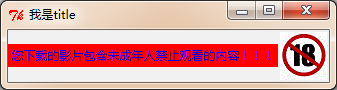
改变前背景色 和 后背景色
前背景色 fg (一般就是打酱油的,前背景色其实就是字体颜色)
后背景色 bg
 1 #!/usr/bin/python
 2 # -*- coding:utf-8 -*-
 3
 4 from Tkinter import *
 5
 6
 7 root = Tk()
 8 root.title('我是title')
 9 #root.geometry()
10 label = Label(root,text='您下载的影片包含未成年人禁止观看的内容!!!',\
11               bg = 'red',fg = 'blue' )                                  #设置前背景色,和后背景色
12
13 photo = PhotoImage(file='C:\\Users\\Administrator\\Desktop\\timg.gif')
14 imgLabel = Label(root,image = photo)
15 imgLabel.pack(side = RIGHT)
16 label.pack(side = LEFT)
17 root.mainloop()
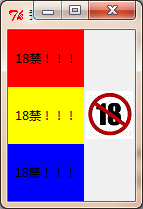
设置 宽度 与 高度
宽度 width
高度 height
 1 #!/usr/bin/python
 2 # -*- coding:utf-8 -*-
 3
 4 from Tkinter import *
 5
 6
 7 root = Tk()
 8 root.title('我是title')
 9 #root.geometry()
10 label = Label(root,text='18禁!!!',\
11               bg = 'red',width = 10,height = 3 )   # 设置宽度和高度
12 label2 = Label(root,text='18禁!!!',\
13               bg = 'blue',width = 10,height = 3 )
14 label3= Label(root,text='18禁!!!',\
15               bg = 'yellow',width = 10,height = 3 )
16
17 photo = PhotoImage(file='C:\\Users\\Administrator\\Desktop\\timg.gif')
18 imgLabel = Label(root,image = photo)
19 imgLabel.pack(side = RIGHT)
20 label.pack(side = TOP)
21 label3.pack(side = TOP)
22 label2.pack(side = TOP)
23 root.mainloop()
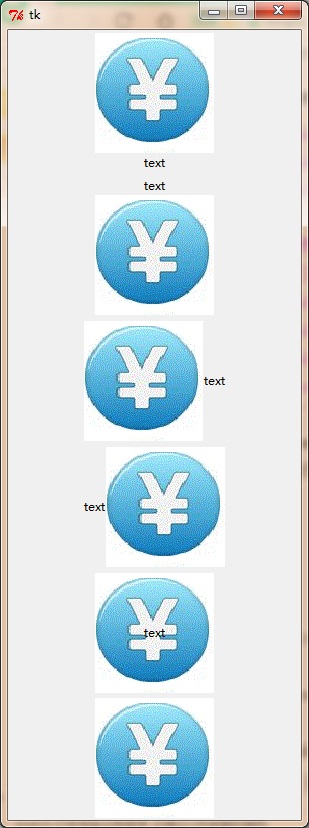
同时使用 文字和 图片
compound 指定文本 text与图片image 如何在 Label 上显示
 1 from Tkinter import *
 2
 3 root = Tk()
 4
 5 photo = PhotoImage(file = 'C:\\Users\\Administrator\\Desktop\\timg.gif')
 6 Label(root,text='text',compound='top',image= photo).pack()
 7 Label(root,text='text',compound='bottom',image= photo).pack()
 8 Label(root,text='text',compound='left',image= photo).pack()
 9 Label(root,text='text',compound='right',image= photo).pack()
10 Label(root,text='text',compound='center',image= photo).pack()
11 Label(root,text='text',compound='none',image= photo).pack()
12 root.mainloop()
经常用到的是 compound = center,
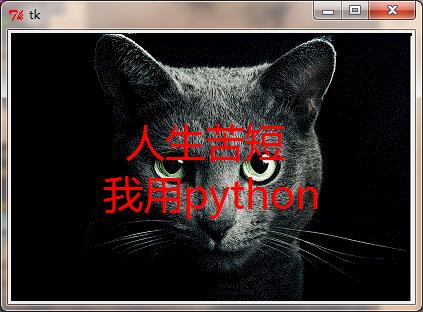
代码是
 1 #!/usr/bin/python
 2 # -*-coding:utf-8 -*-
 3
 4 from Tkinter import *
 5
 6 root = Tk()
 7
 8 photo = PhotoImage(file = 'C:\\Users\\Administrator\\Desktop\\timg.gif')
 9
10 Label(root,text='人生苦短 \n我用python',image=photo,fg = 'red',\
11       compound = CENTER,font = ('微软雅黑',30)).pack()
12
13 root.mainloop()
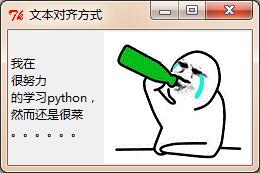
文字对齐的设置 justify
文字在Label中 默认居中。 justify 可以设置文字 左对齐 和右对齐 ,直接上代码
 1 #!/usr/bin/python
 2 # -*- coding:utf-8 -*-
 3
 4 from Tkinter import *
 5 root = Tk()
 6 root.title('文本对齐方式')
 7
 8 photo = PhotoImage(file = 'C:\\Users\\Administrator\\Desktop\\timg.gif')
 9 Label(root,text='我在\n很努力\n的学习python,\n然而还是很菜\n。。。。。。',justify\
10 ='left').pack(side = LEFT)    #设置为左对齐 justify = ‘left’ 同理右对齐为justify = ‘right’

11 Label2=Label(root,image = photo).pack(side=RIGHT) 12 13 root.mainloop()
posted on 2017-11-22 22:59 jiayou888888 阅读(9401) 评论(0) 编辑 收藏 举报

