

二、环境搭建(二)
在“一”中,对树莓派的基本使用环境进行搭建后,已经可以实现PC通过SSH对树莓派进行远程连接,但在使用命令行安装一些工具的时候,发现出现了无法解析域名的情况;虽然后来发现是因为通过网线将PC与树莓派连接后,及时显示有连接WIFI,但是树莓派却无法通过WIFI上网,拔掉网线重启设备后即可恢复上网,但是还是想将故障排除的过程记录一下。
注意:在树莓派无法连接网络的情况下,需要对某个文件进行编辑时可以使用 nano ,该工具保存方式为Ctrl + o -> Ctrl + x 或者 Ctrl + x -> Y -> Enter
针对无法解析域名的情况,百度查询后的解决方法入下:
①修改配置文件
使用命令:
1 | sudo vim /etc/resolv.conf |
将文件内容改为:
1 | nameserver 8.8.8.8 |
保存退出后执行:
1 | sudo /etc/init.d/networking restart |
②修改配置文件
使用命令:
1 | sudo nano /etc/dhcpcd.conf |
将文件内容进行修改(找到static domain_name_servers,将其值改为8.8.8.8)
1 | static domain_name_servers = 8.8.8.8 |
保存退出并重启(需重启后方才生效)
③换源(参考:https://blog.csdn.net/qq_41676577/article/details/112856422)
换源的原因在于树莓派本身自带的源访问的是国外网址,在下载某些工具的时候常会遇到无法访问和访问超时的情况,更换为国内的源能够有效解决这个问题,我这里尝试更换了华为云和清华的源,具体细节如下:
使用命令:
1 | sudo nano /etc/apt/sources.List |
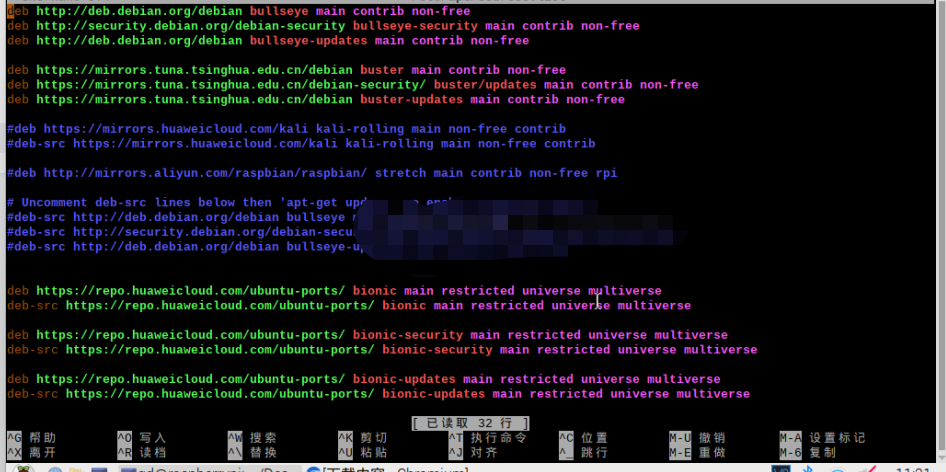
我在原有的基础上添加了如下源(之所以添加这么多源,是因为有些源无法使用,我也懒得去一个个删掉):
1 2 3 4 5 6 7 8 9 10 11 12 | deb https://repo.huaweicloud.com/ubuntu-ports/ bionic main restricted universe multiversedeb-src https://repo.huaweicloud.com/ubuntu-ports/ bionic main restricted universe multiversedeb https://repo.huaweicloud.com/ubuntu-ports/ bionic-security main restricted universe multiversedeb-src https://repo.huaweicloud.com/ubuntu-ports/ bionic-security main restricted universe multiversedeb https://repo.huaweicloud.com/ubuntu-ports/ bionic-updates main restricted universe multiversedeb-src https://repo.huaweicloud.com/ubuntu-ports/ bionic-updates main restricted universe multiversedeb https://mirrors.tuna.tsinghua.edu.cn/debian buster main contrib non-freedeb https://mirrors.tuna.tsinghua.edu.cn/debian-security/ buster/updates main contrib non-freedeb https://mirrors.tuna.tsinghua.edu.cn/debian buster-updates main contrib non-free |
添加完成后Ctrl + o Ctrl + x 保存退出
执行命令:
1 | sudo apt-get update |
其实到目前为止,我也不知道前面的几种方式中哪种可以解决树莓派无法上网的问题,因为最后我是通过拔网线解决的;
一通瞎搅合之后,反正目前来讲树莓派是可以上网了,既然可以上网了,那肯定首先是要安装好开发工具(因为本人不怎么会python,也不是很喜欢Vim的风格,所以新装了个VScode),安装方式如下:
VScode安装:
①、下载安装包:https://code.visualstudio.com/Download
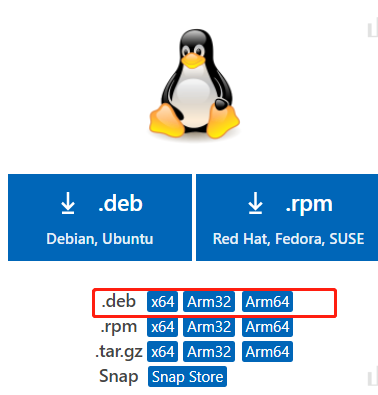
②安装方法也比较简单,直接使用命令:
1 | sudo dpkg -i /指定目录/安装包名 |
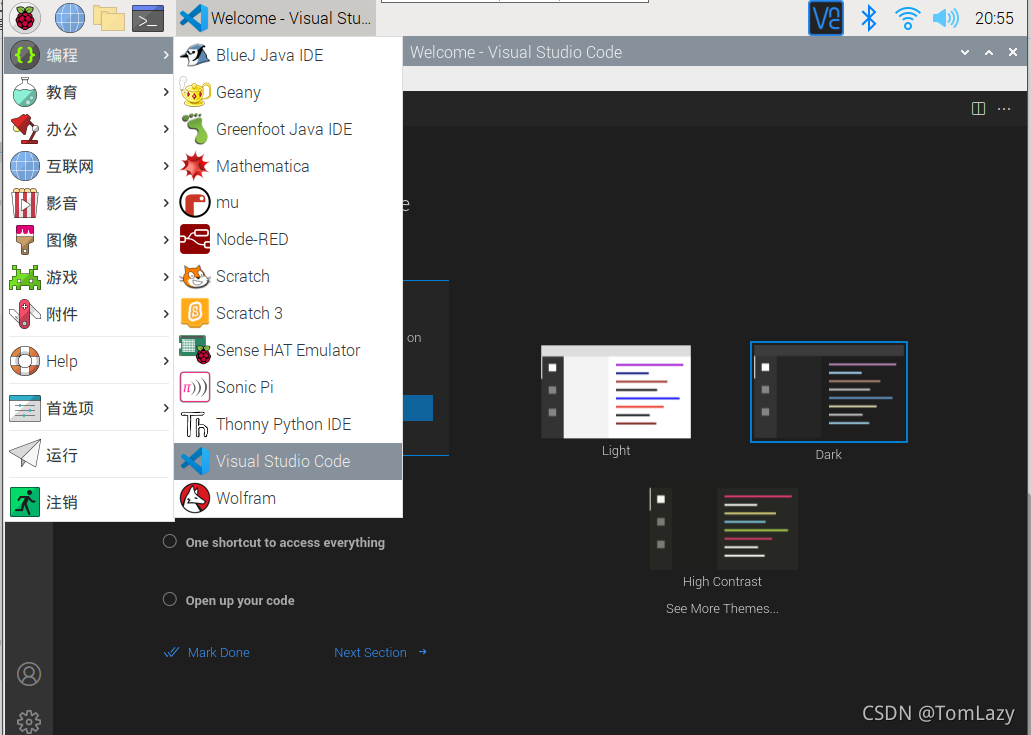
③安装完成后可在菜单中找到VScode
开启FTP服务:
为了方便PC机与树莓派之间的文件传输,需要开启树莓派的FTP服务,开启方式如下:
①FTP Server安装
1 | sudo apt-get install vstfpde |
②FTP启动
1 | sudo service vstfpd start |
③开启权限
树莓派默认FTP的写入权限是禁用的,如需使用FTP传输文件,则需开启该权限
1 | sudo nano /etc/vsftpd.conf |
将 write_enable=YES 前的 # 删除即可,保存并退出后可使用类似FileZilla的软件来与树莓派构建FTP连接

同类软件还有:FlashFXP、 Xftp等
本文来自博客园,作者:伽椰子真可爱,转载请注明原文链接:https://www.cnblogs.com/jiayezi/p/16888540.html


· 阿里巴巴 QwQ-32B真的超越了 DeepSeek R-1吗?
· 10年+ .NET Coder 心语 ── 封装的思维:从隐藏、稳定开始理解其本质意义
· 【设计模式】告别冗长if-else语句:使用策略模式优化代码结构
· 字符编码:从基础到乱码解决
· 提示词工程——AI应用必不可少的技术