docker私有镜像仓库harbor
Harbor用于存储和分发docker镜像的企业级Registry开源服务,它包括权限管理(RBAC)、LDAP、日志审核、管理界面、自我注册、镜像复制和中文支持等功能。它提供了更好的性能和安全,以提升用户使用registry构建和运行环境传输镜像的效率,而且提供了一个非常漂亮的web界面。
官网地址:https://github.com/goharbor/harbor
一、为Harbor自签发证书
[root@harbor ~]# mkdir /data/ssl -p
[root@harbor ~]# cd /data/ssl/
#生成ca证书
[root@harbor ssl]# openssl genrsa -out ca.key 3072 #生成一个3072位的key,也就是私钥
Generating RSA private key, 3072 bit long modulus
[root@harbor ssl]# ll
total 4
-rw-r--r-- 1 root root 2459 Jul 25 12:01 ca.key
[root@harbor ssl]# openssl req -new -x509 -days 3650 -key ca.key -out ca.pem # 生成一个数字证书ca.pem,3650表示证书的有效时间是3年
[root@harbor ssl]# ll
total 8
-rw-r--r-- 1 root root 2459 Jul 25 12:01 ca.key
-rw-r--r-- 1 root root 1594 Jul 25 12:03 ca.pem
#生成域名的证书
[root@harbor ssl]# openssl genrsa -out harbor.key 3072 #生成一个3072位的key,也就是私钥
Generating RSA private key, 3072 bit long modulus
[root@harbor ssl]# ll
total 12
-rw-r--r-- 1 root root 2459 Jul 25 12:01 ca.key
-rw-r--r-- 1 root root 1594 Jul 25 12:03 ca.pem
-rw-r--r-- 1 root root 2459 Jul 25 12:03 harbor.key
[root@harbor ssl]# openssl req -new -key harbor.key -out harbor.csr #生成一个证书请求
[root@harbor ssl]# ll
total 16
-rw-r--r-- 1 root root 2459 Jul 25 12:01 ca.key
-rw-r--r-- 1 root root 1594 Jul 25 12:03 ca.pem
-rw-r--r-- 1 root root 1338 Jul 25 12:04 harbor.csr
-rw-r--r-- 1 root root 2459 Jul 25 12:03 harbor.key
#签发证书
[root@harbor ssl]# openssl x509 -req -in harbor.csr -CA ca.pem -CAkey ca.key -CAcreateserial -out harbor.pem -days 3650
Signature ok
subject=/C=CH/ST=Shaaxi/L=xi'an/O=Default Company Ltd/CN=harbor
Getting CA Private Key
可以看到证书签发好了
[root@harbor ssl]# ll
total 24
-rw-r--r-- 1 root root 2459 Jul 25 12:01 ca.key
-rw-r--r-- 1 root root 1594 Jul 25 12:03 ca.pem
-rw-r--r-- 1 root root 17 Jul 25 12:04 ca.srl
-rw-r--r-- 1 root root 1338 Jul 25 12:04 harbor.csr
-rw-r--r-- 1 root root 2459 Jul 25 12:03 harbor.key
-rw-r--r-- 1 root root 1501 Jul 25 12:04 harbor.pem
二、安装Harbor
1. 安装docker
1)关闭防火墙和selinux
[root@harbor ~]# systemctl stop firewalld && systemctl disable firewalld
[root@harbor ~]# setenforce 0
2)配置时间同步
[root@harbor ~]# yum install -y ntp ntpdate
[root@harbor ~]# ntpdate cn.pool.ntp.org
24 Jul 12:13:50 ntpdate[1307]: step time server 84.16.67.12 offset -86400.875350 sec
3)配置host文件
[root@harbor ~]# cat /etc/hosts
127.0.0.1 localhost localhost.localdomain localhost4 localhost4.localdomain4
::1 localhost localhost.localdomain localhost6 localhost6.localdomain6
10.0.0.129 harbor
4)安装docker-ce
安装依赖包:
[root@harbor ~]# yum install -y yum-utils device-mapper-persistent-data lvm2
增加清华镜像源
[root@harbor ~]# yum-config-manager --add-repo https://download.docker.com/linux/centos/docker-ce.repo
Loaded plugins: fastestmirror
adding repo from: https://download.docker.com/linux/centos/docker-ce.repo
grabbing file https://download.docker.com/linux/centos/docker-ce.repo to /etc/yum.repos.d/docker-ce.repo
repo saved to /etc/yum.repos.d/docker-ce.repo
[root@harbor ~]# sed -i 's+download.docker.com+mirrors.tuna.tsinghua.edu.cn/docker-ce+' /etc/yum.repos.d/docker-ce.repo
安装docker-ce
[root@harbor ~]# yum makecache fast
Loaded plugins: fastestmirror
docker-ce-stable | 3.5 kB 00:00:00
epel/x86_64/metalink | 6.3 kB 00:00:00
(1/2): docker-ce-stable/7/x86_64/updateinfo | 55 B 00:00:00
(2/2): docker-ce-stable/7/x86_64/primary_db | 80 kB 00:00:00
Loading mirror speeds from cached hostfile
* epel: mirrors.bfsu.edu.cn
Metadata Cache Created
[root@harbor ~]# yum install docker-ce
启动docker服务
[root@harbor ~]# systemctl start docker
[root@harbor ~]# systemctl enable docker
Created symlink from /etc/systemd/system/multi-user.target.wants/docker.service to /usr/lib/systemd/system/docker.service.
[root@harbor ~]# systemctl status docker
查看docker版本
[root@harbor ~]# docker version
5)开启包转发功能和修改内核参数
内核参数修改:br_netfilter模块用于将桥接流量转发至iptables链,br_netfilter内核参数需要开启转发
[root@harbor ~]# modprobe br_netfilter
[root@harbor ~]# cat > /etc/sysctl.d/docker.conf <<EOF
> net.bridge.bridge-nf-call-ip6tables = 1
> net.bridge.bridge-nf-call-iptables = 1
> net.ipv4.ip_forward = 1
> EOF
You have new mail in /var/spool/mail/root
#是其生效
[root@harbor ~]# sysctl -p /etc/sysctl.d/docker.conf
net.bridge.bridge-nf-call-ip6tables = 1
net.bridge.bridge-nf-call-iptables = 1
net.ipv4.ip_forward = 1
将Linux系统作为路由或者VPN服务就必须要开启IP转发功能。当linux主机有多个网卡时一个网卡收到的信息是否能够传递给其他的网卡 如果设置成1 的话 可以进行数据包转发,可以实现VxLAN 等功能。不开启会导致docker部署应用无法访问。
重启docker
[root@harbor ~]# systemctl restart docker
配置镜像加速器
[root@harbor ~]# cat /etc/docker/daemon.json
{
"registry-mirrors": ["https://docker.mirrors.ustc.edu.cn","https://reg-mirror.qiniu.com/","https://hub-mirror.c.163.com/"]
}
[root@harbor ~]# systemctl daemon-reload
[root@harbor ~]# systemctl restart docker
2、安装harbor
1)创建安装目录
[root@harbor ~]# mkdir -p /data/software
[root@harbor ~]# cd /data/software/
下载harbor离线包的地址:https://github.com/goharbor/harbor/releases/
2)解压:
[root@harbor software]# tar -zxvf harbor-offline-installer-v2.5.3.tgz
harbor/harbor.v2.5.3.tar.gz
harbor/prepare
harbor/LICENSE
harbor/install.sh
harbor/common.sh
harbor/harbor.yml.tmpl
3)修改配置文件
[root@harbor software]# cd harbor
[root@harbor harbor]# cp harbor.yml.tmpl harbor.yml
[root@harbor harbor]# vim harbor.yml
#修改hostname和密钥位置
hostname: harbor
# http related config
http:
# port for http, default is 80. If https enabled, this port will redirect to https port
port: 80
# https related config
https:
# https port for harbor, default is 443
port: 443
# The path of cert and key files for nginx
certificate: /data/ssl/harbor.pem
private_key: /data/ssl/harbor.key
4)安装docker-compose
注: docker-compose项目是Docker官方的开源项目,负责实现对Docker容器集群的快速编排。Docker-Compose的工程配置文件默认为docker-compose.yml,Docker-Compose运行目录下的必要有一个docker-compose.yml。docker-compose可以管理多个docker实例。
#使用docker-compose命令
[root@harbor software]# mv docker-compose-linux-x86_64 /usr/bin/docker-compose
[root@harbor software]# chmod +x /usr/bin/docker-compose
5)安装harbor需要的离线镜像包docker-harbor-2-3-0.tar.gz
[root@harbor software]# docker load -i docker-harbor-2-3-0.tar.gz
[root@harbor software]# cd harbor
[root@harbor harbor]# ll
total 647852
-rw-r--r-- 1 root root 3361 Jul 7 14:17 common.sh
-rw-r--r-- 1 root root 663348871 Jul 7 14:17 harbor.v2.5.3.tar.gz
-rw-r--r-- 1 root root 9903 Jul 24 13:02 harbor.yml
-rw-r--r-- 1 root root 9917 Jul 7 14:17 harbor.yml.tmpl
-rwxr-xr-x 1 root root 2500 Jul 7 14:17 install.sh
-rw-r--r-- 1 root root 11347 Jul 7 14:17 LICENSE
-rwxr-xr-x 1 root root 1881 Jul 7 14:17 prepare
[root@harbor harbor]# ./install.sh
.........
[Step 5]: starting Harbor ...
[+] Running 10/10
⠿ Network harbor_harbor Created 0.2s
⠿ Container harbor-log Started 1.4s
⠿ Container harbor-portal Started 3.3s
⠿ Container registry Started 3.2s
⠿ Container redis Started 2.9s
⠿ Container registryctl Started 2.7s
⠿ Container harbor-db Started 3.1s
⠿ Container harbor-core Started 3.8s
⠿ Container nginx Started 6.2s
⠿ Container harbor-jobservice Started 5.5s
✔ ----Harbor has been installed and started successfully.----
可以看到已安装成功
如何停掉harbor:
[root@harbor harbor]# docker-compose stop
如何启动harbor:
[root@harbor harbor]# docker-compose start
注:
如果docker-compose start启动harbor之后,还是访问不了,那就需要重启虚拟机
三、Harbor 图像化界面使用说明
默认账号和密码:
账号:admin
密码:Harbor12345
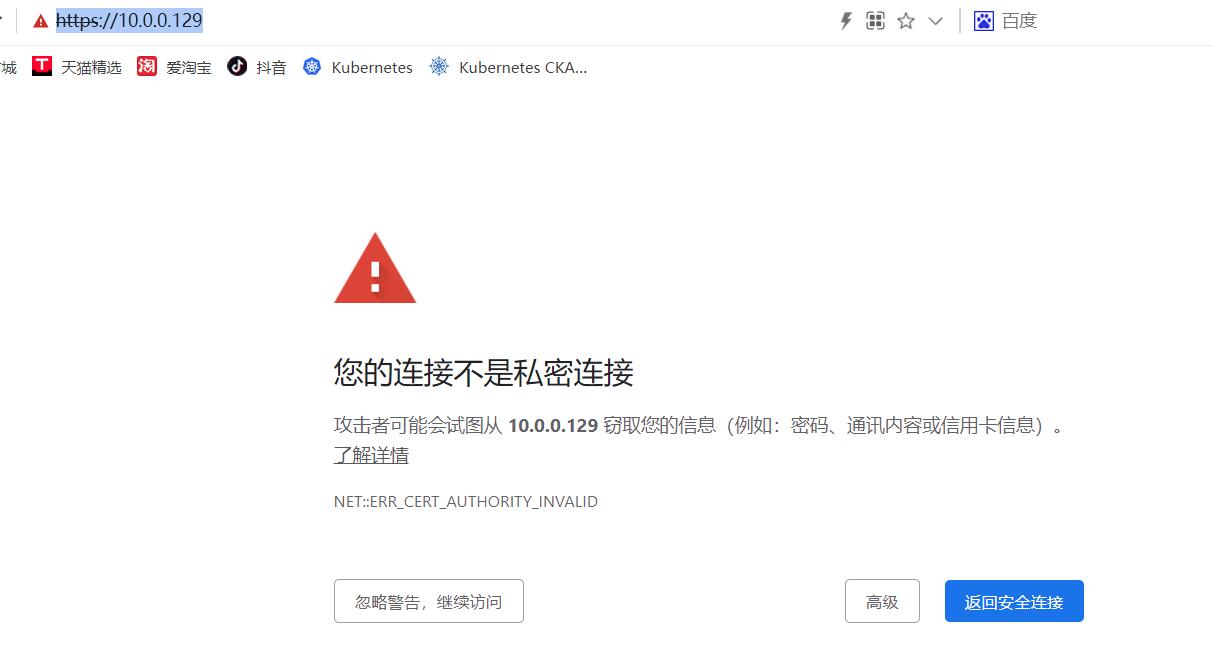
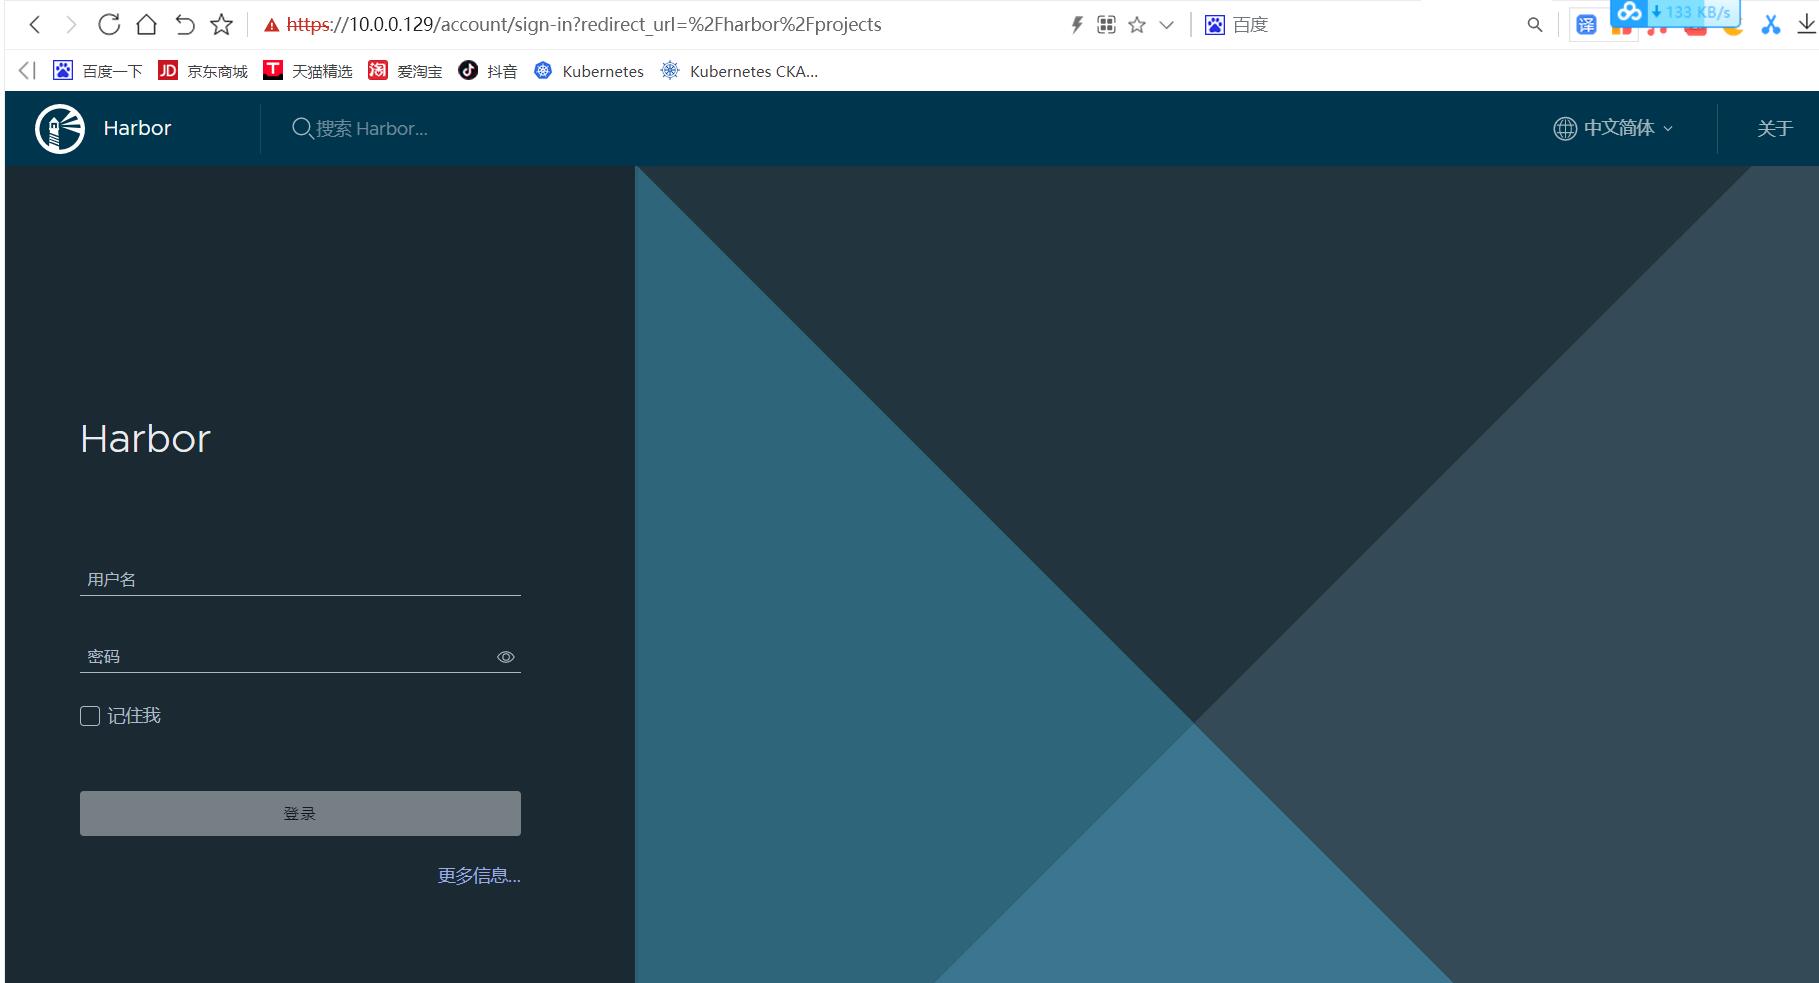
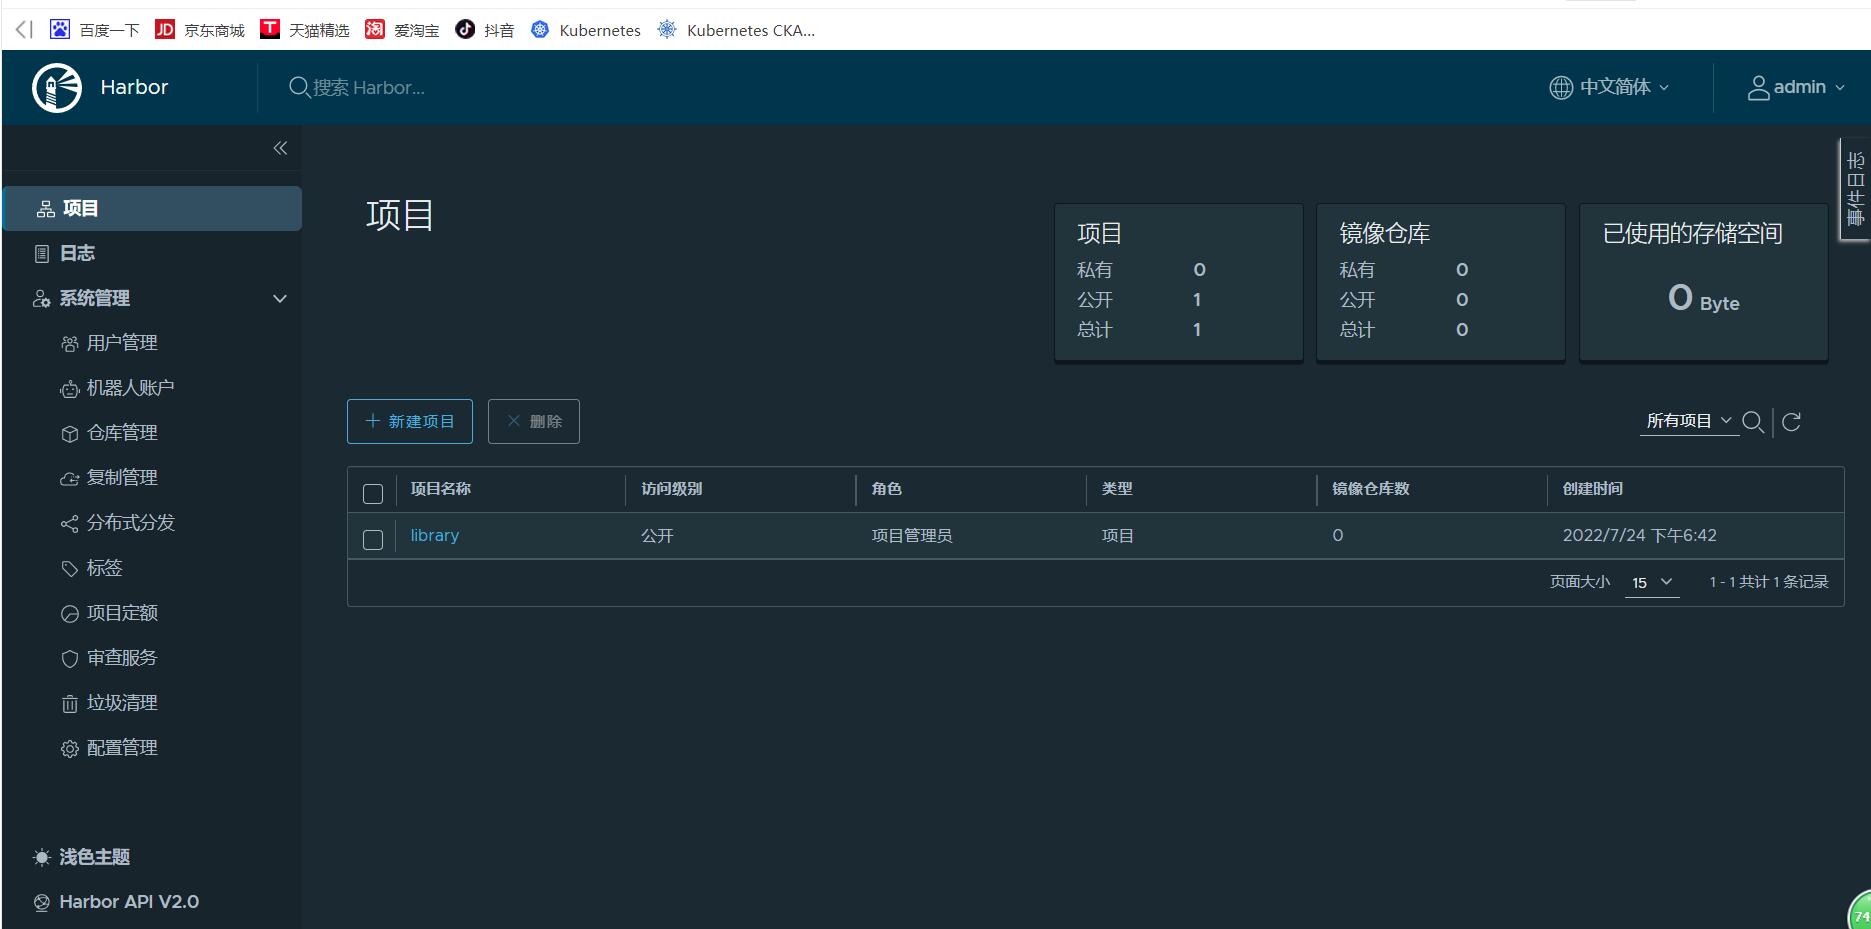
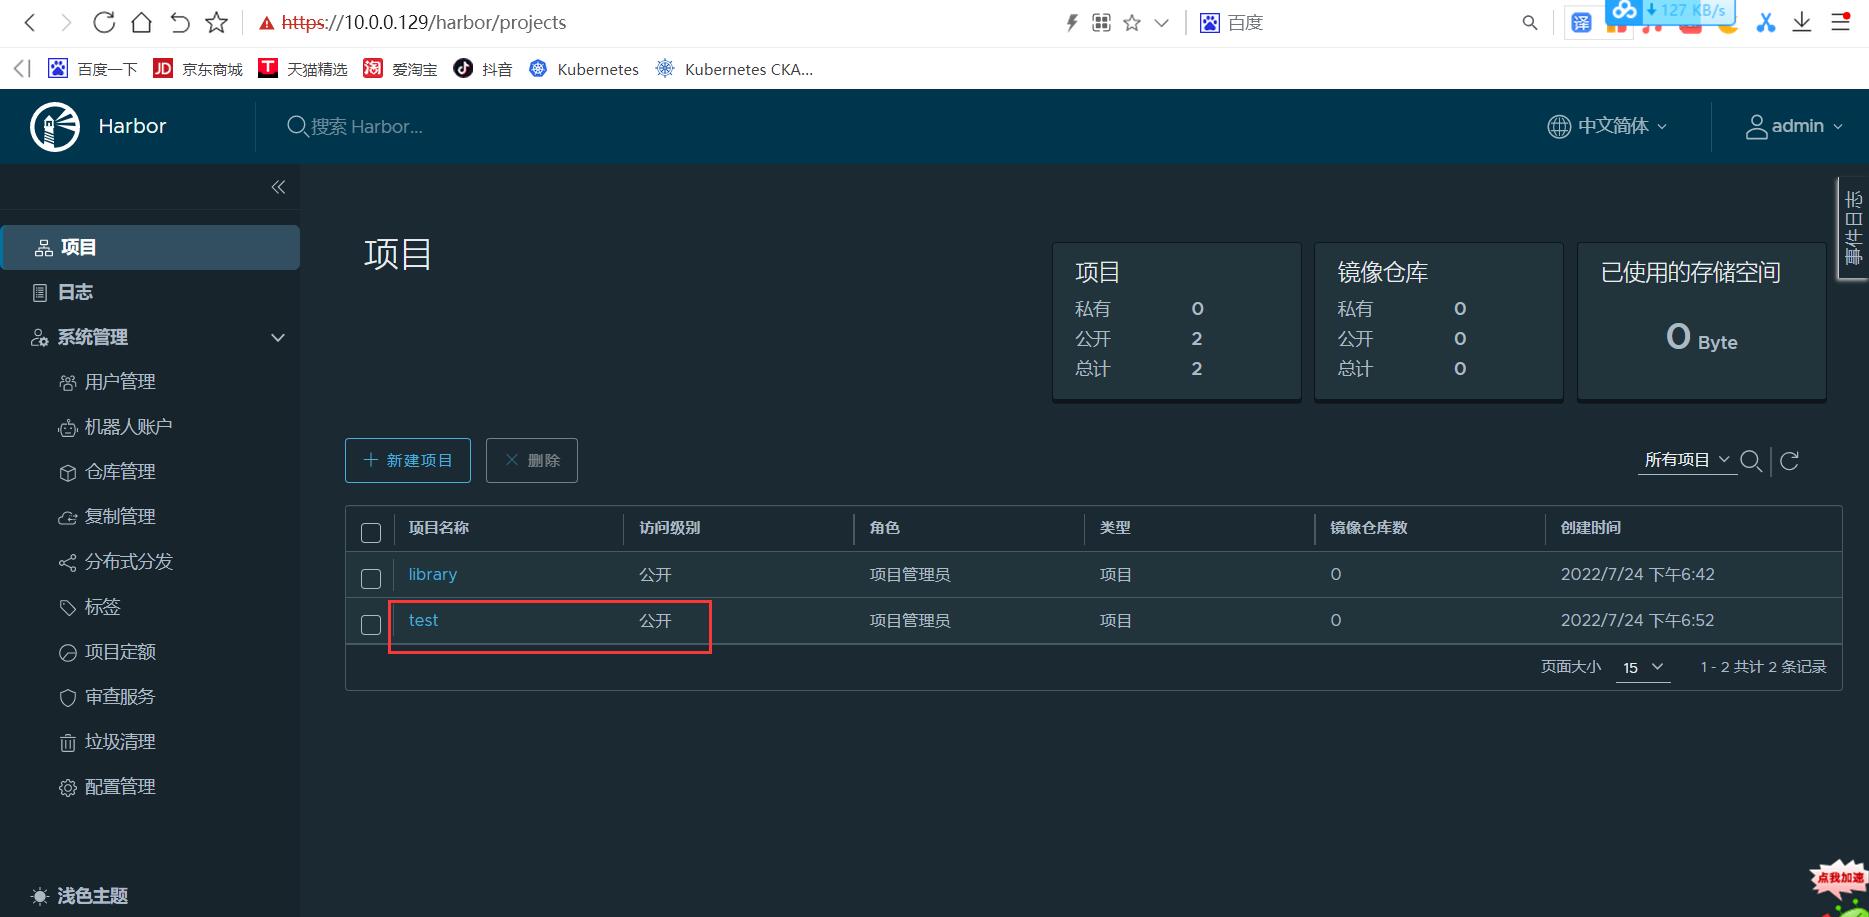
所有基础镜像都会放在library里面,这是一个公开的镜像仓库。
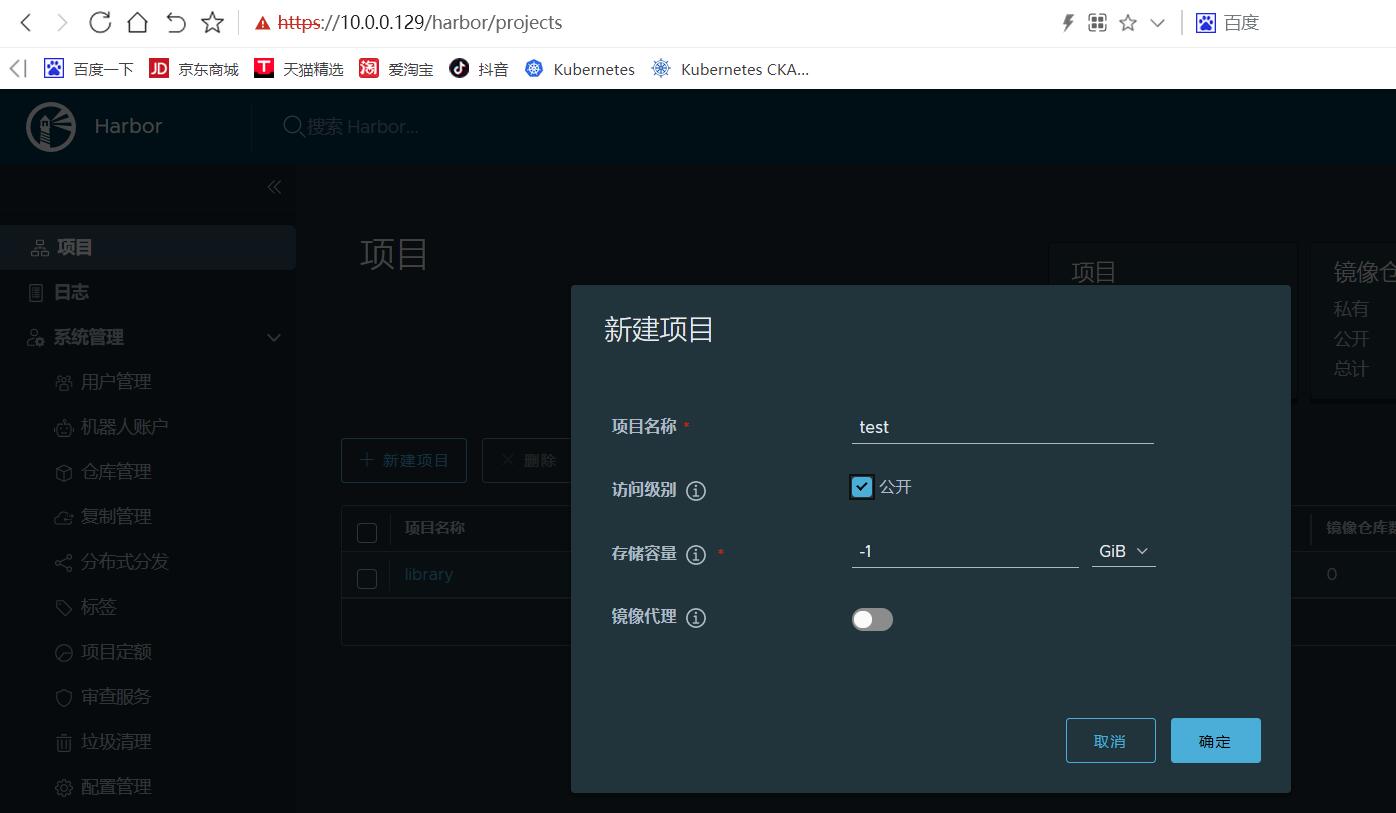
新建项目->起个项目名字test(把访问级别公开那个选中,让项目才可以被公开使用)
四、测试使用harbor私有镜像仓库
1)修改docker配置 ,并使其生效
[root@bogon ~]# vim /etc/docker/daemon.json
[root@bogon ~]# cat /etc/docker/daemon.json
{
"registry-mirrors": ["https://docker.mirrors.ustc.edu.cn","https://reg-mirror.qiniu.com/","https://hub-mirror.c.163.com/"],
"insecure-registries": ["10.0.0.129","harbor"]
}
[root@bogon ~]# systemctl daemon-reload && systemctl restart docker
[root@bogon ~]# systemctl status docker
● docker.service - Docker Application Container Engine
Loaded: loaded (/usr/lib/systemd/system/docker.service; enabled; vendor preset: disabled)
Active: active (running) since Sun 2022-07-24 19:09:28 CST; 28s ago
Docs: https://docs.docker.com
Main PID: 48636 (dockerd)
Memory: 40.2M
CGroup: /system.slice/docker.service
└─48636 /usr/bin/dockerd -H fd:// --containerd=/run/containerd/containerd.sock
Jul 24 19:09:25 bogon dockerd[48636]: time="2022-07-24T19:09:25.902457478+08:00" level=info msg="Removing stale sandbox dfb676e989...551e99)"
Jul 24 19:09:25 bogon dockerd[48636]: time="2022-07-24T19:09:25.930128340+08:00" level=warning msg="Error (Unable to complete atom...ing...."
Jul 24 19:09:27 bogon dockerd[48636]: time="2022-07-24T19:09:27.251522564+08:00" level=info msg="Removing stale sandbox f38a56a0ce...64a930)"
Jul 24 19:09:27 bogon dockerd[48636]: time="2022-07-24T19:09:27.262461879+08:00" level=warning msg="Error (Unable to complete atom...ing...."
Jul 24 19:09:27 bogon dockerd[48636]: time="2022-07-24T19:09:27.341269009+08:00" level=info msg="Default bridge (docker0) is assig...address"
Jul 24 19:09:27 bogon dockerd[48636]: time="2022-07-24T19:09:27.567634212+08:00" level=info msg="Loading containers: done."
Jul 24 19:09:27 bogon dockerd[48636]: time="2022-07-24T19:09:27.735254171+08:00" level=info msg="Docker daemon" commit=a89b842 gra...20.10.17
Jul 24 19:09:27 bogon dockerd[48636]: time="2022-07-24T19:09:27.735701311+08:00" level=info msg="Daemon has completed initialization"
Jul 24 19:09:28 bogon systemd[1]: Started Docker Application Container Engine.
Jul 24 19:09:28 bogon dockerd[48636]: time="2022-07-24T19:09:28.089423745+08:00" level=info msg="API listen on /var/run/docker.sock"
Hint: Some lines were ellipsized, use -l to show in full.
2)登录harbor
[root@bogon ~]# docker login 10.0.0.129
Username: admin
Password:
WARNING! Your password will be stored unencrypted in /root/.docker/config.json.
Configure a credential helper to remove this warning. See
https://docs.docker.com/engine/reference/commandline/login/#credentials-store
Login Succeeded
3)上传centos镜像至harbor的test目录下
[root@bogon ~]# mkdir images
[root@bogon ~]# cd images/
[root@bogon images]# docker load -i centos.tar.gz
[root@bogon images]# docker tag centos:latest 10.0.0.129/test/centos:v1
[root@bogon images]# docker push 10.0.0.129/test/centos:v1
The push refers to repository [10.0.0.129/test/centos]
2653d992f4ef: Pushed
v1: digest: sha256:dbbacecc49b088458781c16f3775f2a2ec7521079034a7ba499c8b0bb7f86875 size: 529
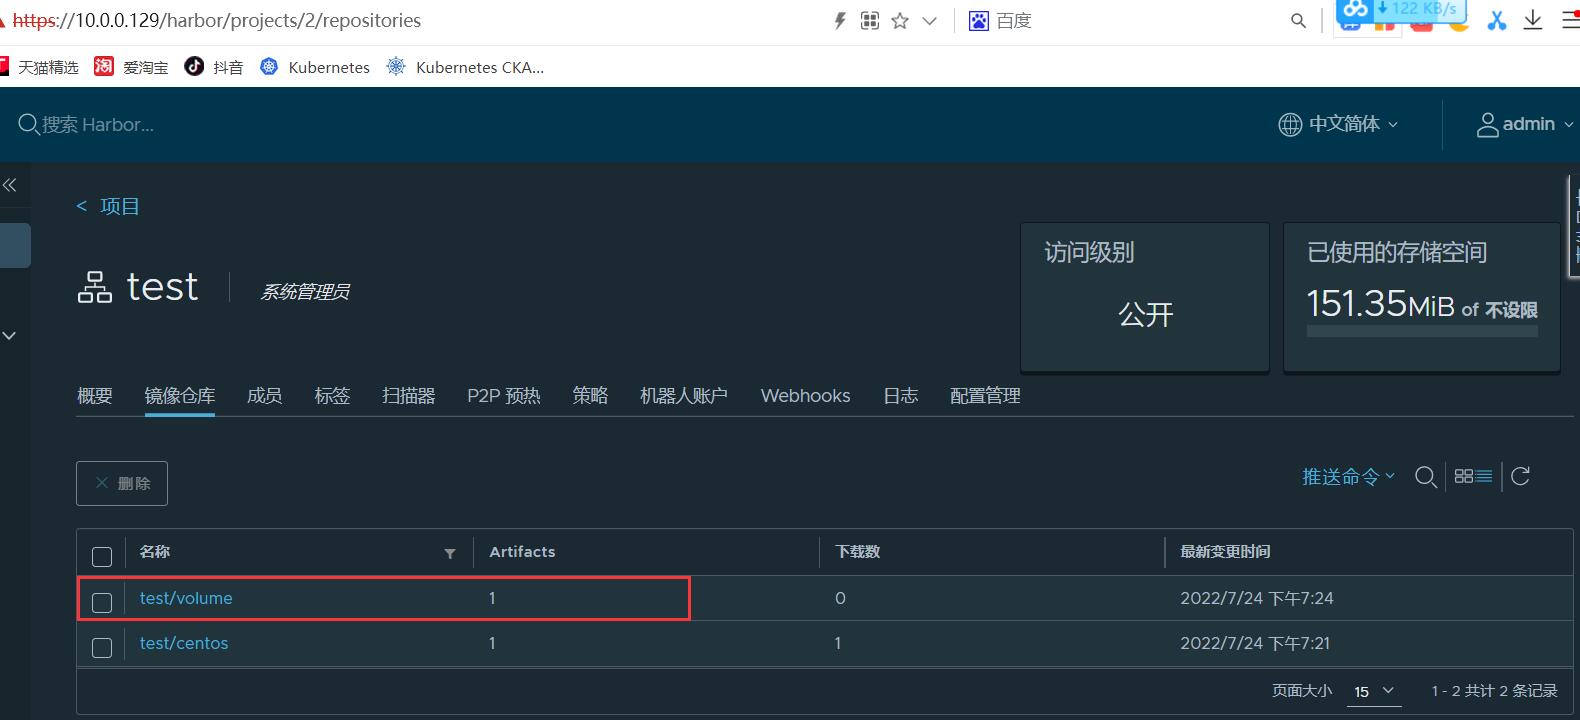
执行上面命令就会把10.0.0.129/test/centos:v1上传到harbor里的test项目下

上传本地镜像到harbor仓库
[root@bogon images]# docker tag volume:latest 10.0.0.129/test/volume:v1
[root@bogon images]# docker push 10.0.0.129/test/volume:v1
The push refers to repository [10.0.0.129/test/volume]
74ddd0ec08fa: Pushed
v1: digest: sha256:67a1da6b4444f2e41bdd28212e7966a74077febe79f6fa3e800c4bfc411fdaa2 size: 529
4)从harbor上拉取镜像
[root@bogon images]# docker rmi 10.0.0.129/test/centos:v1
Untagged: 10.0.0.129/test/centos:v1
Untagged: 10.0.0.129/test/centos@sha256:dbbacecc49b088458781c16f3775f2a2ec7521079034a7ba499c8b0bb7f86875
[root@bogon images]# docker pull 10.0.0.129/test/centos:v1
v1: Pulling from test/centos
Digest: sha256:dbbacecc49b088458781c16f3775f2a2ec7521079034a7ba499c8b0bb7f86875
Status: Downloaded newer image for 10.0.0.129/test/centos:v1
10.0.0.129/test/centos:v1
[root@bogon images]# docker images |grep 10.0.0.129
10.0.0.129/test/centos v1 300e315adb2f 19 months ago 209MB


【推荐】国内首个AI IDE,深度理解中文开发场景,立即下载体验Trae
【推荐】编程新体验,更懂你的AI,立即体验豆包MarsCode编程助手
【推荐】抖音旗下AI助手豆包,你的智能百科全书,全免费不限次数
【推荐】轻量又高性能的 SSH 工具 IShell:AI 加持,快人一步
· 无需6万激活码!GitHub神秘组织3小时极速复刻Manus,手把手教你使用OpenManus搭建本
· C#/.NET/.NET Core优秀项目和框架2025年2月简报
· 葡萄城 AI 搜索升级:DeepSeek 加持,客户体验更智能
· 什么是nginx的强缓存和协商缓存
· 一文读懂知识蒸馏