


Mongodb在CentOS下部署安装
一、Mongodb简介
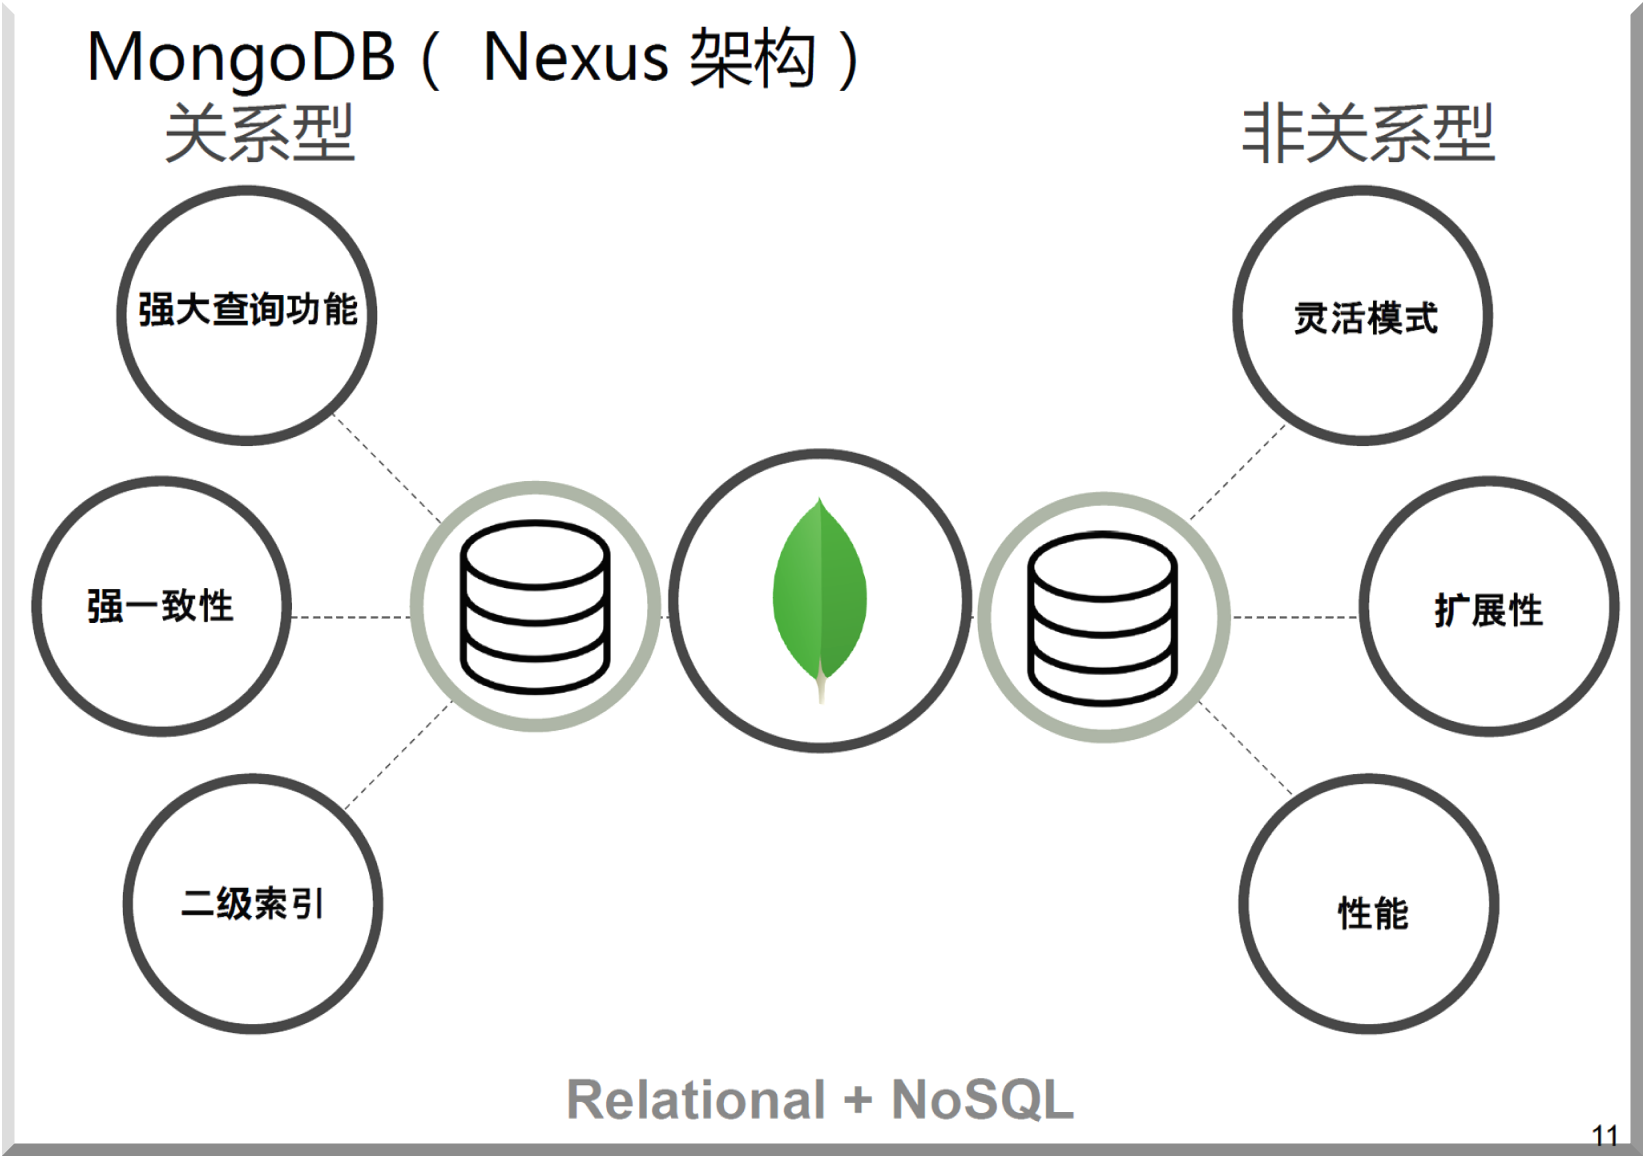
MongoDB是一个高性能,开源,无模式的文档型数据库,是一个介于关系数据库和非关系数据库之间的产品。它是由C++语言编写的一个基于分布式文件存储的开源数据库系统,它的目的在于为WEB应用提供可扩展的高性能数据存储解决方案。它支持的数据结构非常松散,会将数据存储为一个文档,数据结构由键值对(key=>value)组成,是类似于json的bson格式,字段值可以包含其它文档、数组和文档数组,因此可以存储比较复杂的数据类型。
1. Mongodb特性
2. MongoDB与RDBMS最大的区别在于:没有固定的行列组织数据结构。
MongoDB数据存储格式——JSON
MongoDB 使用JSON(JavaScript ObjectNotation)文档存储记录。
1)JSON数据库语句可以容易被解析
2)Web 应用大量使用
3)NAME-VALUE 配对
3. MongoDB核心功能介绍
1)JSON 文档模型;2)自动复制;3)高可用;4)自动分片;5)水平扩展;6)支持多种存储引擎
4.数据逻辑结构
层次关系
文档(document)
集合(collection)
数据库(database)
二、Mongodb源码安装使用
官网下载地址:http://www.mongodb.org/downloads
1. 创建所需用户和组
[root@hadoop101 ~]# groupadd -g 800 mongod
[root@hadoop101 ~]# useradd -u 801 -g mongod mongod
[root@hadoop101 ~]# passwd mongod
Changing password for user mongod.
New password:
BAD PASSWORD: The password is shorter than 8 characters
Retype new password:
passwd: all authentication tokens updated successfully.
2. 创建mongodb所需目录结构
[root@hadoop101 ~]# mkdir -p /mongodb/{bin,conf,log,data}
[root@hadoop101 ~]# ll /mongodb/
total 0
drwxr-xr-x 2 root root 6 Nov  2 22:07 bin
drwxr-xr-x 2 root root 6 Nov  2 22:07 conf
drwxr-xr-x 2 root root 6 Nov  2 22:07 data
drwxr-xr-x 2 root root 6 Nov  2 22:07 log
3. 上传并解压软件到指定位置
[root@hadoop101 ~]# mkdir -p /server/tools
[root@hadoop101 ~]# cd /server/tools/
[root@hadoop101 tools]# ll
total 0
[root@hadoop101 tools]#
[root@hadoop101 tools]# ll
total 80628
-rw-r--r-- 1 root root 82561216 Jan  2  2019 mongodb-linux-x86_64-rhel70-3.2.16.tgz

#解压
[root@hadoop101 tools]# tar -zxvf mongodb-linux-x86_64-rhel70-3.2.16.tgz
mongodb-linux-x86_64-rhel70-3.2.16/README
mongodb-linux-x86_64-rhel70-3.2.16/THIRD-PARTY-NOTICES
mongodb-linux-x86_64-rhel70-3.2.16/MPL-2
mongodb-linux-x86_64-rhel70-3.2.16/GNU-AGPL-3.0
mongodb-linux-x86_64-rhel70-3.2.16/bin/mongodump
mongodb-linux-x86_64-rhel70-3.2.16/bin/mongorestore
mongodb-linux-x86_64-rhel70-3.2.16/bin/mongoexport
mongodb-linux-x86_64-rhel70-3.2.16/bin/mongoimport
mongodb-linux-x86_64-rhel70-3.2.16/bin/mongostat
mongodb-linux-x86_64-rhel70-3.2.16/bin/mongotop
mongodb-linux-x86_64-rhel70-3.2.16/bin/bsondump
mongodb-linux-x86_64-rhel70-3.2.16/bin/mongofiles
mongodb-linux-x86_64-rhel70-3.2.16/bin/mongooplog
mongodb-linux-x86_64-rhel70-3.2.16/bin/mongoperf
mongodb-linux-x86_64-rhel70-3.2.16/bin/mongosniff
mongodb-linux-x86_64-rhel70-3.2.16/bin/mongod
mongodb-linux-x86_64-rhel70-3.2.16/bin/mongos
mongodb-linux-x86_64-rhel70-3.2.16/bin/mongo
#拷贝目录下bin程序到/mongodb/bin
[root@hadoop101 tools]# cp -a /server/tools/mongodb-linux-x86_64-rhel70-3.2.16/bin/* /mongodb/bin
[root@hadoop101 tools]# ll /mongodb/bin/
total 242540
-rwxr-xr-x 1 root root 10122000 Jul 28  2017 bsondump
-rwxr-xr-x 1 root root 20930984 Jul 28  2017 mongo
-rwxr-xr-x 1 root root 37408558 Jul 28  2017 mongod
-rwxr-xr-x 1 root root 12416955 Jul 28  2017 mongodump
-rwxr-xr-x 1 root root 10454865 Jul 28  2017 mongoexport
-rwxr-xr-x 1 root root 10354731 Jul 28  2017 mongofiles
-rwxr-xr-x 1 root root 10522792 Jul 28  2017 mongoimport
-rwxr-xr-x 1 root root 10137026 Jul 28  2017 mongooplog
-rwxr-xr-x 1 root root 37055869 Jul 28  2017 mongoperf
-rwxr-xr-x 1 root root 13749679 Jul 28  2017 mongorestore
-rwxr-xr-x 1 root root 17254954 Jul 28  2017 mongos
-rwxr-xr-x 1 root root 37092025 Jul 28  2017 mongosniff
-rwxr-xr-x 1 root root 10498636 Jul 28  2017 mongostat
-rwxr-xr-x 1 root root 10334087 Jul 28  2017 mongotop
4. 设置目录结构权限
[root@hadoop101 tools]# chown -R mongod:mongod /mongodb
[root@hadoop101 tools]# ll /mongodb/
total 0
drwxr-xr-x 2 mongod mongod 242 Nov  2 22:08 bin
drwxr-xr-x 2 mongod mongod   6 Nov  2 22:07 conf
drwxr-xr-x 2 mongod mongod   6 Nov  2 22:07 data
drwxr-xr-x 2 mongod mongod   6 Nov  2 22:07 log
5. 设置用户环境变量
[mongod@hadoop101 ~]$ vim .bash_profile
[mongod@hadoop101 ~]$ cat .bash_profile
# .bash_profile

# Get the aliases and functions
if [ -f ~/.bashrc ]; then
    . ~/.bashrc
fi

# User specific environment and startup programs

PATH=$PATH:$HOME/.local/bin:$HOME/bin

export PATH
export PATH=/mongodb/bin:$PATH
[mongod@hadoop101 ~]$ source .bash_profile
6. 使用配置文件
[mongod@hadoop101 ~]$ vim /mongodb/conf/mongodb.conf
[mongod@hadoop101 ~]$ cat /mongodb/conf/mongodb.conf
logpath=/mongodb/log/mongodb.log
dbpath=/mongodb/data
port=27017
logappend=true
fork=true
7. 启动mongodb
使用配置文件启动mongodb
[mongod@hadoop101 ~]$ mongod -f /mongodb/conf/mongodb.conf
about to fork child process, waiting until server is ready for connections.
forked process: 1850
child process started successfully, parent exiting
[mongod@hadoop101 ~]$ ps -ef |grep mongodb
mongod     1850      1  6 22:13 ?        00:00:00 mongod -f /mongodb/conf/mongodb.conf
mongod     1870   1795  0 22:13 pts/0    00:00:00 grep --color=auto mongodb
[mongod@hadoop101 ~]$ netstat -lntup
(Not all processes could be identified, non-owned process info
 will not be shown, you would have to be root to see it all.)
Active Internet connections (only servers)
Proto Recv-Q Send-Q Local Address           Foreign Address         State       PID/Program name
tcp        0      0 0.0.0.0:111             0.0.0.0:*               LISTEN      -
tcp        0      0 192.168.122.1:53        0.0.0.0:*               LISTEN      -
tcp        0      0 0.0.0.0:22              0.0.0.0:*               LISTEN      -
tcp        0      0 127.0.0.1:25            0.0.0.0:*               LISTEN      -
tcp        0      0 0.0.0.0:27017           0.0.0.0:*               LISTEN      1850/mongod
tcp6       0      0 :::111                  :::*                    LISTEN      -
tcp6       0      0 :::22                   :::*                    LISTEN      -
tcp6       0      0 ::1:25                  :::*                    LISTEN      -
udp        0      0 0.0.0.0:886             0.0.0.0:*                           -
udp        0      0 192.168.122.1:53        0.0.0.0:*                           -
udp        0      0 0.0.0.0:67              0.0.0.0:*                           -
udp        0      0 0.0.0.0:111             0.0.0.0:*                           -
udp6       0      0 :::886                  :::*                                -
udp6       0      0 :::111                  :::*                                -
关闭mongodb
mongod -f /mongodb/conf/mongodb.conf --shutdown
8. 登录mongodb
[mongod@hadoop101 ~]$ mongo
MongoDB shell version: 3.2.16
connecting to: test
Welcome to the MongoDB shell.
For interactive help, type "help".
For more comprehensive documentation, see
    http://docs.mongodb.org/
Questions? Try the support group
    http://groups.google.com/group/mongodb-user
Server has startup warnings:
2020-11-02T22:13:03.831+0800 I CONTROL  [initandlisten]
2020-11-02T22:13:03.832+0800 I CONTROL  [initandlisten] ** WARNING: /sys/kernel/mm/transparent_hugepage/enabled is 'always'.
2020-11-02T22:13:03.832+0800 I CONTROL  [initandlisten] **        We suggest setting it to 'never'
2020-11-02T22:13:03.832+0800 I CONTROL  [initandlisten]
2020-11-02T22:13:03.832+0800 I CONTROL  [initandlisten] ** WARNING: /sys/kernel/mm/transparent_hugepage/defrag is 'always'.
2020-11-02T22:13:03.832+0800 I CONTROL  [initandlisten] **        We suggest setting it to 'never'
2020-11-02T22:13:03.832+0800 I CONTROL  [initandlisten]
> exit
bye
#解决办法:关闭大页内存机制
root用户下
[root@hadoop101 ~]# vim /etc/rc.local
[root@hadoop101 ~]# cat /etc/rc.local
#!/bin/bash
# THIS FILE IS ADDED FOR COMPATIBILITY PURPOSES
#
# It is highly advisable to create own systemd services or udev rules
# to run scripts during boot instead of using this file.
#
# In contrast to previous versions due to parallel execution during boot
# this script will NOT be run after all other services.
#
# Please note that you must run 'chmod +x /etc/rc.d/rc.local' to ensure
# that this script will be executed during boot.

touch /var/lock/subsys/local

if test -f /sys/kernel/mm/transparent_hugepage/enabled; then
  echo never > /sys/kernel/mm/transparent_hugepage/enabled
fi
if test -f /sys/kernel/mm/transparent_hugepage/defrag; then
   echo never > /sys/kernel/mm/transparent_hugepage/defrag
fi
[root@hadoop101 ~]# source /etc/rc.local
[root@hadoop101 ~]# su - mongod
Last login: Mon Nov  2 22:10:13 CST 2020 on pts/0#关闭mongodb
[mongod@hadoop101 ~]$ mongod -f /mongodb/conf/mongodb.conf --shutdown
killing process with pid: 1850#启动mongodb
[mongod@hadoop101 ~]$ mongod -f /mongodb/conf/mongodb.conf
about to fork child process, waiting until server is ready for connections.
forked process: 1973
child process started successfully, parent exiting
#登录
[mongod@hadoop101 ~]$ mongo
MongoDB shell version: 3.2.16
connecting to: test
>
三、采用yum的方式安装mongodb
1. 创建mongodb源
[root@web01 ~]# vim /etc/yum.repos.d/mongodb-org-3.2.repo
[root@web01 ~]# cat /etc/yum.repos.d/mongodb-org-3.2.repo
[mongodb-org-3.2]
name=MongoDB Repository
baseurl=https://repo.mongodb.org/yum/redhat/$releasever/mongodb-org/3.2/x86_64/
gpgcheck=0
enabled=1
2.安装MongoDB和相关工具
[root@web01 ~]# yum install -y mongodb-org
3.启动Mongodb
[root@web01 ~]# systemctl start mongod
4. 其他
日志文件:/var/log/mongodb/mongod.log
配置文件:/etc/mongod.conf
数据目录:/var/lib/mongo/
四、Mongodb的日常操作命令
1. 登陆和退出
mongo 命令直接加MongoDB服务器的IP地址就可以利用 Mongo 的默认端口号(27017)登陆 Mongo, 然后便能够进行简单的命令行操作。退出,直接 exit
如果默认bind绑定的ip是127.0.0.1以及端口是27017,那么登陆可以直接用下面两种都可以:
[mongod@hadoop101 ~]$ mongo
[mongod@hadoop101 ~]$ mongo 127.0.0.1:27017
如果是绑定了固定的ip地址,连接某个库,命令是
[mongod@hadoop101 ~]$ mongo ip:port/库名 -u用户名 -p密码
> help
登陆mongodb数据库后,可以直接执行help命令进行帮助查看
2. database级操作
#查看服务器上的数据库
> show dbs;
local  0.000GB
#切换数据库
> use oldboy;
switched to db oldboy
# 查看当前数据库中的所有集合
> show collections;
# 查看当前数据库中的所有表
> show tables;
创建数据库
mongo 中创建数据库采用的也是 use 命令,如果 use 后面跟的数据库名不存在,那么 mongo 将会新建该数据库。不过,实际上只执行 use 命令后,mongo 是不会新建该数据库的,直到向该数据库中插入了数据。
> use oldboy;
switched to db oldboy> show dbs;
local  0.000GB
> db.t1.insert({"name":"testdb"})
WriteResult({ "nInserted" : 1 })
> show dbs;
local   0.000GB
oldboy  0.000GB
> show collections;
t1
这样,便可以看到 mongo 的确创建了 oldboy 数据库,其中有一个 t1 集合
删除数据库
> db.dropDatabase()
{ "dropped" : "oldboy", "ok" : 1 }
> show dbs;
local  0.000GB
> db
oldboy
> db.getName();
oldboy
> use oldgirl
switched to db oldgirl
> db
oldgirl
> show dbs;
local  0.000GB
可以看出删除 oldboy数据库之后,当前的 db 还是指向它,只有当切换数据库之后,oldboy 才会彻底消失
查看当前数据库状态
> db.stats();
{
    "db" : "oldgirl",
    "collections" : 0,
    "objects" : 0,
    "avgObjSize" : 0,
    "dataSize" : 0,
    "storageSize" : 0,
    "numExtents" : 0,
    "indexes" : 0,
    "indexSize" : 0,
    "fileSize" : 0,
    "ok" : 1
}
当前db版本
> db.version();
3.2.16
查看当前db的链接机器地址
>  db.getMongo();
connection to 127.0.0.1:27017
3.collection 级操作
#新建 collection
> db.createCollection("Hello")
{ "ok" : 1 }
#查看当前数据库中的所有 collection
> show collections;
Hello
#直接向一个不存在的 collection 中插入数据也能创建一个 collection。
> db.t1.insert({id:001,"name":"zhangsan"})
WriteResult({ "nInserted" : 1 })
> show collections;
Hello
t1
#删除 collection
> db.Hello.drop()
true
> show collections;
t1
#重命名 collection
> db.t1.renameCollection("t2")
{ "ok" : 1 }
4.Record 级的操作
插入操作
> db.t1.insert({id:002,"name":"lisi"})
WriteResult({ "nInserted" : 1 })
> db.t1.insert({id:003,"name":"wangwu"})
WriteResult({ "nInserted" : 1 })
#查找操作

> db.t1.find().pretty()
{ "_id" : ObjectId("5fa01f366550d902a2e8571c"), "id" : 2, "name" : "lisi" }
{
    "_id" : ObjectId("5fa01f416550d902a2e8571d"),
    "id" : 3,
    "name" : "wangwu"
}
#save 完成类似的插入操作
> db.t1.save({id:004,"name":"haha"})
WriteResult({ "nInserted" : 1 })
#查找操作
> db.t1.find().pretty()
{ "_id" : ObjectId("5fa01f366550d902a2e8571c"), "id" : 2, "name" : "lisi" }
{
    "_id" : ObjectId("5fa01f416550d902a2e8571d"),
    "id" : 3,
    "name" : "wangwu"
}
{ "_id" : ObjectId("5fa01fc16550d902a2e8571e"), "id" : 4, "name" : "haha" }
查找操作
> db.t1.find()
{ "_id" : ObjectId("5fa01f366550d902a2e8571c"), "id" : 2, "name" : "lisi" }
{ "_id" : ObjectId("5fa01f416550d902a2e8571d"), "id" : 3, "name" : "wangwu" }
{ "_id" : ObjectId("5fa01fc16550d902a2e8571e"), "id" : 4, "name" : "haha" }> db.t1.find({id:002})
{ "_id" : ObjectId("5fa01f366550d902a2e8571c"), "id" : 2, "name" : "lisi" }
> db.t1.findOne({})
{ "_id" : ObjectId("5fa01f366550d902a2e8571c"), "id" : 2, "name" : "lisi" }
> db.t1.find().count()
3
删除操作
> db.t1.remove({})
WriteResult({ "nRemoved" : 3 })
> db.t1.find()


【推荐】国内首个AI IDE,深度理解中文开发场景,立即下载体验Trae
【推荐】编程新体验,更懂你的AI,立即体验豆包MarsCode编程助手
【推荐】抖音旗下AI助手豆包,你的智能百科全书,全免费不限次数
【推荐】轻量又高性能的 SSH 工具 IShell:AI 加持,快人一步
· Linux系列:如何用heaptrack跟踪.NET程序的非托管内存泄露
· 开发者必知的日志记录最佳实践
· SQL Server 2025 AI相关能力初探
· Linux系列:如何用 C#调用 C方法造成内存泄露
· AI与.NET技术实操系列(二):开始使用ML.NET
· 无需6万激活码!GitHub神秘组织3小时极速复刻Manus,手把手教你使用OpenManus搭建本
· C#/.NET/.NET Core优秀项目和框架2025年2月简报
· 葡萄城 AI 搜索升级:DeepSeek 加持,客户体验更智能
· 什么是nginx的强缓存和协商缓存
· 一文读懂知识蒸馏