


Memcached介绍
一、Memcached简介
Memcached是一款开源的、高性能的纯内存缓存服务软件
Mem是内存的意思,cache是缓存的意思,d是daemon的意思
优点:
1. 对于用户来讲,用户访问网站更快了,体验更好了。
2. 对网站来说,数据库压力降低了。只有当内存没有数据时才会去请求数据库。第一次写入的数据也会请求数据库。一般公司没有预热,只有当用户读取过数据库才会放到Memcached中。
3. 提升了网站的并发访问,减少服务器数量。
二. 缓存数据库的选择
• MySQL:磁盘上的数据库,数据写入读取相对较慢
• Memcached:内存中的数据库,数据读写都快,但是数据易丢失
• 数据存储,数据仓库选择MySQL这种磁盘的数据库;
• 高并发,业务大的应用选择Memcached或Redis内存数据库
• 实际工作中,MySQL+Memcached/Redis搭配使用
三、企业使用场景

对于用户来讲,用户访问网站更快了,体验更好了
对网站来说,数据库压力降低了。提升了网站的并发访问,减少服务器数量
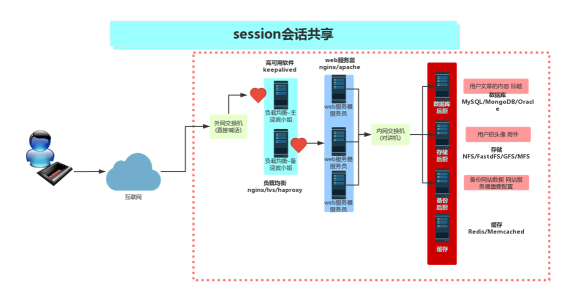
四、 Cookie和Session
最开始:
本地浏览器 cookies cookies名字:内容(用户名,登录信息)
改进后:
本地浏览器: cookies cookies名字:内容(session id 编号)
服务器: session session id:内容(用户名,登录信息)
主流使用场景:cookies + session
五、部署与使用Memcached(注服务端外网ip:10.0.0.61.内网ip:172.16.1.61)
第一个里程:安装memcached服务端
[root@cache01 ~]# yum -y install memcached
[root@cache01 ~]# rpm -qa |grep memcached
memcached-1.4.15-10.el7_3.1.x86_64
第二个里程:修改配置文件,并启动服务
# vim /etc/sysconfig/memcached
PORT="11211" ---> 端口11211
USER="memcached" ---> 用户memcached
MAXCONN="1024" ---> 最大连接数
CACHESIZE="64" ---> 内存空间大小MB
OPTIONS="" ---> 选项(这里可以填写-l对监听网段做限制)
-----------------------------------------------------------
# memcached -h
-d 启动一个守护进程
-m 分配给Memcache使用的内存数量,单位是MB
-u 运行Memcache的用户
-l 监听的服务器IP地址,可以有多个地址
-p 设置Memcache监听的端口,,最好是1024以上的端口
-c 最大运行的并发连接数,默认是1024
-P 设置保存Memcache的pid文件
-----------------------------------------------------------
# vim /usr/lib/systemd/system/memcached.service
[Unit]
Description=Memcached <---描述
Before=httpd.service <---运行程序前置程序
After=network.target <---运行程序后置程序
[Service]
Type=simple
EnvironmentFile=-/etc/sysconfig/memcached <---Memcached启动文件
ExecStart=/usr/bin/memcached -u $USER -p $PORT -m $CACHESIZE -c $MAXCONN $OPTIONS
[Install]
WantedBy=multi-user.target <---安装在哪个用户模式下边
第三个里程:启动memcached服务
[root@cache01 ~]# systemctl start memcached
[root@cache01 ~]# systemctl status memcached
● memcached.service - Memcached
Loaded: loaded (/usr/lib/systemd/system/memcached.service; disabled; vendor preset: disabled)
Active: active (running) since Wed 2020-06-17 21:51:42 CST; 5s ago
Main PID: 10170 (memcached)
Group: /system.slice/memcached.service
└─10170 /usr/bin/memcached -u memcached -p 11211 -m 64 -c 1024
Jun 17 21:51:42 cache01 systemd[1]: Started Memcached.
第四个里程:利用nc或telnet进行memcache测试

#写入数据
[root@cache01 ~]# printf "set oldboy 0 0 10\r\noldboy1231\r\n"|nc 172.16.1.61 11211
STORED
# 读取数据
[root@cache01 ~]# printf "get oldboy\r\n" |nc 172.16.1.61 11211
VALUE oldboy 0 10
oldboy1231
END
#删除数据
[root@cache01 ~]# printf "delete oldboy\r\n"|nc 172.16.1.61 11211
DELETED
#改数据
[root@cache01 ~]# printf "get oldboy\r\n" |nc 172.16.1.61 11211
END
[root@cache01 ~]# printf "set oldboy 0 0 2\r\n12\r\n" | nc 172.16.1.61 11211
STORED
[root@cache01 ~]# printf "get oldboy\r\n" | nc 172.16.1.61 11211
VALUE oldboy 0 2
12
END
[root@cache01 ~]# printf "replace oldboy 0 0 2\r\n15\r\n" | nc 172.16.1.61 11211
STORED
[root@cache01 ~]# printf "get oldboy\r\n" | nc 172.16.1.61 11211
VALUE oldboy 0 2
15
END
命令语法格式说明
set key 0 0 10 \r\n oldboy0987 \r\n
<command name> <key> <flags> <exptime> <bytes>\r\n <data block>\r\n
- <flags> 是在取回内容时,与数据和发送块一同保存服务器上的任意16位无符号整型(用十进制来书写)。客户端可以用它作为“位域”来存储一些特定的信息;它对服务器是不透明的。
- <exptime> 是终止时间。如果为0,该项永不过期(虽然它可能被删除,以便为其他缓存项目腾出位置)。如果非0(Unix时间戳或当前时刻的秒偏移),到达终止时间后,客户端无法再获得这项内容。
- <bytes> 是随后的数据区块的字节长度,不包括用于分页的“\r\n”。它可以是0(这时后面跟随一个空的数据区块)。
- <data block> 是大段的8位数据,其长度由前面的命令行中的<bytes>指定。
\n 换行且光标移至行首
\r 光标移至行首,但不换行
#其他
[root@cache01 ~]# printf "stats\r\n" | nc 172.16.1.61 11211
STAT pid 10170
STAT uptime 634
STAT time 1592402534
STAT version 1.4.15
STAT libevent 2.0.21-stable
STAT pointer_size 64
STAT rusage_user 0.014448
STAT rusage_system 0.068629
STAT curr_connections 10
STAT total_connections 21
STAT connection_structures 11
STAT reserved_fds 20
STAT cmd_get 6
STAT cmd_set 4
STAT cmd_flush 0
STAT cmd_touch 0
STAT get_hits 4
STAT get_misses 2
STAT delete_misses 0
STAT delete_hits 2
STAT incr_misses 0
STAT incr_hits 0
STAT decr_misses 0
STAT decr_hits 0
STAT cas_misses 0
STAT cas_hits 0
STAT cas_badval 0
STAT touch_hits 0
STAT touch_misses 0
STAT auth_cmds 0
STAT auth_errors 0
STAT bytes_read 215
STAT bytes_written 184
STAT limit_maxbytes 67108864
STAT accepting_conns 1
STAT listen_disabled_num 0
STAT threads 4
STAT conn_yields 0
STAT hash_power_level 16
STAT hash_bytes 524288
STAT hash_is_expanding 0
STAT bytes 73
STAT curr_items 1
STAT total_items 4
STAT expired_unfetched 0
STAT evicted_unfetched 0
STAT evictions 0
STAT reclaimed 0
END
其中:
pid: memcached运行的进程号
uptime:运行时间
time:当前的时间戳
version:当前版本
total_items:历史存储的键数
curr_items:当前存储的键数
cmd_get:总共向memcached服务器请求的次数
get_hits:响应成功的次数
get_misses:失败的次数
第五个里程:在web服务器上部署memcache客户端
[root@web01 ~]# cd /server/tools/
[root@web01 tools]# wget http://pecl.php.net/get/memcache-2.2.5.tgz
[root@web01 tools]# tar xf memcache-2.2.5.tgz
[root@web01 tools]# cd memcache-2.2.5/
[root@web01 memcache-2.2.5]# /application/php/bin/phpize
[root@web01 memcache-2.2.5]# ./configure --enable-memcache --with-php-config=/application/php/bin/php-config --with-zlib-dir
[root@web01 memcache-2.2.5]# echo $?
0
[root@web01 memcache-2.2.5]# make && make install
[root@web01 memcache-2.2.5]# echo $?
0
第六个里程:修改php配置文件,并重启php服务
[root@web01 memcache-2.2.5]# sed -i '$a extension=memcache.so' /application/php/lib/php.ini

[root@web01 memcache-2.2.5]# /application/php/sbin/php-fpm -t
[17-Jun-2020 22:21:08] NOTICE: configuration file /application/php-5.3.27/etc/php-fpm.conf test is successful
[root@web01 memcache-2.2.5]# /application/php/sbin/php-fpm
#memcached模块安装是否成功
[root@web01 memcache-2.2.5]# /application/php/bin/php -m|grep memcache
memcache
[root@web01 memcache-2.2.5]# ps -ef |grep php
root 9011 1 0 22:21 ? 00:00:00 php-fpm: master process (/application/php-5.3.27/etc/php-fpm.conf)
www 9012 9011 0 22:21 ? 00:00:00 php-fpm: pool www
www 9013 9011 0 22:21 ? 00:00:00 php-fpm: pool www
root 9017 6609 0 22:22 pts/0 00:00:00 grep --color=auto php
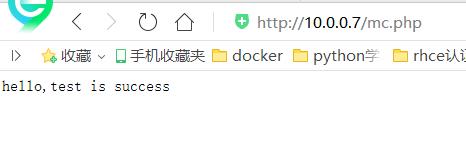
第六个里程:编写测试页面,进行测试
cat >/application/nginx/html/blog/mc.php<<'EOF'
<?php
$memcache = new Memcache;
$memcache->connect('10.0.0.61', 11211) or die ("Could not connect");
$memcache->set('key_test', 'hello,test is success');
$get_value = $memcache->get('key_test');
echo $get_value;
?>
EOF
[root@web01 ~]# /application/php/bin/php /application/nginx/html/blog/mc.php
hello,test is success[root@web01 ~]#
在服务端测试
[root@cache01 ~]# printf "get key_test\r\n" | nc 10.0.0.61 11211
VALUE key_test 0 21
hello,test is success
END
在浏览器上测试
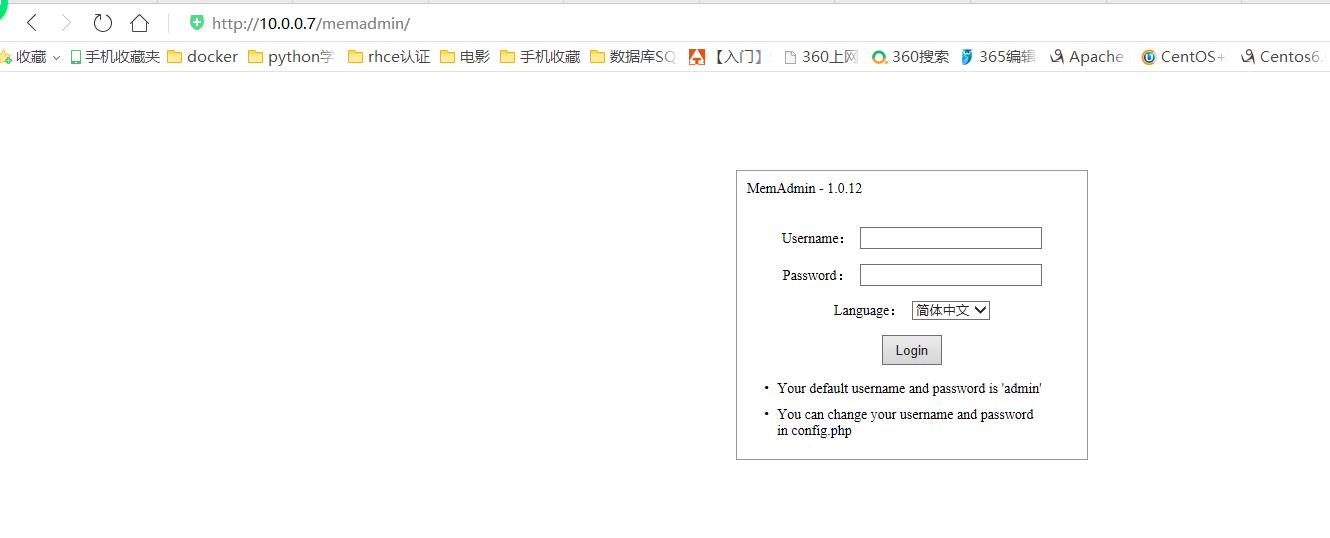
六、利用web界面管理memcached服务
官网地址:http://www.junopen.com/memadmin/
下载memadmin包:memadmin-1.0.12.tar.gz
tar xf memadmin-1.0.12.tar.gz -C /application/nginx/html/blog/
在web页面使用

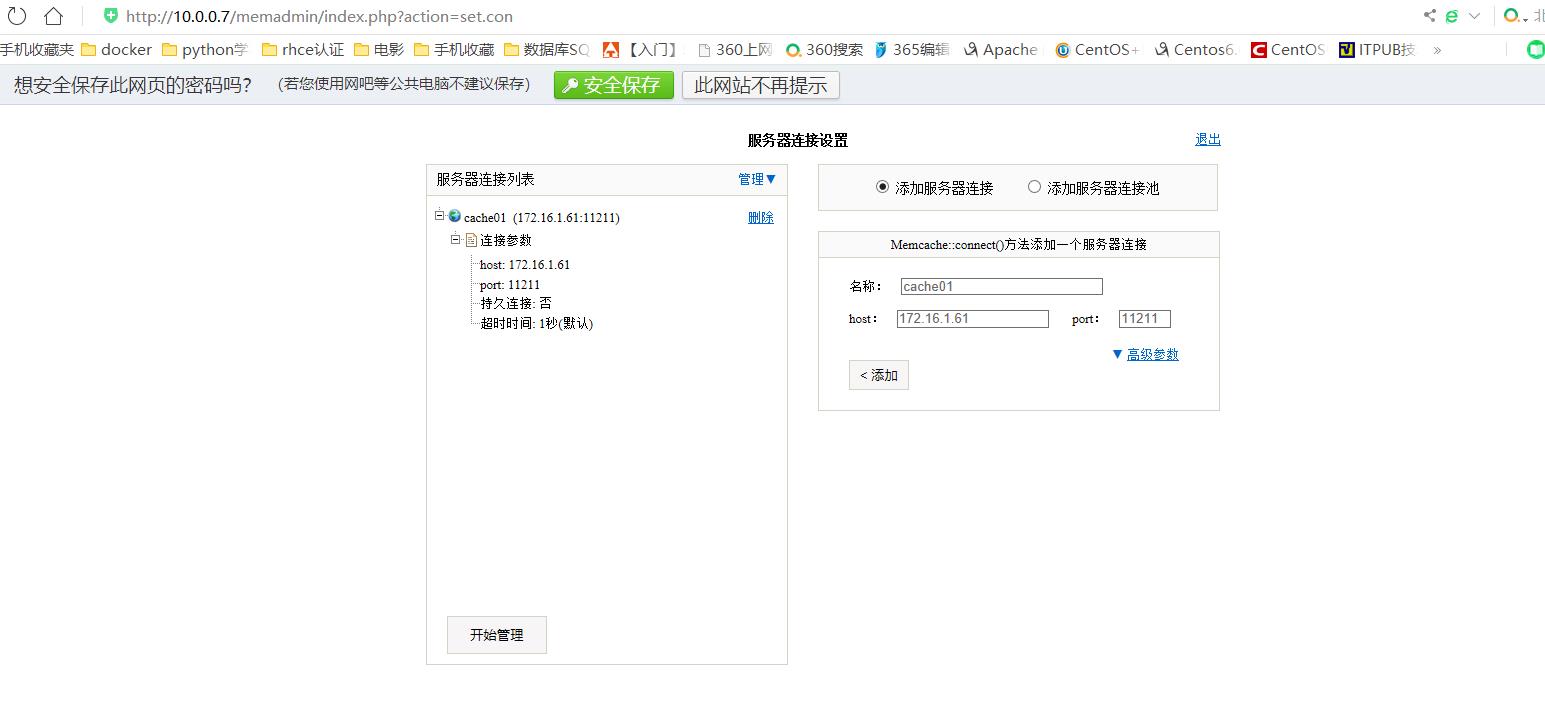
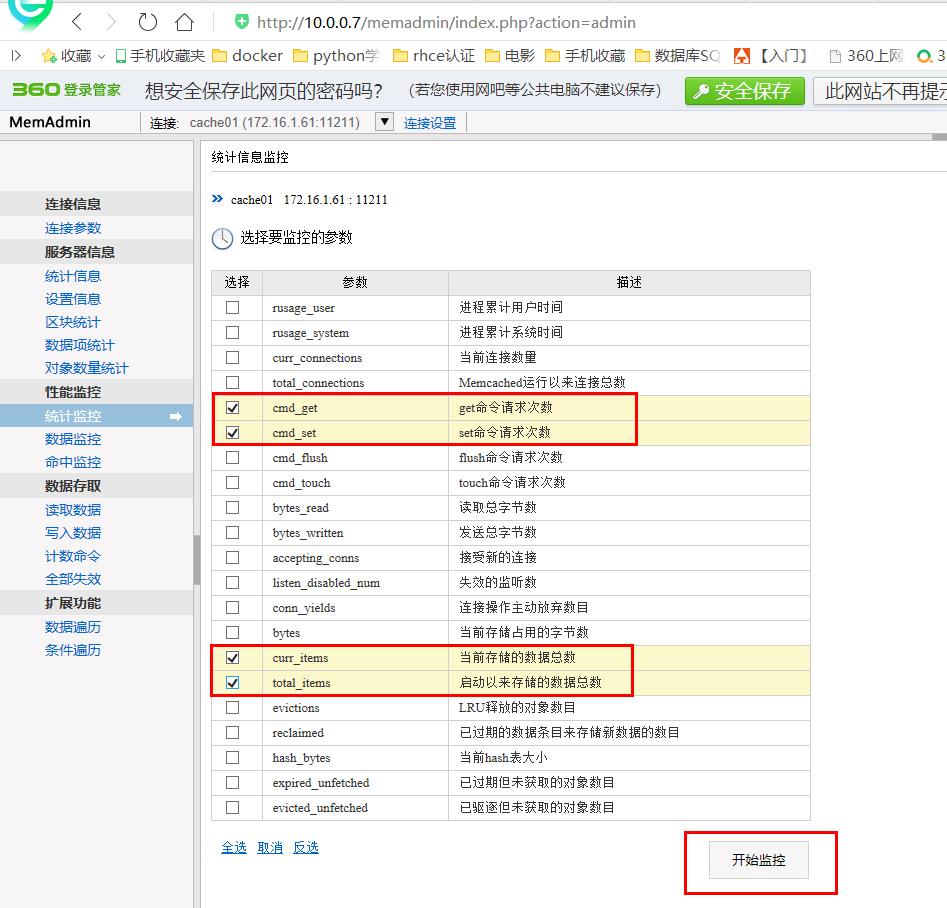
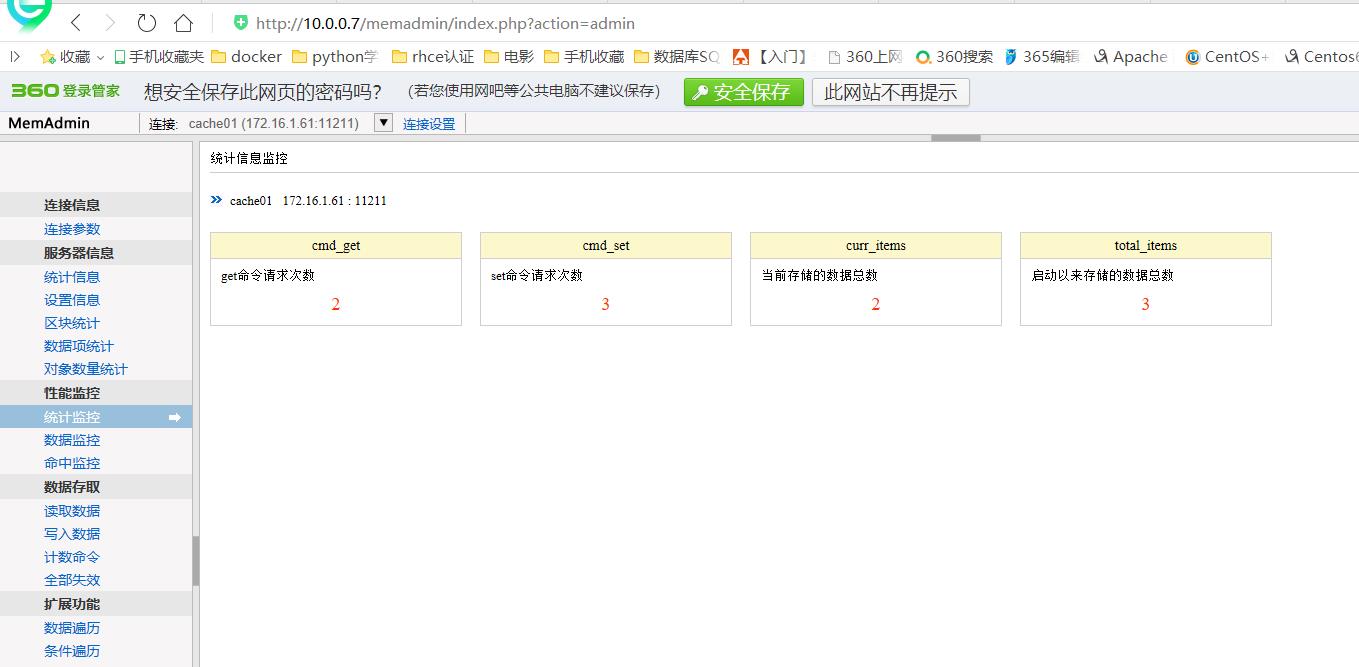
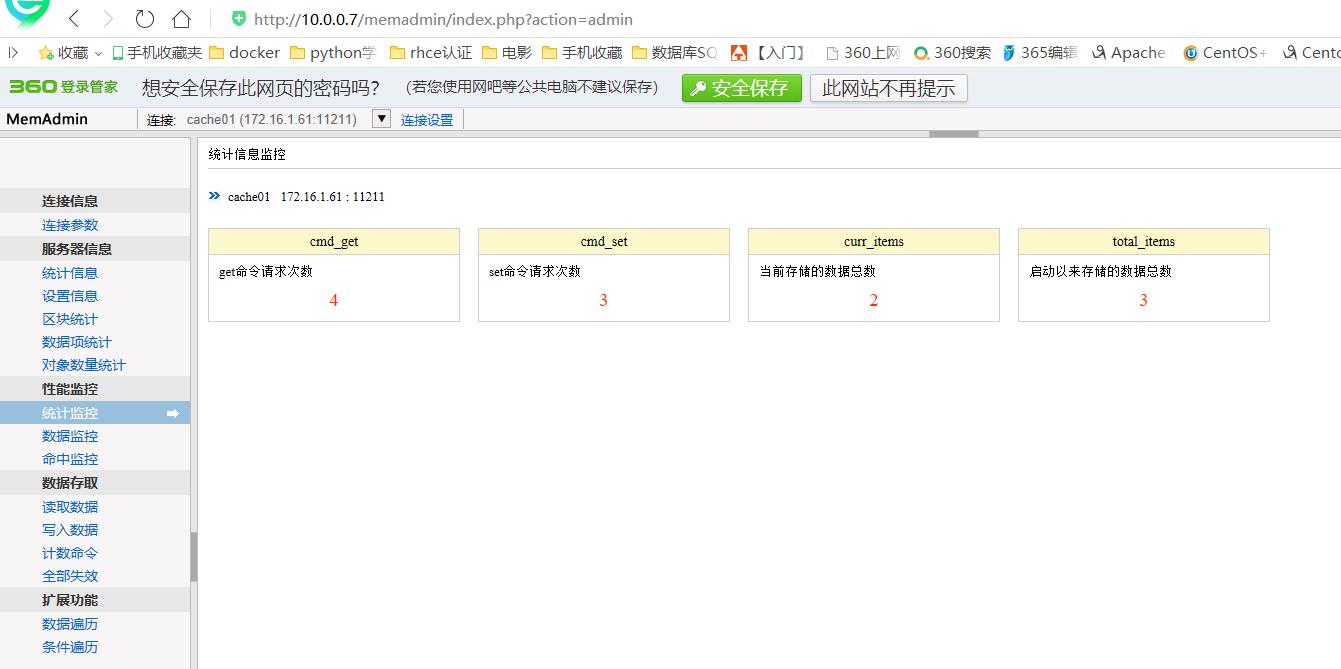
在cache01主机上执行读取数据和写入数据,查看监控页面,数据发生变化
[root@cache01 ~]# printf "set data01 0 0 10\r\noldgirls01\r\n" | nc 172.16.1.61 11211
STORED
[root@cache01 ~]# printf "get data01\r\n" |nc 172.16.1.61 11211
VALUE data01 0 10
oldgirls01
END
[root@cache01 ~]# printf "get data01\r\n" |nc 172.16.1.61 11211
VALUE data01 0 10
oldgirls01
END


七、利用Memcached缓存wordpress数据库

第一步:下载memcached缓存配置文件
wordpress缓存数据缓存到memcached中:https://cn.wordpress.org/plugins/memcached/
下载:memcached.3.2.2.zip
wordpress缓存数据缓存到redis中:https://cn.wordpress.org/plugins/redis-cache/
第二步:将下载好的配置文件放到wordprss下的wp-content中
[root@web01 tools]# unzip memcached.3.2.2.zip
[root@web01 tools]# cd memcached/
[root@web01 memcached]# mv object-cache.php /application/nginx/html/blog/wp-content/
[root@web01 memcached]# ll /application/nginx/html/blog/wp-content/object-cache.php
-rw-r--r-- 1 root root 22881 Jun 3 12:30 /application/nginx/html/blog/wp-content/object-cache.php
使用memcached缓存wordpress博文数据
第三步:修改object-cache.php配置文件,将array('127.0.0.1','');为memcached服务器ip地址

[root@web01 memcached]# grep -n "172" /application/nginx/html/blog/wp-content/object-cache.php
745: $buckets = array( '172.16.1.61:11211' );
第四步:进行测试


【推荐】国内首个AI IDE,深度理解中文开发场景,立即下载体验Trae
【推荐】编程新体验,更懂你的AI,立即体验豆包MarsCode编程助手
【推荐】抖音旗下AI助手豆包,你的智能百科全书,全免费不限次数
【推荐】轻量又高性能的 SSH 工具 IShell:AI 加持,快人一步
· Linux系列:如何用heaptrack跟踪.NET程序的非托管内存泄露
· 开发者必知的日志记录最佳实践
· SQL Server 2025 AI相关能力初探
· Linux系列:如何用 C#调用 C方法造成内存泄露
· AI与.NET技术实操系列(二):开始使用ML.NET
· 无需6万激活码!GitHub神秘组织3小时极速复刻Manus,手把手教你使用OpenManus搭建本
· C#/.NET/.NET Core优秀项目和框架2025年2月简报
· 葡萄城 AI 搜索升级:DeepSeek 加持,客户体验更智能
· 什么是nginx的强缓存和协商缓存
· 一文读懂知识蒸馏