linux 之 LAMP架构综合演练
LAMP 基本架构图和基本概念
1.CGI


192.168.170.27 #apache 服务器
yum install httpd php php-mysql -y

192.168.170.17 #数据库服务器

[root@chujiapeng ~]# yum install mariadb-server -y
2.准备php测试代码vim /var/www/html/test.php
<?
php
echo date("Y/m/d H:i:s");
phpinfo();
?>
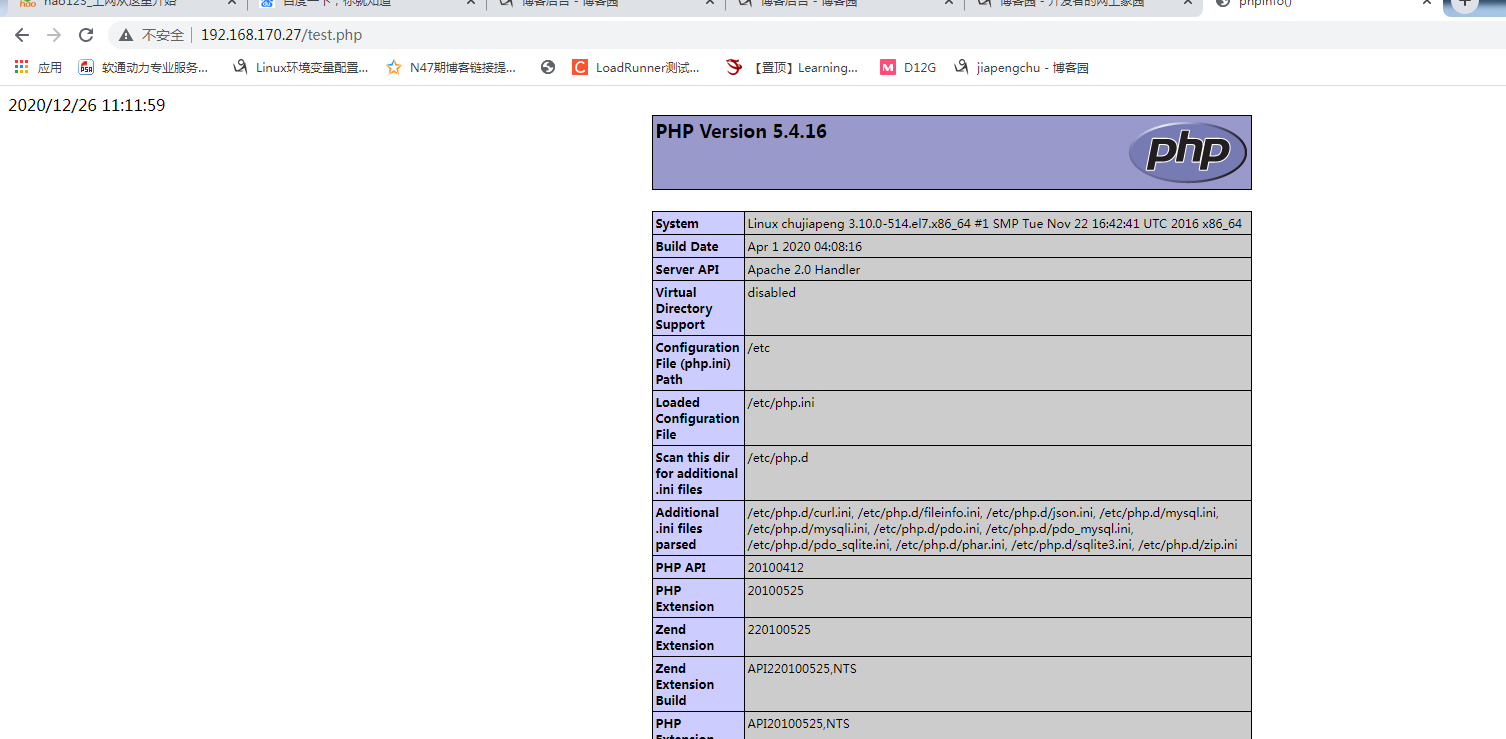
vim /etc/php.ini
date.timezone =Asia/Shanghai

4.实现LAMP的phpmyadmin,管理数据库
版本:phpMyAdmin-4.0.10.20-all-languages.tar.gz
cd /data
tar -xf phpMyAdmin-4.0.10.20-all-languages.tar.gz
mkdir /var/www/html/pma
cd phpMyAdmin-4.0.10.20-all-languages/
mv * /var/www/html/pma/
cd  /var/www/html/pma/
mv config.sample.inc.php config.inc.php
配置文件修改如下
$cfg['blowfish_secret'] = '111111'; /* YOU MUST FILL IN THIS FOR COOKIE AUTH! */
$cfg['Servers'][$i]['host'] = '192.168.170.17';
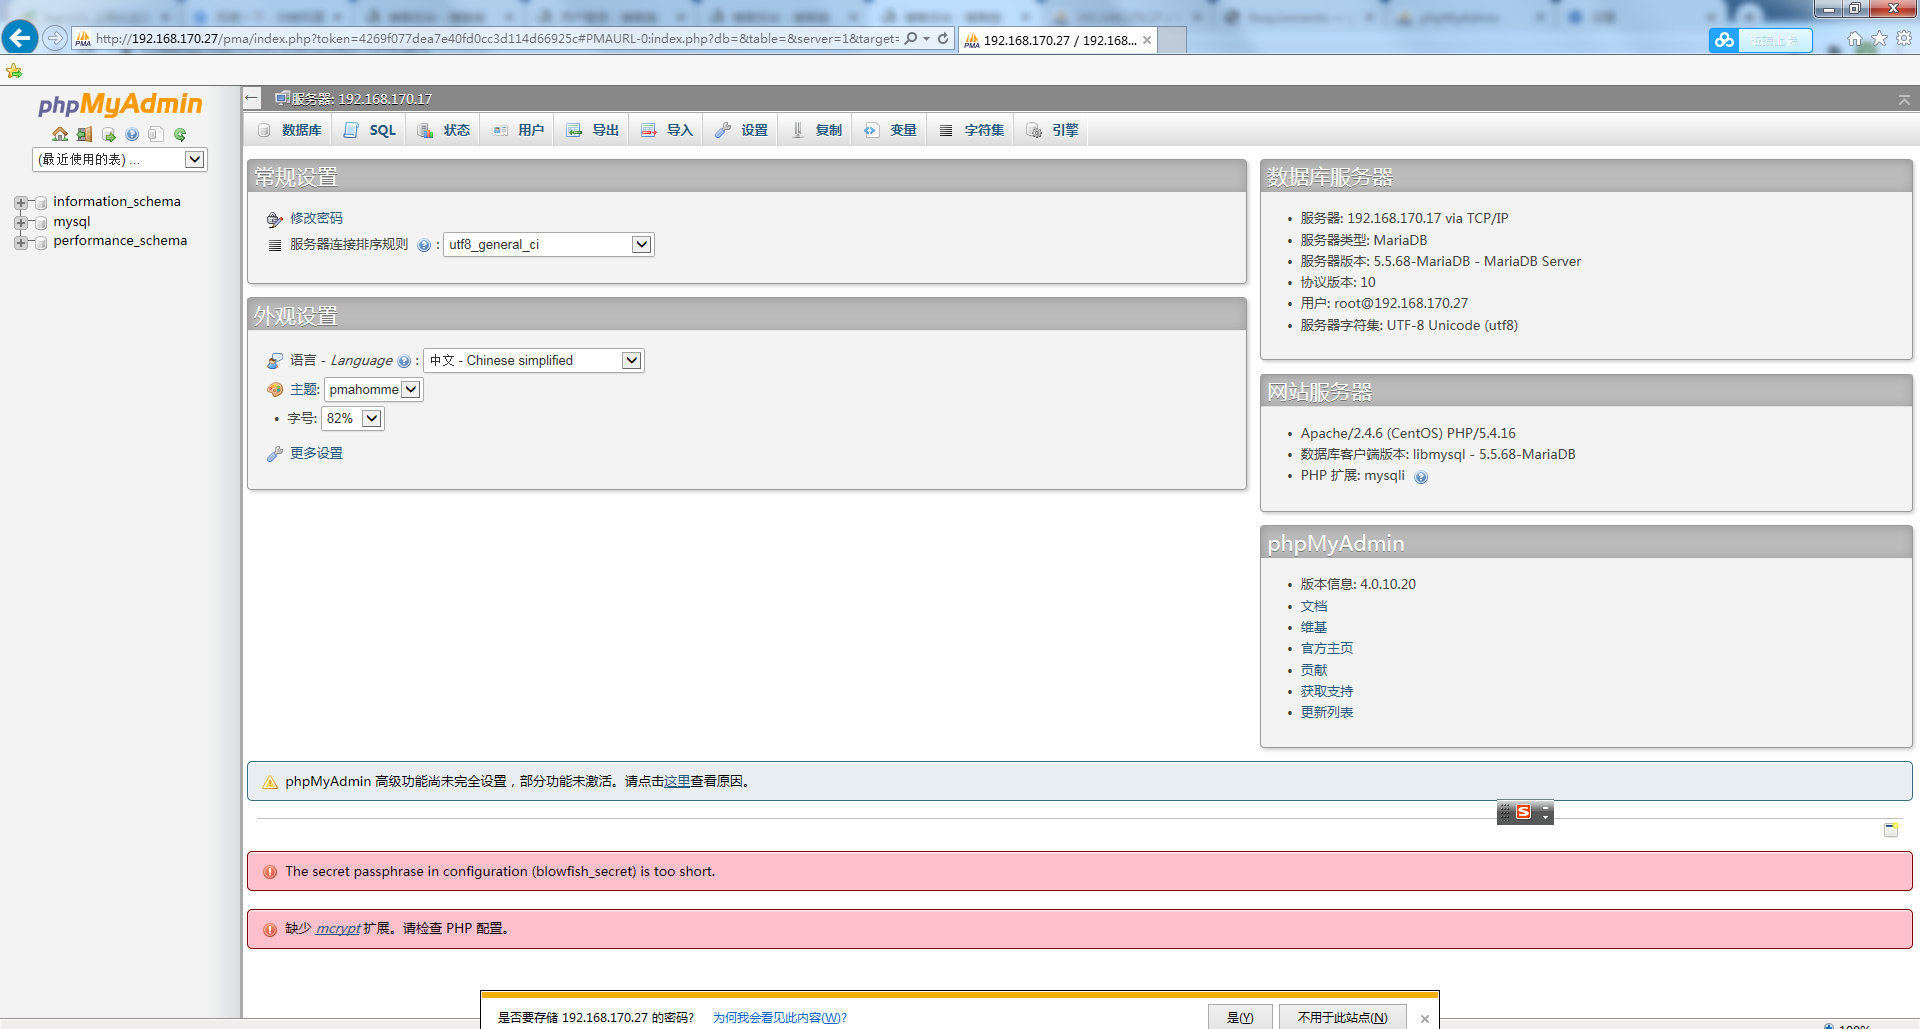
测试

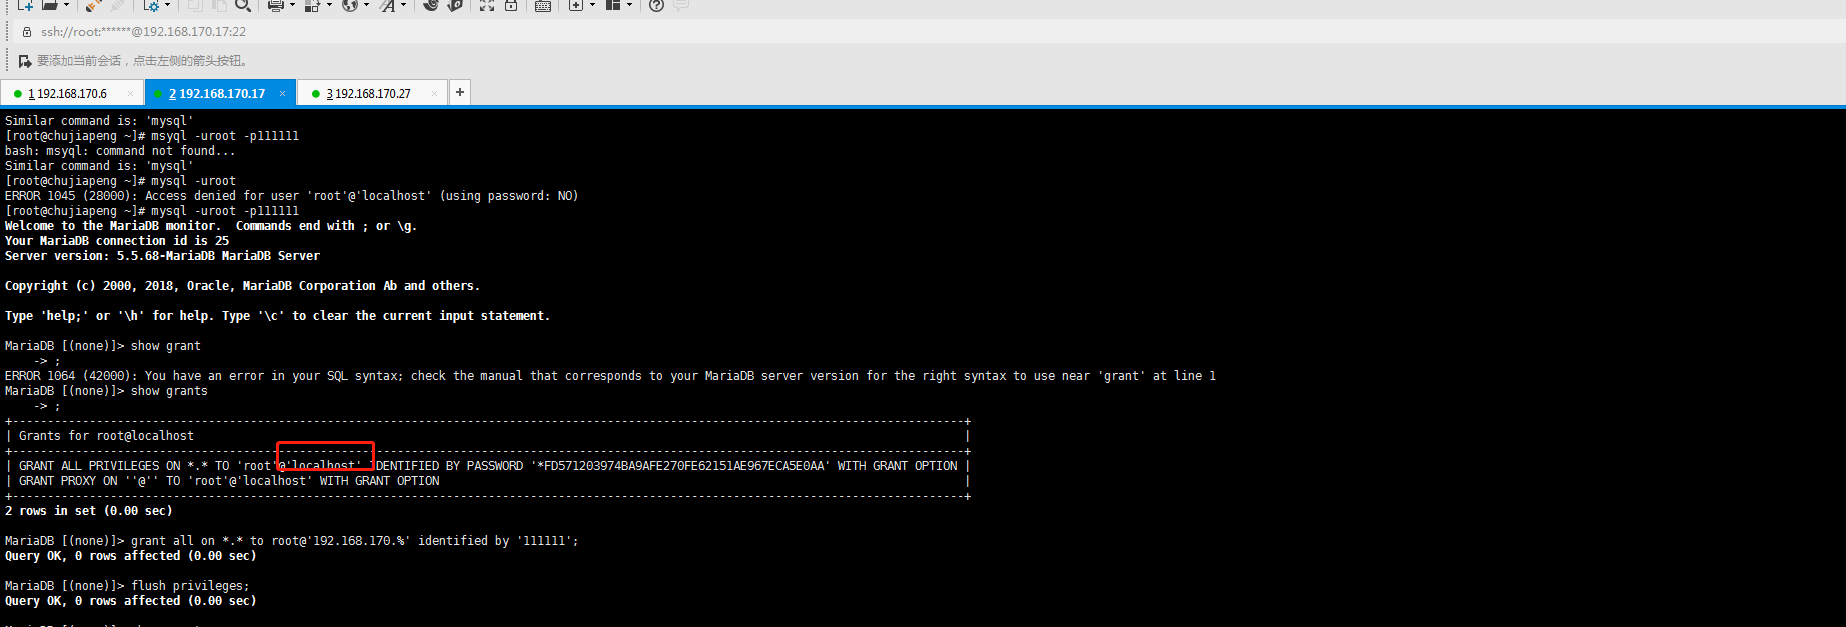
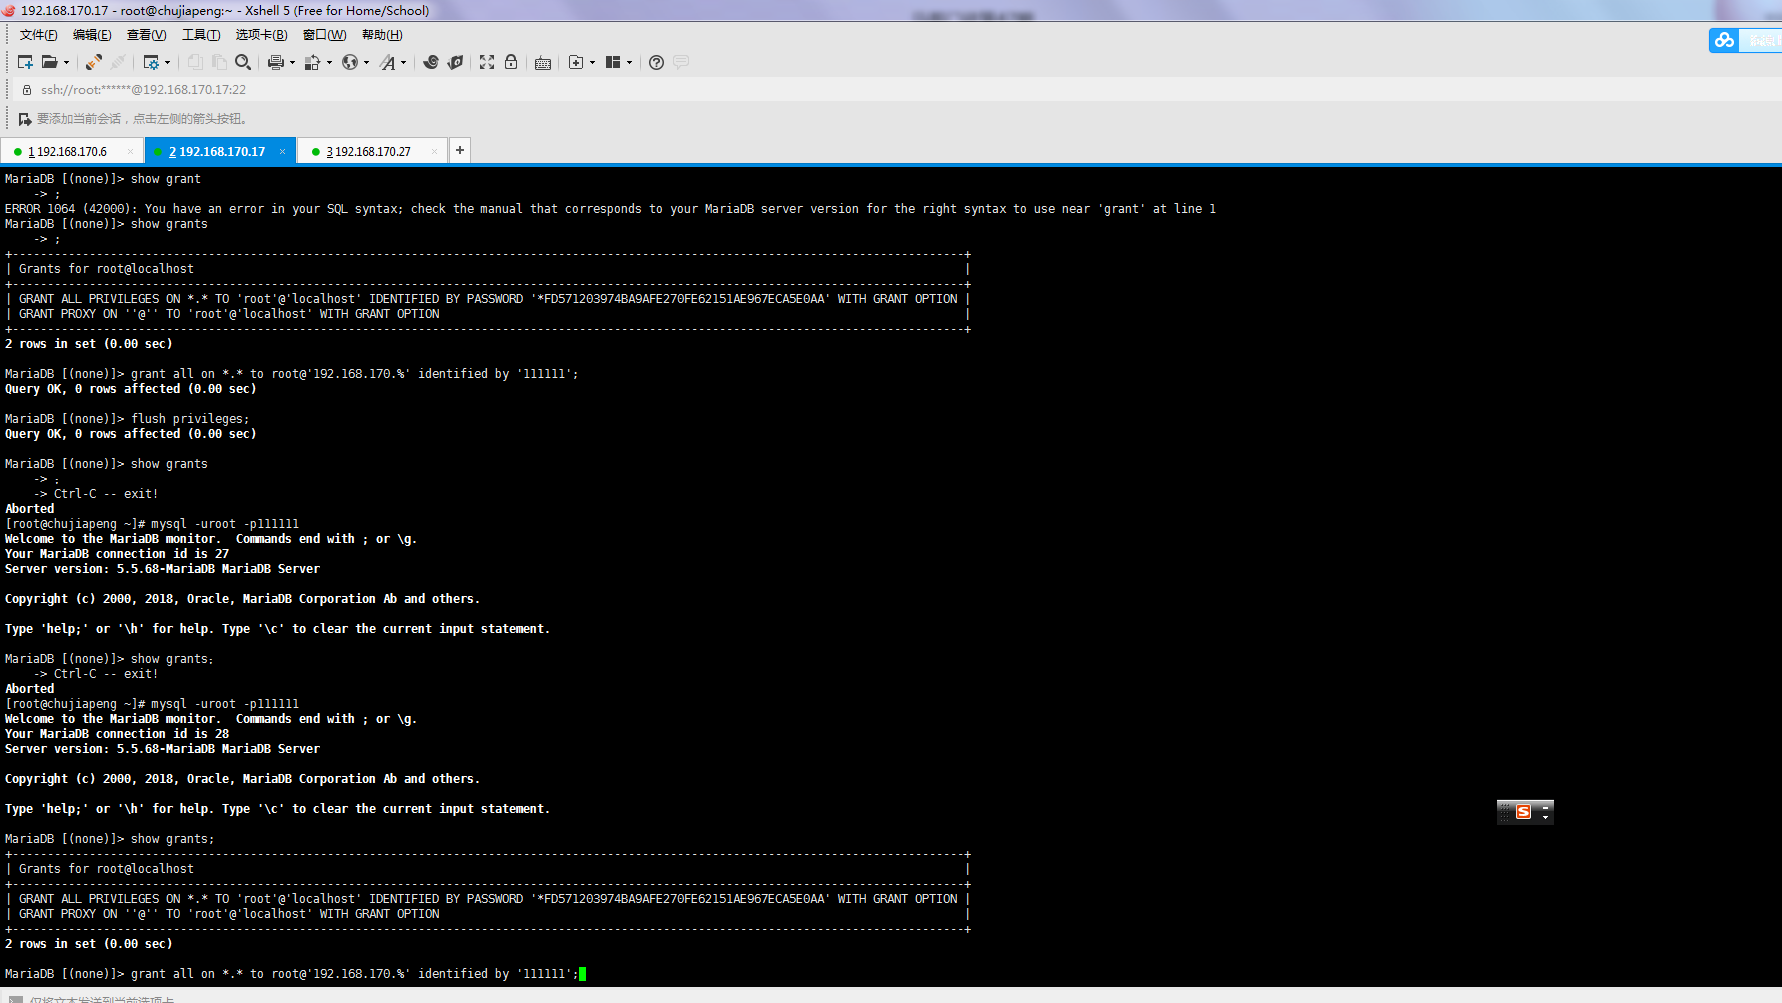
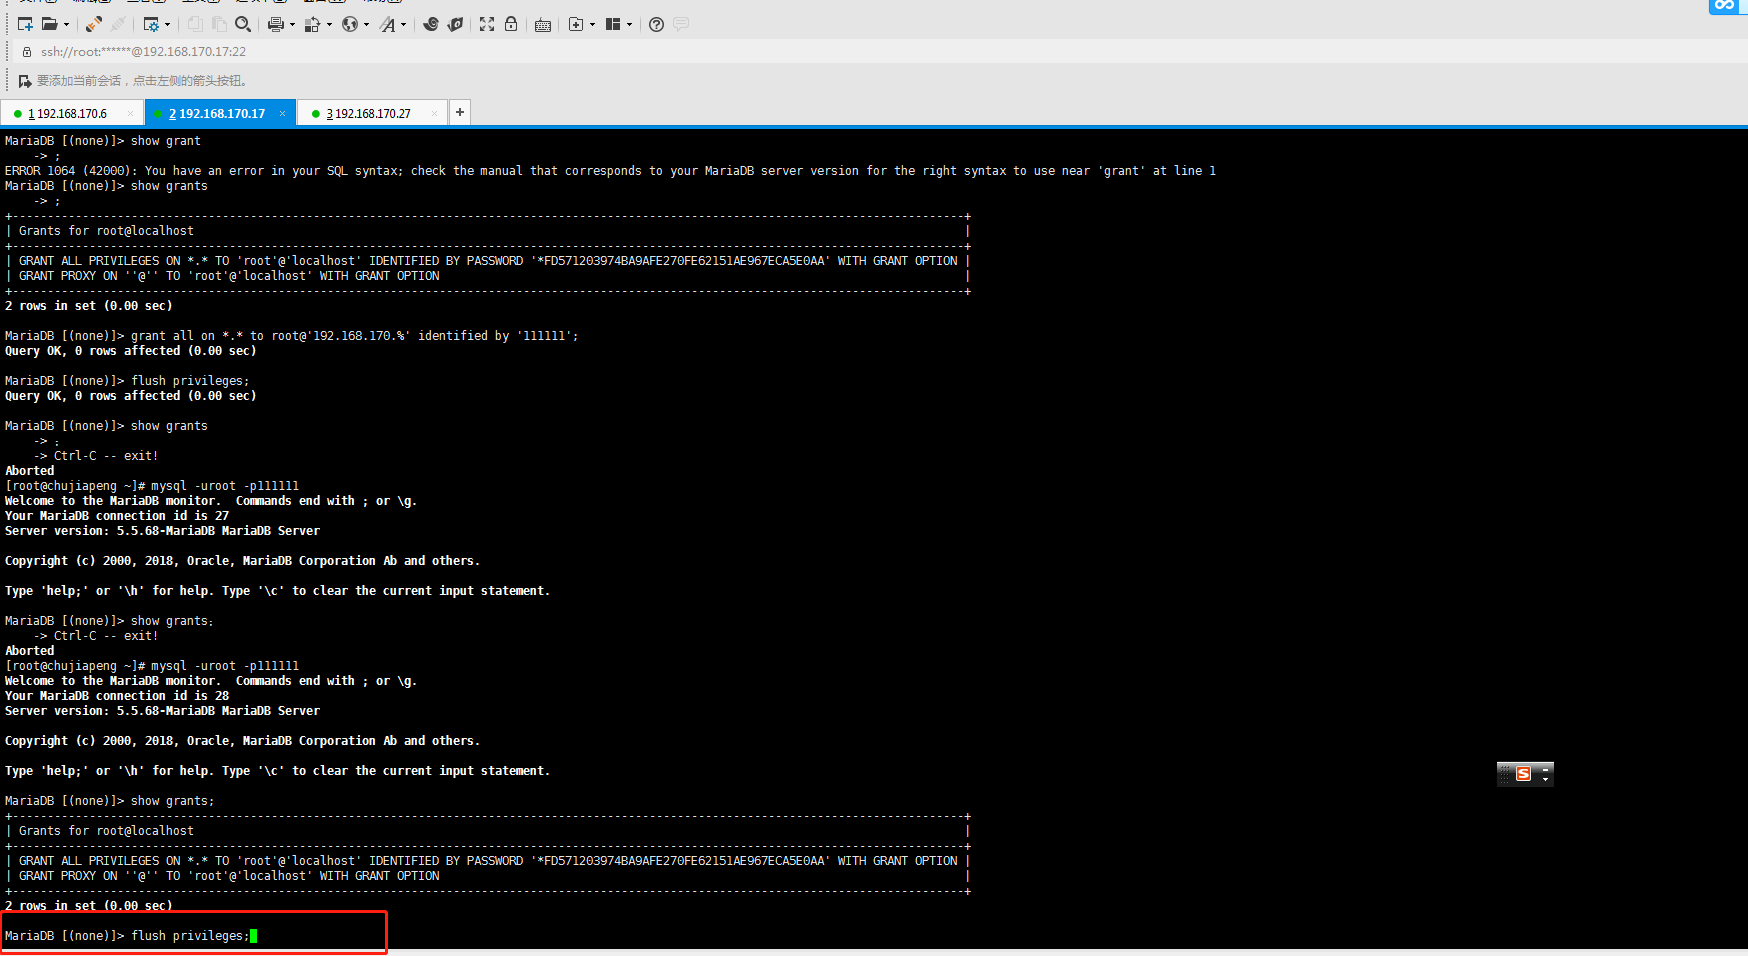
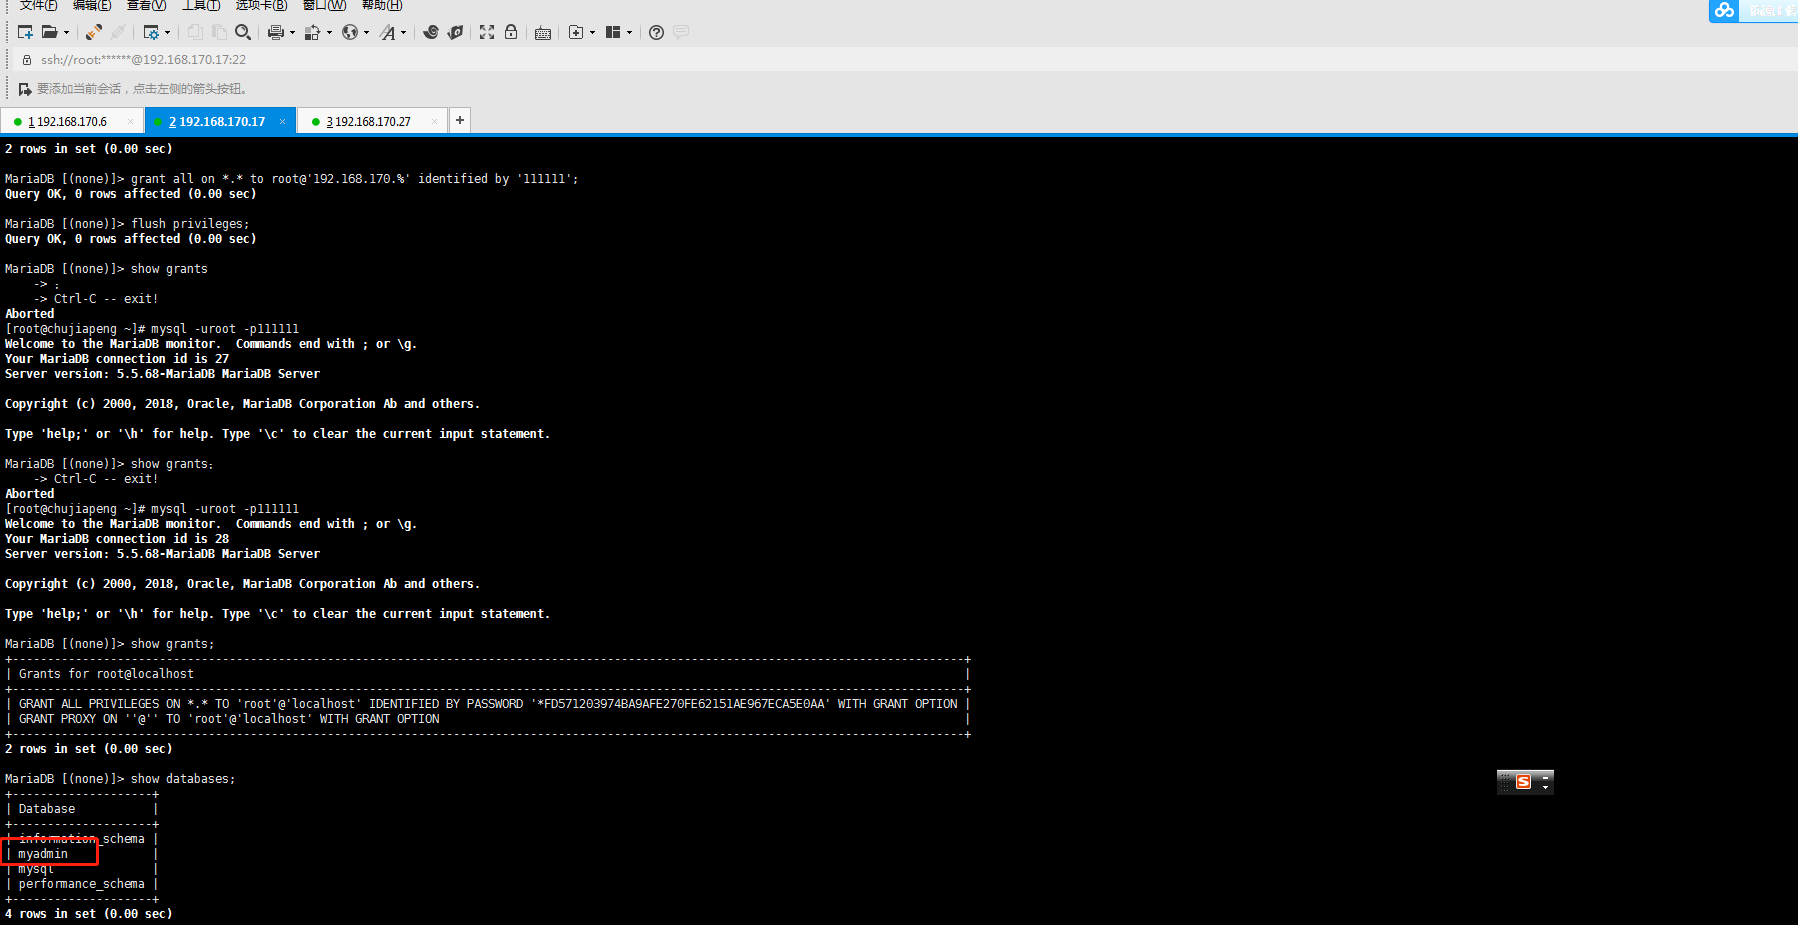
排错过程,原因是数据库只能localhost链接,重新授权即可
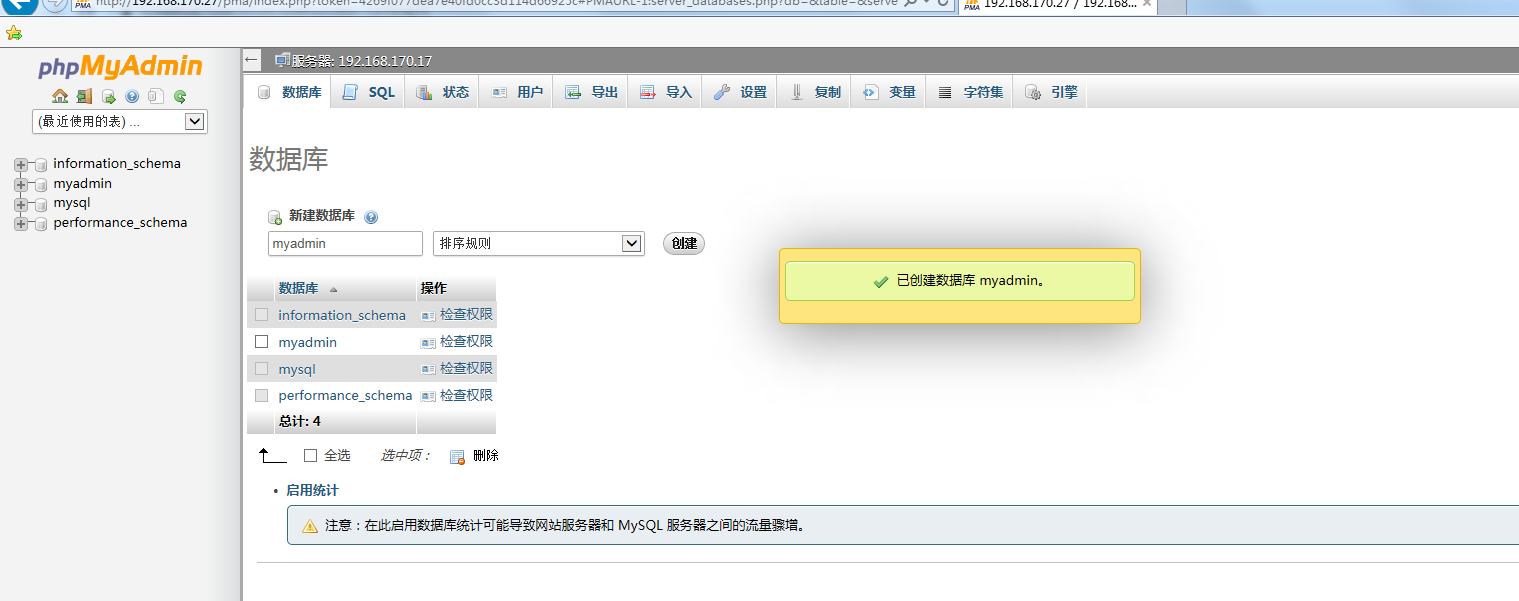
再次测试成功

5.实现LAMP的wordpress,搭建个人博客和改造网站
1.环境搭建
软件版本
wordpress-5.0.4-zh_CN.tar.gz
数据库服务器17
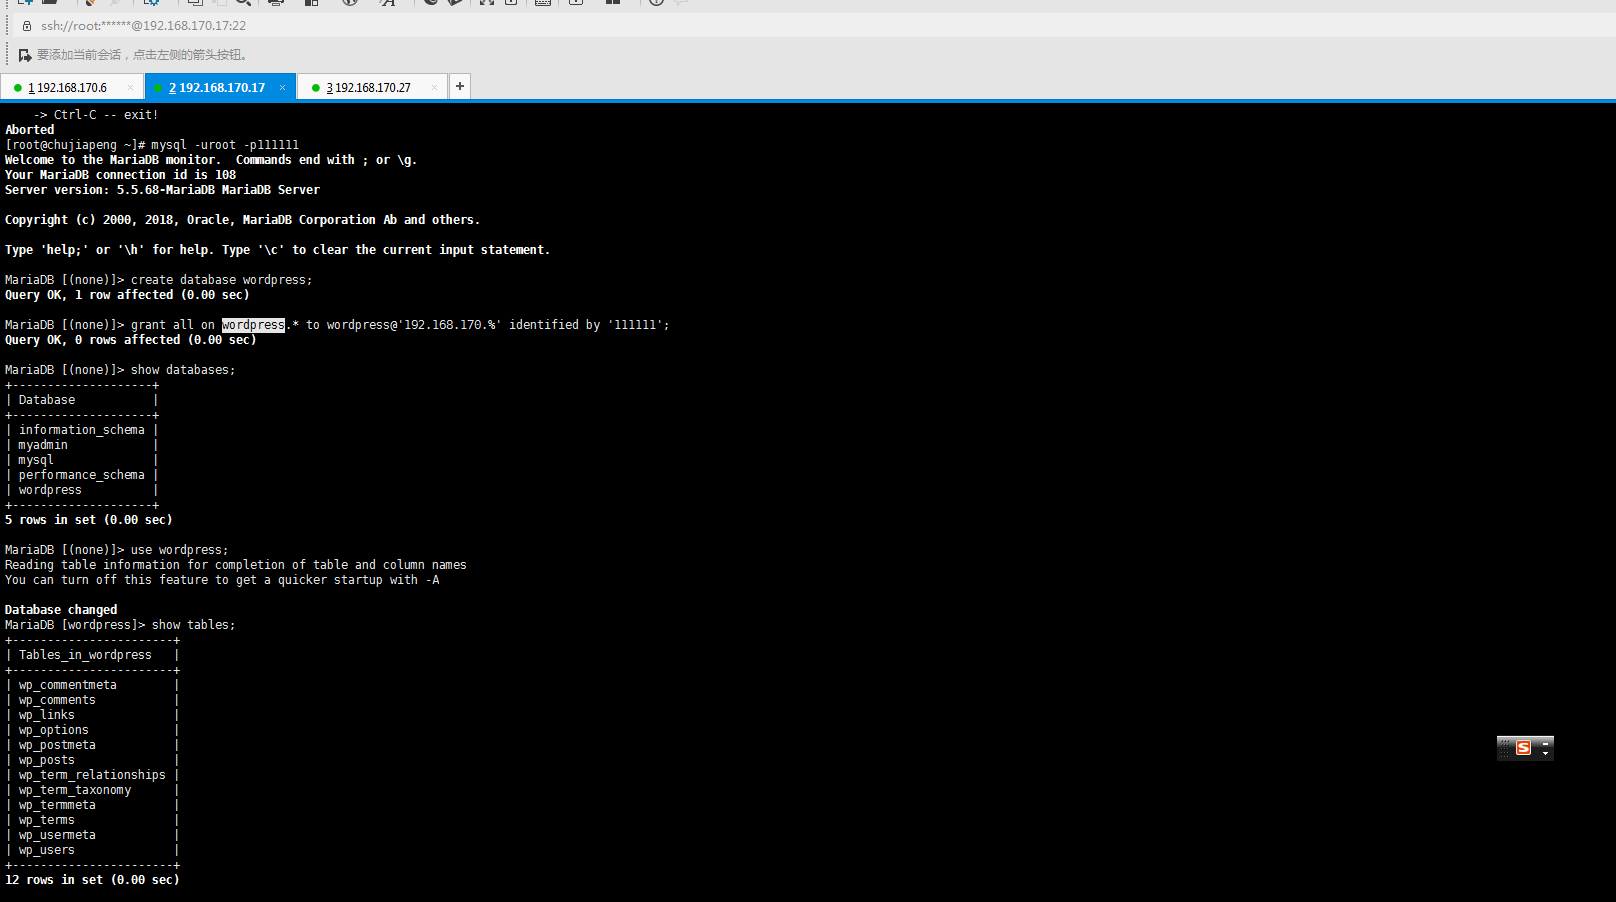
1.创建链接wordpresd的用户和数据库
MariaDB [(none)]> create database wordpress;
Query OK, 1 row affected (0.00 sec)
MariaDB [(none)]> grant all on wordpress.* to wordpress@'192.168.170.%' identified by '111111';
Query OK, 0 rows affected (0.00 sec)
2.在应用服务器27上测试下链接
[root@chujiapeng data]# mysql -uwordpress -p111111 -h192.168.170.17
Welcome to the MariaDB monitor. Commands end with ; or \g.
Your MariaDB connection id is 109
Server version: 5.5.68-MariaDB MariaDB Server
Copyright (c) 2000, 2018, Oracle, MariaDB Corporation Ab and others.
Type 'help;' or '\h' for help. Type '\c' to clear the current input statement.
3.web服务27上部署WordPress
193 tar -xf wordpress-5.0.4-zh_CN.tar.gz
194 ll
195 mv wordpress /var/www/html/\
196 mv wordpress /var/www/html/
197 ll /var/www/html/
2.准备WordPress配置文件
cd /var/www/html/wordpress
cp wp-config-sample.php wp-config.php
vim wp-config.php
修改前
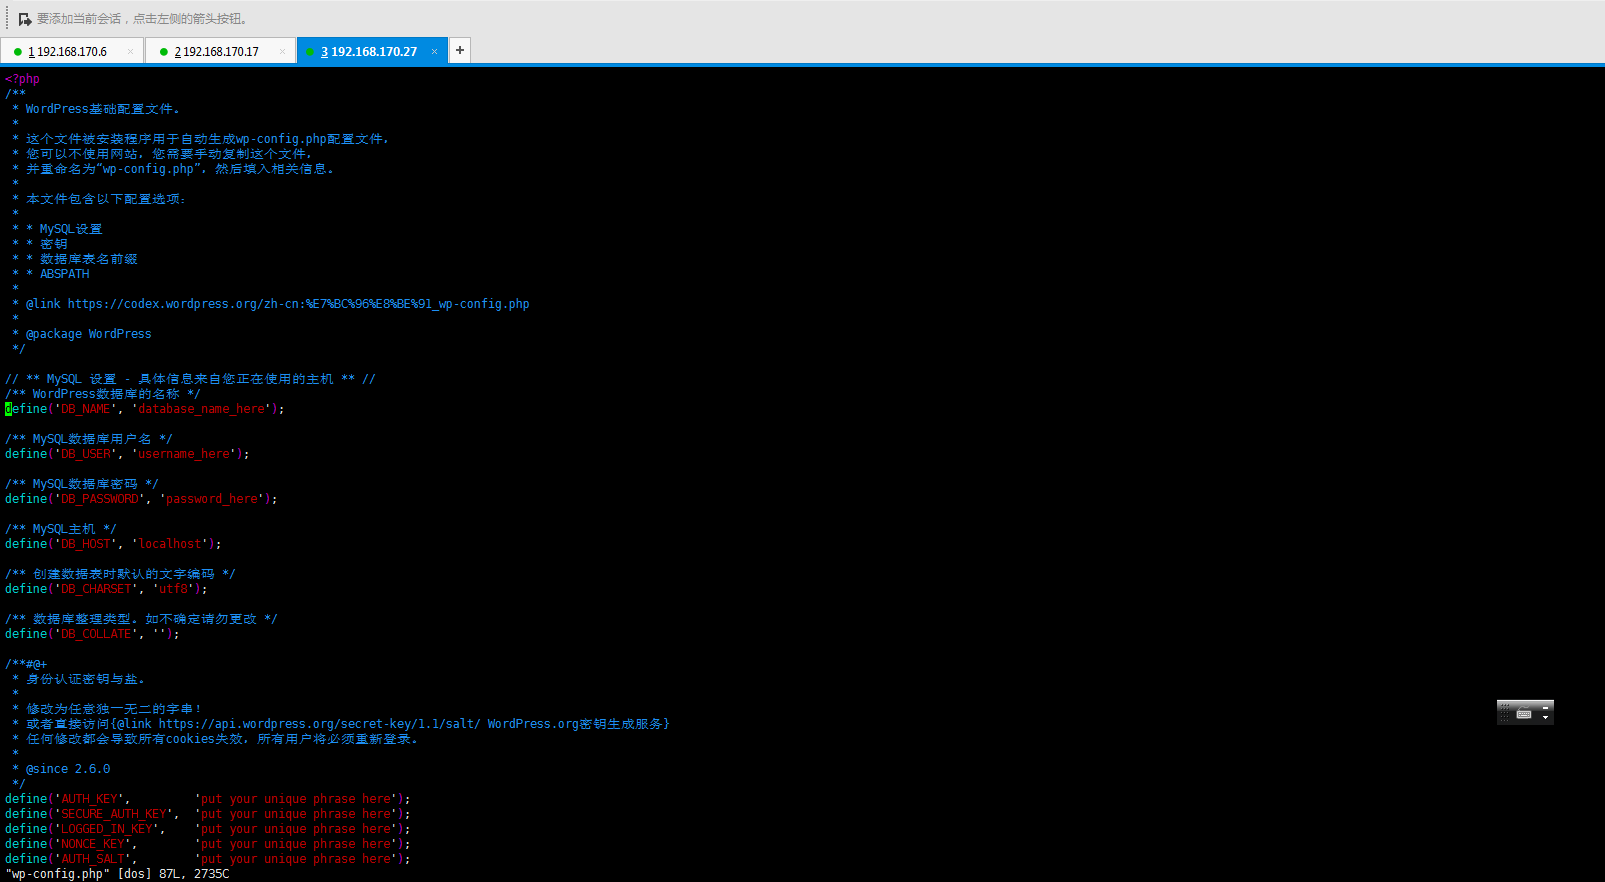
修改后
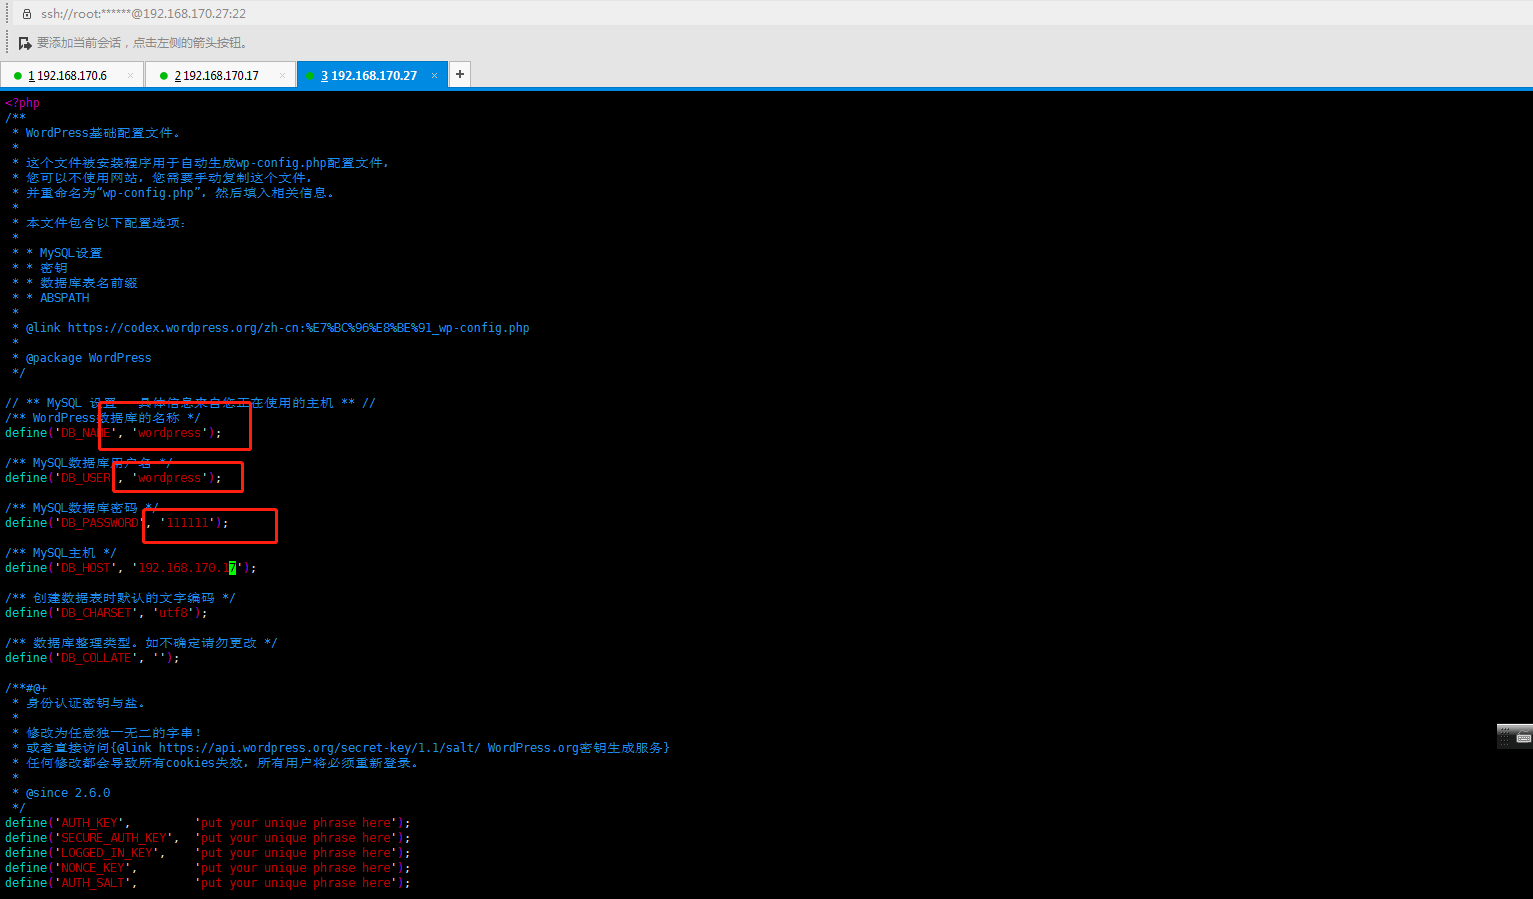
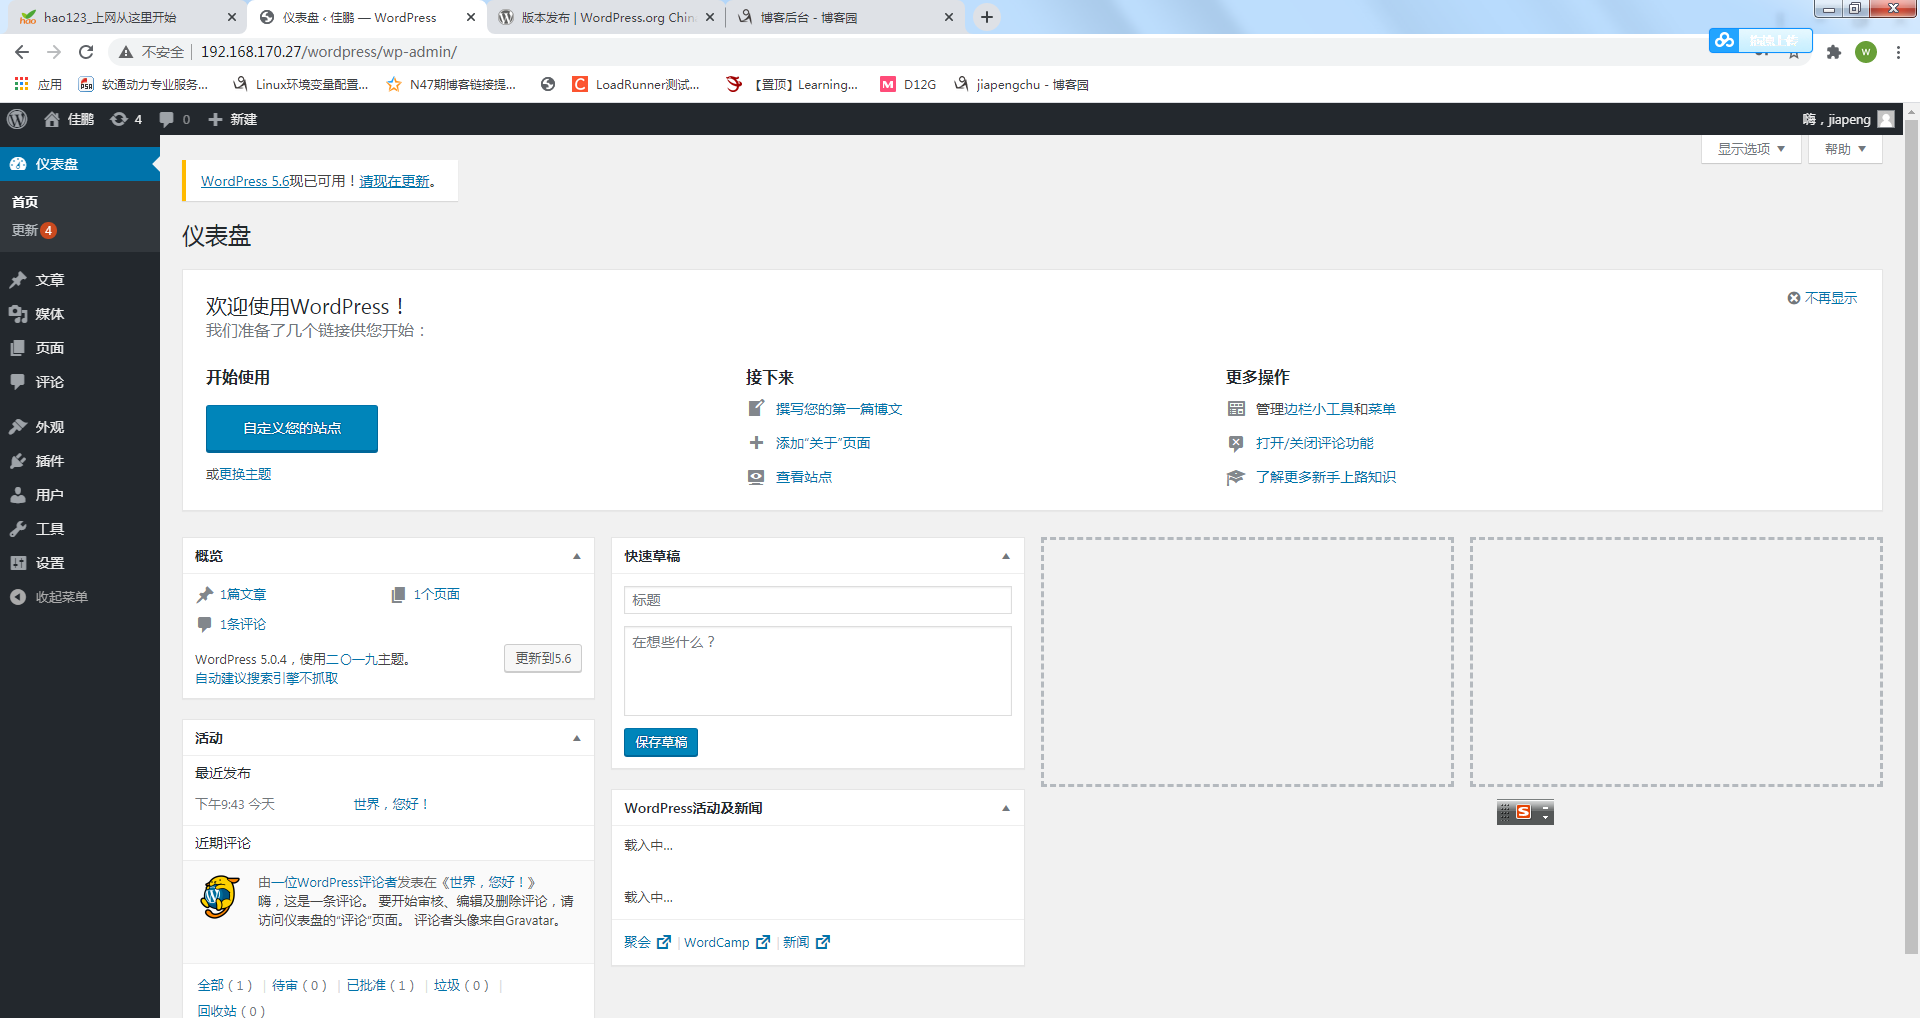
3.安装
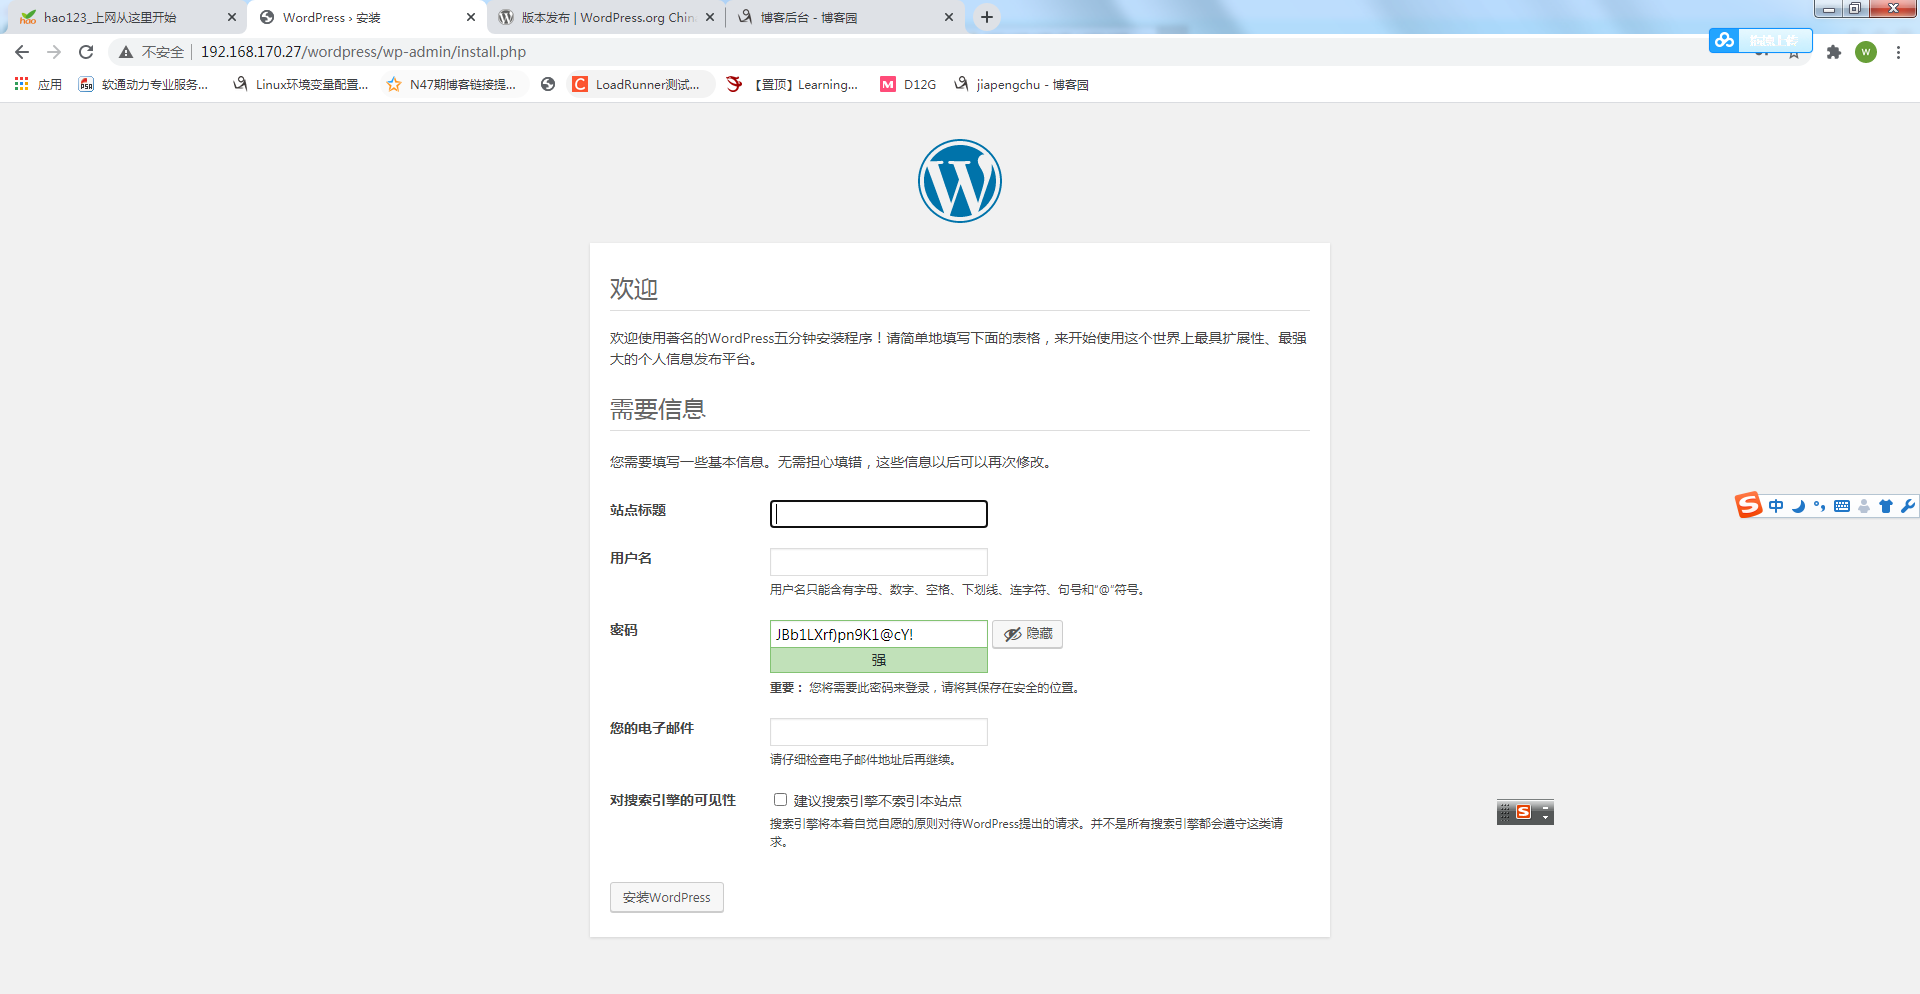
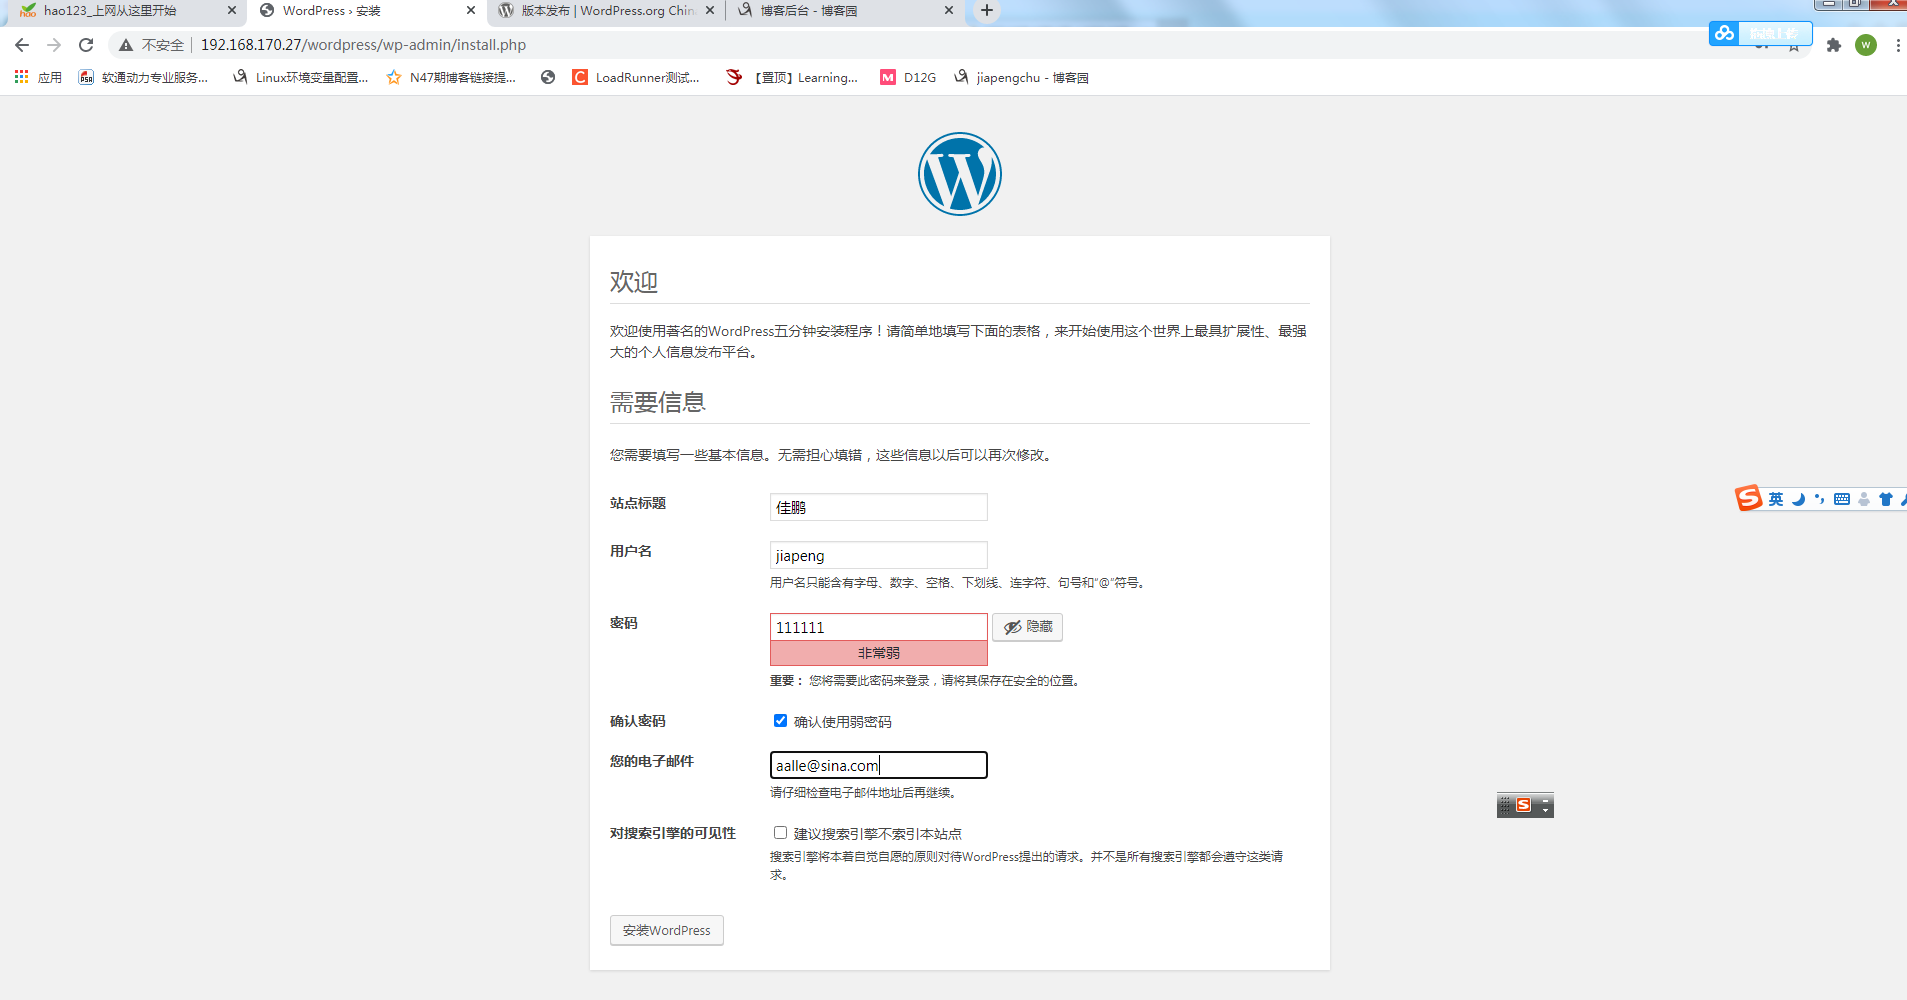

此时去数据库查看表,已经生成


6.实现LAMP的discus论坛
discus 版本Discuz_X3.3_SC_UTF8.zip
cd /data
unzip Discuz_X3.3_SC_UTF8.zip
mv upload/ /var/www/html/forum
ll /var/www/html/forum/
开始安装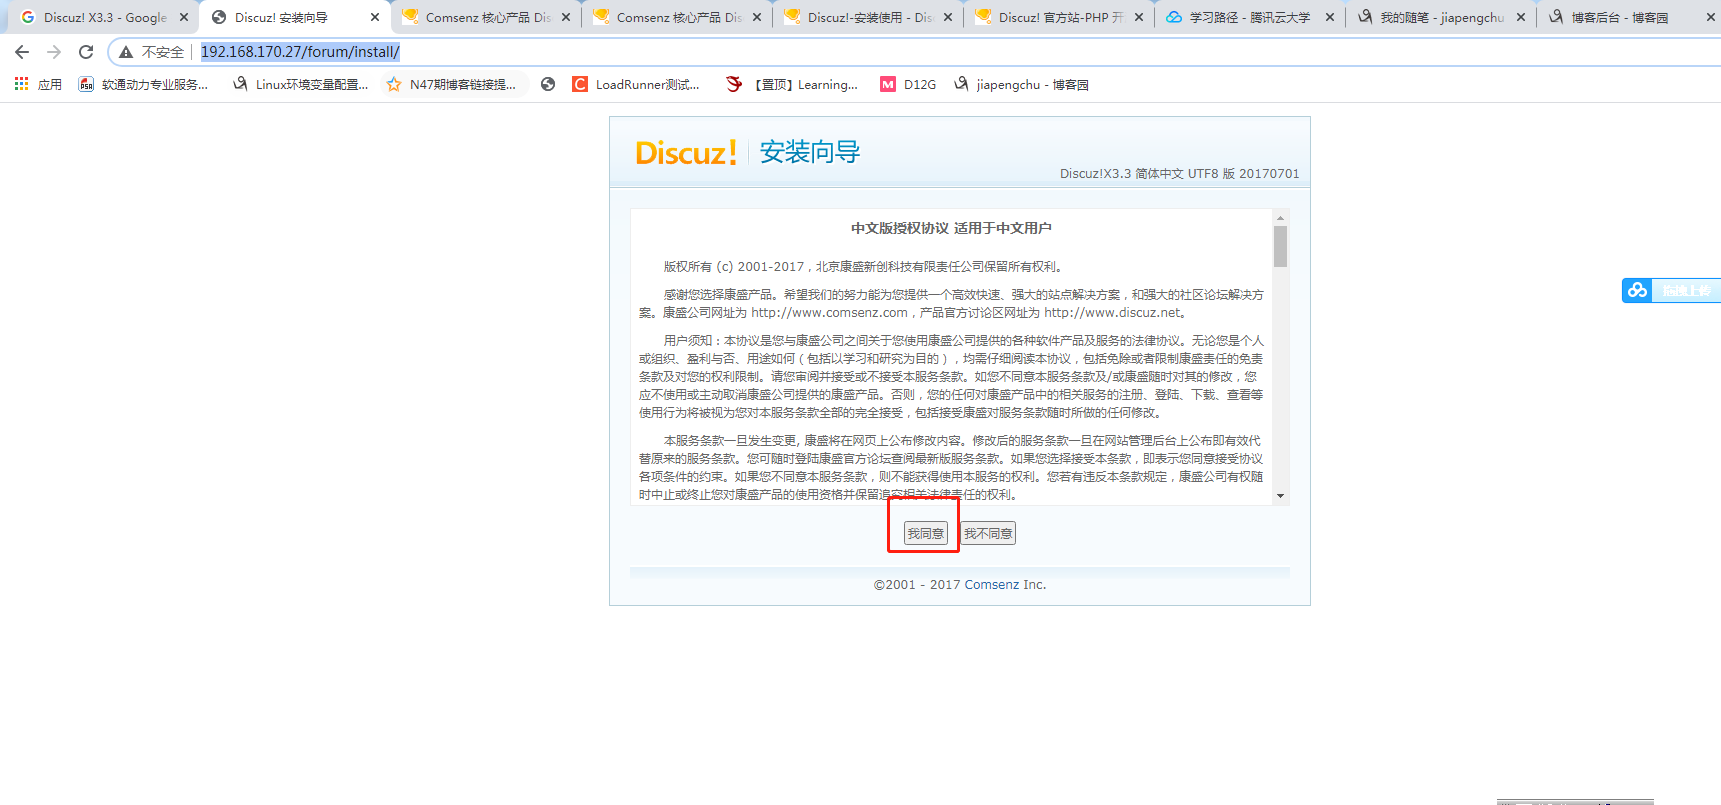

是没有权限
所以我们付给apache用户读写执行权限

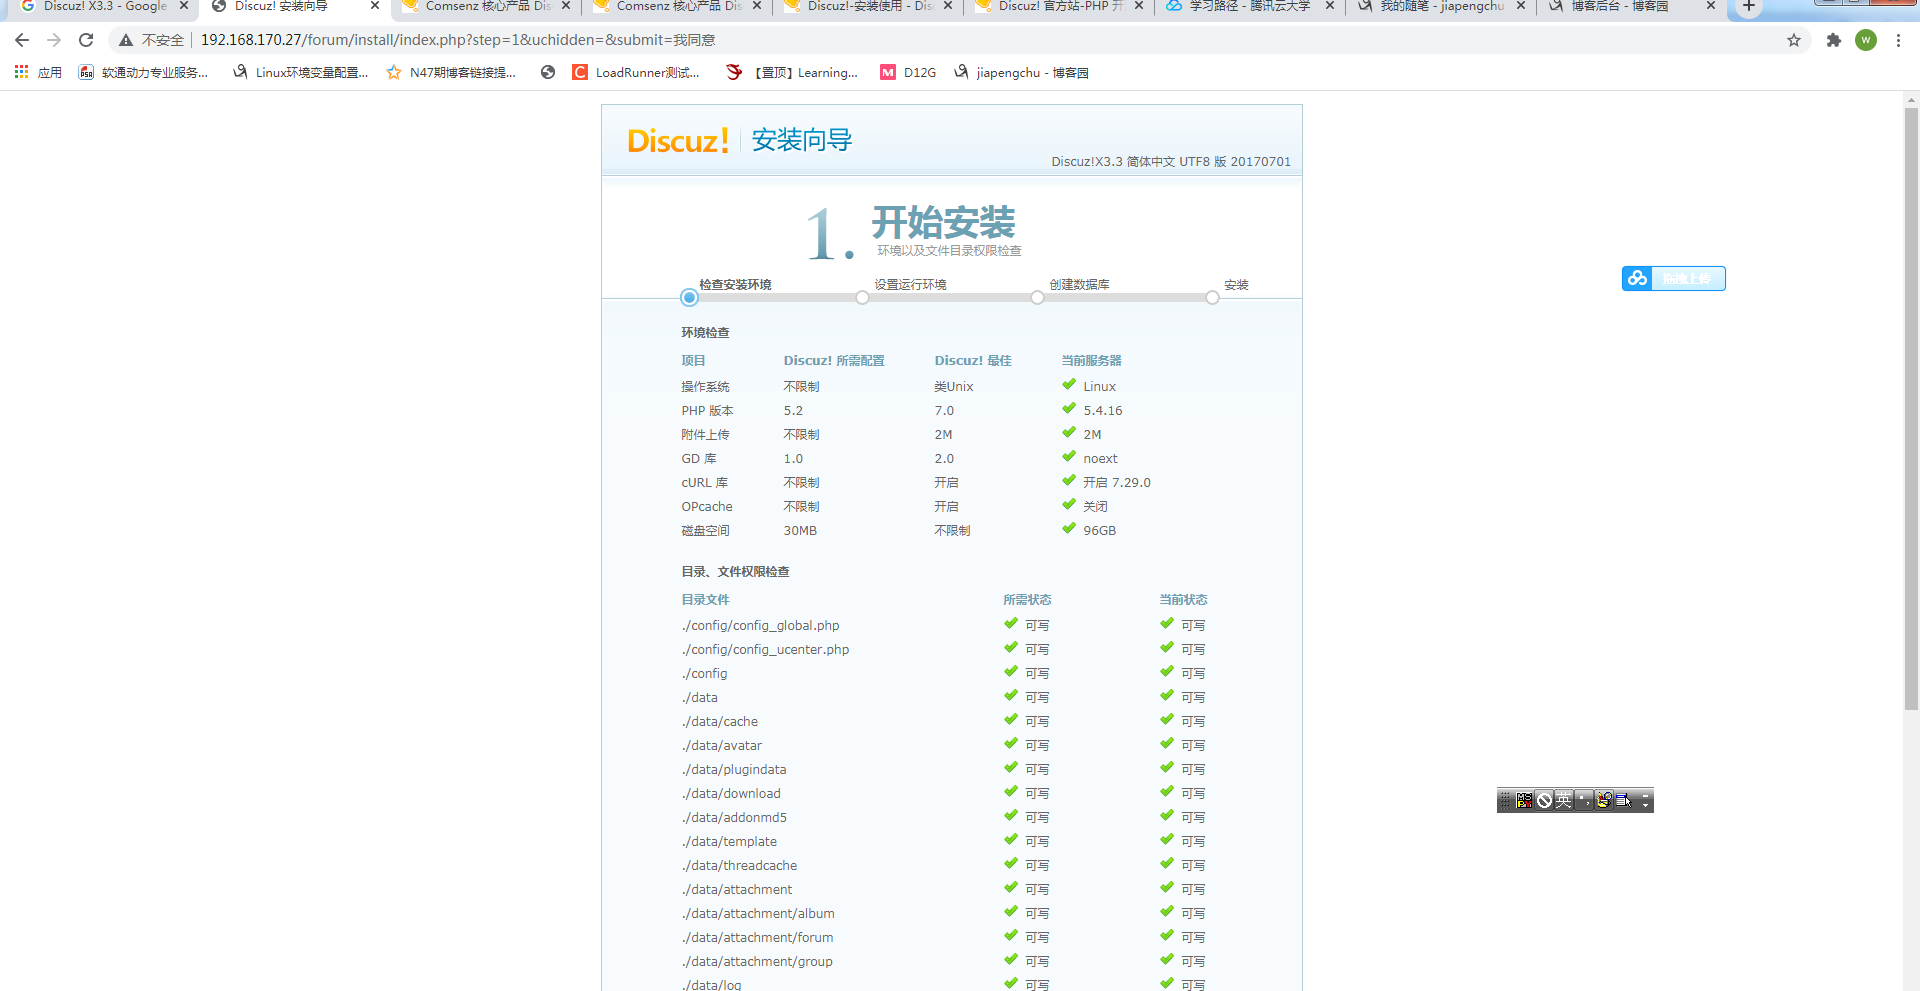
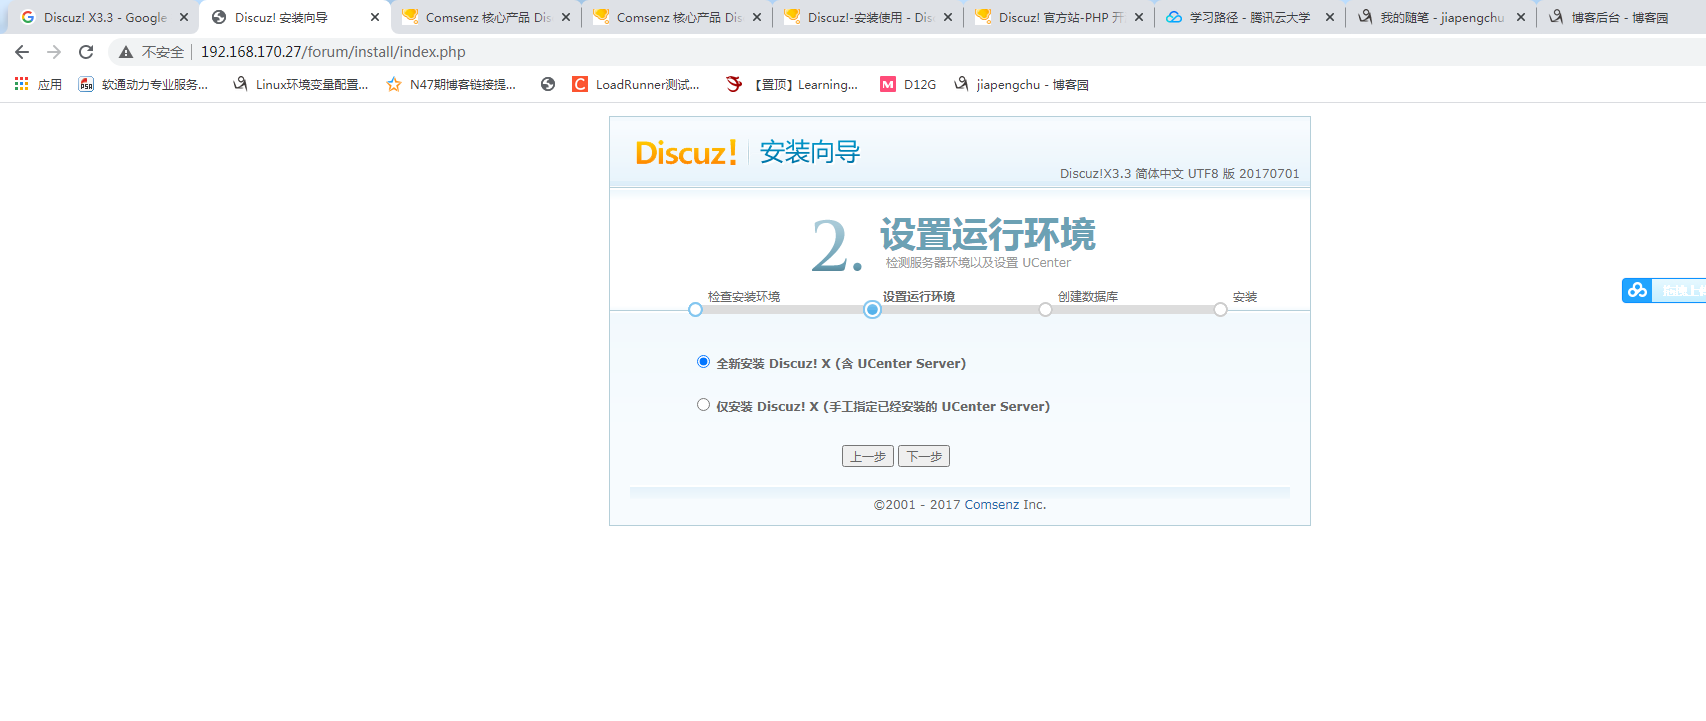


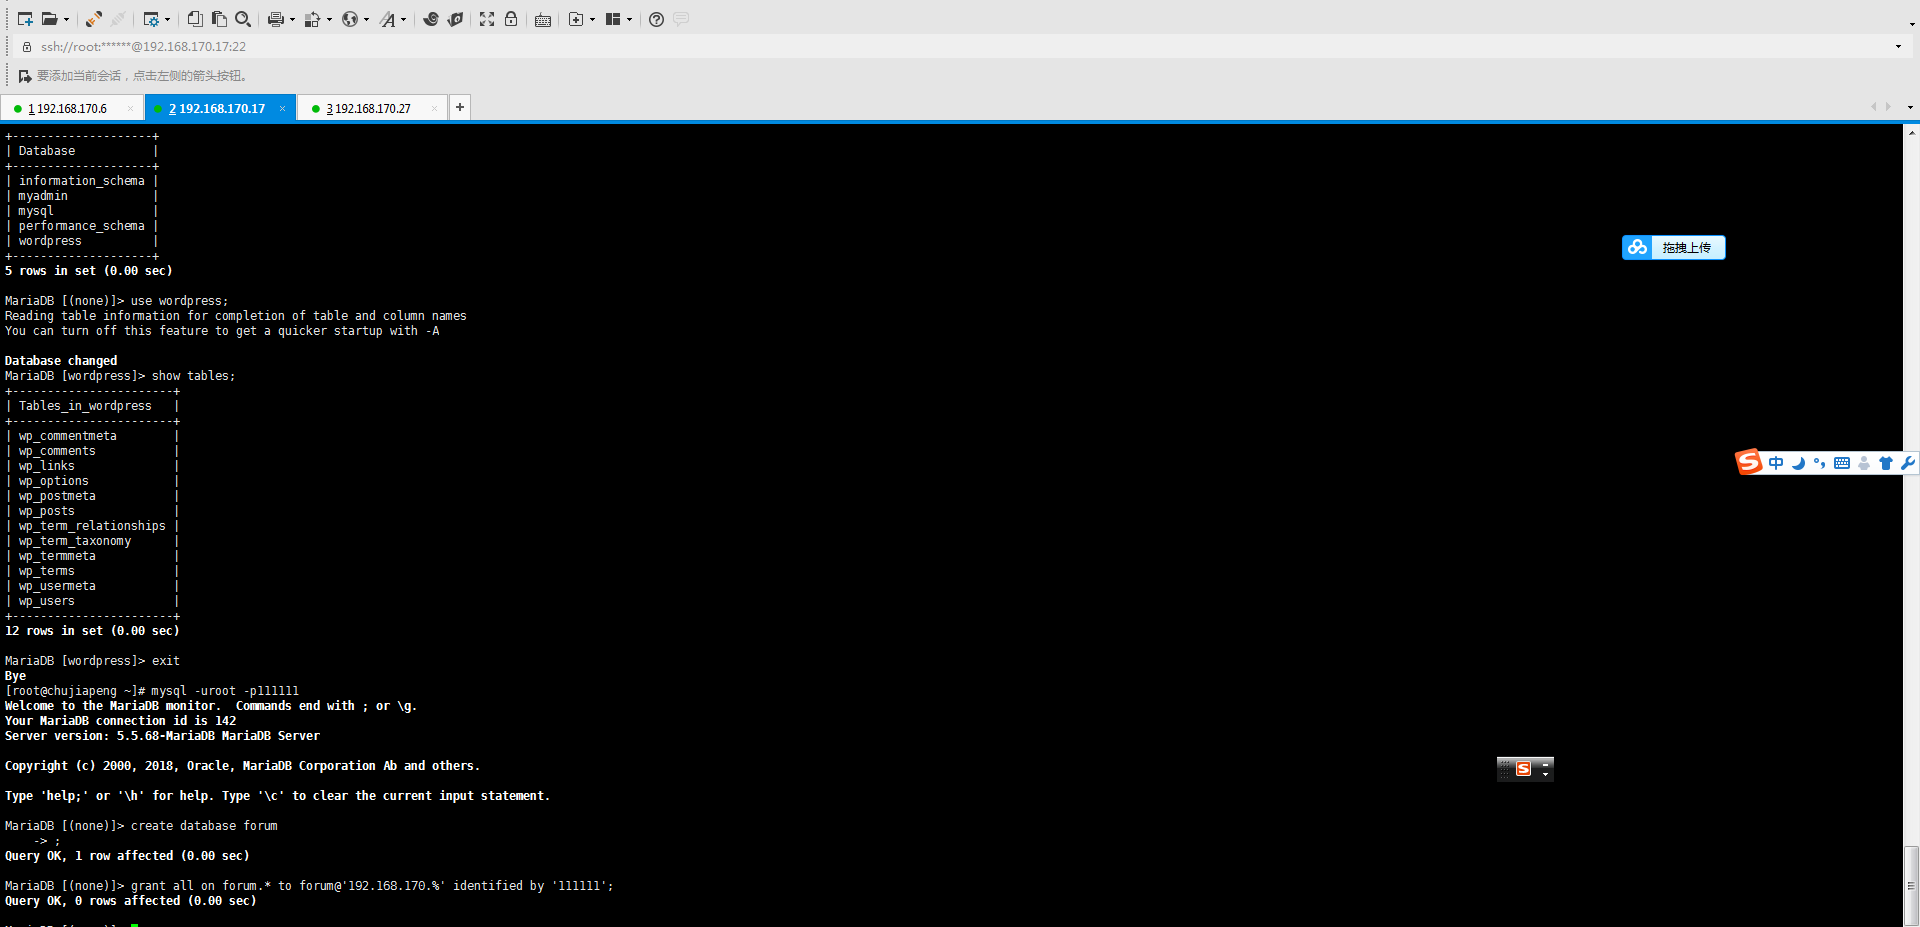
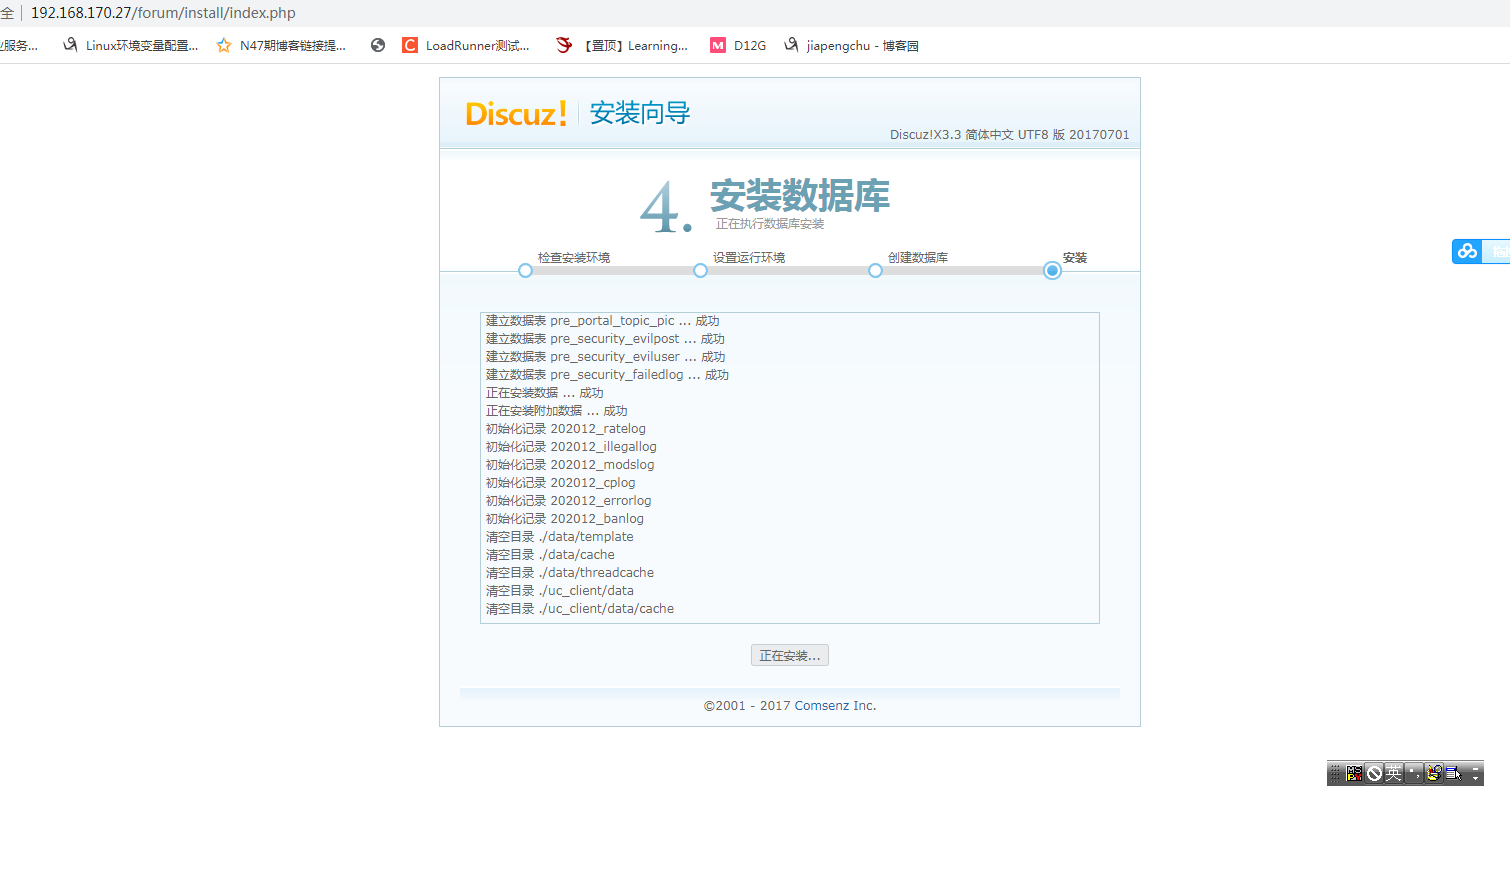
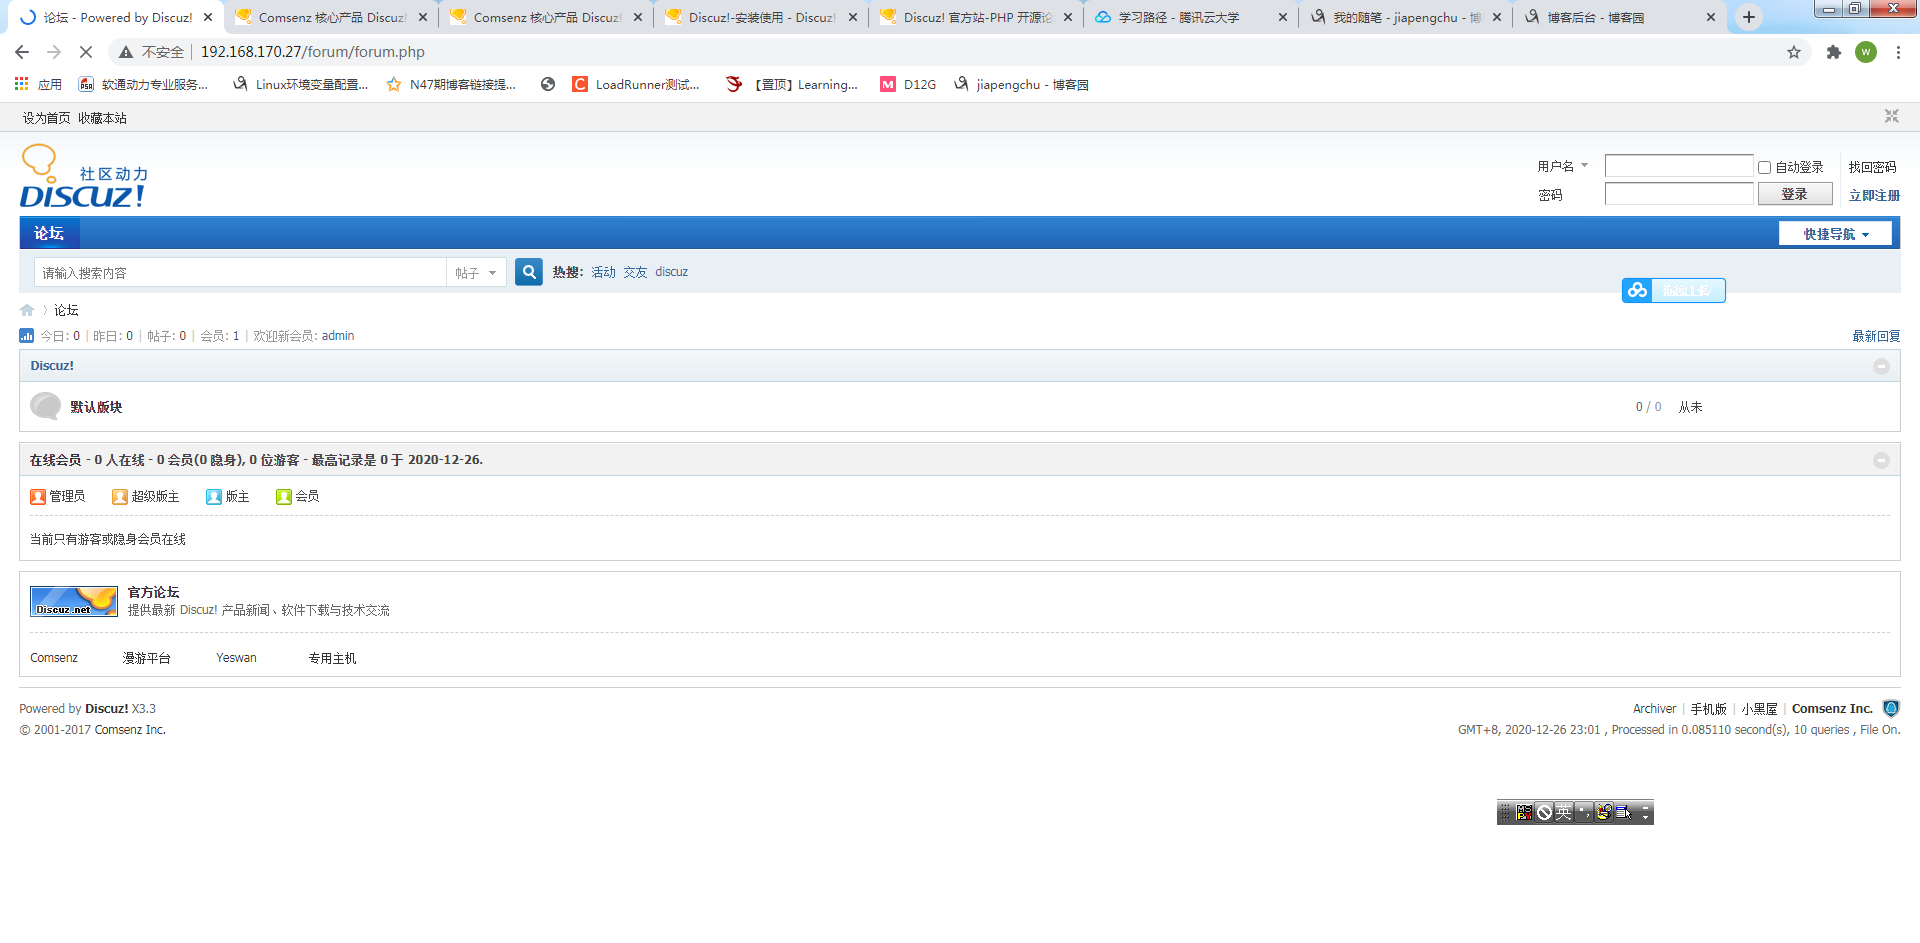
再次运行,

7.实现LAMP的实现WEB管理的PowerDNS
1.服务器配置过程
环境:
192.168.170.27 web服务
1.yum install -y pdns pdns-backend-mysql
2.rpm -ql pdns pdns-backend-mysql
放回结果

/etc/pdns

/etc/pdns/pdns.conf
/usr/bin/pdns_control
/usr/bin/pdns_zone2ldap
/usr/bin/pdnsutil
/usr/bin/zone2json
/usr/bin/zone2sql
/usr/lib/systemd/system/pdns.service
/usr/lib/systemd/system/pdns@.service
/usr/lib64/pdns
/usr/lib64/pdns/libbindbackend.so
/usr/sbin/pdns_server
/usr/share/doc/pdns-4.1.14
/usr/share/doc/pdns-4.1.14/README
/usr/share/licenses/pdns-4.1.14
/usr/share/licenses/pdns-4.1.14/COPYING
/usr/share/man/man1/pdns_control.1.gz
/usr/share/man/man1/pdns_server.1.gz
/usr/share/man/man1/pdns_zone2ldap.1.gz
/usr/share/man/man1/pdnsutil.1.gz
/usr/share/man/man1/zone2json.1.gz
/usr/share/man/man1/zone2sql.1.gz
/usr/lib64/pdns/libgmysqlbackend.so
/usr/share/doc/pdns-backend-mysql-4.1.14
/usr/share/doc/pdns-backend-mysql-4.1.14/3.4.0_to_4.1.0_schema.mysql.sql
/usr/share/doc/pdns-backend-mysql-4.1.14/dnssec-3.x_to_3.4.0_schema.mysql.sql
/usr/share/doc/pdns-backend-mysql-4.1.14/nodnssec-3.x_to_3.4.0_schema.mysql.sql
/usr/share/doc/pdns-backend-mysql-4.1.14/schema.mysql.sql
3.192.168.170.17 数据库服务
CREATE DATABASE powerdns;
GRANT ALL ON powerdns.* TO 'powerdns'@'192.168.170.%' IDENTIFIED BY '111111';
4.参考官网文档建立数据库表
mysql -upowerdns -p111111 -h192.168.170.17
MariaDB [(none)]> show databases;
+--------------------+
| Database |
+--------------------+
| information_schema |
| powerdns |
+--------------------+
2 rows in set (0.00 sec)
MariaDB [(none)]> use powerdns
MariaDB [powerdns]>
建表官网文档
https://doc.powerdns.com/md/authoritative/backend-generic-mysql/
CREATE TABLE domains (
  id                    INT AUTO_INCREMENT,
  name                  VARCHAR(255) NOT NULL,
  master                VARCHAR(128) DEFAULT NULL,
  last_check            INT DEFAULT NULL,
  type                  VARCHAR(6) NOT NULL,
  notified_serial       INT DEFAULT NULL,
  account               VARCHAR(40) DEFAULT NULL,
  PRIMARY KEY (id)
) Engine=InnoDB;

CREATE UNIQUE INDEX name_index ON domains(name);


CREATE TABLE records (
  id                    BIGINT AUTO_INCREMENT,
  domain_id             INT DEFAULT NULL,
  name                  VARCHAR(255) DEFAULT NULL,
  type                  VARCHAR(10) DEFAULT NULL,
  content               VARCHAR(64000) DEFAULT NULL,
  ttl                   INT DEFAULT NULL,
  prio                  INT DEFAULT NULL,
  change_date           INT DEFAULT NULL,
  disabled              TINYINT(1) DEFAULT 0,
  ordername             VARCHAR(255) BINARY DEFAULT NULL,
  auth                  TINYINT(1) DEFAULT 1,
  PRIMARY KEY (id)
) Engine=InnoDB;

CREATE INDEX nametype_index ON records(name,type);
CREATE INDEX domain_id ON records(domain_id);
CREATE INDEX recordorder ON records (domain_id, ordername);


CREATE TABLE supermasters (
  ip                    VARCHAR(64) NOT NULL,
  nameserver            VARCHAR(255) NOT NULL,
  account               VARCHAR(40) NOT NULL,
  PRIMARY KEY (ip, nameserver)
) Engine=InnoDB;


CREATE TABLE comments (
  id                    INT AUTO_INCREMENT,
  domain_id             INT NOT NULL,
  name                  VARCHAR(255) NOT NULL,
  type                  VARCHAR(10) NOT NULL,
  modified_at           INT NOT NULL,
  account               VARCHAR(40) NOT NULL,
  comment               VARCHAR(64000) NOT NULL,
  PRIMARY KEY (id)
) Engine=InnoDB;

CREATE INDEX comments_domain_id_idx ON comments (domain_id);
CREATE INDEX comments_name_type_idx ON comments (name, type);
CREATE INDEX comments_order_idx ON comments (domain_id, modified_at);


CREATE TABLE domainmetadata (
  id                    INT AUTO_INCREMENT,
  domain_id             INT NOT NULL,
  kind                  VARCHAR(32),
  content               TEXT,
  PRIMARY KEY (id)
) Engine=InnoDB;

CREATE INDEX domainmetadata_idx ON domainmetadata (domain_id, kind);


CREATE TABLE cryptokeys (
  id                    INT AUTO_INCREMENT,
  domain_id             INT NOT NULL,
  flags                 INT NOT NULL,
  active                BOOL,
  content               TEXT,
  PRIMARY KEY(id)
) Engine=InnoDB;

CREATE INDEX domainidindex ON cryptokeys(domain_id);


CREATE TABLE tsigkeys (
  id                    INT AUTO_INCREMENT,
  name                  VARCHAR(255),
  algorithm             VARCHAR(50),
  secret                VARCHAR(255),
  PRIMARY KEY (id)
) Engine=InnoDB;

CREATE UNIQUE INDEX namealgoindex ON tsigkeys(name, algorithm);
MariaDB [powerdns]> show tables;
+--------------------+
| Tables_in_powerdns |
+--------------------+
| comments |
| cryptokeys |
| domainmetadata |
| domains |
| records |
| supermasters |
| tsigkeys |
+--------------------+
7 rows in set (0.00 sec)
5.修改dns配置文件(27上)
vim /etc/pdns/pdns.conf
launch=bind
修改后
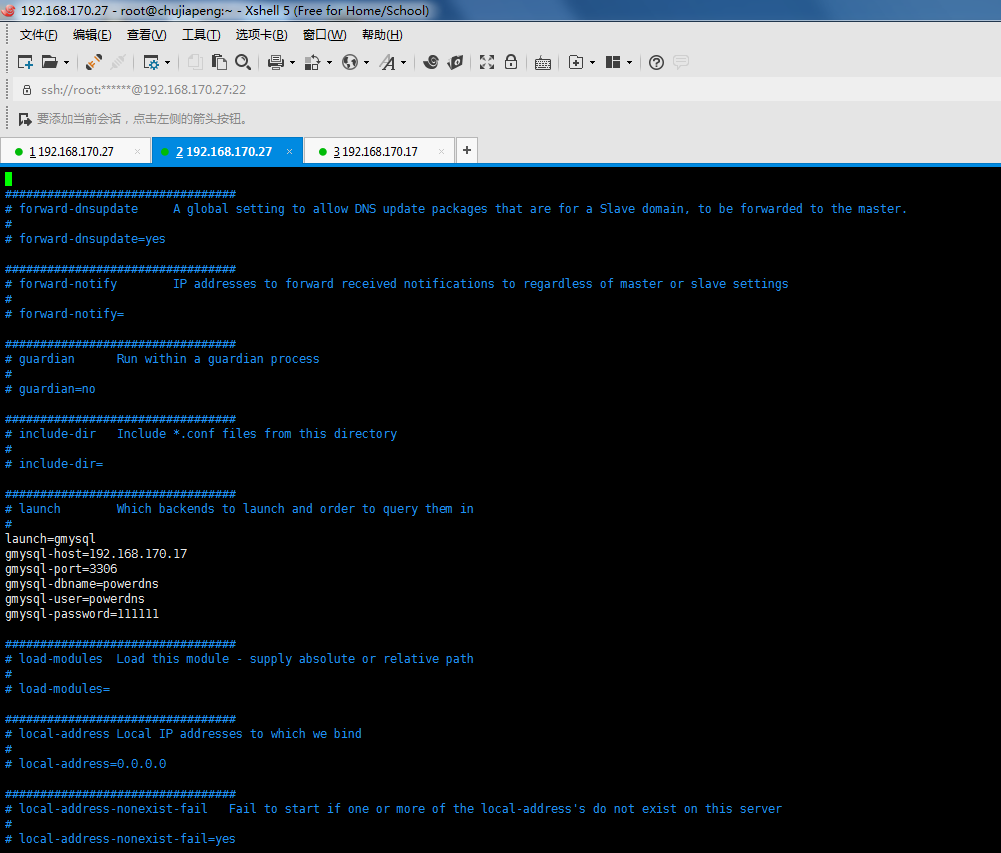
launch=gmysql
在加几行
gmysql-host=192.168.170.17
gmysql-port=3306
gmysql-dbname=powerdns
gmysql-user=powerdns
gmysql-password=111111
6.启动服务
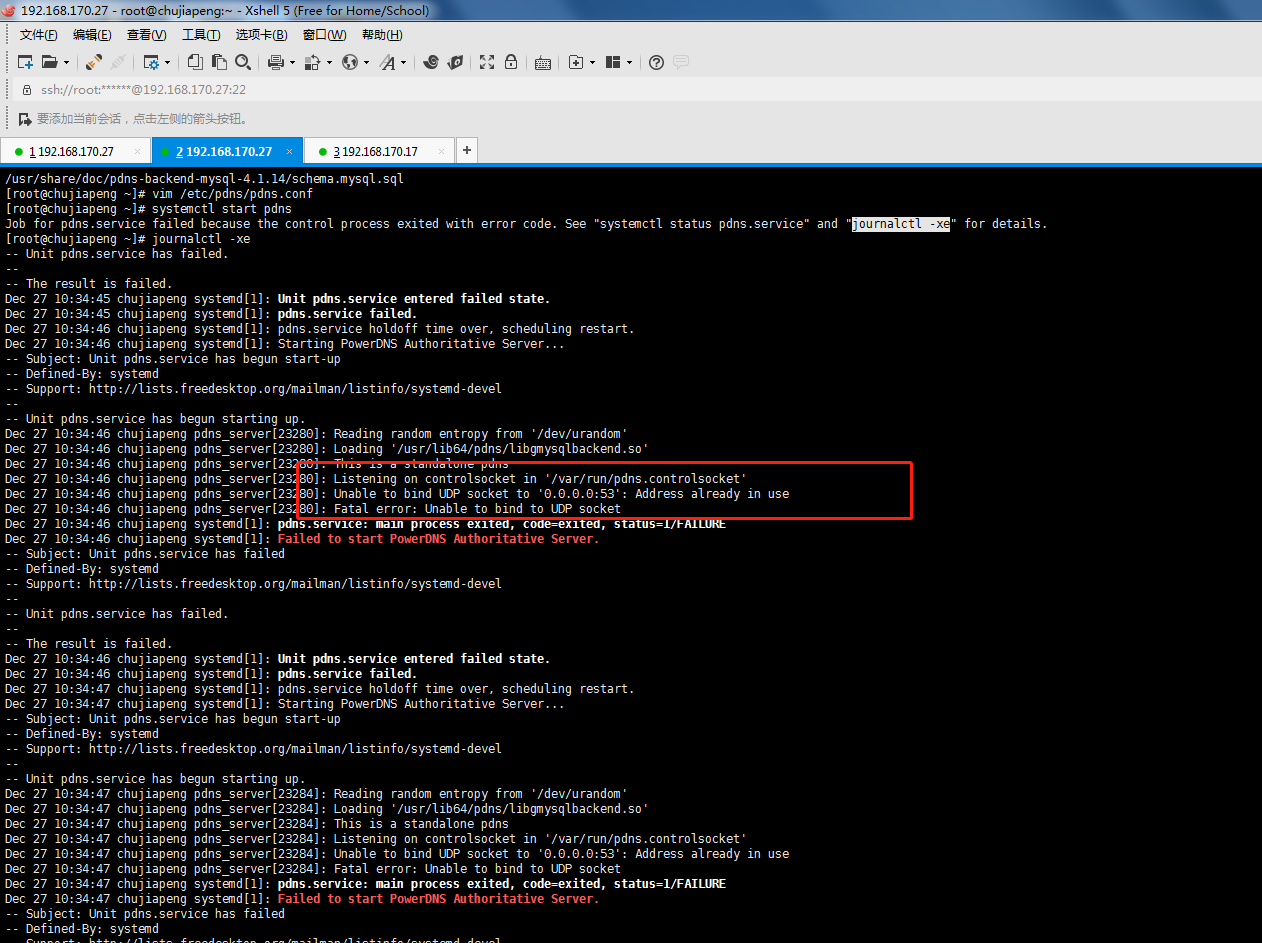
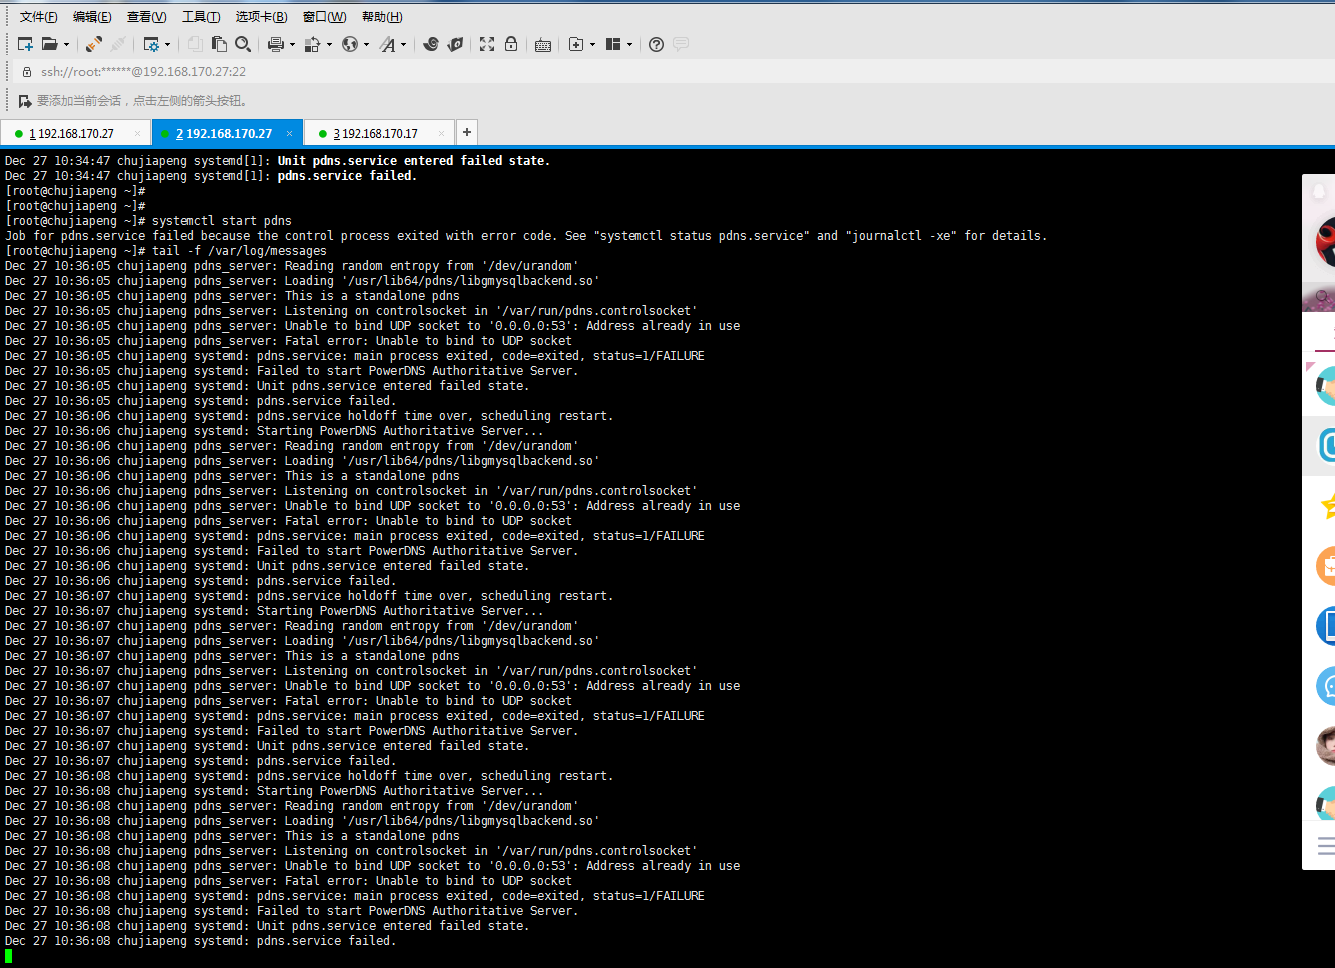
[root@chujiapeng ~]# systemctl start pdns
Job for pdns.service failed because the control process exited with error code. See "systemctl status pdns.service" and "journalctl -xe" for details.
[root@chujiapeng ~]# journalctl -xe
-- Unit pdns.service has failed.
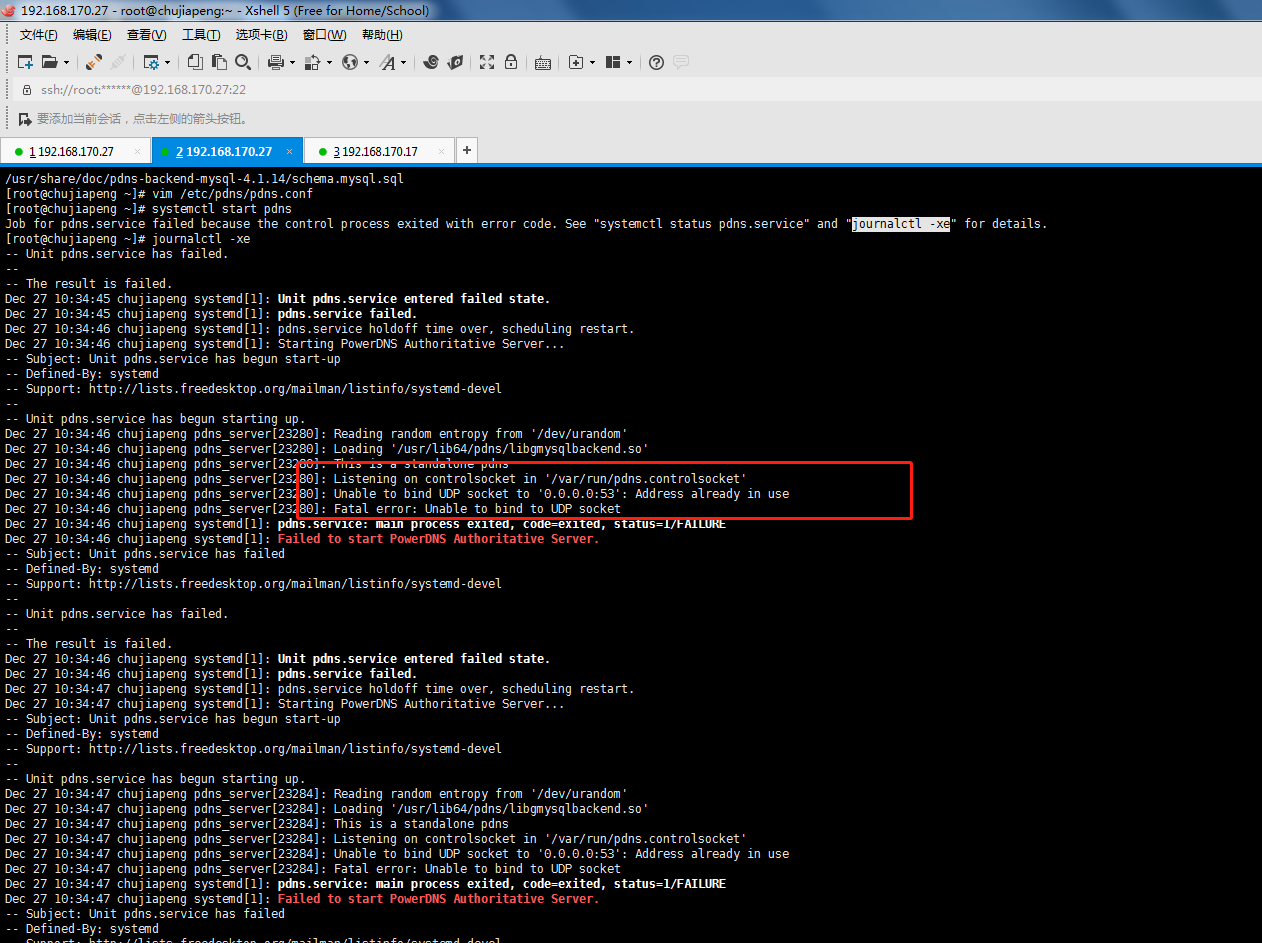
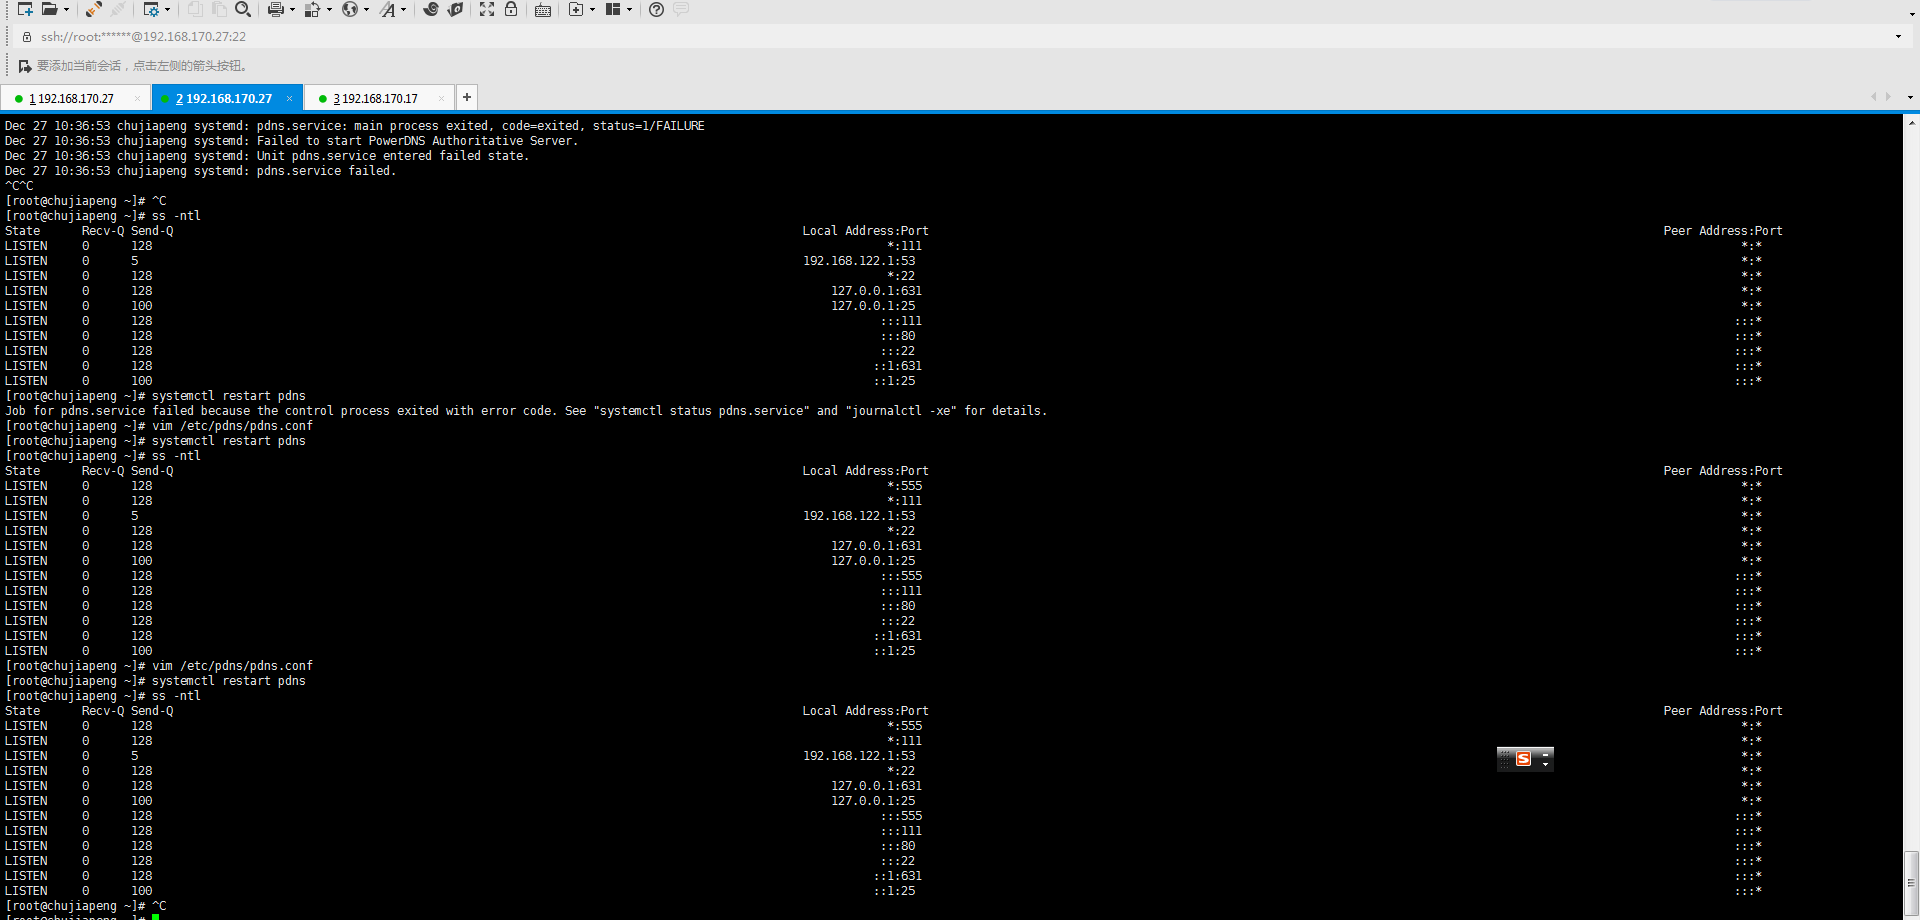
报错,查看是由于54端口被其它程序占用,再次修改
vim /etc/pdns/pdns.conf
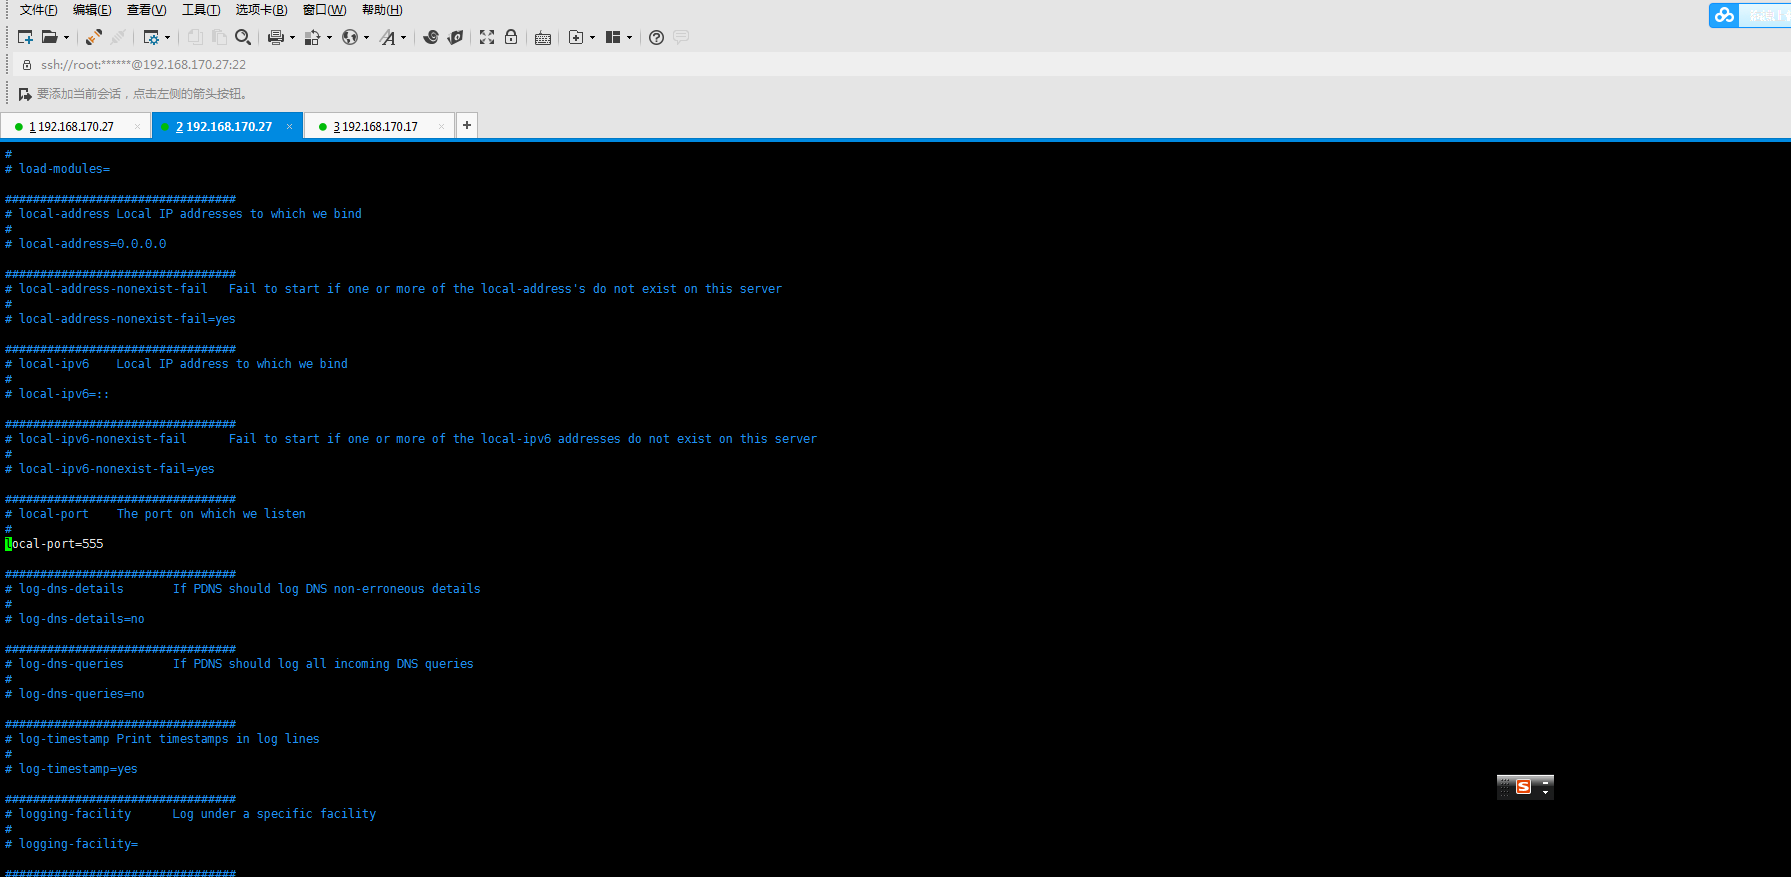
local-port=555
再次启动成功
local-port=555
[root@chujiapeng ~]# systemctl restart pdns
[root@chujiapeng ~]# ss -ntl
State Recv-Q Send-Q Local Address:Port Peer Address:Port
LISTEN 0 128 *:555 *:*
LISTEN 0 128 *:111 *:*
LISTEN 0 5 192.168.122.1:53 *:*
LISTEN 0 128 *:22 *:*
LISTEN 0 128 127.0.0.1:631 *:*
LISTEN 0 100 127.0.0.1:25 *:*
LISTEN 0 128 :::555 :::*
LISTEN 0 128 :::111 :::*
LISTEN 0 128 :::80 :::*
LISTEN 0 128 :::22 :::*
LISTEN 0 128 ::1:631 :::*
LISTEN 0 100 ::1:25 :::*
7.软件包 poweradmin-2.1.5.tgz
tar xf
poweradmin-2.1.5.tgz
mv poweradmin-2.1.5 /var/www/html/poweradmin
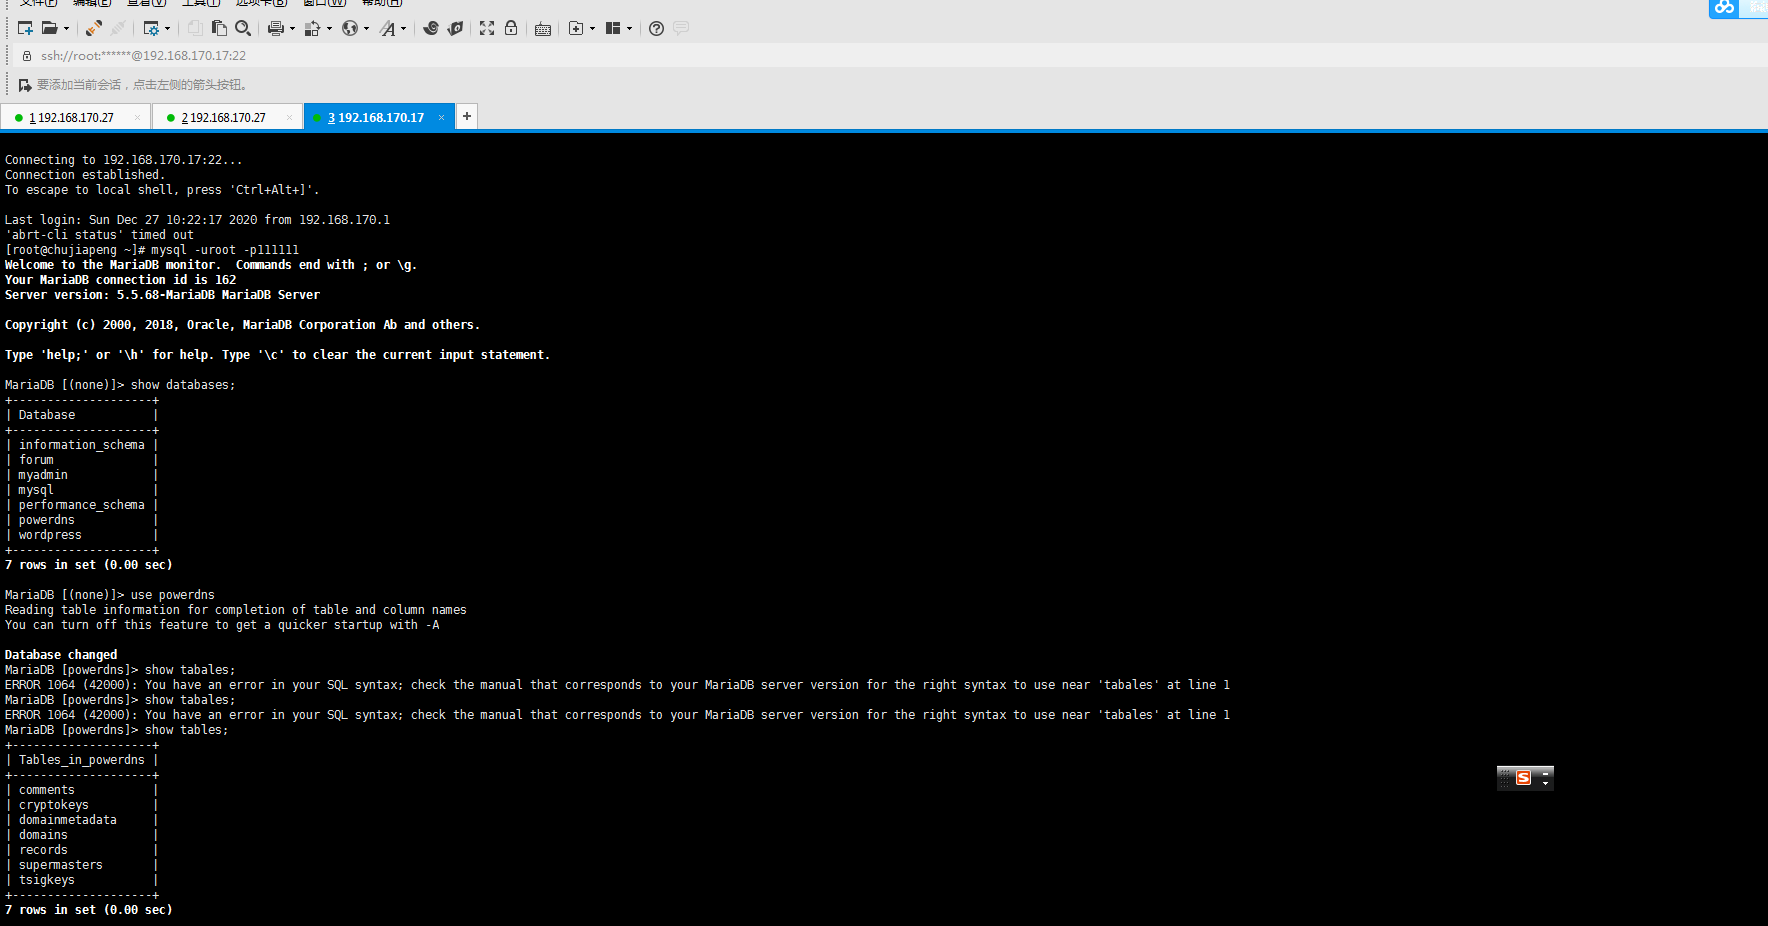
重要操作记录过程图,
2.web页面配置过程
安装初始化包
[root@chujiapeng data]# yum -y install httpd phpphp-devel php-gd php-mcrypt php-imap php-ldap php-mysql php-odbc php-pear php-xml php-xmlrpc php-mbstring php-mcrypt php-mhash gettext

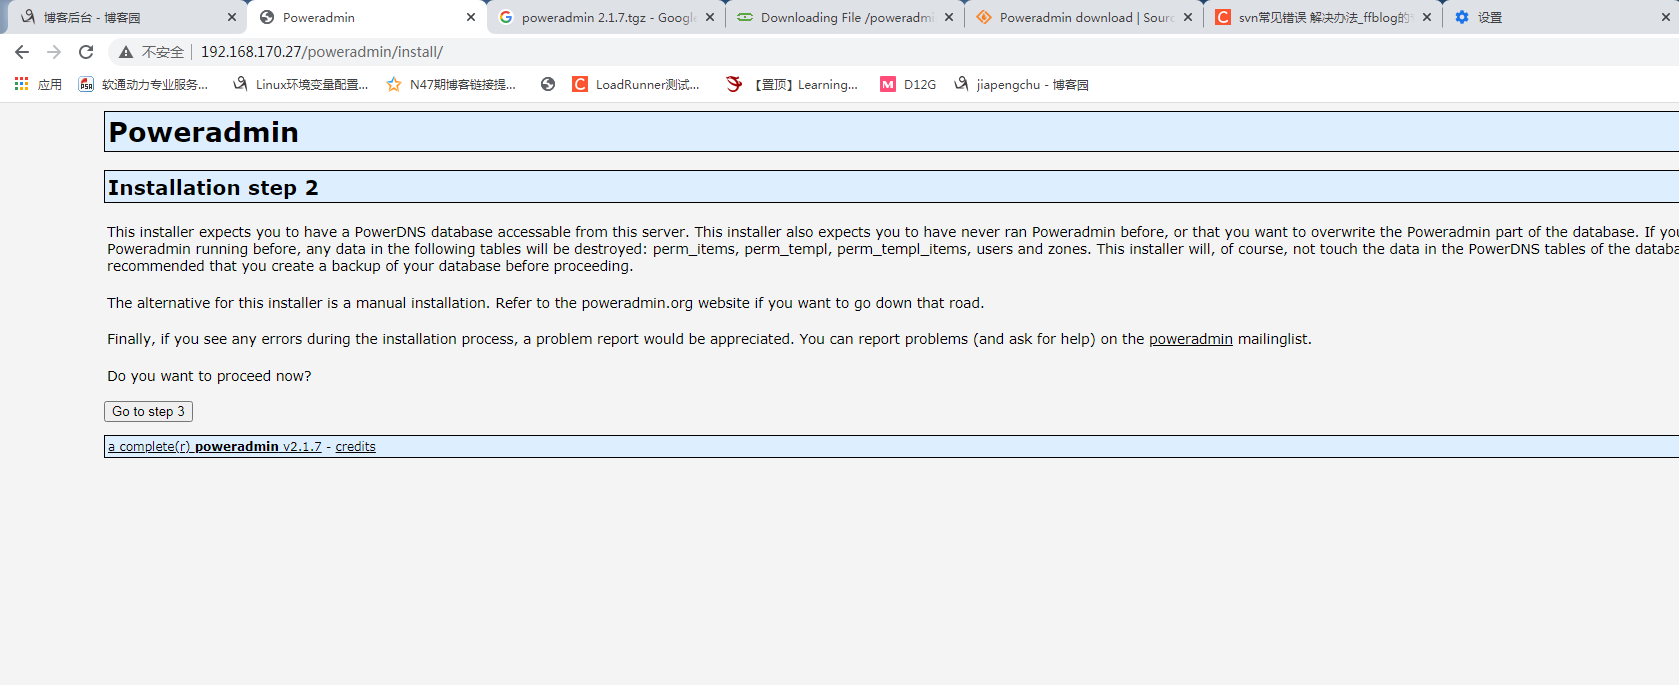
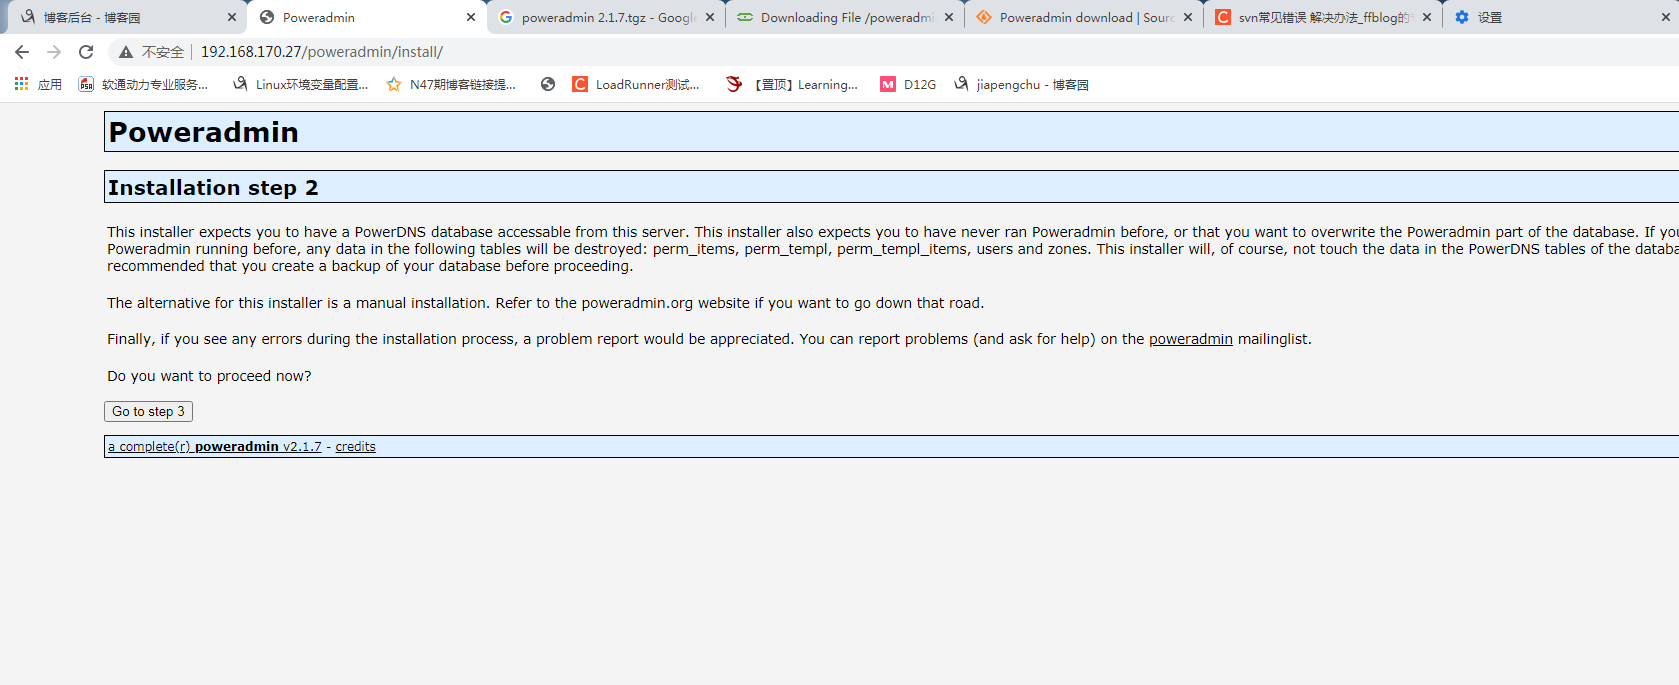
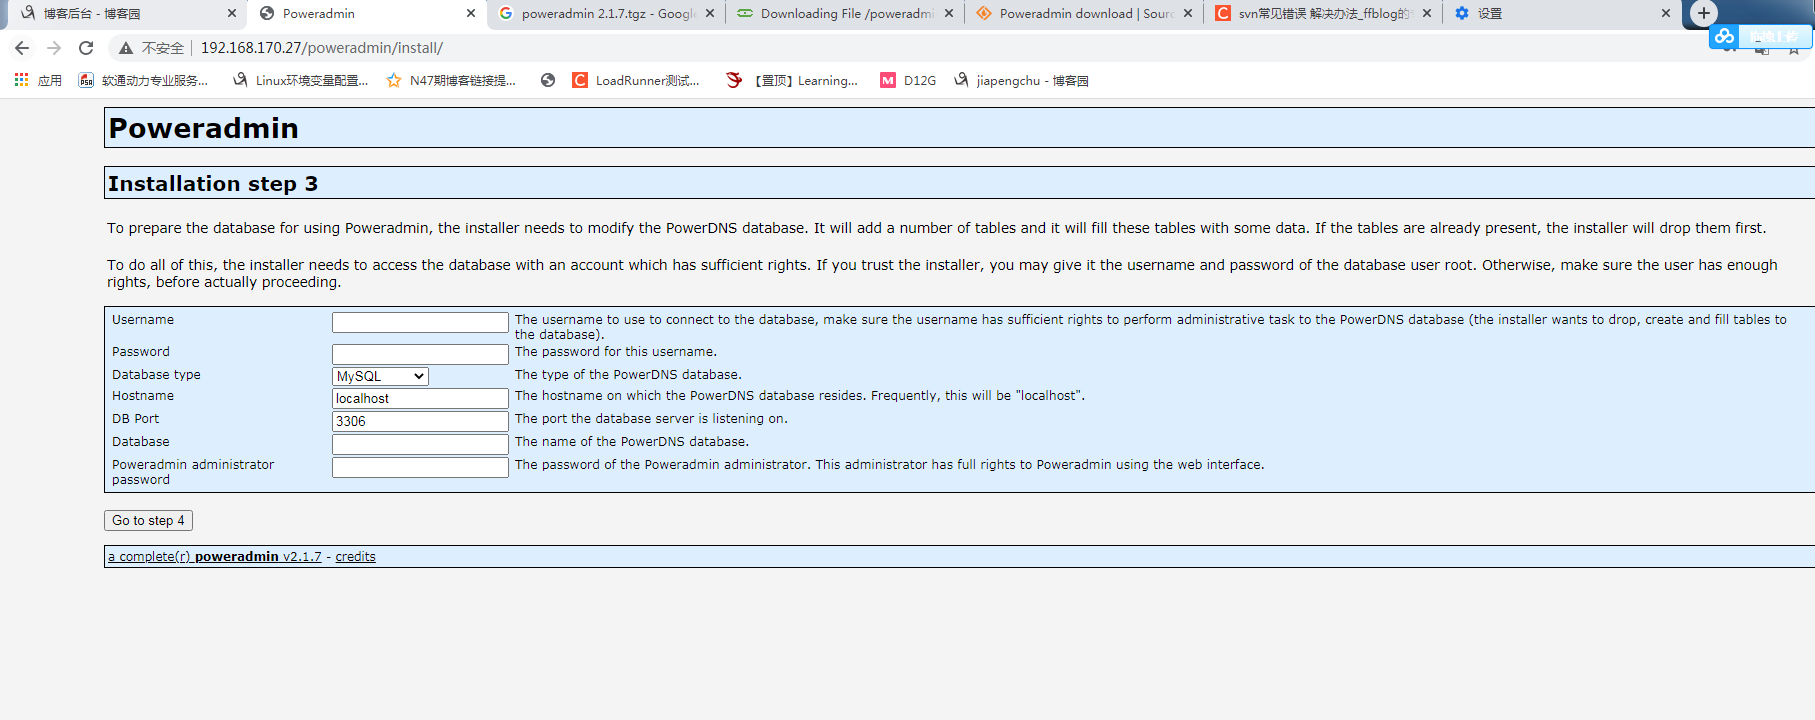
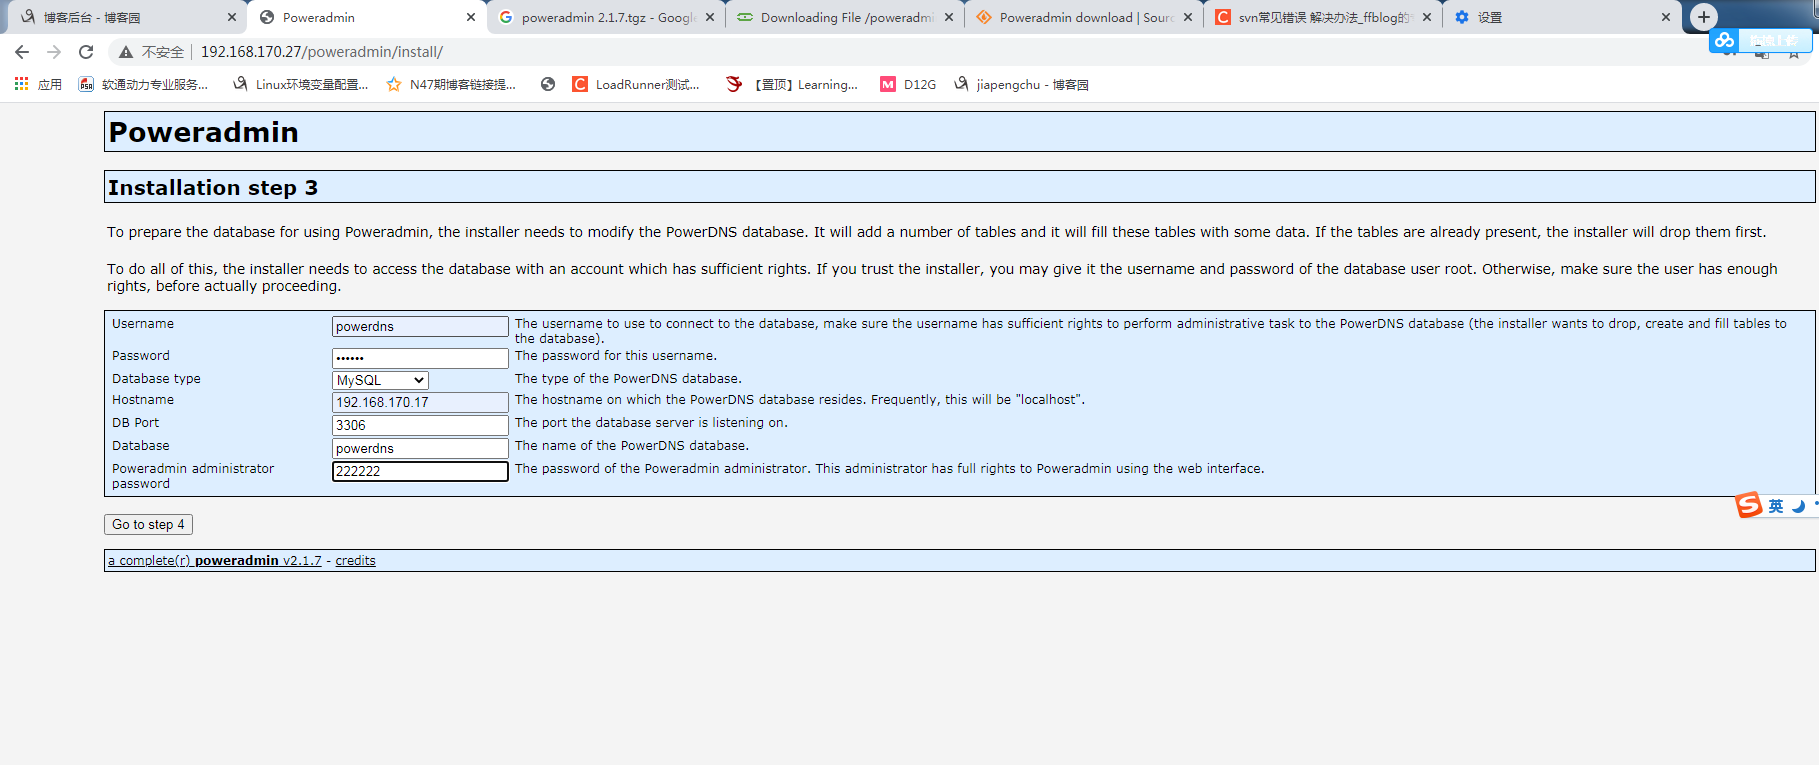
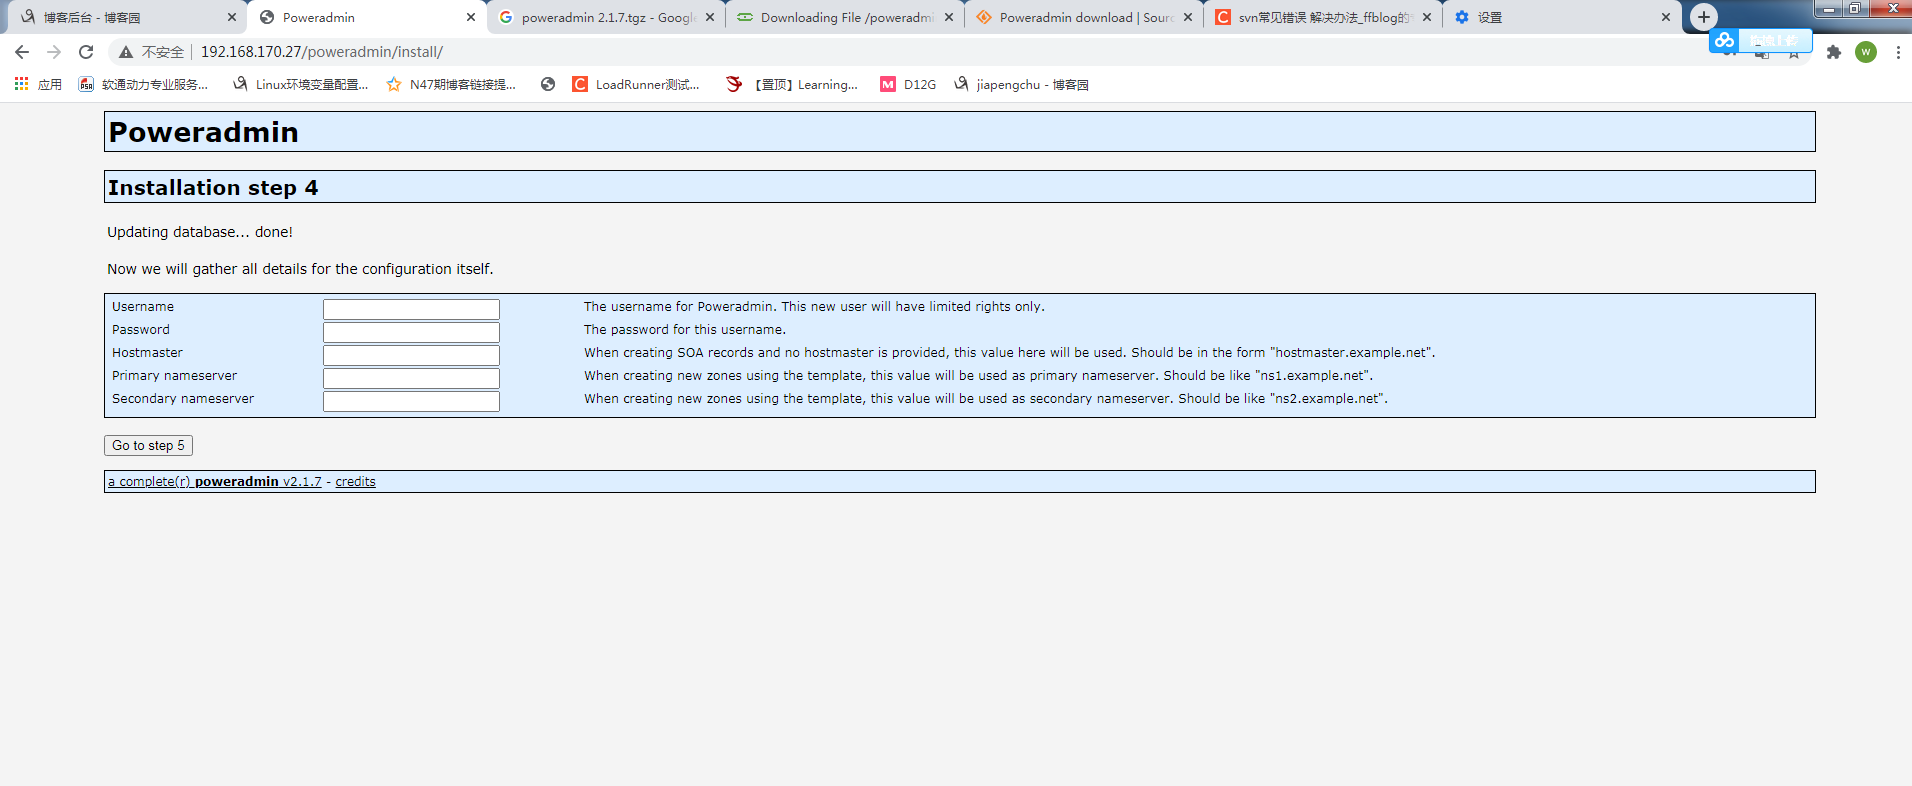

step3穿点pweradmin 用户
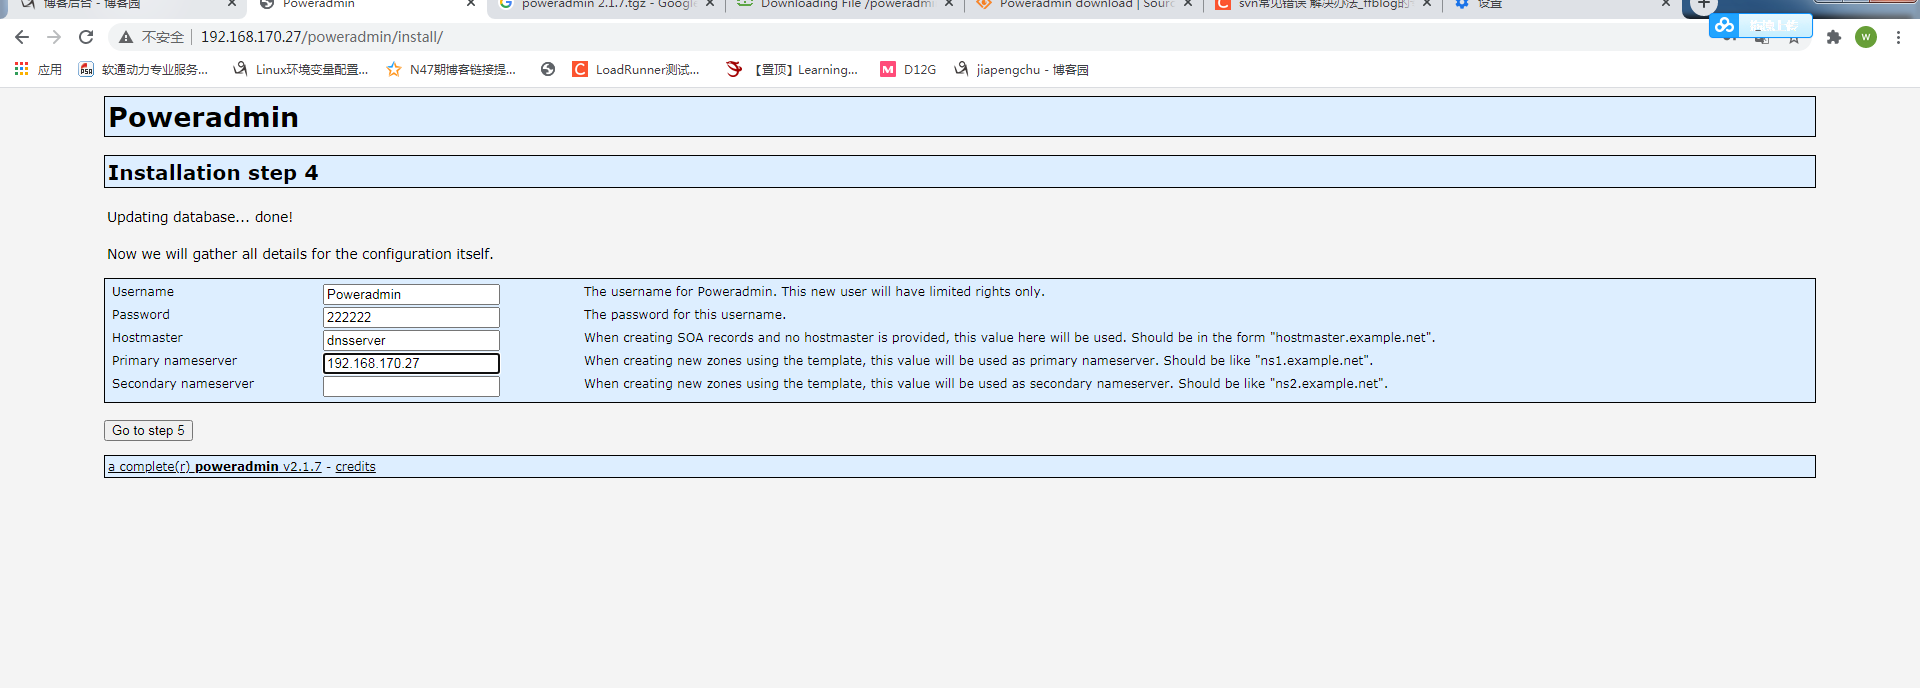
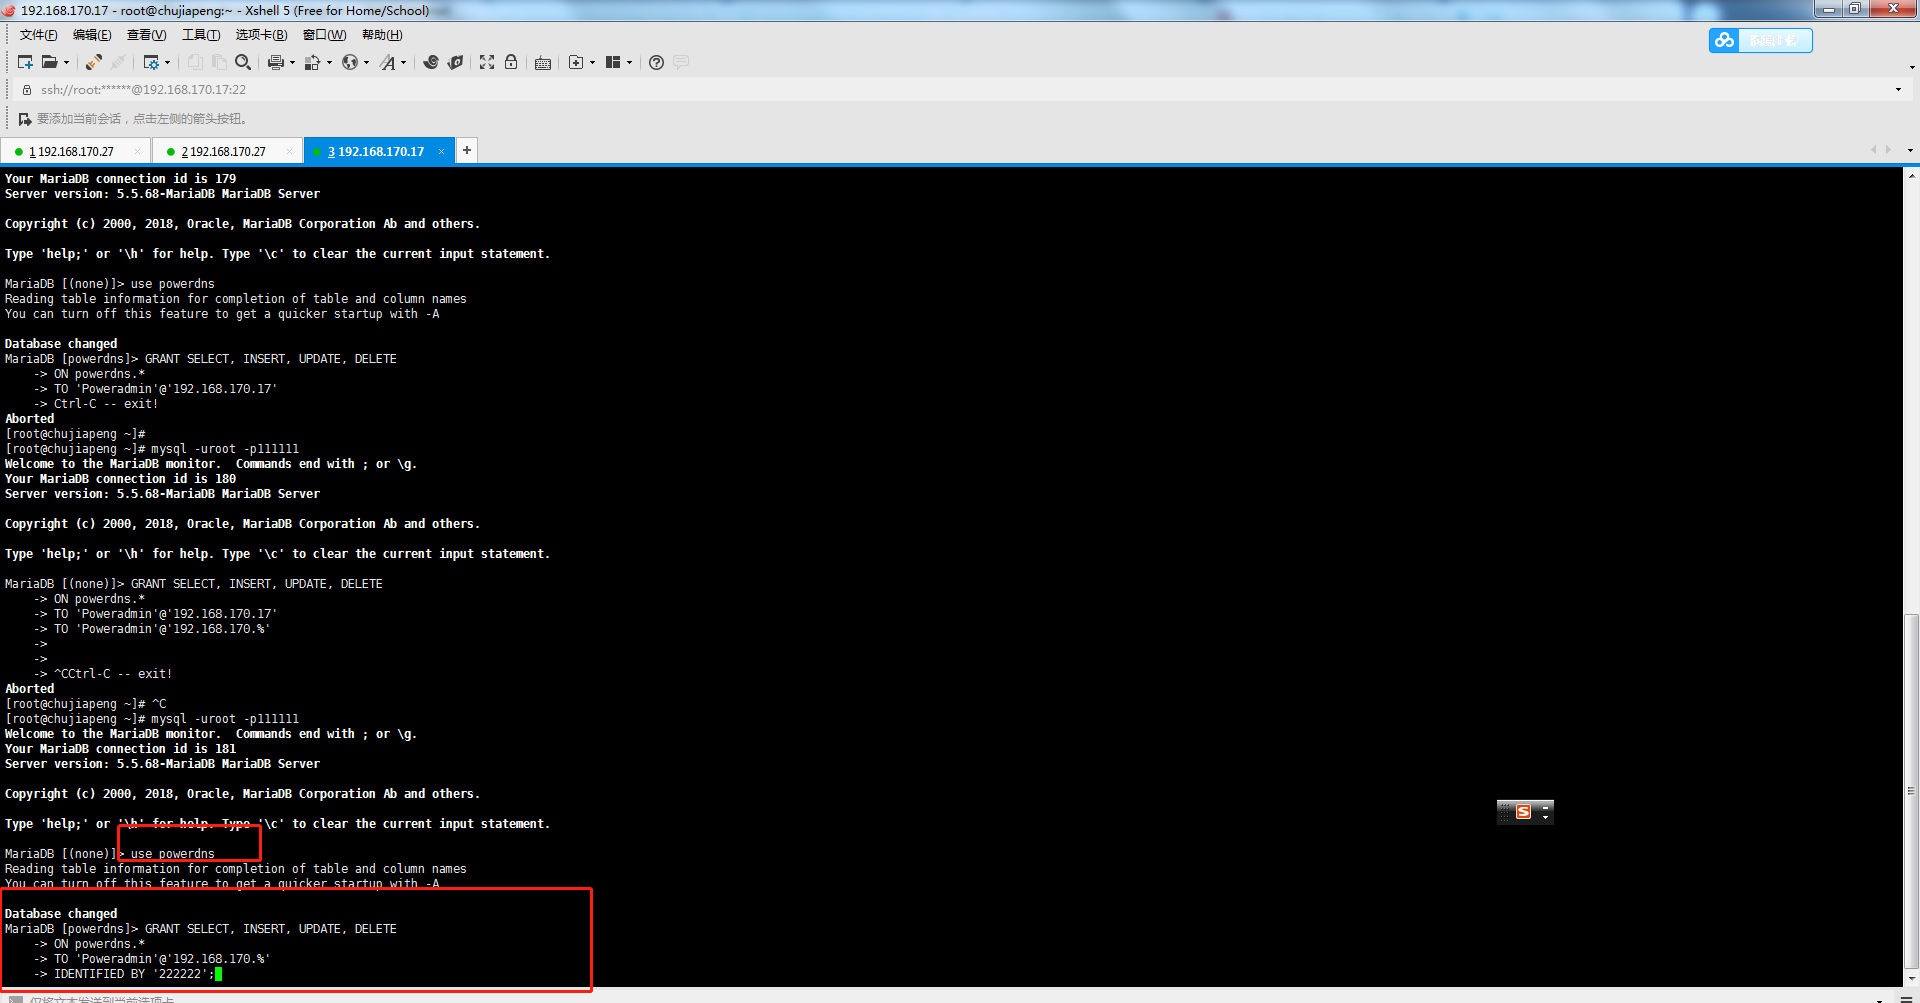
step5 为poweradmin用户授权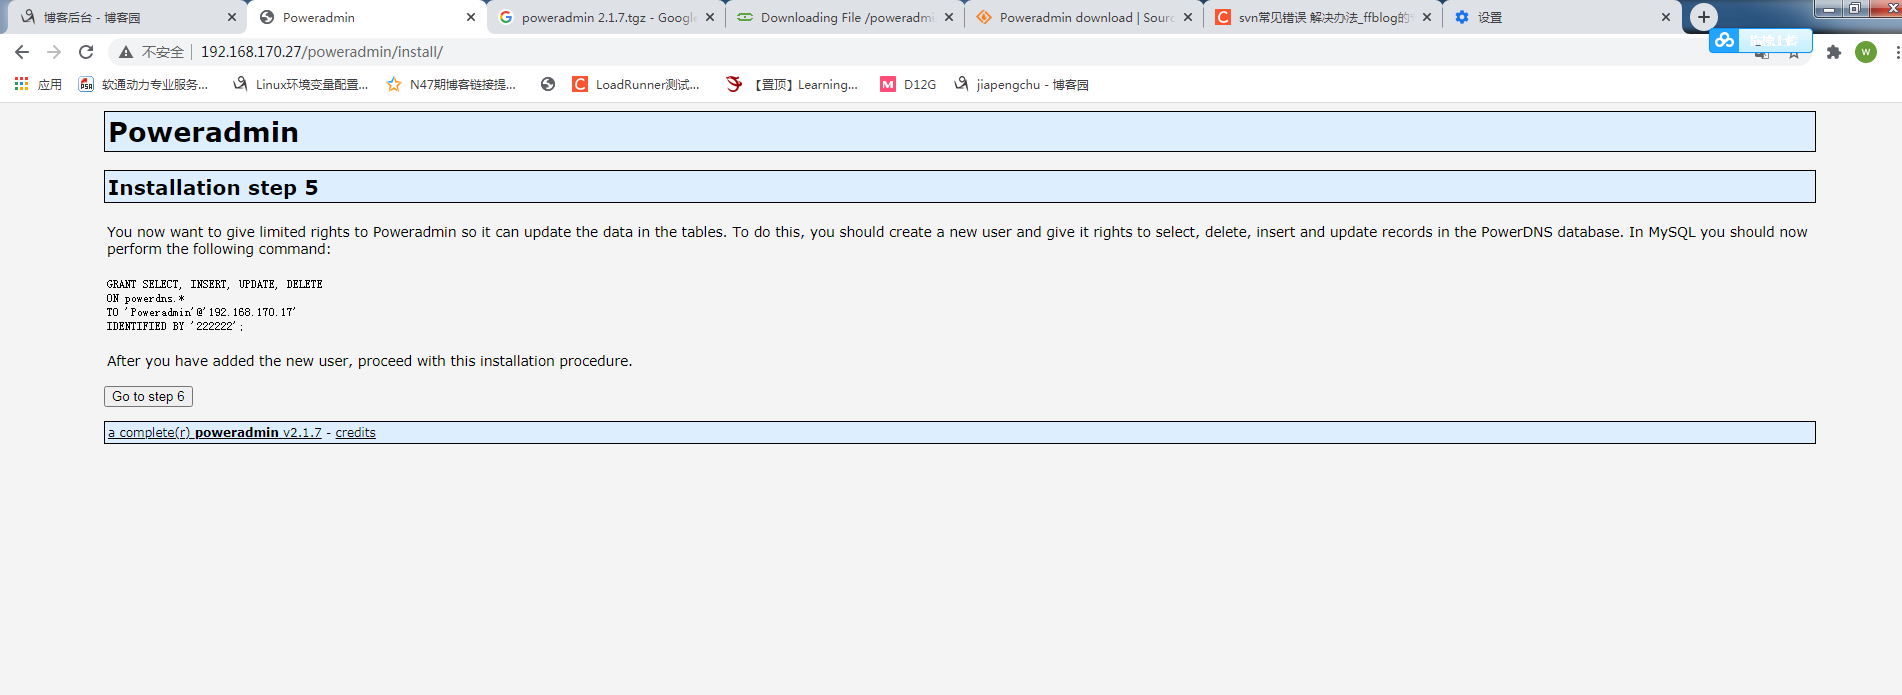
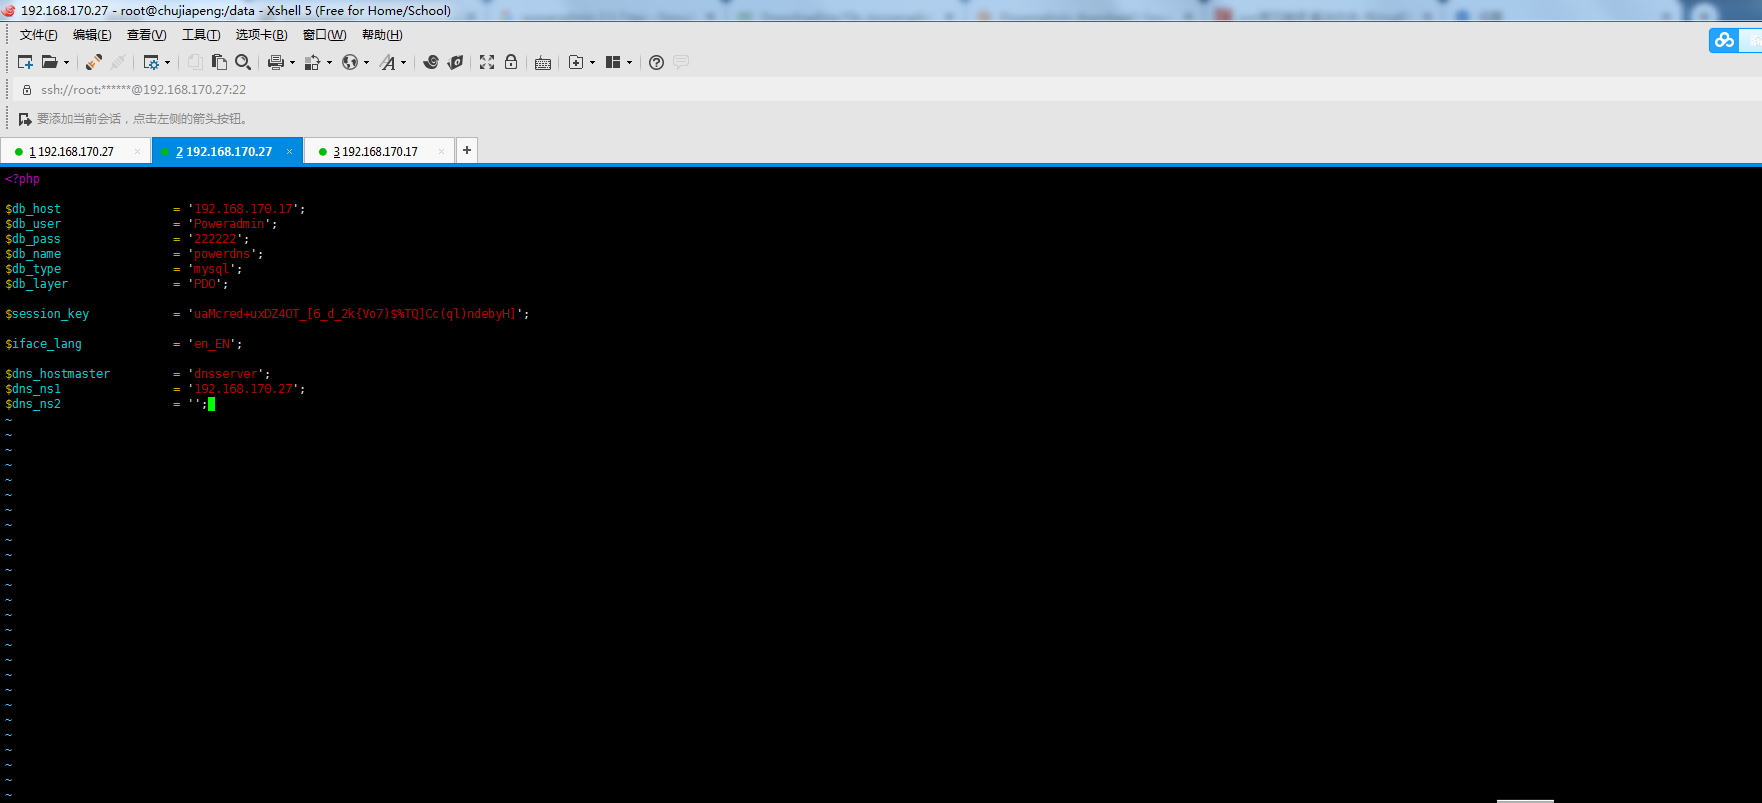
step6 创建配置文件

vim /var/www/html/poweradmin/inc/config.inc.php
<?php

$db_host        = '192.168.170.17';
$db_user        = 'Poweradmin';
$db_pass        = '222222';
$db_name        = 'powerdns';
$db_type        = 'mysql';
$db_layer        = 'PDO';

$session_key        = 'uaMcred+uxDZ4OT_[6_d_2k{Vo7)$%TQ]Cc(ql)ndebyH]';

$iface_lang        = 'en_EN';

$dns_hostmaster        = 'dnsserver';
$dns_ns1        = '192.168.170.27';
$dns_ns2        = '';
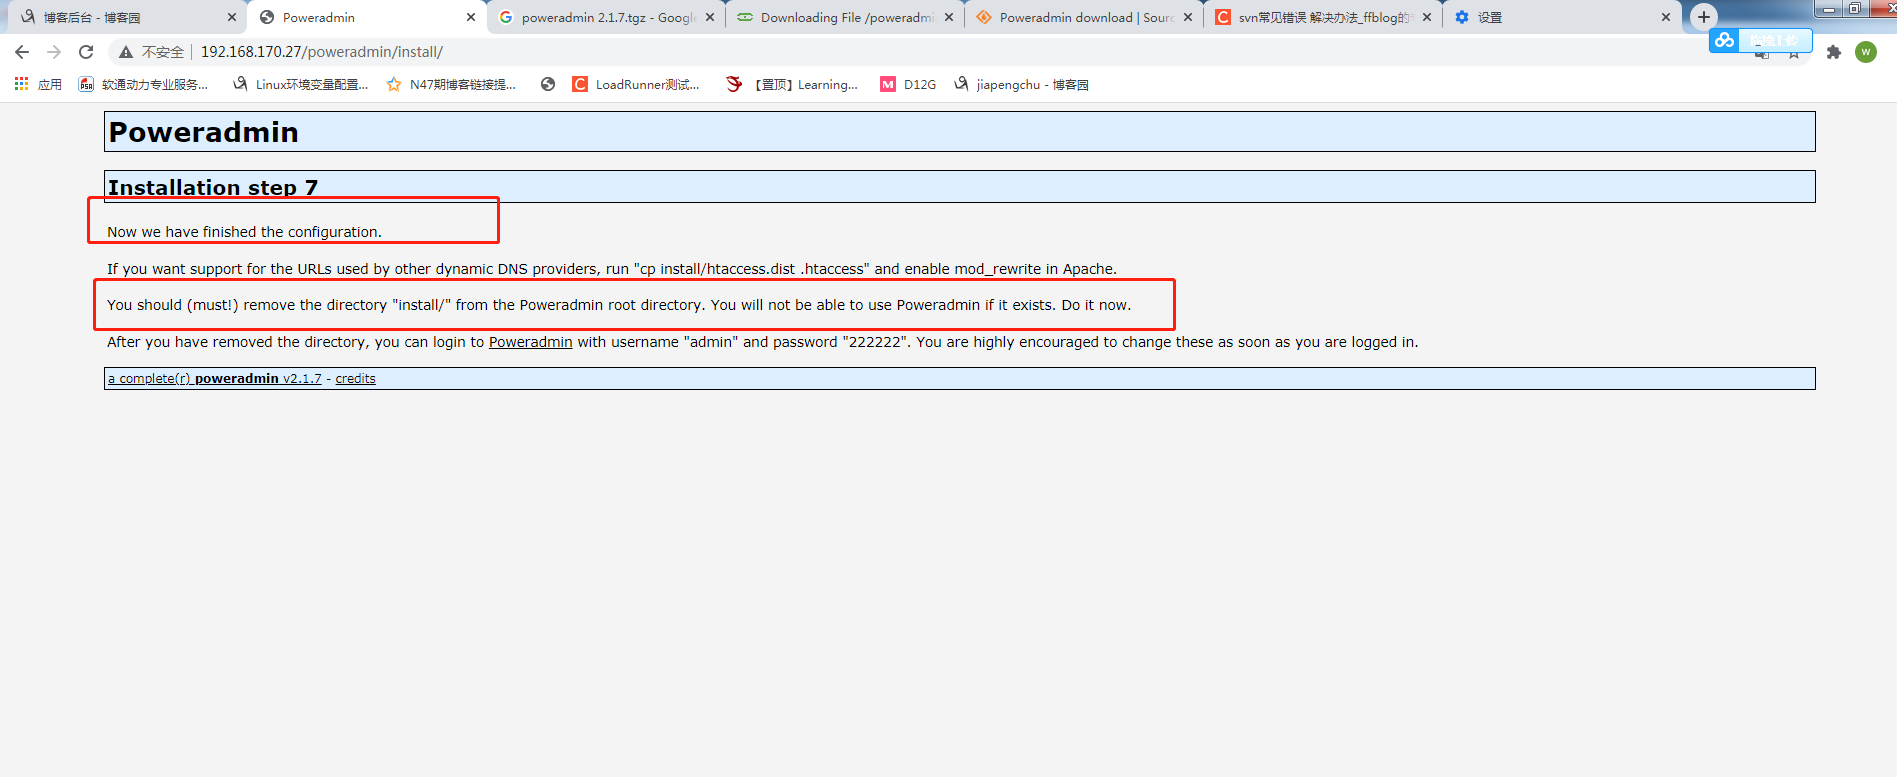
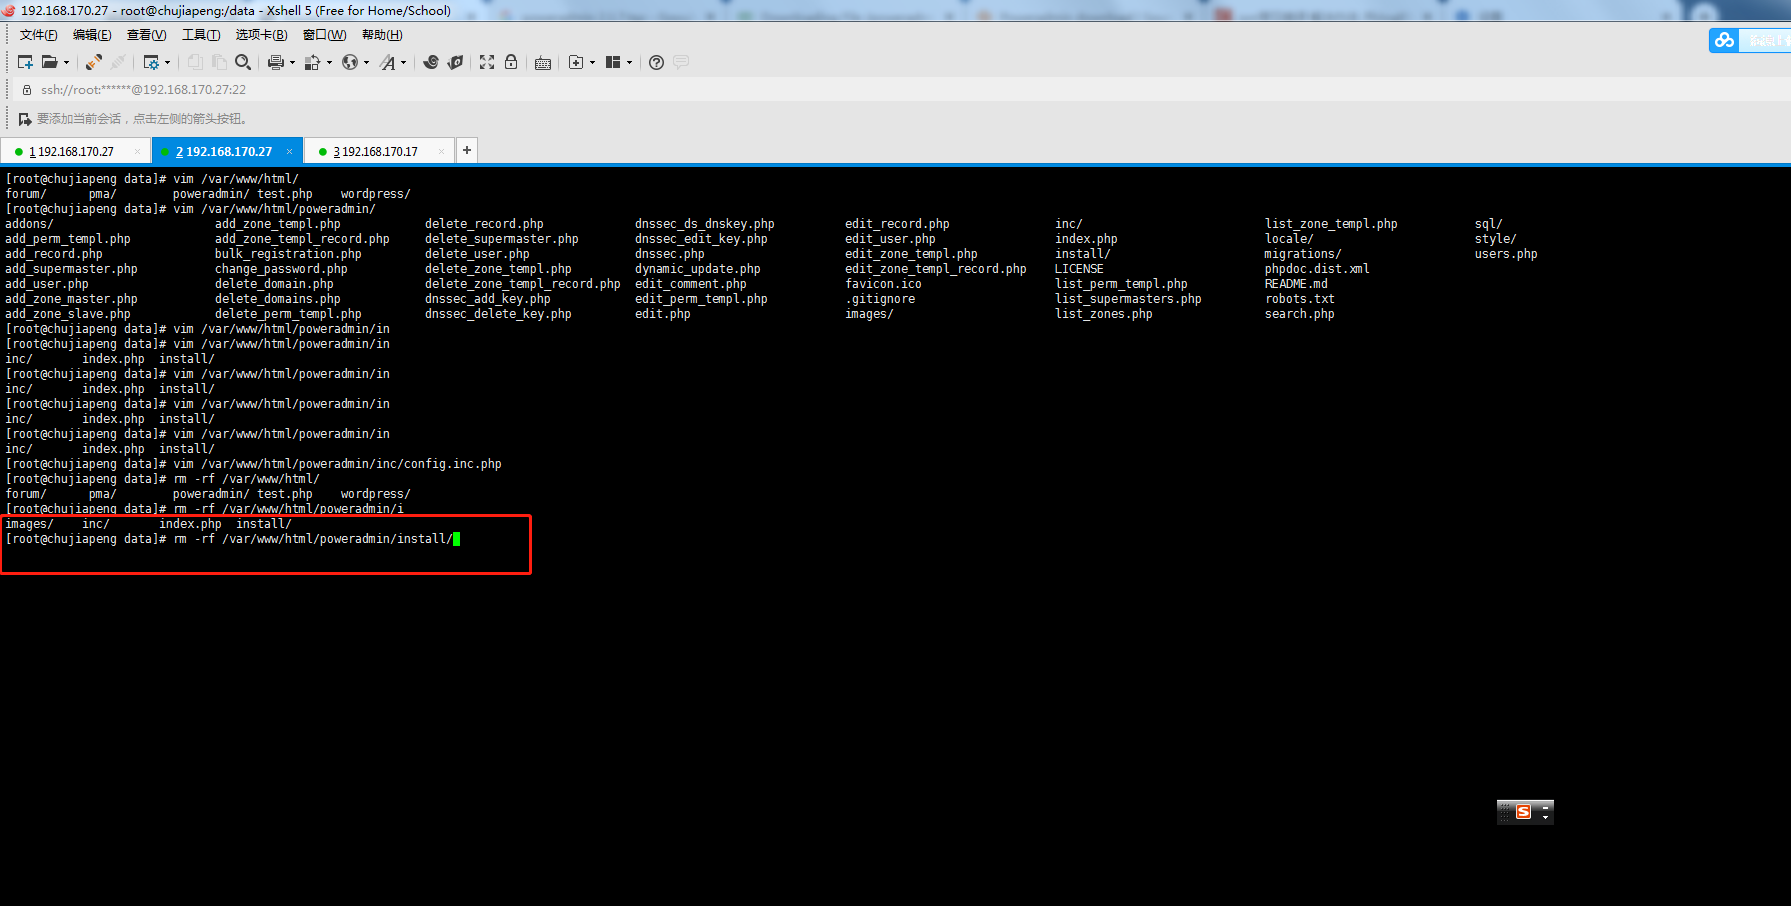
到此安装结束,
测试
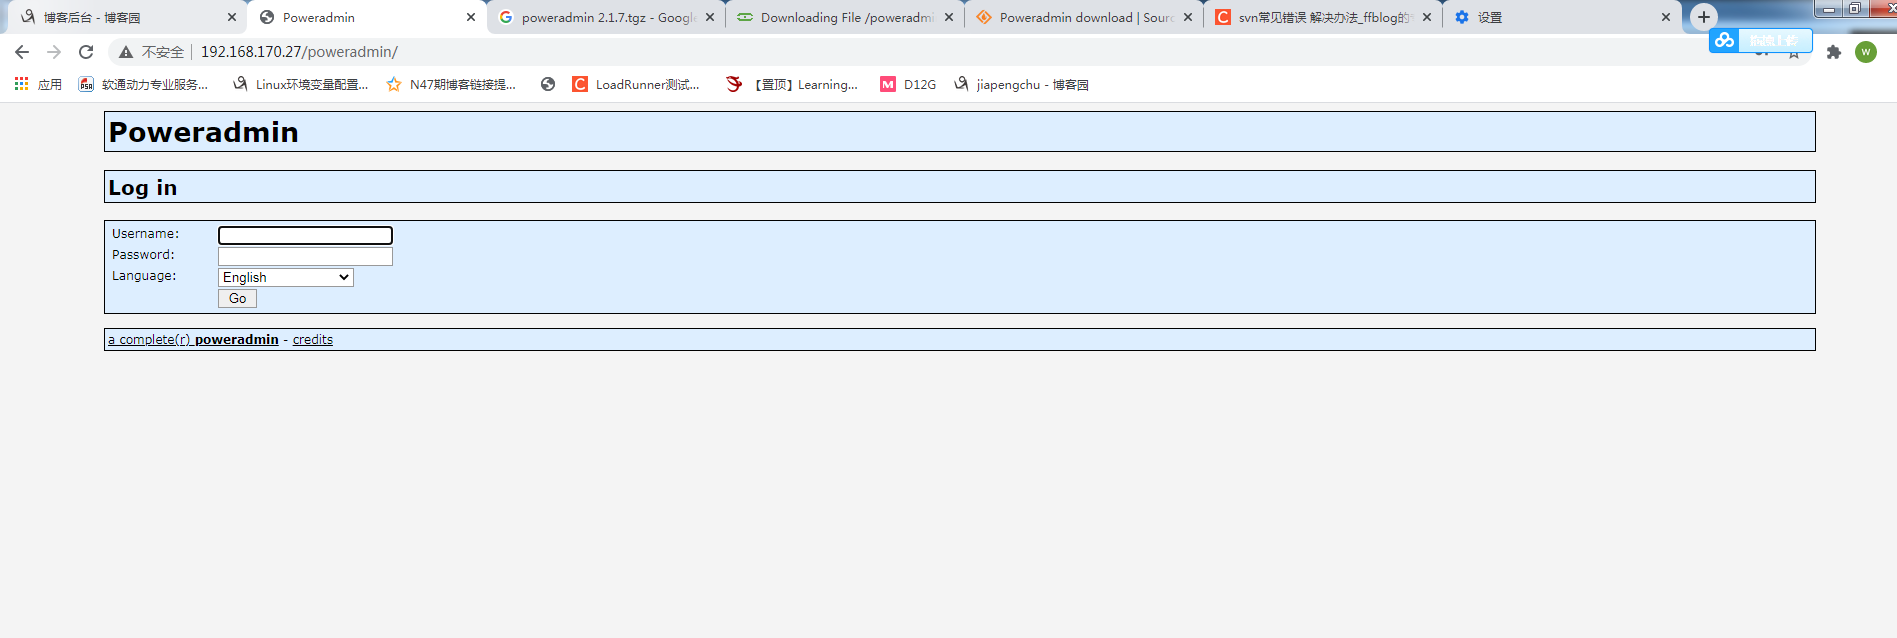


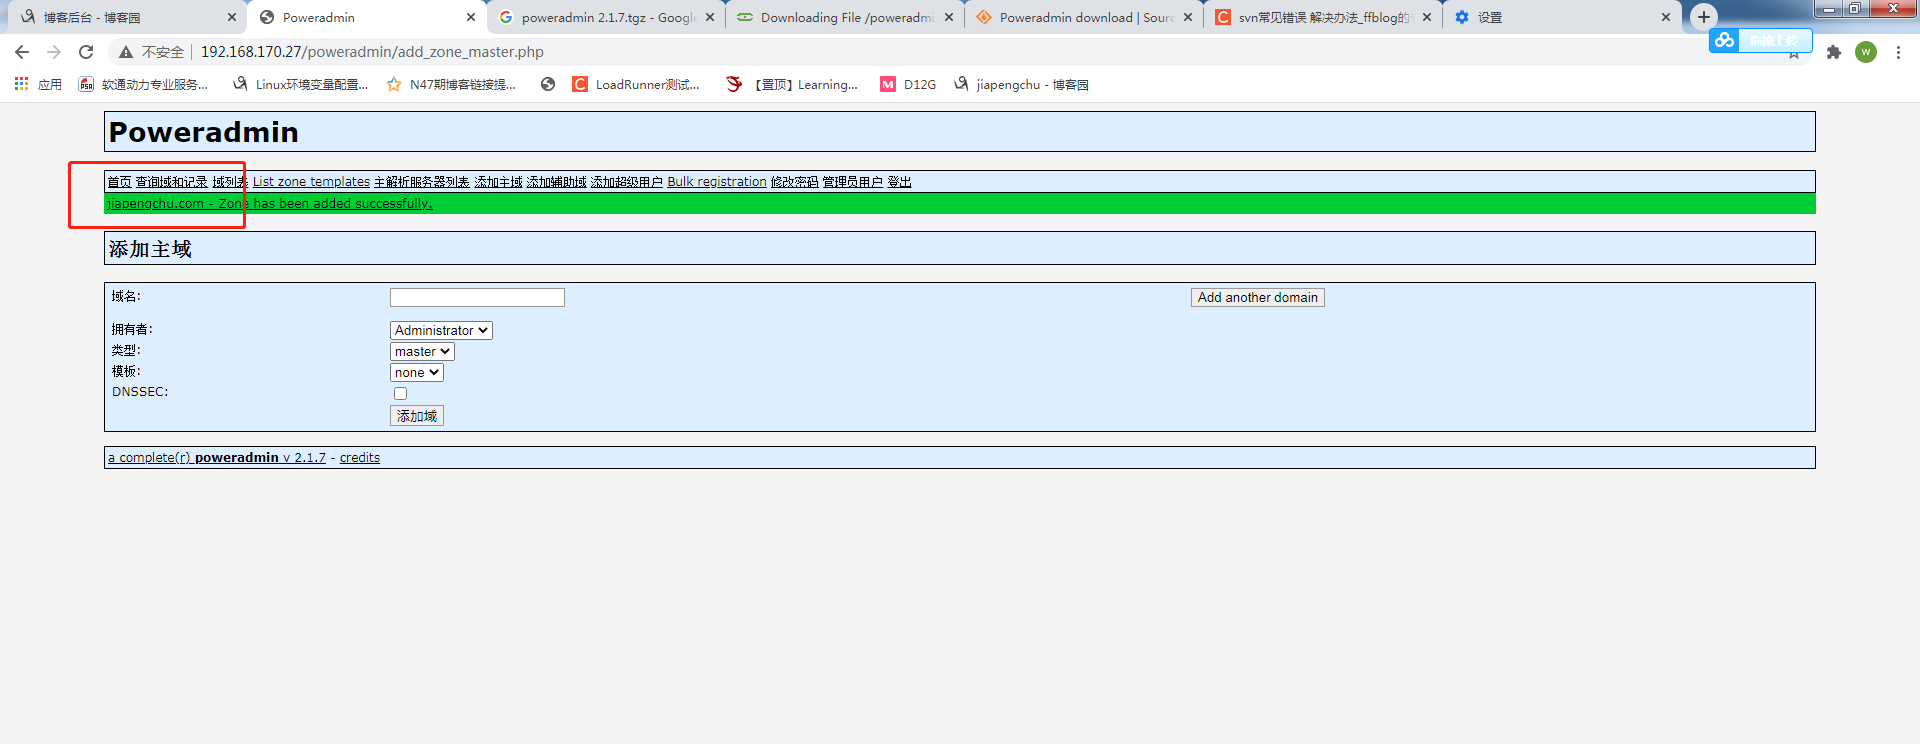
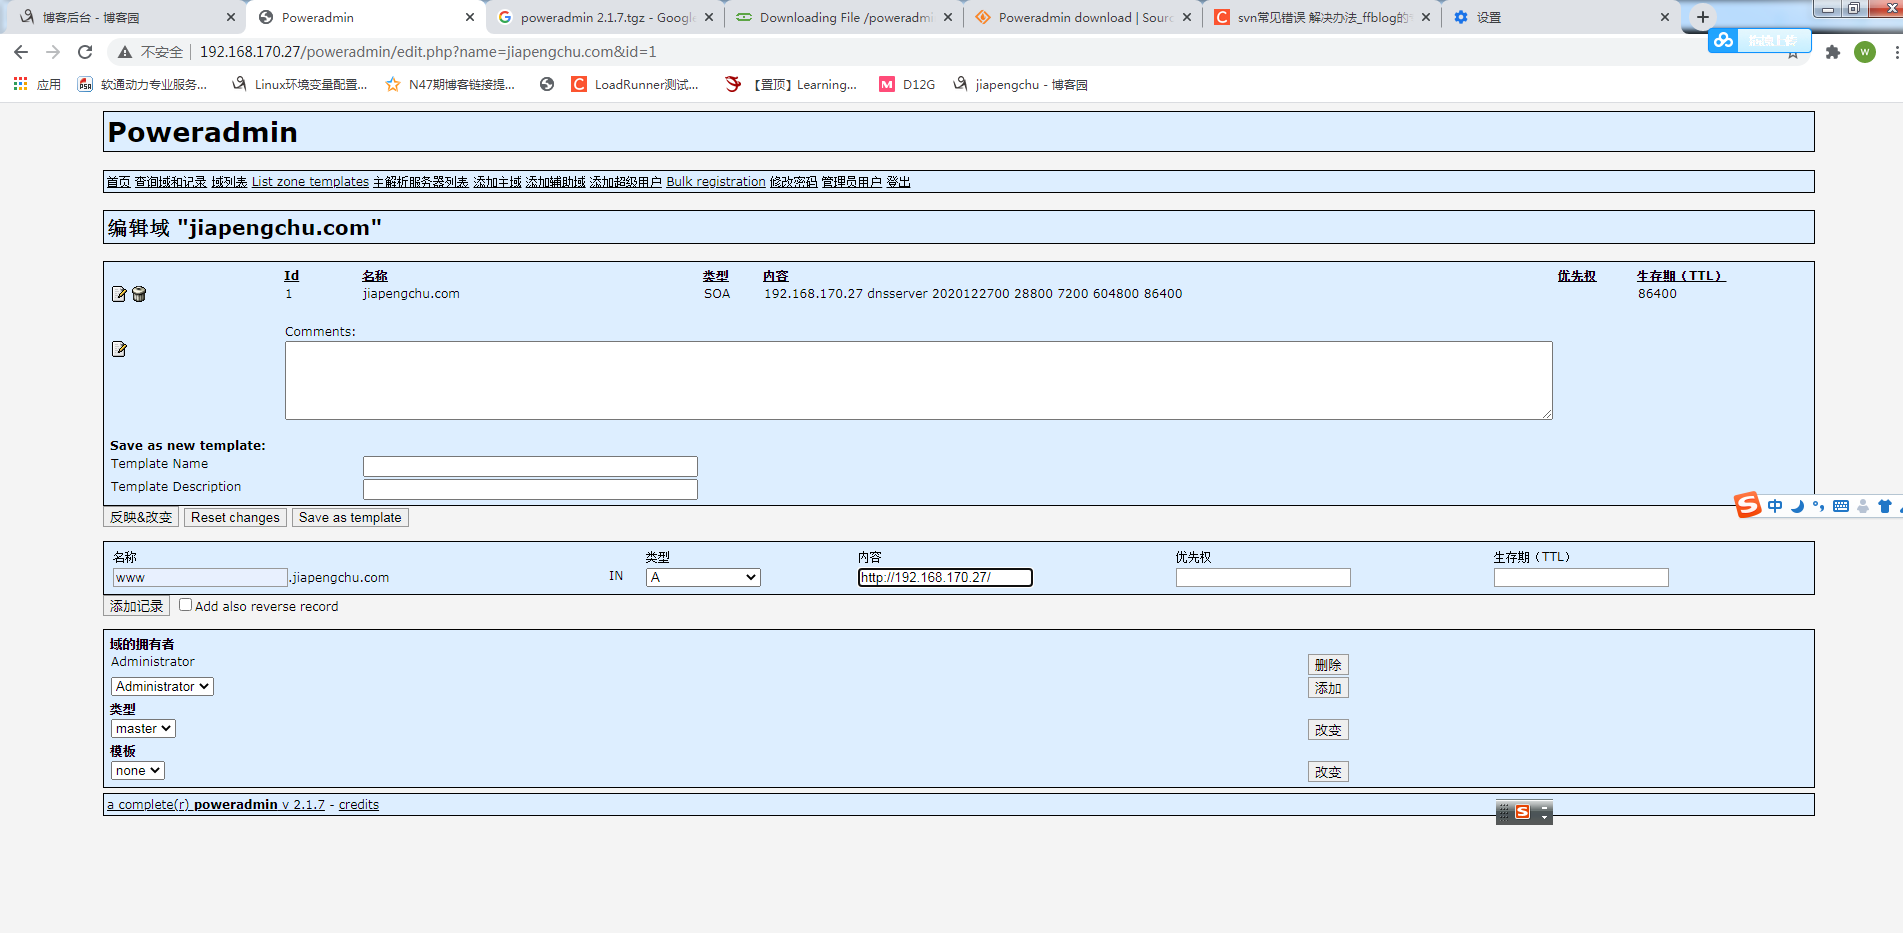
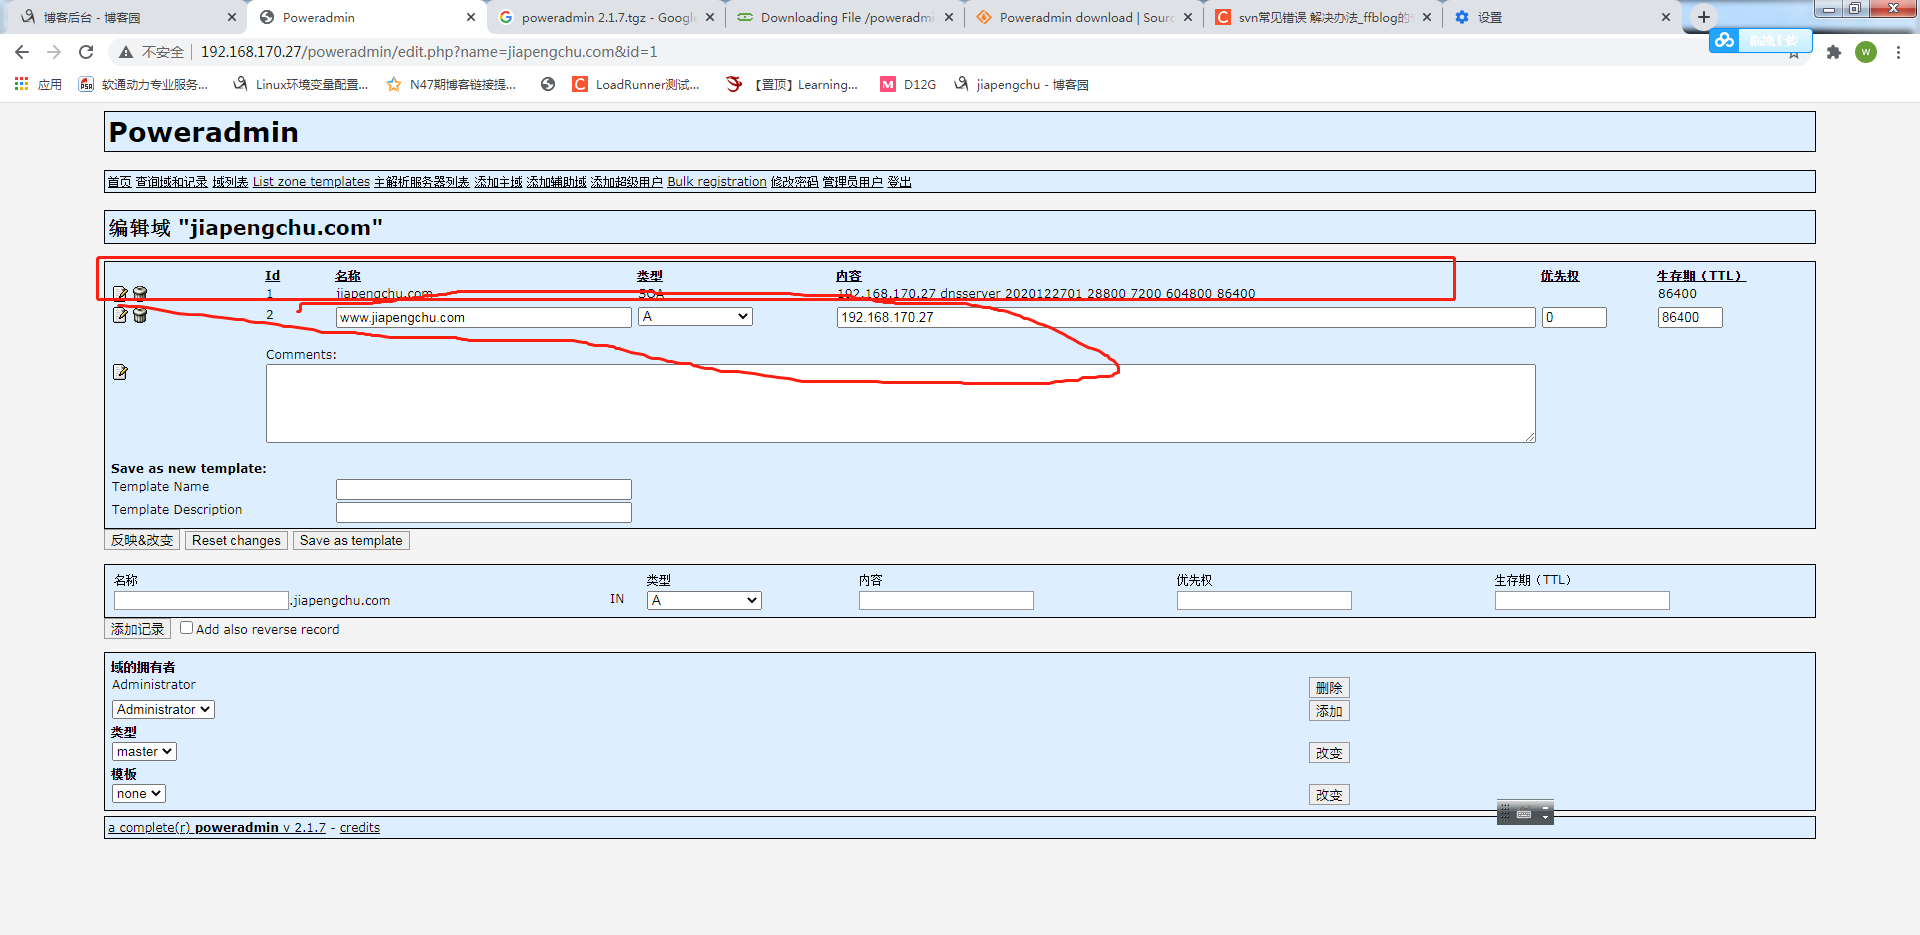
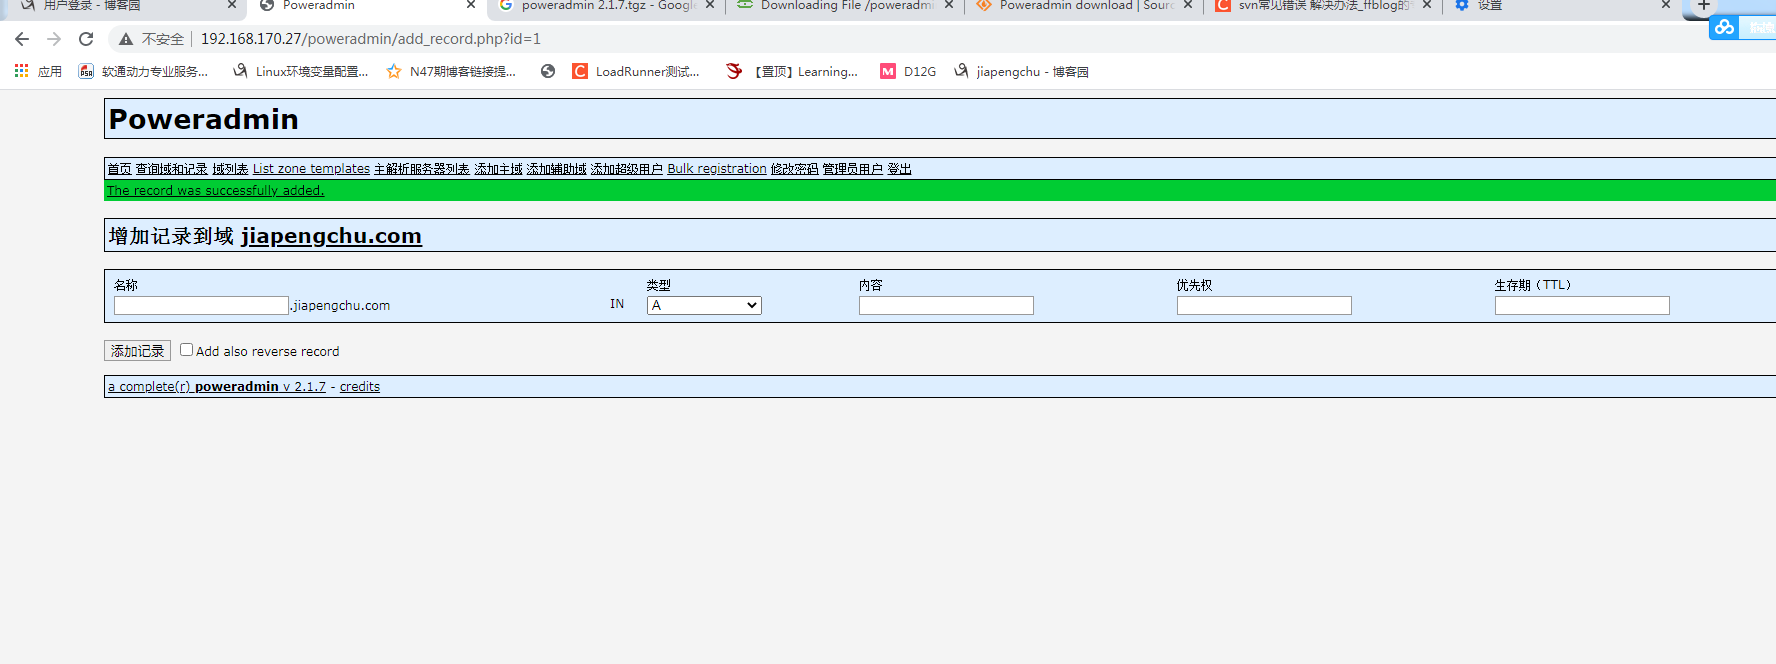
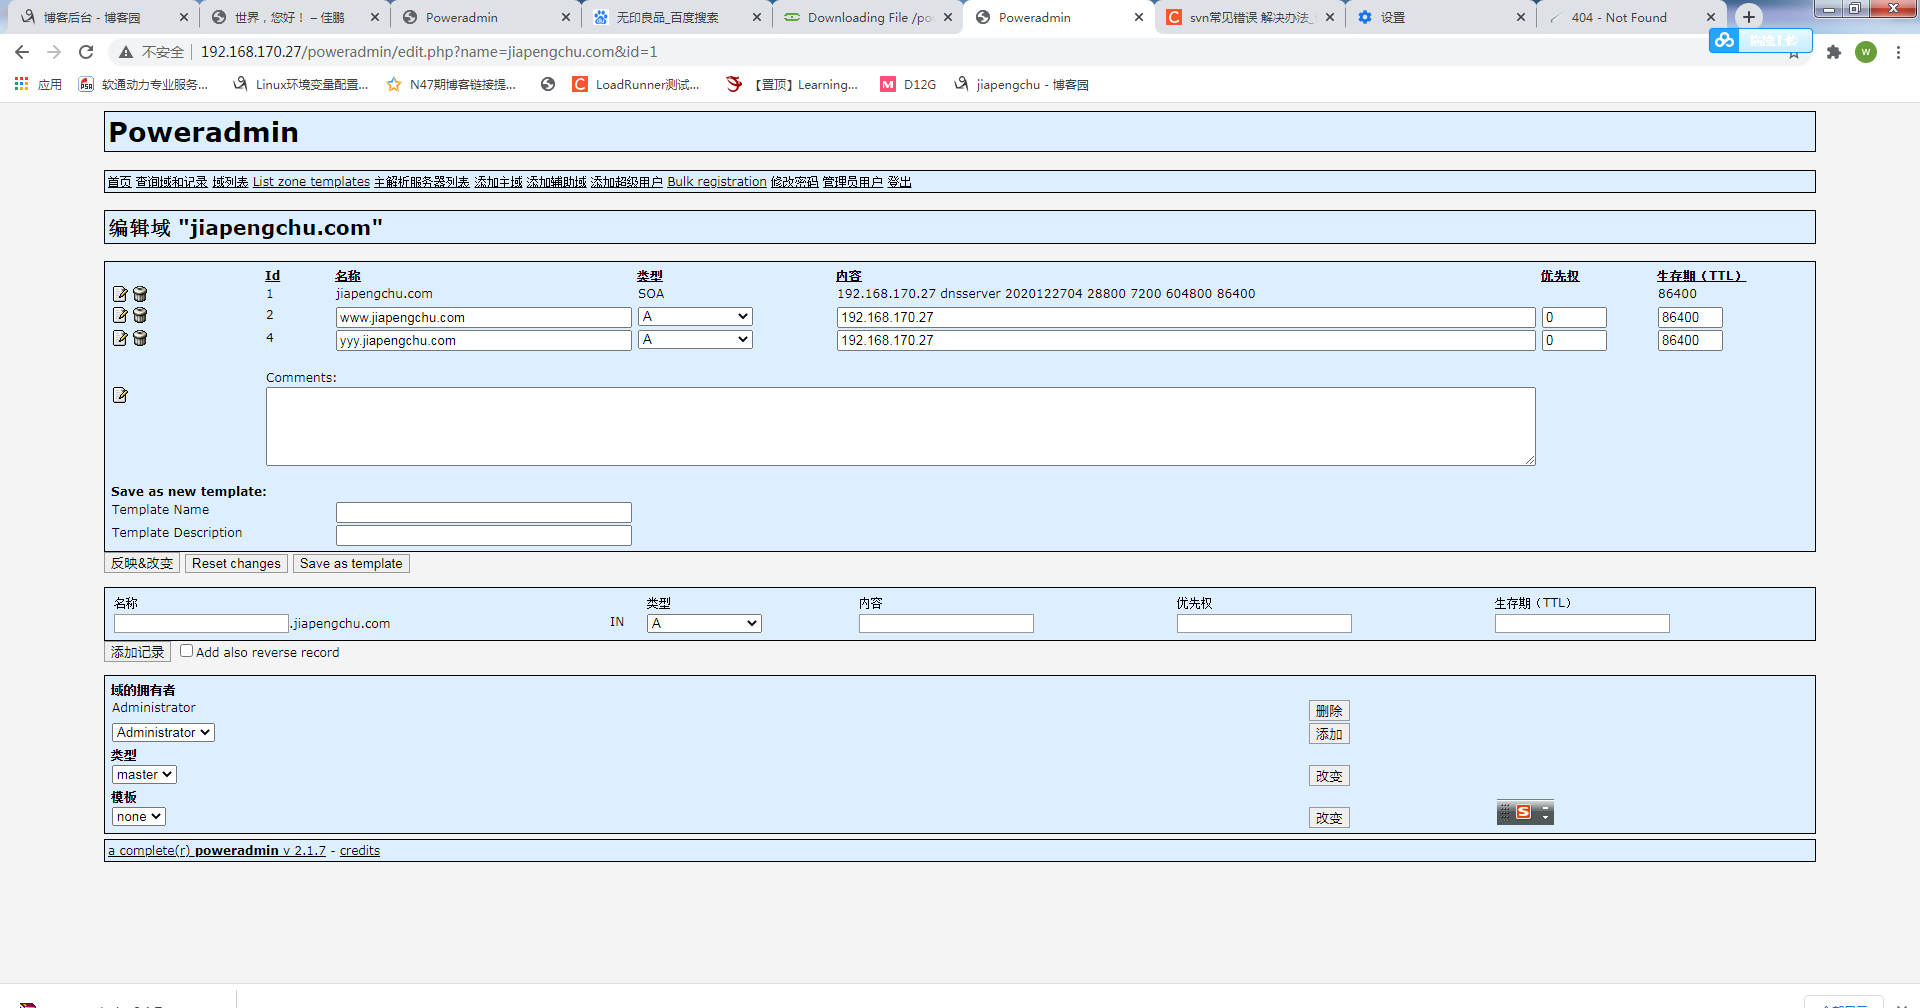
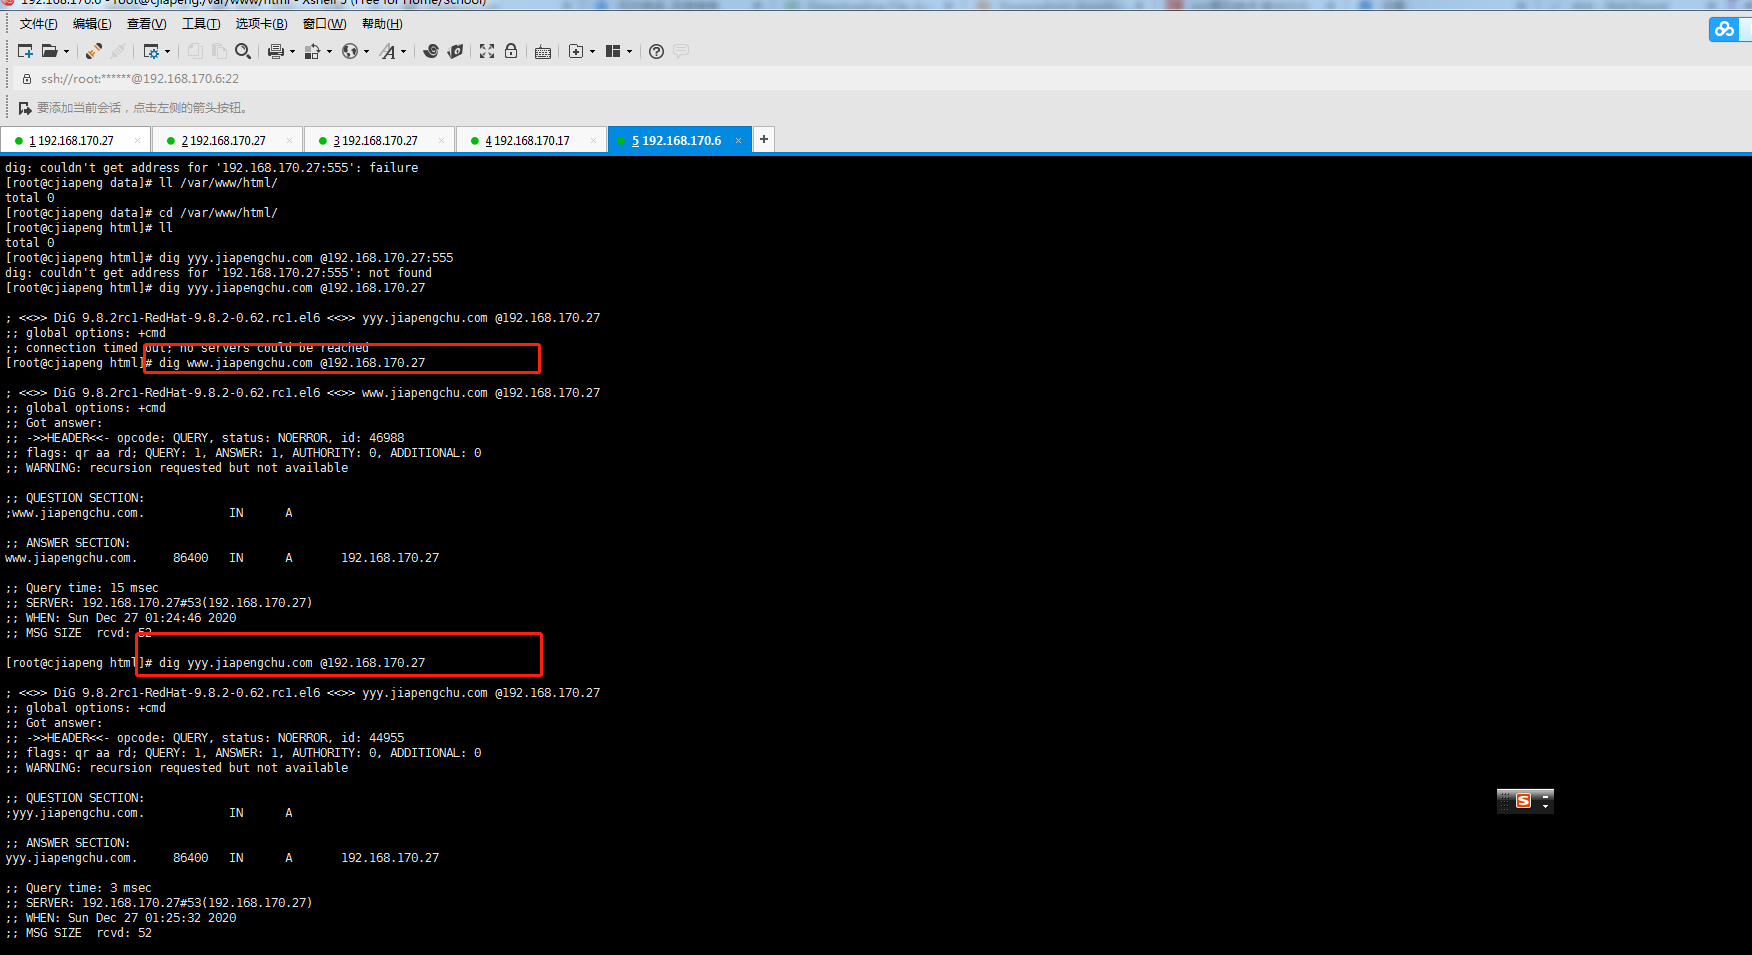
用192.168.170.6测试下添加的dns是否可用

实验二、php加载xcache模块
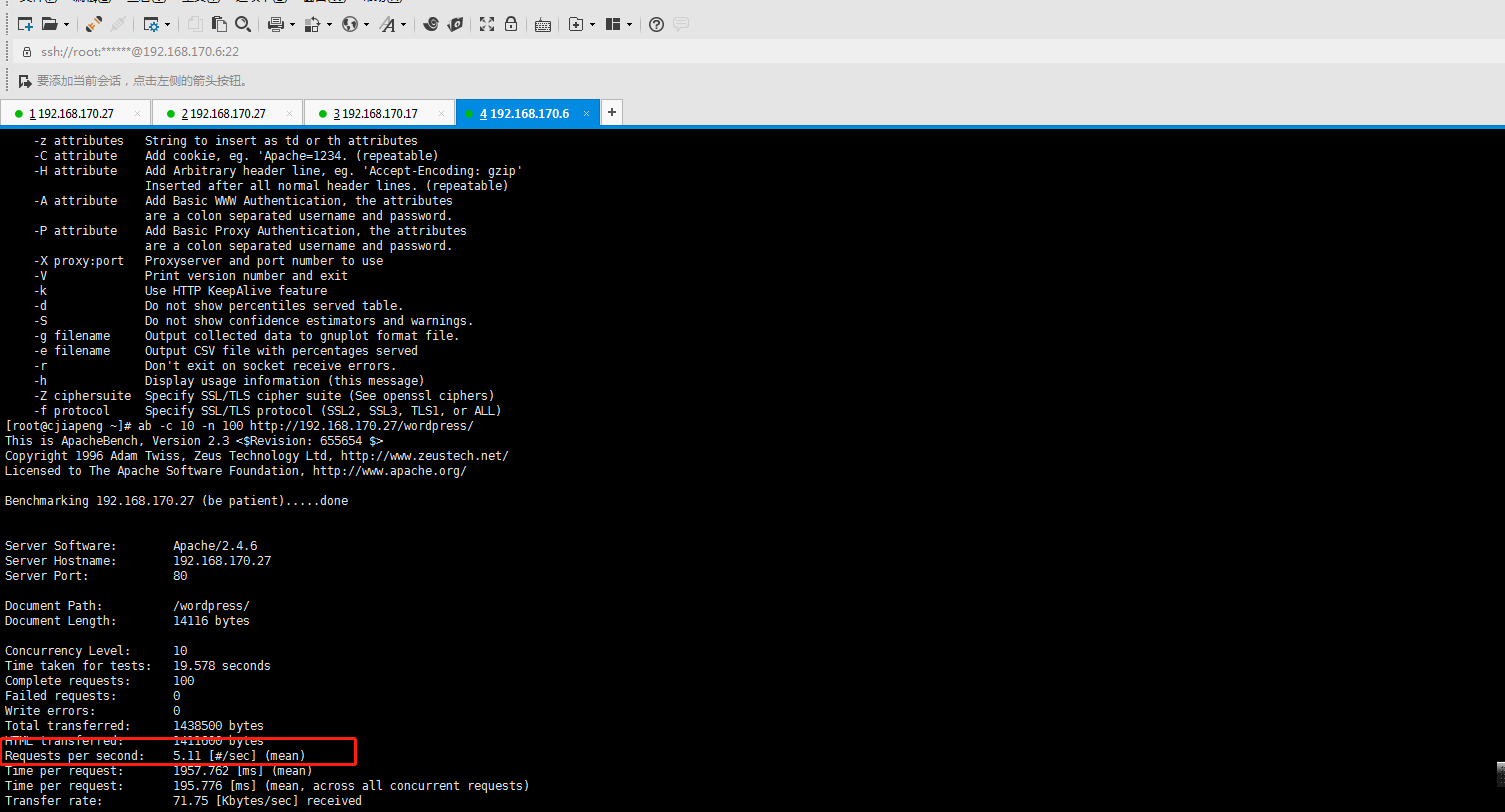
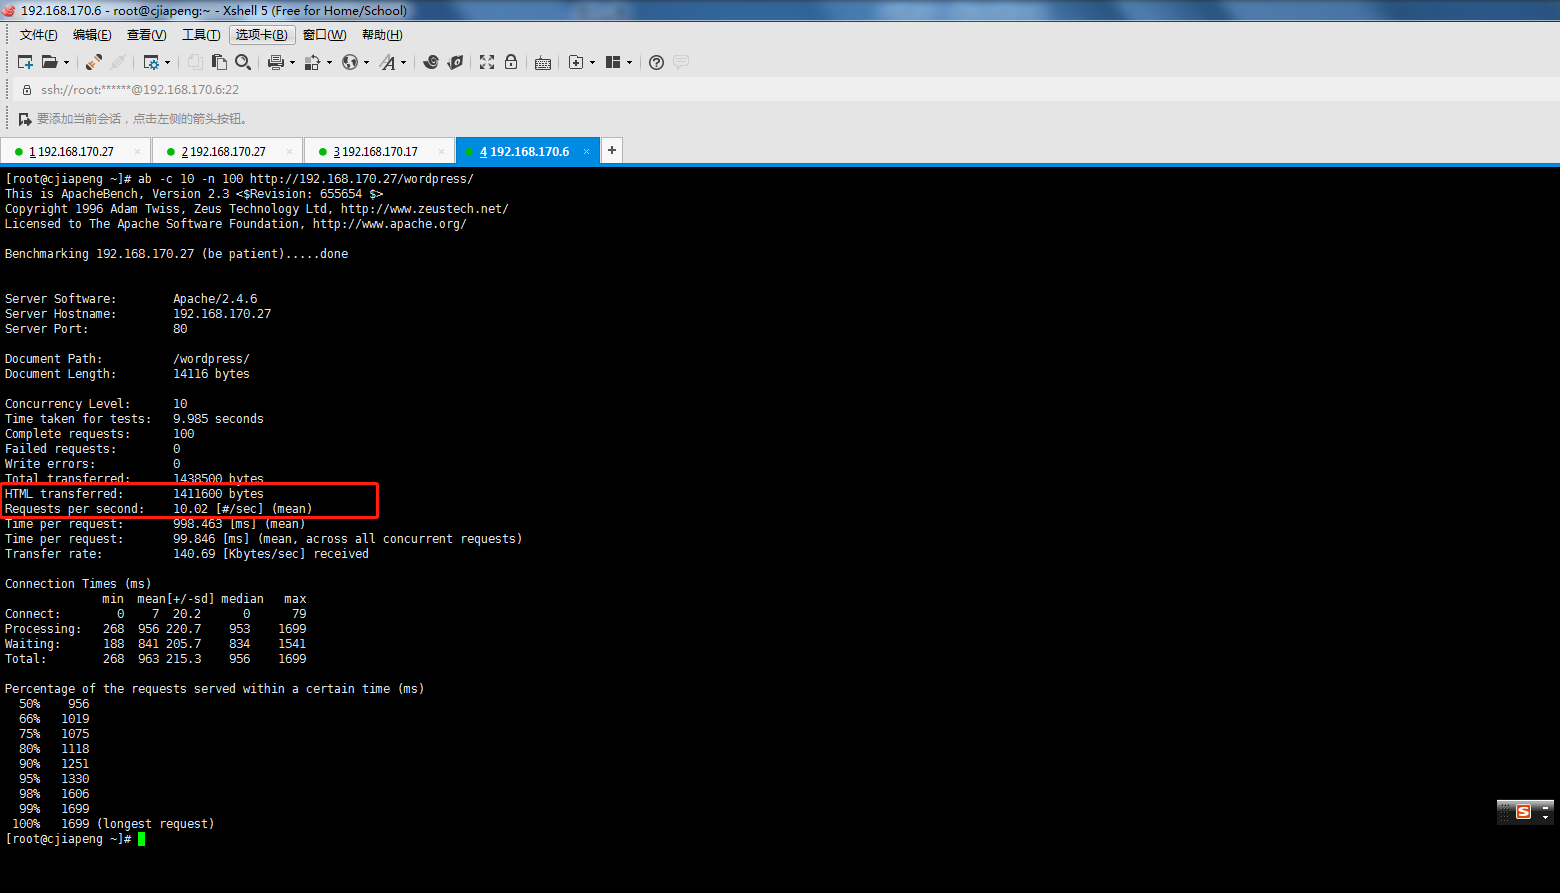
首先我们用ab命令测试下worpress首页的性能,我们看到原声的性能tps只有5个左右
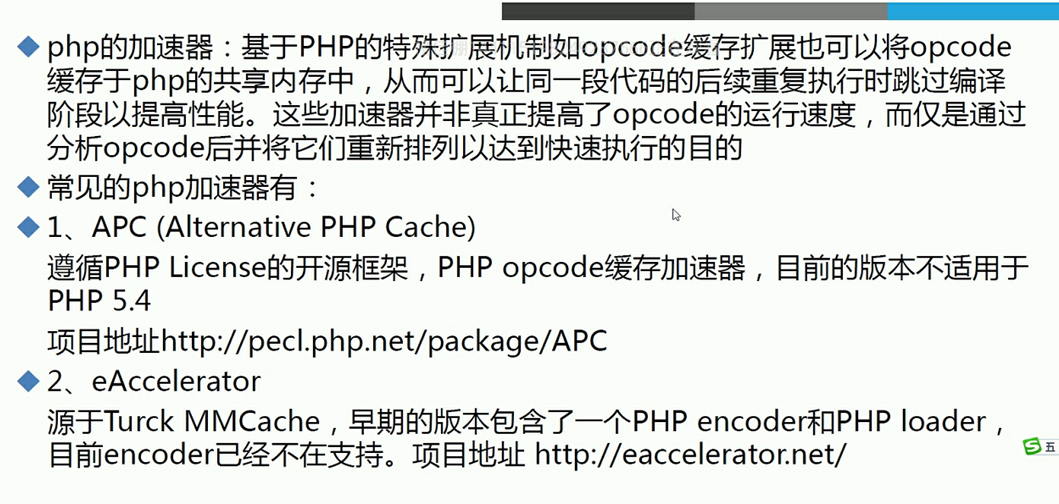
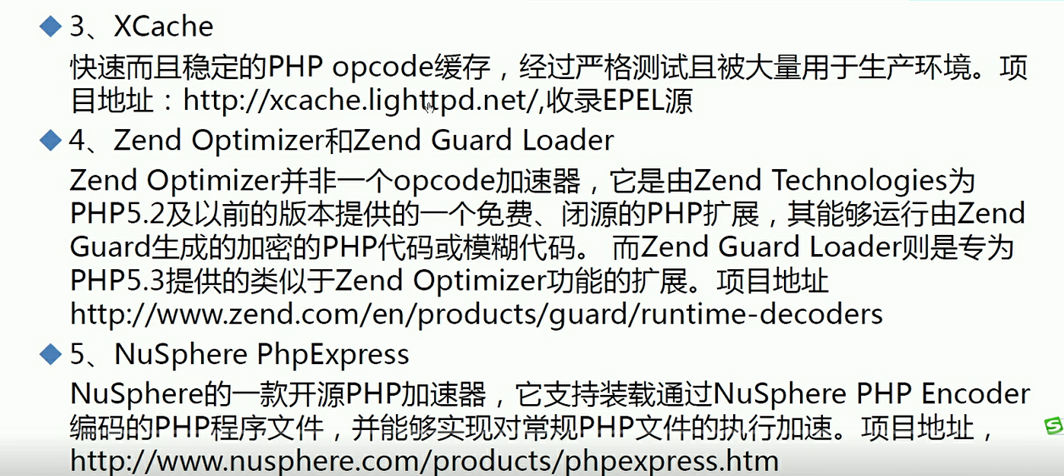
2.所以我们引入php加速器的概念
了解完原理后我们开始实战
root@chujiapeng wordpress]# yum search xcache
返回结果
php-xcache.x86_64 : Fast, stable PHP opcode cacher

[root@chujiapeng wordpress]# yum info php-xcache
Name        : php-xcache
Arch        : x86_64
Version     : 3.1.1
Release     : 1.el7
Size        : 72 k
Repo        : epel/x86_64
Summary     : Fast, stable PHP opcode cacher
URL         : http://xcache.lighttpd.net/
License     : BSD
Description : XCache is a fast, stable  PHP opcode and data cacher that has been tested
            : and is now running on production servers under high load.
            :
            : It is tested (on linux) and supported on all of the latest PHP release.
            : ThreadSafe is also perfectly supported.
            :
            : NOTICE: opcode cacher is disable to allow use with php-opcache only for user
            : data cache. You need to edit configuration file (xcache.ini) to enable it.
[root@chujiapeng wordpress]# yum install php-xcache -y

[root@chujiapeng wordpress]# rpm -ql php-xcache
/etc/php.d/xcache.ini
/usr/lib64/php/modules/xcache.so
/usr/share/doc/php-xcache-3.1.1
/usr/share/doc/php-xcache-3.1.1/AUTHORS
/usr/share/doc/php-xcache-3.1.1/COPYING
/usr/share/doc/php-xcache-3.1.1/ChangeLog
/usr/share/doc/php-xcache-3.1.1/README
/usr/share/doc/php-xcache-3.1.1/THANKS
vim /etc/php.d/xcache.ini
;; this is an example, it won't work unless properly configured into php.ini
[xcache-common]
;; non-Windows example:
extension = xcache.so
;; Windows example:
; extension = php_xcache.dll

[xcache.admin]
xcache.admin.enable_auth = On
重启服务后继续测试
[root@chujiapeng wordpress]# systemctl restart httpd
性能比之前提升了一倍左右
=====================================================================================================================
源码编译测试xcache-3.2.0.tar.gz
卸载
[root@chujiapeng data]# yum remove php-xcache -y
[root@chujiapeng data]# tar -xf xcache-3.2.0.tar.gz
[root@chujiapeng data]# cd xcache-3.2.0/
[root@chujiapeng xcache-3.2.0]# ll
total 132
-rw-rw-r-- 1 1027 513 26 Sep 26 2013 AUTHORS
drwxrwxr-x 2 1027 513 43 Nov 10 2013 bin
-rw-rw-r-- 1 1027 513 12185 Sep 18 2014 ChangeLog
-rw-rw-r-- 1 1027 513 4704 Sep 8 2014 config.m4
-rw-rw-r-- 1 1027 513 5044 Sep 8 2014 config.w32
-rw-rw-r-- 1 1027 513 1510 Sep 8 2014 COPYING
drwxrwxr-x 3 1027 513 226 Sep 18 2014 devel
-rwxrwxr-x 1 1027 513 3854 Sep 26 2013 gen_structinfo.awk
drwxrwxr-x 6 1027 513 137 Sep 26 2013 htdocs
-rw-rw-r-- 1 1027 513 108 Sep 26 2013 includes.c
-rw-rw-r-- 1 1027 513 487 Sep 26 2013 INSTALL
drwxrwxr-x 2 1027 513 34 Sep 3 2014 lib
-rw-rw-r-- 1 1027 513 2101 Sep 8 2014 Makefile.frag
-rw-rw-r-- 1 1027 513 5619 Sep 8 2014 Makefile.frag.deps
drwxrwxr-x 2 1027 513 28 Nov 10 2013 mod_assembler
drwxrwxr-x 2 1027 513 62 Sep 18 2014 mod_cacher
drwxrwxr-x 2 1027 513 50 Sep 8 2014 mod_coverager
drwxrwxr-x 2 1027 513 26 Sep 26 2013 mod_decoder
drwxrwxr-x 2 1027 513 56 Sep 8 2014 mod_disassembler
drwxrwxr-x 2 1027 513 26 Sep 26 2013 mod_encoder
drwxrwxr-x 2 1027 513 50 Nov 10 2013 mod_optimizer
-rw-rw-r-- 1 1027 513 3596 Sep 18 2014 NEWS
drwxrwxr-x 2 1027 513 128 Sep 8 2014 processor
-rw-rw-r-- 1 1027 513 364 Sep 26 2013 README
-rwxrwxr-x 1 1027 513 1376 Sep 26 2013 run-xcachetest
drwxrwxr-x 2 1027 513 4096 Sep 3 2014 tests
-rw-rw-r-- 1 1027 513 385 Sep 26 2013 THANKS
drwxrwxr-x 2 1027 513 156 Nov 10 2013 util
drwxrwxr-x 2 1027 513 4096 Sep 18 2014 xcache
-rw-rw-r-- 1 1027 513 26047 Sep 18 2014 xcache.c
-rw-rw-r-- 1 1027 513 1325 Nov 10 2013 xcache_globals.h
-rw-rw-r-- 1 1027 513 709 Sep 19 2014 xcache.h
-rw-rw-r-- 1 1027 513 3112 Nov 10 2013 xcache.ini
-rw-rw-r-- 1 1027 513 656 Sep 26 2013 xcache-test.ini
-rw-rw-r-- 1 1027 513 2574 Sep 26 2013 xcache-zh-gb2312.ini
[root@chujiapeng xcache-3.2.0]# cat INSTALL
# vim:ts=4:sw=4
Installtion:
$ phpize --clean && phpize
$ ./configure --help
$ CFLAGS='your cflags' ./configure --enable-xcache --enable...
$ make
$ su
# make install
(update php.ini, restart php)
Reinstall:
$ mv config.nice conf
$ make distclean && phpize --clean && phpize
$ mv conf config.nice
$ ./config.nice
$ make
$ su
# make install
(update php.ini, restart php)
Update php.ini:
$ su
# cat xcache.ini >> /etc/php.ini
# $EDITOR /etc/php.ini
[root@chujiapeng xcache-3.2.0]#phpize --clean && phpize
[root@chujiapeng xcache-3.2.0]# phpize --clean && phpize
Cleaning..
Configuring for:
PHP Api Version: 20100412
Zend Module Api No: 20100525
Zend Extension Api No: 220100525
[root@chujiapeng xcache-3.2.0]# ./configure --enable-xcache
checking for grep that handles long lines and -e... /usr/bin/grep
checking for egrep... /usr/bin/grep -E
checking for a sed that does not truncate output... /usr/bin/sed
checking for cc... no
checking for gcc... no
configure: error: in `/data/xcache-3.2.0':
configure: error: no acceptable C compiler found in $PATH
See `config.log' for more details
[root@chujiapeng xcache-3.2.0]# yum install gcc -y
[root@chujiapeng xcache-3.2.0]# ./configure --enable-xcache
[root@chujiapeng xcache-3.2.0]# make -j4 && make install
Build complete.
Don't forget to run 'make test'.
Installing shared extensions: /usr/lib64/php/modules/
[root@chujiapeng ~]# ll /usr/lib64/php/modules/
total 6672
-rwxr-xr-x 1 root root 702048 Dec 27 13:39 xcache.so
-rwxr-xr-x 1 root root 32920 Apr 1 2020 xmlreader.so
修改php的配置文件吧模块加入到php里
[root@chujiapeng xcache-3.2.0]# cp xcache.ini /etc/php.d/
[root@chujiapeng xcache-3.2.0]# vim /etc/php.d/xcache.ini #只看 啥也不用改
;; this is an example, it won't work unless properly configured into php.ini
[xcache-common]
;; non-Windows example:
extension = xcache.so
;; Windows example:
; extension = php_xcache.dll
[xcache.admin]
xcache.admin.enable_auth = On
; use http://xcache.lighttpd.net/demo/cacher/mkpassword.php to generate your encrypted password
xcache.admin.user = "mOo"
xcache.admin.pass = "md5 encrypted password"
[xcache]
; ini only settings, all the values here is default unless explained
; select low level shm implemenation
xcache.shm_scheme = "mmap"
; to disable: xcache.size=0
; to enable : xcache.size=64M etc (any size > 0) and your system mmap allows
xcache.size = 60M
; set to cpu count (cat /proc/cpuinfo |grep -c processor)
xcache.count = 1
; just a hash hints, you can always store count(items) > slots
xcache.slots = 8K
; ttl of the cache item, 0=forever
xcache.ttl = 0
; interval of gc scanning expired items, 0=no scan, other values is in seconds
xcache.gc_interval = 0
; same as aboves but for variable cache
xcache.var_size = 4M
xcache.var_count = 1
xcache.var_slots = 8K
重启服务即可
[root@chujiapeng xcache-3.2.0]# systemctl restart httpd
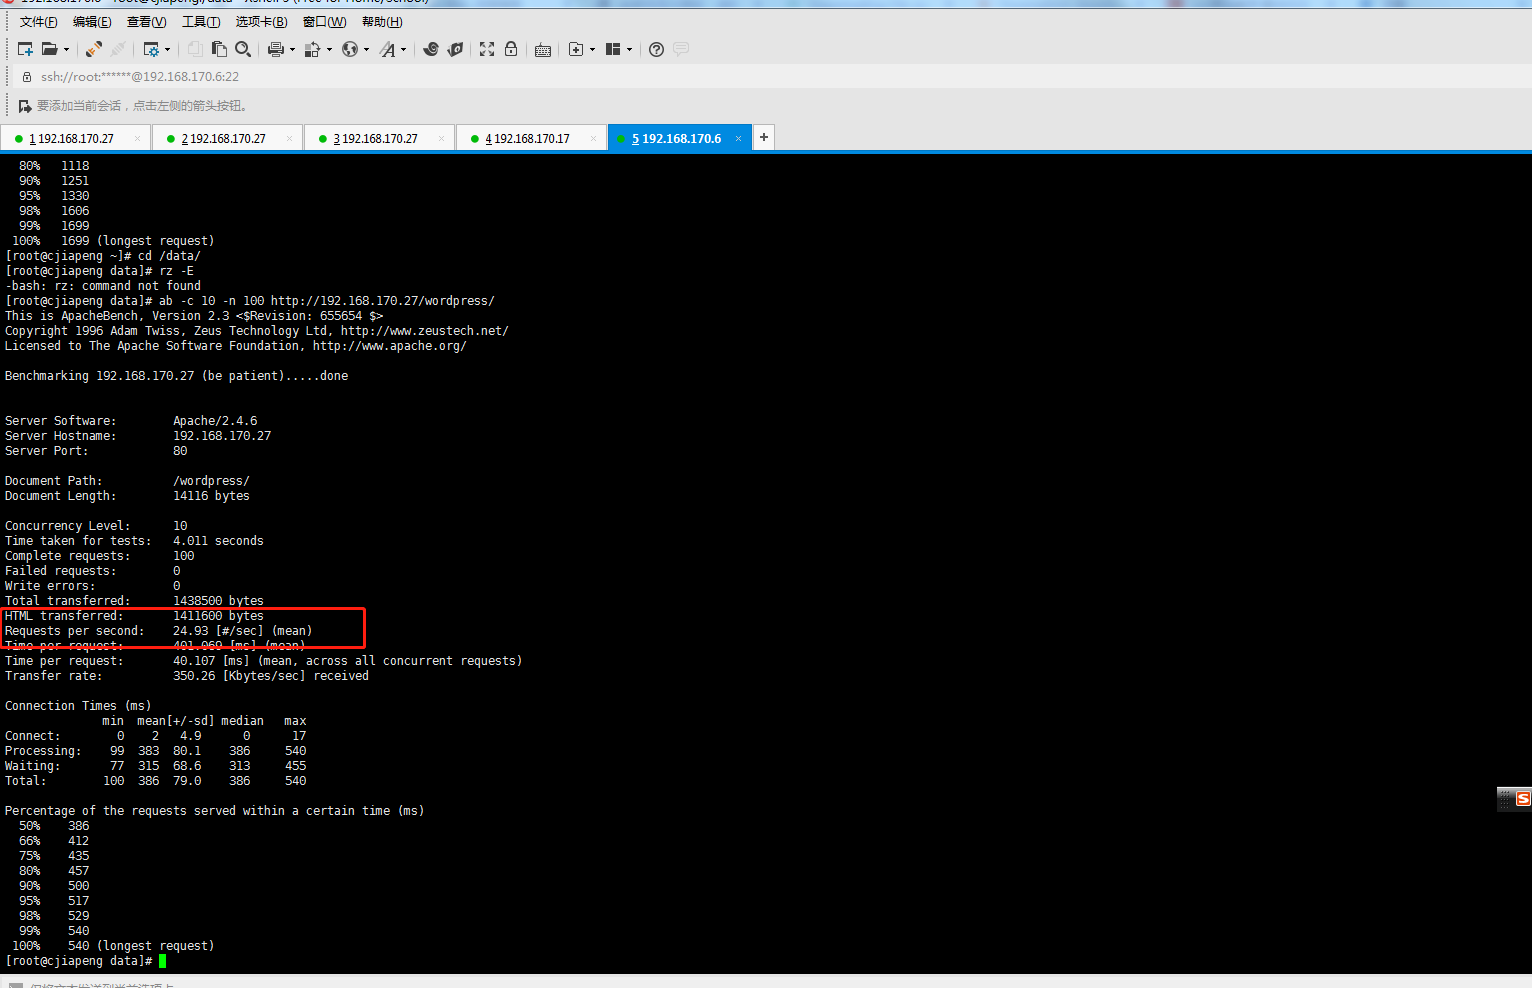
再次测试我们发现性能在yum安装的基础上又提升了一倍多
到此结束
posted on 2020-12-26 20:57 jiapengchu 阅读(197) 评论(0) 编辑 收藏 举报


