


spring cache及springboot如何使用redis连接池
一、springboot整合Redis
要整合 Redis 的话,最好的方式是使用 Spring Cache,仅仅通过 @Cacheable、@CachePut、@CacheEvict、@EnableCaching 等注解就可以轻松使用 Redis 做缓存了。
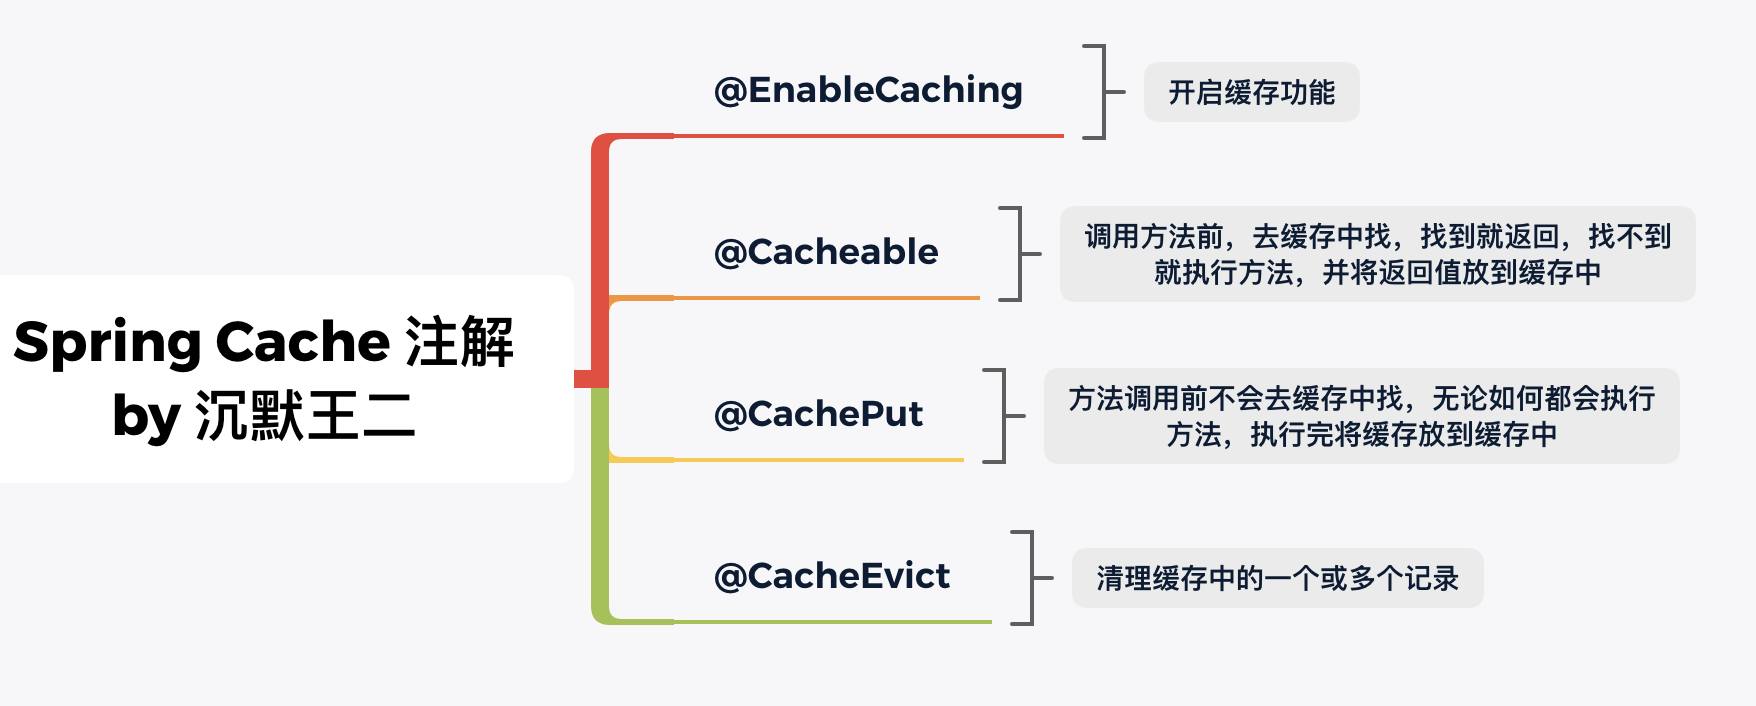
1)@EnableCaching,开启缓存功能。
2)@Cacheable,调用方法前,去缓存中找,找到就返回,找不到就执行方法,并将返回值放到缓存中。
3)@CachePut,方法调用前不会去缓存中找,无论如何都会执行方法,执行完将返回值放到缓存中。
4)@CacheEvict,清理缓存中的一个或多个记录。
Spring Cache 是 Spring 提供的一套完整的缓存解决方案,虽然它本身没有提供缓存的实现,但它提供的一整套接口、规范、配置、注解等,可以让我们无缝衔接 Redis、Ehcache 等缓存实现。
Spring Cache 的注解(前面提到的四个)会在调用方法之后,去缓存方法返回的最终结果;或者在方法调用之前拿缓存中的结果,当然还有删除缓存中的结果。
这些读写操作不用我们手动再去写代码实现了,直接交给 Spring Cache 来打理就 OK 了,是不是非常贴心?
第一步,在 pom.xml 文件中追加 Redis 的 starter。
<dependency>
    <groupId>org.springframework.boot</groupId>
    <artifactId>spring-boot-starter-data-redis</artifactId>
</dependency>
第二步,在 application.yml 文件中添加 Redis 链接配置。
spring:
    redis:
        host: 118.xx.xx.xxx # Redis服务器地址
        database: 0 # Redis数据库索引(默认为0)
        port: 6379 # Redis服务器连接端口
        password: xx # Redis服务器连接密码(默认为空)
        timeout: 1000ms # 连接超时时间(毫秒)
第三步,新增 RedisConfig.java 类,通过 RedisTemplate 设置 JSON 格式的序列化器,这样的话存储到 Redis 里的数据将是有类型的 JSON 数据,例如:
@EnableCaching
@Configuration
public class RedisConfig extends CachingConfigurerSupport {

    @Bean
    public RedisTemplate<String, Object> redisTemplate(RedisConnectionFactory redisConnectionFactory) {
        RedisTemplate<String, Object> redisTemplate = new RedisTemplate<>();
        redisTemplate.setConnectionFactory(redisConnectionFactory);

        // 通过 Jackson 组件进行序列化
        RedisSerializer<Object> serializer = redisSerializer();

        // key 和 value
        // 一般来说, redis-key采用字符串序列化;
        // redis-value采用json序列化, json的体积小,可读性高,不需要实现serializer接口。
        redisTemplate.setKeySerializer(new StringRedisSerializer());
        redisTemplate.setValueSerializer(serializer);

        redisTemplate.setHashKeySerializer(new StringRedisSerializer());
        redisTemplate.setHashValueSerializer(serializer);

        redisTemplate.afterPropertiesSet();
        return redisTemplate;
    }

    @Bean
    public RedisSerializer<Object> redisSerializer() {
        //创建JSON序列化器
        Jackson2JsonRedisSerializer<Object> serializer = new Jackson2JsonRedisSerializer<>(Object.class);
        ObjectMapper objectMapper = new ObjectMapper();
        objectMapper.setVisibility(PropertyAccessor.ALL, JsonAutoDetect.Visibility.ANY);
        // https://www.cnblogs.com/shanheyongmu/p/15157378.html
        // objectMapper.enableDefaultTyping()被弃用
        objectMapper.activateDefaultTyping(
                LaissezFaireSubTypeValidator.instance,
                ObjectMapper.DefaultTyping.NON_FINAL,
                JsonTypeInfo.As.WRAPPER_ARRAY);
        serializer.setObjectMapper(objectMapper);
        return serializer;
    }

}
通过 RedisCacheConfiguration 设置超时时间,来避免产生很多不必要的缓存数据。
@Bean
public RedisCacheManager redisCacheManager(RedisConnectionFactory redisConnectionFactory) {
    RedisCacheWriter redisCacheWriter = RedisCacheWriter.nonLockingRedisCacheWriter(redisConnectionFactory);
    //设置Redis缓存有效期为1天
    RedisCacheConfiguration redisCacheConfiguration = RedisCacheConfiguration.defaultCacheConfig()
            .serializeValuesWith(RedisSerializationContext.SerializationPair.fromSerializer(redisSerializer())).entryTtl(Duration.ofDays(1));
    return new RedisCacheManager(redisCacheWriter, redisCacheConfiguration);
}
第四步,在标签更新接口中添加 @CachePut 注解,也就是说方法执行前不会去缓存中找,但方法执行完会将返回值放入缓存中。
@Controller
@Api(tags = "标签")
@RequestMapping("/postTag")
public class PostTagController {

    @Autowired
    private IPostTagService postTagService;
    @Autowired
    private IPostTagRelationService postTagRelationService;

    @RequestMapping(value = "/update", method = RequestMethod.POST)
    @ResponseBody
    @ApiOperation("修改标签")
    @CachePut(value = "codingmore", key = "'codingmore:postags:'+#postAddTagParam.postTagId")
    public ResultObject<String> update(@Valid PostTagParam postAddTagParam) {
        if (postAddTagParam.getPostTagId() == null) {
            return ResultObject.failed("标签id不能为空");
        }
        PostTag postTag = postTagService.getById(postAddTagParam.getPostTagId());
        if (postTag == null) {
            return ResultObject.failed("标签不存在");
        }
        QueryWrapper<PostTag> queryWrapper = new QueryWrapper<>();
        queryWrapper.eq("description", postAddTagParam.getDescription());
        int count = postTagService.count(queryWrapper);
        if (count > 0) {
            return ResultObject.failed("标签名称已存在");
        }
        BeanUtils.copyProperties(postAddTagParam, postTag);
        return ResultObject.success(postTagService.updateById(postTag) ? "修改成功" : "修改失败");
    }
}
注意看 @CachePut 注解这行代码:
@CachePut(value = "codingmore", key = "'codingmore:postags:'+#postAddTagParam.postTagId")
- value:缓存名称,也就是缓存的命名空间,value 这里应该换成 namespace 更好一点;
- key:用于在命名空间中缓存的 key 值,可以使用 SpEL 表达式,比如说
'codingmore:postags:'+#postAddTagParam.postTagId; - 还有两个属性 unless 和 condition 暂时没用到,分别表示条件符合则不缓存,条件符合则缓存。
二、使用 Redis 连接池
Redis 是基于内存的数据库,本来是为了提高程序性能的,但如果不使用 Redis 连接池的话,建立连接、断开连接就需要消耗大量的时间。
用了连接池,就可以实现在客户端建立多个连接,需要的时候从连接池拿,用完了再放回去,这样就节省了连接建立、断开的时间。
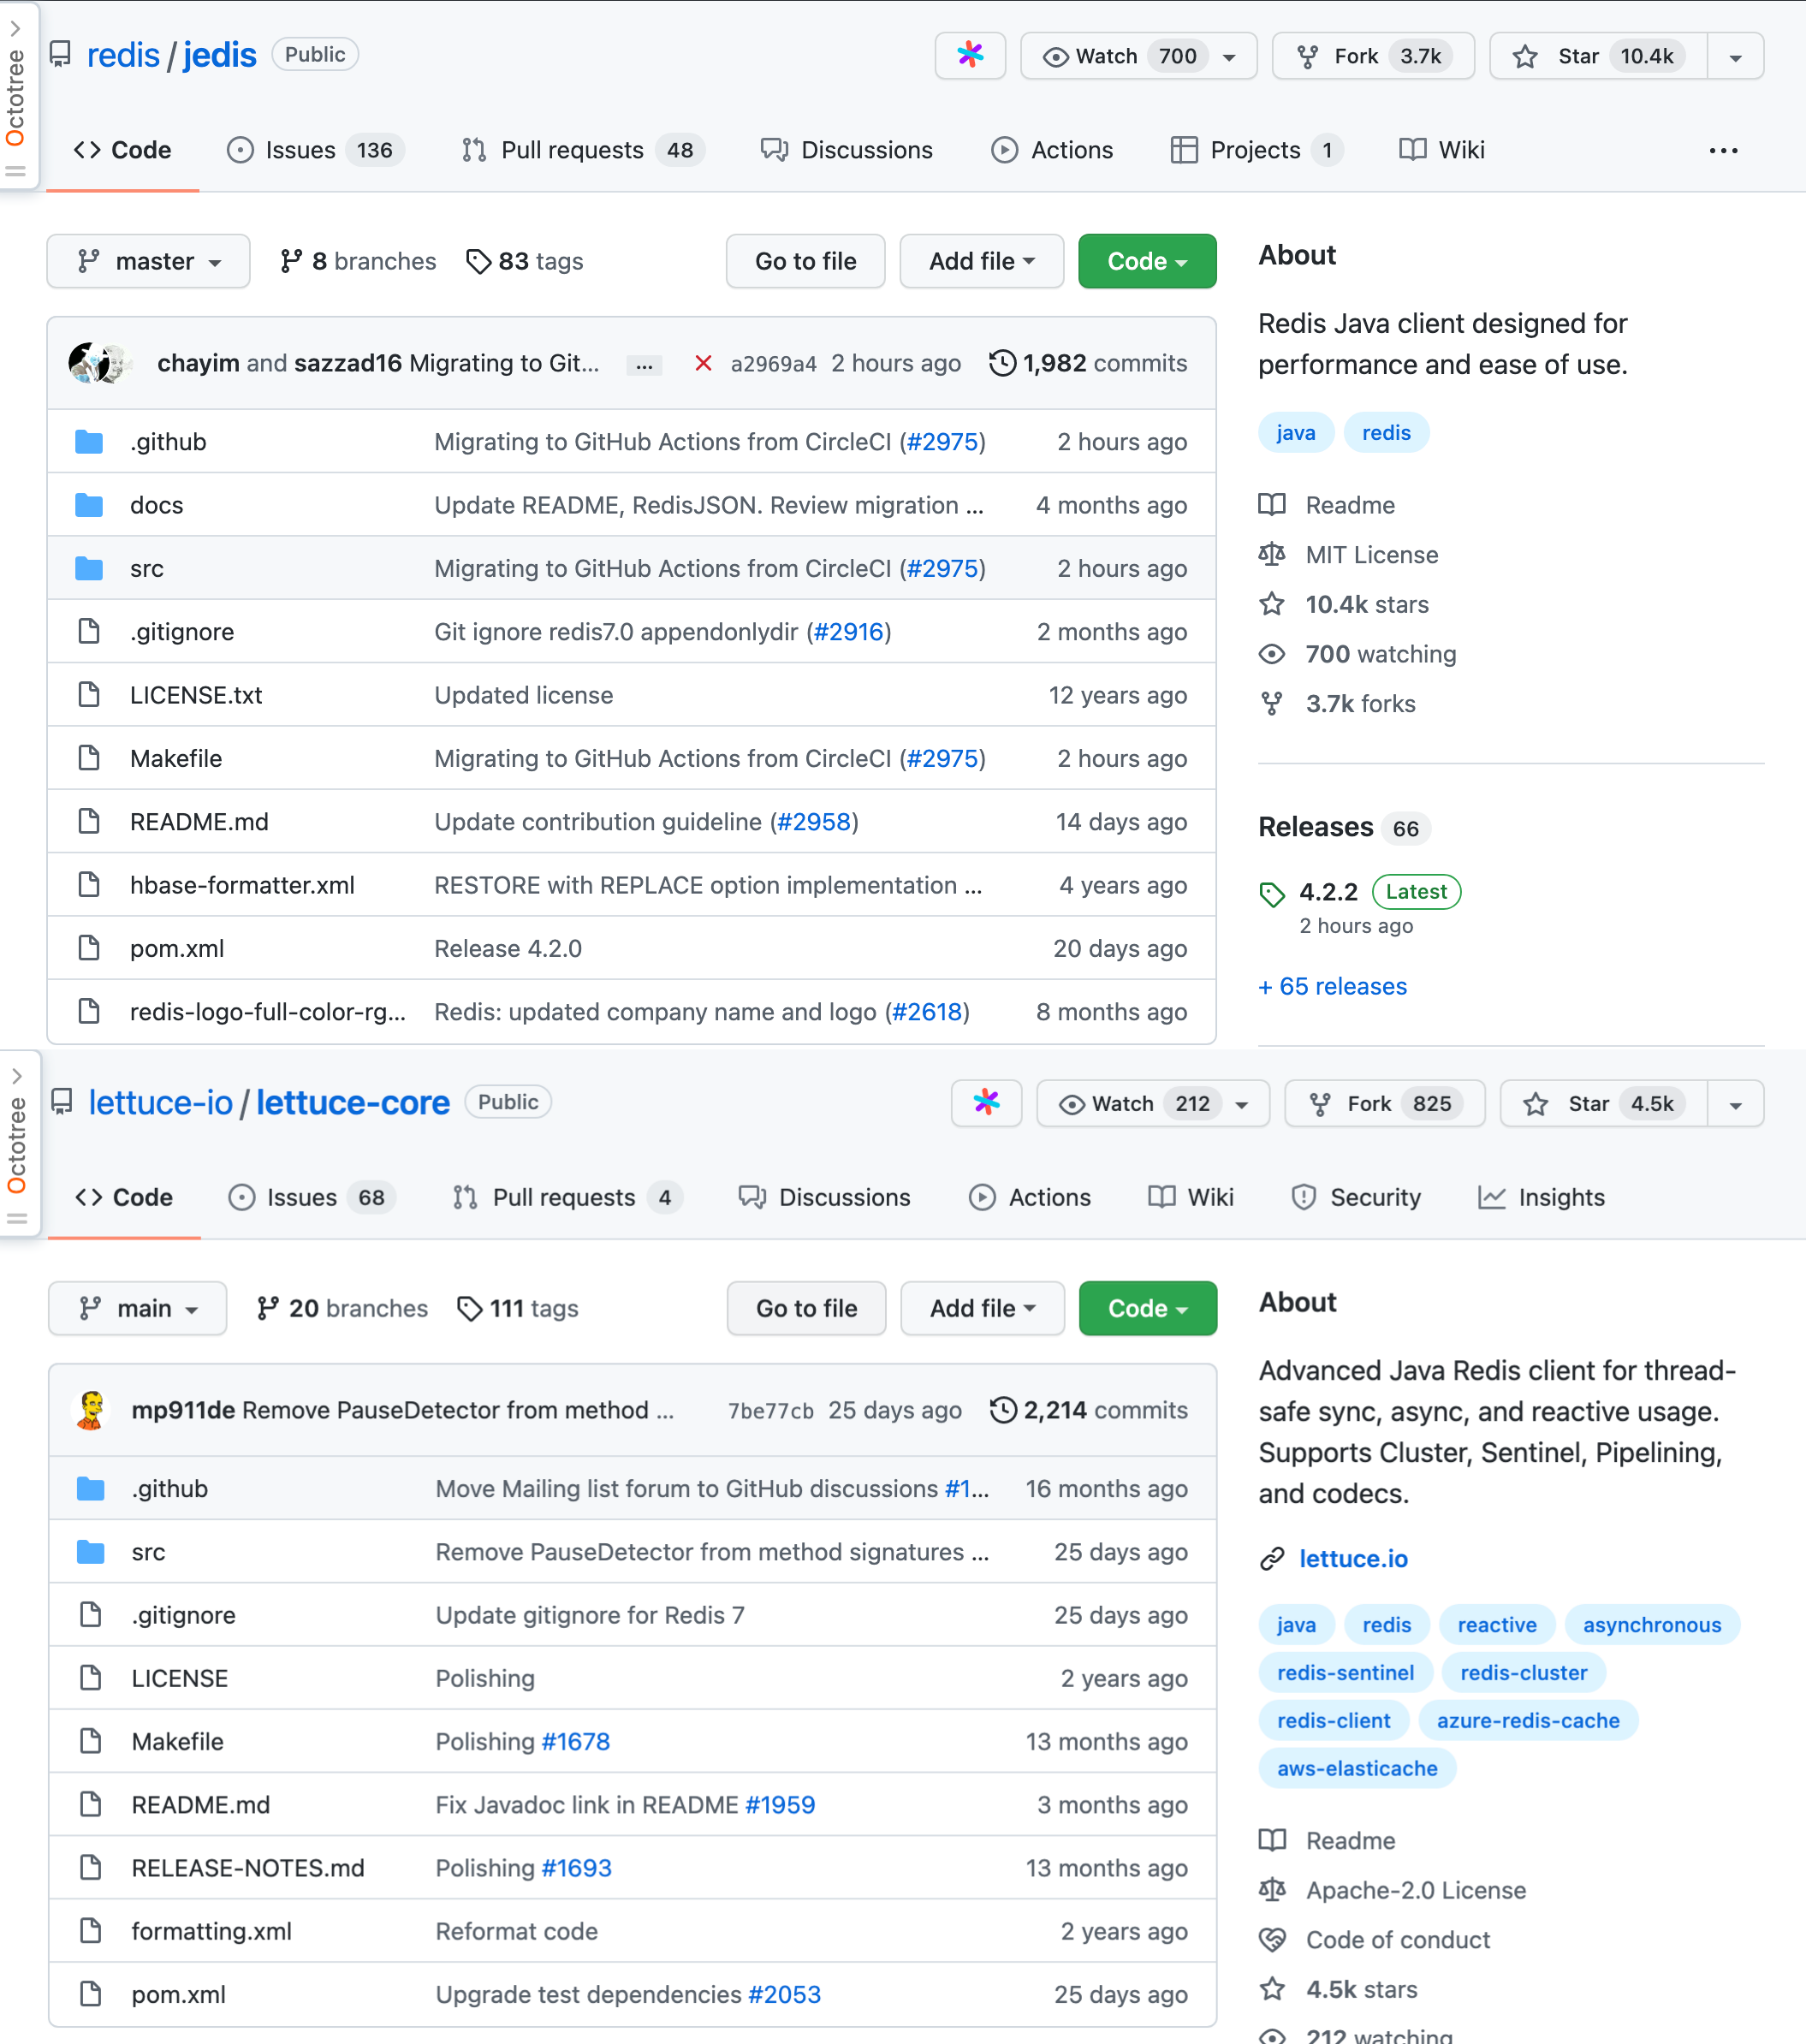
要使用连接池,我们得先了解 Redis 的客户端,常用的有两种:Jedis 和 Lettuce。
- Jedis:Spring Boot 1.5.x 版本时默认的 Redis 客户端,实现上是直接连接 Redis Server,如果在多线程环境下是非线程安全的,这时候要使用连接池为每个 jedis 实例增加物理连接;
- Lettuce:Spring Boot 2.x 版本后默认的 Redis 客户端,基于 Netty 实现,连接实例可以在多个线程间并发访问,一个连接实例不够的情况下也可以按需要增加连接实例。
它俩在 GitHub 上都挺受欢迎的,大家可以按需选用。
我这里把两种客户端的情况都演示一下,方便小伙伴们参考。
1)Lettuce
第一步,修改 application-dev.yml,添加 Lettuce 连接池配置(pool 节点)。
spring:
    redis:
        lettuce:
          pool:
            max-active: 8 # 连接池最大连接数
            max-idle: 8 # 连接池最大空闲连接数
            min-idle: 0 # 连接池最小空闲连接数
            max-wait: -1ms # 连接池最大阻塞等待时间,负值表示没有限制
第二步,在 pom.xml 文件中添加 commons-pool2 依赖,否则会在启动的时候报 ClassNotFoundException 的错。这是因为 Spring Boot 2.x 里默认没启用连接池。
Caused by: java.lang.ClassNotFoundException: org.apache.commons.pool2.impl.GenericObjectPoolConfig
	at java.net.URLClassLoader.findClass(URLClassLoader.java:381)
	at java.lang.ClassLoader.loadClass(ClassLoader.java:424)
	at sun.misc.Launcher$AppClassLoader.loadClass(Launcher.java:335)
	at java.lang.ClassLoader.loadClass(ClassLoader.java:357)
	... 153 common frames omitted
添加 commons-pool2 依赖:
<dependency>
    <groupId>org.apache.commons</groupId>
    <artifactId>commons-pool2</artifactId>
    <version>2.6.2</version>
    <type>jar</type>
    <scope>compile</scope>
</dependency>
重新启动服务,在 RedisConfig 类的 redisTemplate 方法里对 redisTemplate 打上断点,debug 模式下可以看到连接池的配置信息(redisConnectionFactory→clientConfiguration→poolConfig)。如下图所示。
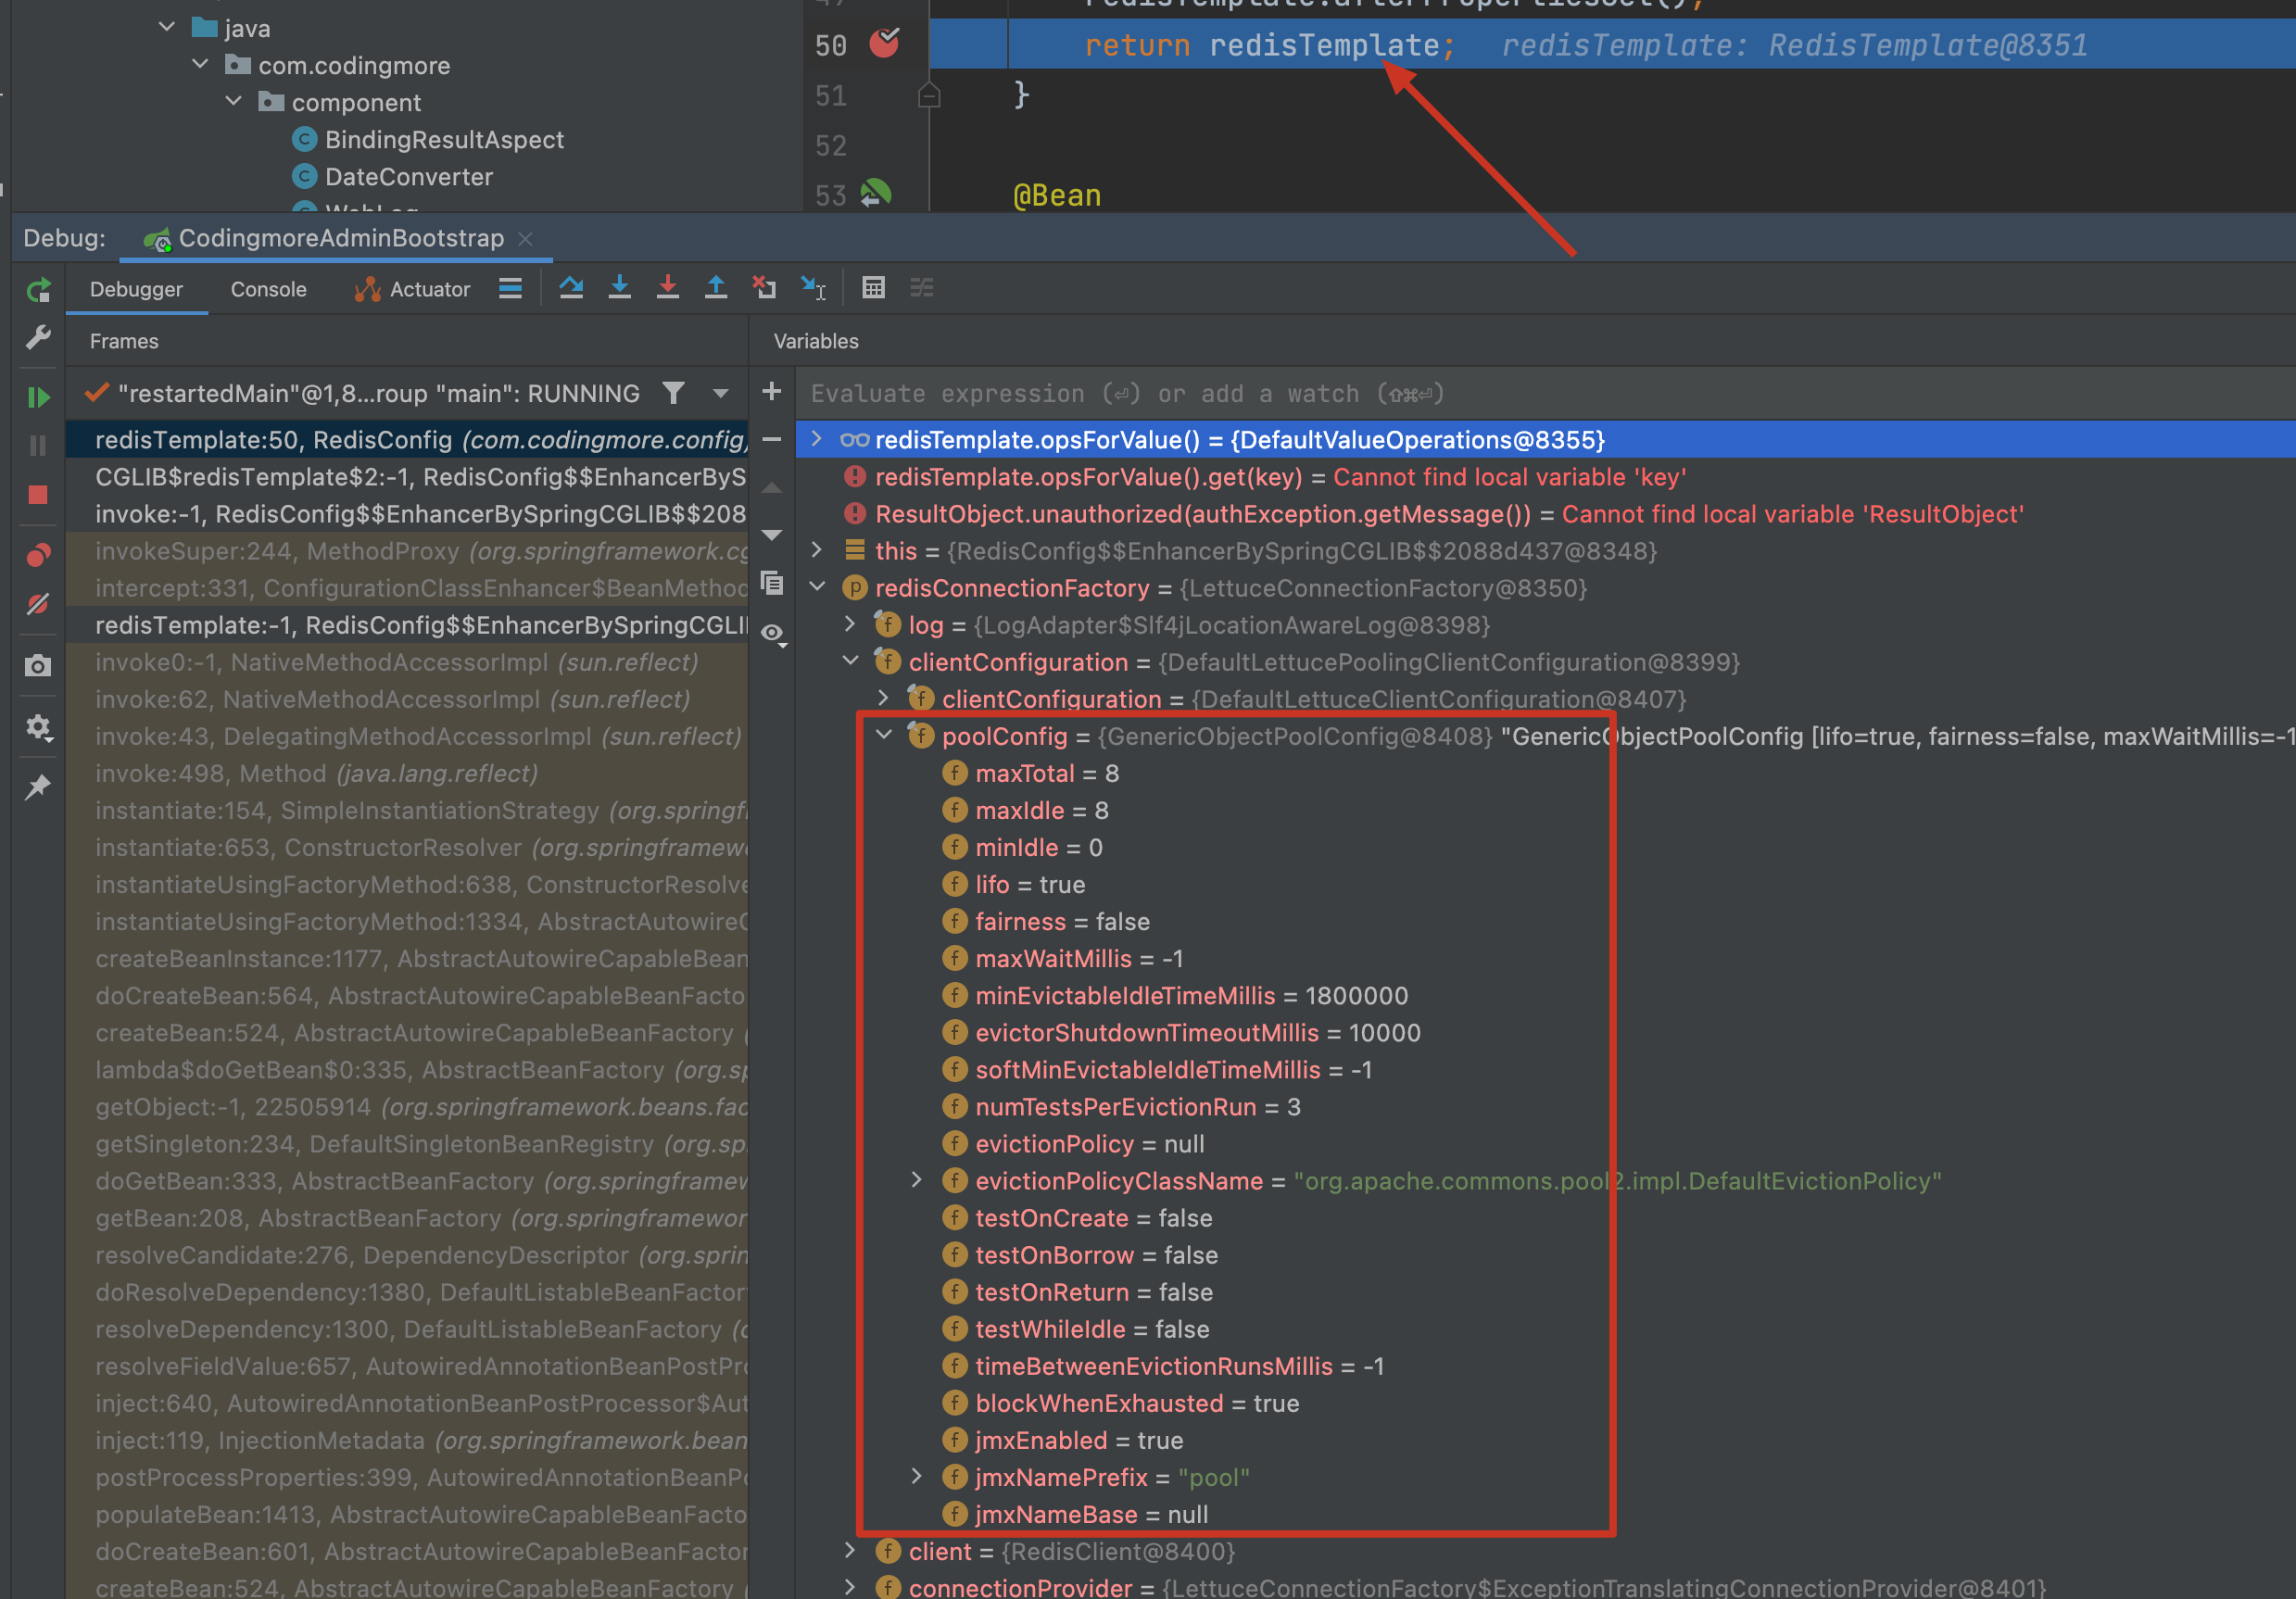
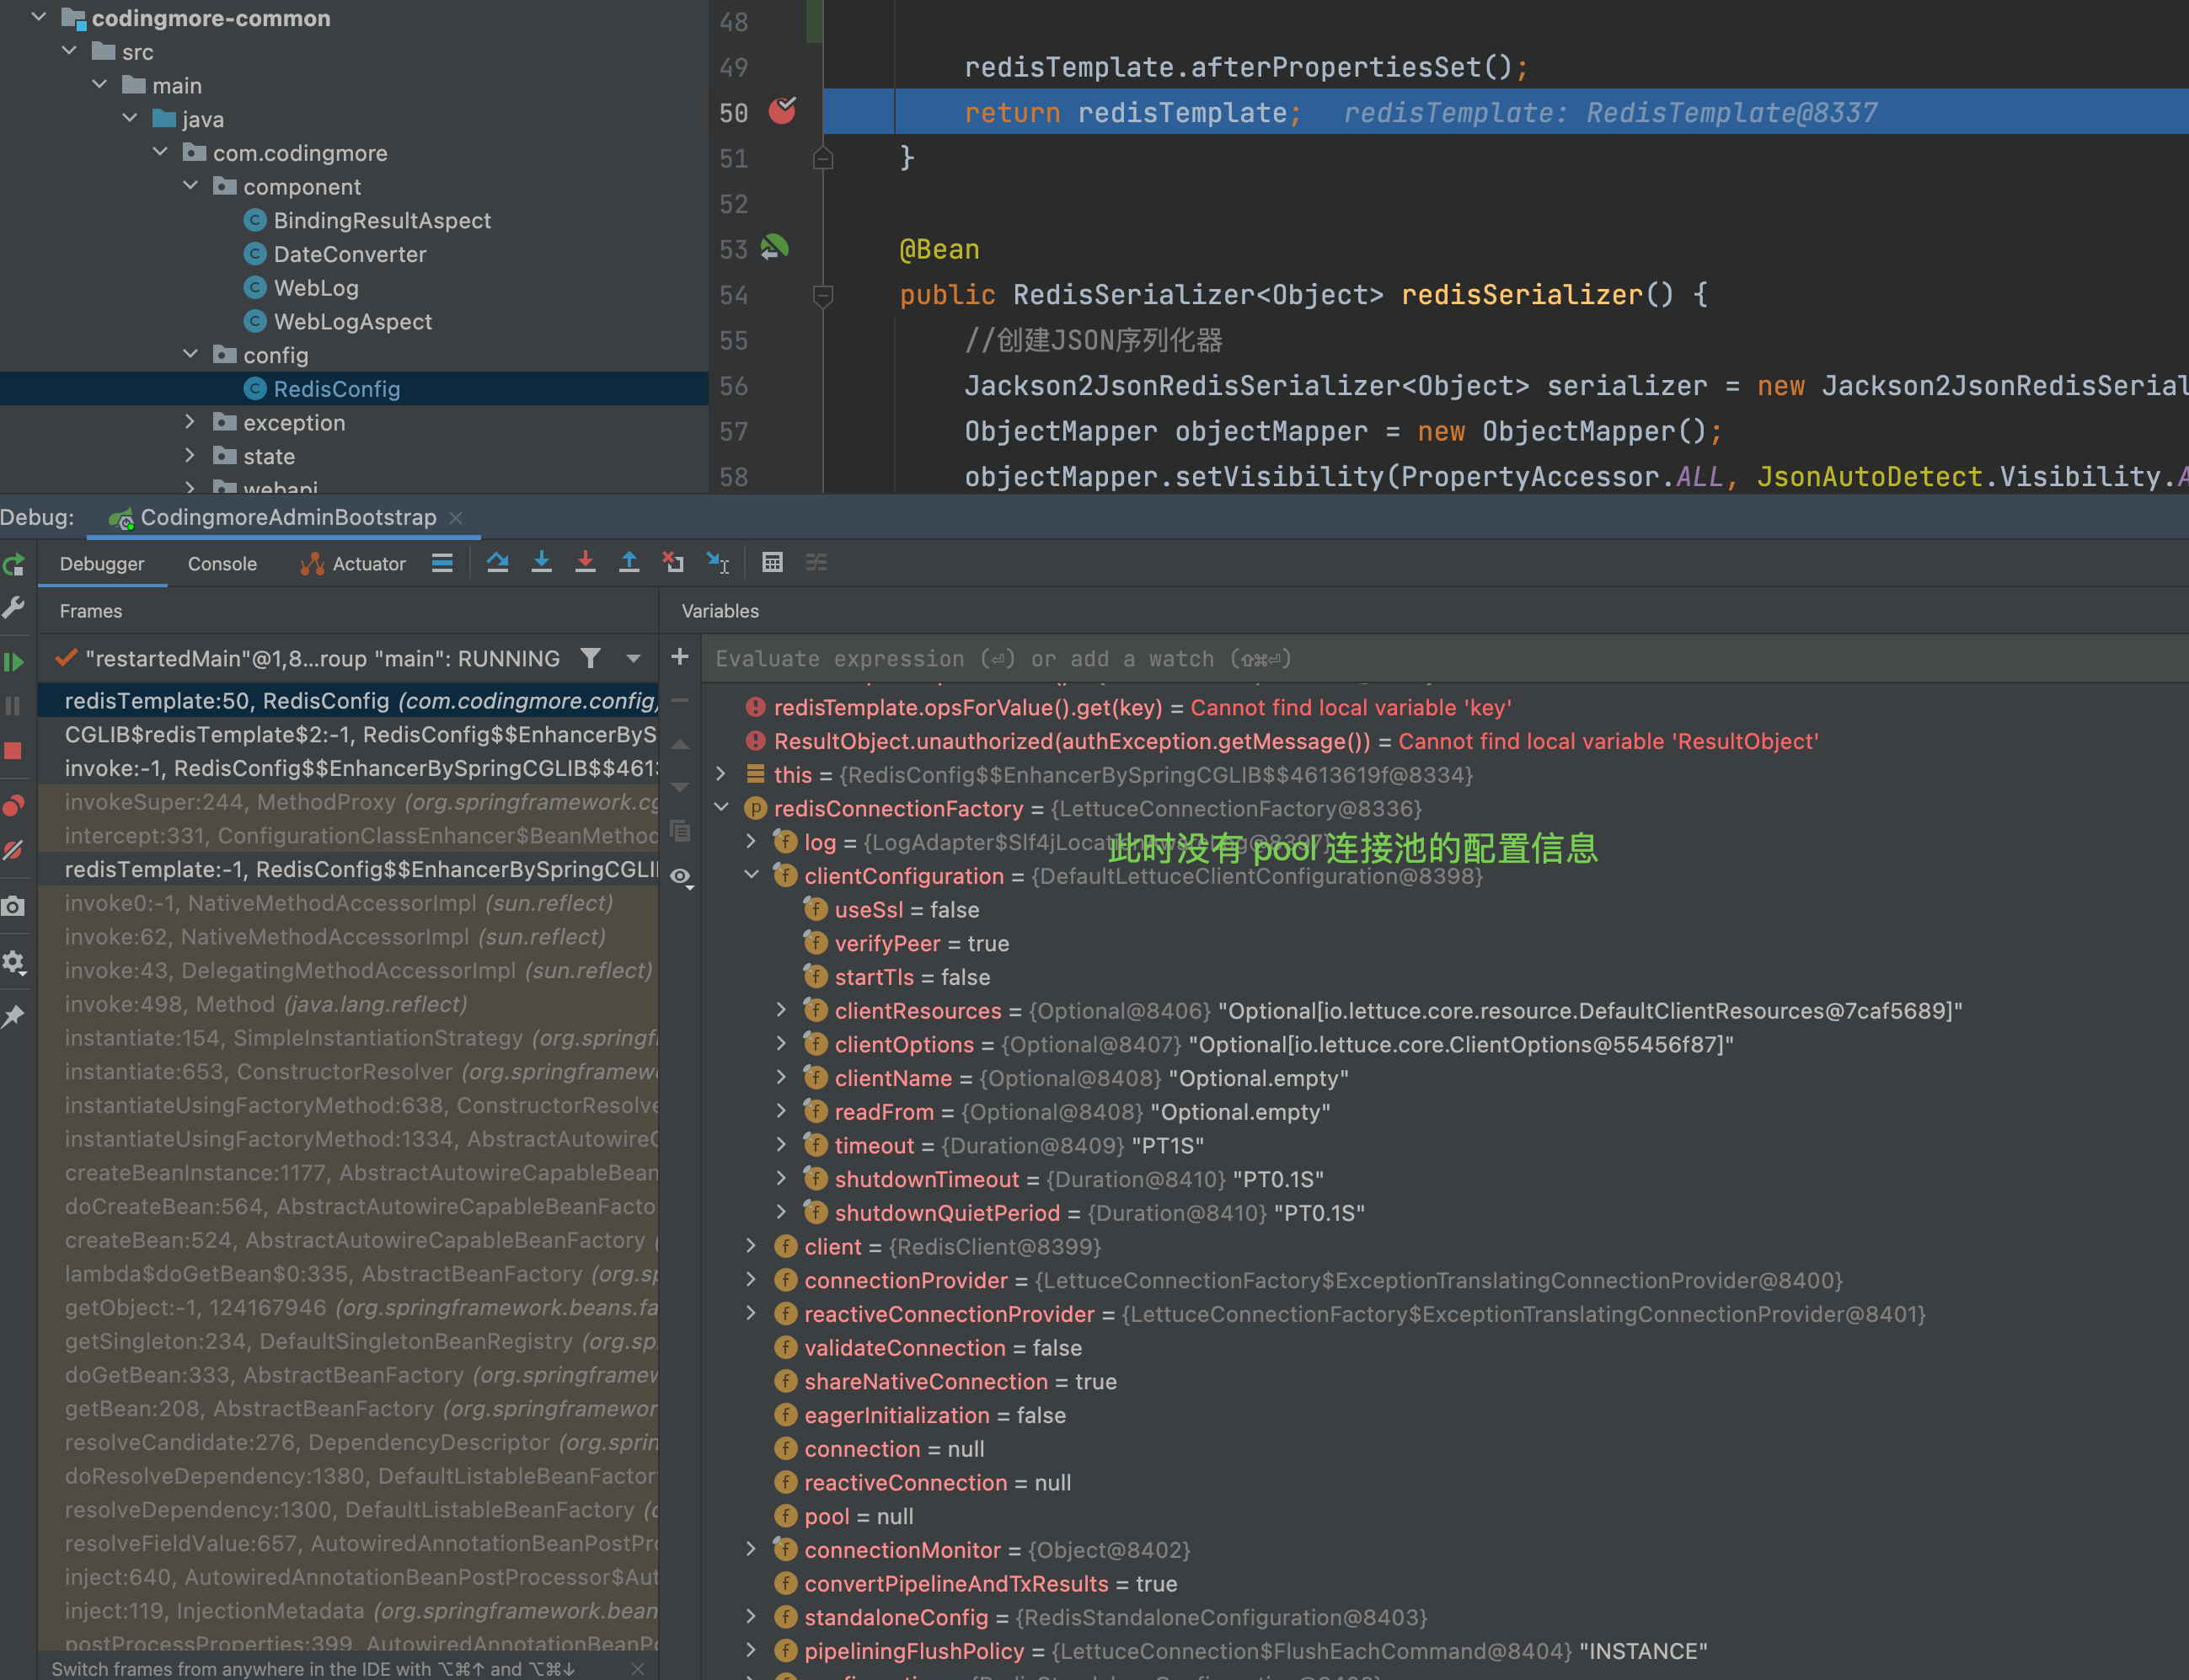
如果在 application-dev.yml 文件中没有添加 Lettuce 连接池配置的话,是不会看到
2)Jedis
第一步,在 pom.xml 文件中添加 Jedis 依赖,去除 Lettuce 默认依赖。
<dependency>
    <groupId>org.springframework.boot</groupId>
    <artifactId>spring-boot-starter-data-redis</artifactId>
    <exclusions>
        <exclusion>
            <groupId>io.lettuce</groupId>
            <artifactId>lettuce-core</artifactId>
        </exclusion>
    </exclusions>
</dependency>

<dependency>
    <groupId>redis.clients</groupId>
    <artifactId>jedis</artifactId>
</dependency>
第二步,修改 application-dev.yml,添加 Jedis 连接池配置。
spring:
    redis:
        jedis:
          pool:
            max-active: 8 # 连接池最大连接数
            max-idle: 8 # 连接池最大空闲连接数
            min-idle: 0 # 连接池最小空闲连接数
            max-wait: -1ms # 连接池最大阻塞等待时间,负值表示没有限制
启动服务后,观察 redisTemplate 的 clientConfiguration 节点,可以看到它的值已经变成 DefaultJedisClientConfiguration 对象了。

当然了,也可以不配置 Jedis 客户端的连接池,走默认的连接池配置。因为 Jedis 客户端默认增加了连接池的依赖包,在 pom.xml 文件中点开 Jedis 客户端依赖可以查看到。


【推荐】编程新体验,更懂你的AI,立即体验豆包MarsCode编程助手
【推荐】凌霞软件回馈社区,博客园 & 1Panel & Halo 联合会员上线
【推荐】抖音旗下AI助手豆包,你的智能百科全书,全免费不限次数
【推荐】博客园社区专享云产品让利特惠,阿里云新客6.5折上折
【推荐】轻量又高性能的 SSH 工具 IShell:AI 加持,快人一步