ROS基本概念、文件系统、创建ROS软件包、ROS中的一些命令
2022-01-12 00:48 jym蒟蒻 阅读(2351) 评论(0) 收藏 举报ROS基本概念 文件系统 创建ROS软件包 ROS中的一些命令
- ROS是什么
- ROS文件系统
- 文件系统工具:rospack、roscd、rosls
- 创建ROS 软件包
- catkin是什么
- 创建和构建一个catkin工作空间:
- catkin软件包的结构
- catkin工作空间中存放软件包的结构
- 创建catkin软件包-catkin_create_pkg
- 构建一个catkin工作区并生效配置文件
- package.xml文件内容
- ROS一些基本概念
- 节点:
- 客户端库:
- roscore:
- rosnode:获取节点信息的ROS工具
- rosrun:运行给定的软件包中的节点
- ROS话题:节点之间是通过一个ROS话题来相互通信的
- rqt_graph:显示当前运行的节点和话题
- rostopic:获取ROS话题的信息
- rostopic echo:显示在某个话题上发布的数据
- rostopic list:列出当前已被订阅和发布的所有话题。
- ROS消息:话题的通信是通过节点间发送ROS消息实现的
- rostopic type:查看所发布话题的消息类型
- rostopic pub:把数据发布到当前某个正在广播的话题上
- rostopic hz:报告数据发布的速率
- rqt_plot:在滚动时间图上显示发布到某个话题上的数据
- ROS服务:节点之间通讯的另一种方式
- rosservice:有许多可用于服务的命令
- rosservice list:显示节点提供的服务
- rosservice type:查看服务的类型
- rosservice call:调用服务
- rosparam:在ROS参数服务器上存储和操作数据
- rosparam list:查看参数服务器上都有哪些参数
- rosparam set:改变参数服务器上参数的值
- rosparam get:查看参数服务器上参数的值
- rqt_console:连接ROS的日志框架,显示节点的输出信息
- rqt_logger_level:在节点运行时改变输出信息的详细级别
- roslaunch:启动定义在launch(启动)文件中的节点
- launch XML文件的内容
- 使用roslaunch:运行launch文件
中间件,连接了真正的操作系统和程序,提供了类似操作系统的功能。
它提供了操作系统应有的服务,包括硬件抽象,底层设备控制,常用函数的实现,进程间消息传递,以及包管理。
ROS包括:框架+工具+功能+社区
框架:分布式、进程管理、进程间通信
ros采用分布式架构,可以同时运行多个进程,每个进程可以单独设计,并且组合起来。
ros用节点Node代表进程。
机器人控制是一个Node,激光雷达laser是一个node。ros提供了一套框架管理这些node,并且提供他们之间相互通信的桥梁。
分布式架构,扩展性好,软件复用率高。如果换一个高级激光雷达,只用修改节点,不需要修改通信。
工具:仿真、数据可视化、图形界面、数据记录
提供一些工具 比如:Gazebo、Rviz等
功能:控制、规划、视觉、建图
有一些功能包
社区:软件包管理、文档、教程
软件包(Packages):包是ROS代码的软件组织单元,每个软件包都可以包含程序库、可执行文件、脚本或其他构件。
Manifests (package.xml): 清单(Manifest)是对软件包的描述。它用于定义软件包之间的依赖关系,并记录有关软件包的元信息,如版本、维护者、许可证等。
1.rospack
rospack获取软件包的有关信息,rospack find,可以返回软件包的所在路径。
用法:
$ rospack find [package_name]
例子:
jym@ubuntu:~$ rospack find roscpp
/opt/ros/noetic/share/roscpp
2.roscd
roscd接切换目录到某个软件包或者软件包集当中。
例子:
jym@ubuntu:~$ roscd roscpp
jym@ubuntu:/opt/ros/noetic/share/roscpp$
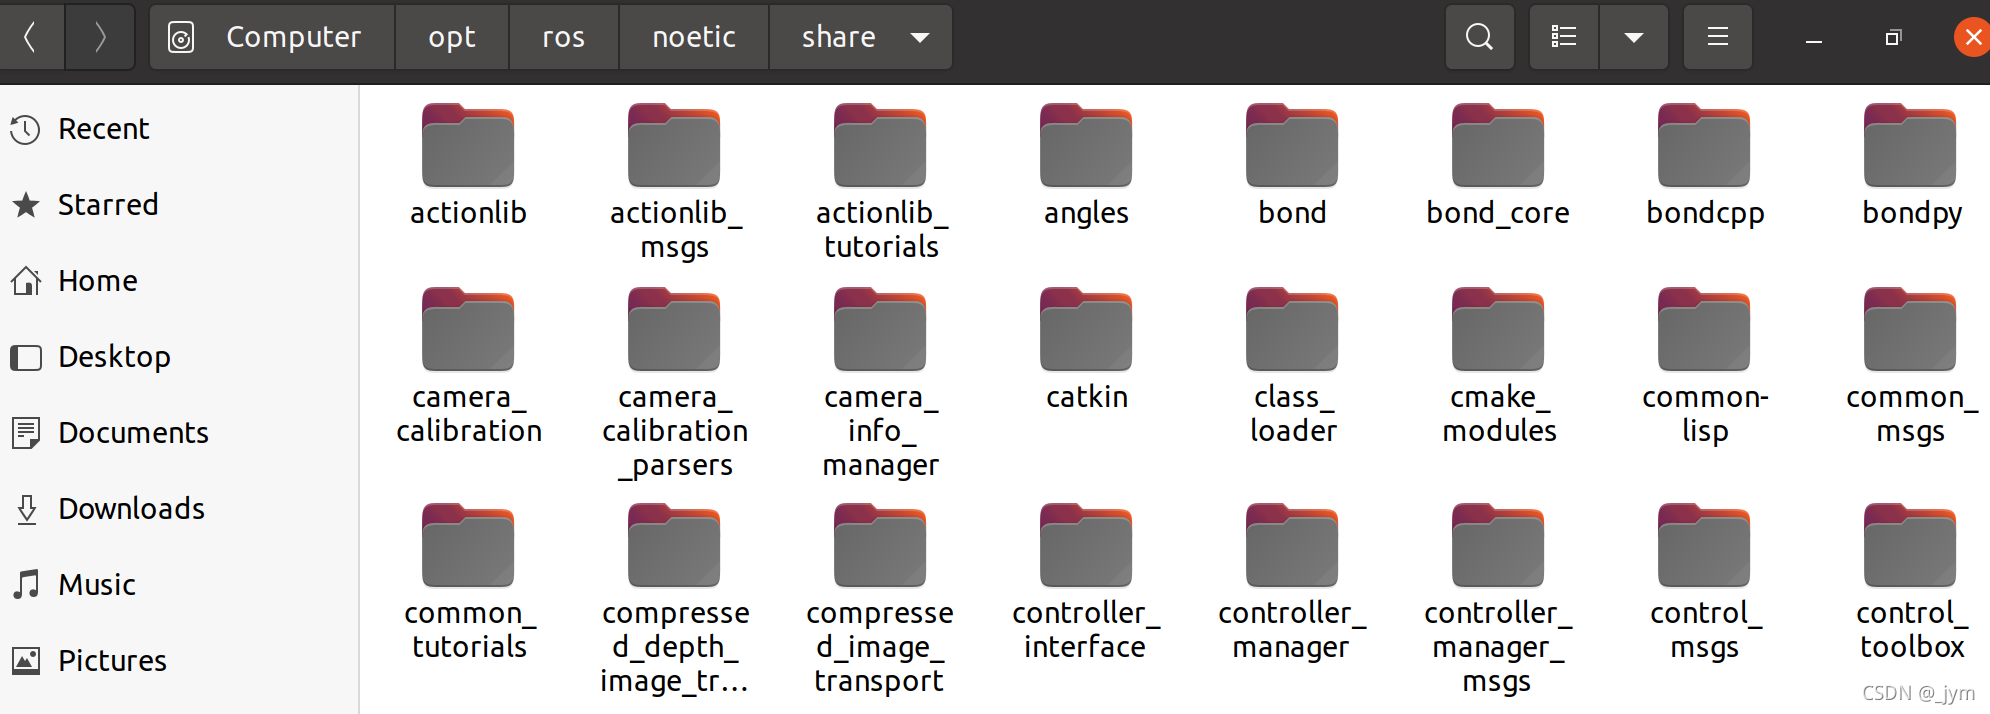
roscd只能切换到那些路径已经包含在ROS_PACKAGE_PATH环境变量中的软件包。
使用echo $ROS_PACKAGE_PATH查看查看ROS_PACKAGE_PATH中包含的路径。
jym@ubuntu:~$ echo $ROS_PACKAGE_PATH
/opt/ros/noetic/share
打开这个文件夹,可以找到这些包。
roscd也可以切换到一个软件包或软件包集的子目录中。
jym@ubuntu:~$ roscd roscpp/cmake
jym@ubuntu:/opt/ros/noetic/share/roscpp/cmake$ pwd
/opt/ros/noetic/share/roscpp/cmake
3.rosls
允许直接按软件包的名称执行 ls 命令(而不必输入绝对路径)。
jym@ubuntu:~$ rosls roscpp_tutorials
cmake  launch  package.xml  srv
代码变成可执行文件,叫做编译(compile);先编译这个,还是先编译那个(即编译的安排),叫做构建(build)。
catkin是ros定制的编译构建系统。
ros代码都放在catkin workspace中,这个工作空间需要通过指令catkin_make创建。
jym@ubuntu:~$ source /opt/ros/noetic/setup.bash
jym@ubuntu:~$ mkdir -p ~/catkin_ws/src
jym@ubuntu:~$ cd ~/catkin_ws/
jym@ubuntu:~/catkin_ws$ catkin_make
终端:
jym@ubuntu:~$ source /opt/ros/noetic/setup.bash
jym@ubuntu:~$ mkdir -p ~/catkin_ws/src
jym@ubuntu:~$ cd ~/catkin_ws/
jym@ubuntu:~/catkin_ws$ catkin_make
Base path: /home/jym/catkin_ws
Source space: /home/jym/catkin_ws/src
Build space: /home/jym/catkin_ws/build
Devel space: /home/jym/catkin_ws/devel
Install space: /home/jym/catkin_ws/install
Creating symlink "/home/jym/catkin_ws/src/CMakeLists.txt" pointing to "/opt/ros/noetic/share/catkin/cmake/toplevel.cmake"
####
#### Running command: "cmake /home/jym/catkin_ws/src -DCATKIN_DEVEL_PREFIX=/home/jym/catkin_ws/devel -DCMAKE_INSTALL_PREFIX=/home/jym/catkin_ws/install -G Unix Makefiles" in "/home/jym/catkin_ws/build"
####
-- The C compiler identification is GNU 9.3.0
-- The CXX compiler identification is GNU 9.3.0
-- Check for working C compiler: /usr/bin/cc
-- Check for working C compiler: /usr/bin/cc -- works
-- Detecting C compiler ABI info
-- Detecting C compiler ABI info - done
-- Detecting C compile features
-- Detecting C compile features - done
-- Check for working CXX compiler: /usr/bin/c++
-- Check for working CXX compiler: /usr/bin/c++ -- works
-- Detecting CXX compiler ABI info
-- Detecting CXX compiler ABI info - done
-- Detecting CXX compile features
-- Detecting CXX compile features - done
-- Using CATKIN_DEVEL_PREFIX: /home/jym/catkin_ws/devel
-- Using CMAKE_PREFIX_PATH: /opt/ros/noetic
-- This workspace overlays: /opt/ros/noetic
-- Found PythonInterp: /usr/bin/python3 (found suitable version "3.8.10", minimum required is "3")
-- Using PYTHON_EXECUTABLE: /usr/bin/python3
-- Using Debian Python package layout
-- Found PY_em: /usr/lib/python3/dist-packages/em.py
-- Using empy: /usr/lib/python3/dist-packages/em.py
-- Using CATKIN_ENABLE_TESTING: ON
-- Call enable_testing()
-- Using CATKIN_TEST_RESULTS_DIR: /home/jym/catkin_ws/build/test_results
-- Forcing gtest/gmock from source, though one was otherwise available.
-- Found gtest sources under '/usr/src/googletest': gtests will be built
-- Found gmock sources under '/usr/src/googletest': gmock will be built
-- Found PythonInterp: /usr/bin/python3 (found version "3.8.10")
-- Found Threads: TRUE
-- Using Python nosetests: /usr/bin/nosetests3
-- catkin 0.8.10
-- BUILD_SHARED_LIBS is on
-- BUILD_SHARED_LIBS is on
-- Configuring done
-- Generating done
-- Build files have been written to: /home/jym/catkin_ws/build
####
#### Running command: "make -j2 -l2" in "/home/jym/catkin_ws/build"
####
最终可以在Home-catkin_ws中找到:

接下来source一下新生成的setup.*sh文件:
$ source devel/setup.bash
要保证工作区被安装脚本正确覆盖,需确定ROS_PACKAGE_PATH环境变量包含当前的工作空间目录:
$ echo $ROS_PACKAGE_PATH
jym@ubuntu:~/catkin_ws$ source devel/setup.bash
jym@ubuntu:~/catkin_ws$ echo $ROS_PACKAGE_PATH
/home/jym/catkin_ws/src:/opt/ros/noetic/share
一个包要想称为catkin软件包,必须符合以下要求:
1.这个包必须有一个符合catkin规范的package.xml文件
这个package.xml文件提供有关该软件包的元信息
2.这个包必须有一个catkin版本的CMakeLists.txt文件
如果它是个Catkin元包的话,则需要有一个CMakeList.txt文件的相关样板
3.每个包必须有自己的目录
这意味着在同一个目录下不能有嵌套的或者多个软件包存在
my_package/
  CMakeLists.txt
  package.xml
workspace_folder/        -- WORKSPACE
  src/                   -- SOURCE SPACE
    CMakeLists.txt       -- 'Toplevel' CMake file, provided by catkin
    package_1/
      CMakeLists.txt     -- CMakeLists.txt file for package_1
      package.xml        -- Package manifest for package_1
    ...
    package_n/
      CMakeLists.txt     -- CMakeLists.txt file for package_n
      package.xml        -- Package manifest for package_n
1.切换到刚才创建的空白catkin工作空间中的源文件空间目录
$ cd ~/catkin_ws/src
2.使用catkin_create_pkg命令创建一个名为beginner_tutorials的新软件包,这个软件包依赖于std_msgs、roscpp和rospy
$ catkin_create_pkg beginner_tutorials std_msgs rospy roscpp
终端:
jym@ubuntu:~/catkin_ws$ cd ~/catkin_ws/src
jym@ubuntu:~/catkin_ws/src$ catkin_create_pkg beginner_tutorials std_msgs rospy roscpp
Created file beginner_tutorials/package.xml
Created file beginner_tutorials/CMakeLists.txt
Created folder beginner_tutorials/include/beginner_tutorials
Created folder beginner_tutorials/src
Successfully created files in /home/jym/catkin_ws/src/beginner_tutorials. Please adjust the values in package.xml.
可以观察到对应的文件夹:


在上面已经有介绍过创建和构建一个catkin工作空间,那边主要目的是创建一个空白的catkin工作空间。
到了这个地方主要目的是构建一个catkin工作空间。
1.在catkin工作区中构建软件包
$ cd ~/catkin_ws
$ catkin_make
2.工作空间构建完成后,要将这个工作空间添加到ROS环境中,需要source一下生成的配置文件
$ . ~/catkin_ws/devel/setup.bash
jym@ubuntu:~/catkin_ws/src$ cd ~/catkin_ws
jym@ubuntu:~/catkin_ws$ catkin_make
Base path: /home/jym/catkin_ws
Source space: /home/jym/catkin_ws/src
Build space: /home/jym/catkin_ws/build
Devel space: /home/jym/catkin_ws/devel
Install space: /home/jym/catkin_ws/install
####
#### Running command: "cmake /home/jym/catkin_ws/src -DCATKIN_DEVEL_PREFIX=/home/jym/catkin_ws/devel -DCMAKE_INSTALL_PREFIX=/home/jym/catkin_ws/install -G Unix Makefiles" in "/home/jym/catkin_ws/build"
####
-- Using CATKIN_DEVEL_PREFIX: /home/jym/catkin_ws/devel
-- Using CMAKE_PREFIX_PATH: /home/jym/catkin_ws/devel;/opt/ros/noetic
-- This workspace overlays: /home/jym/catkin_ws/devel;/opt/ros/noetic
-- Found PythonInterp: /usr/bin/python3 (found suitable version "3.8.10", minimum required is "3")
-- Using PYTHON_EXECUTABLE: /usr/bin/python3
-- Using Debian Python package layout
-- Using empy: /usr/lib/python3/dist-packages/em.py
-- Using CATKIN_ENABLE_TESTING: ON
-- Call enable_testing()
-- Using CATKIN_TEST_RESULTS_DIR: /home/jym/catkin_ws/build/test_results
-- Forcing gtest/gmock from source, though one was otherwise available.
-- Found gtest sources under '/usr/src/googletest': gtests will be built
-- Found gmock sources under '/usr/src/googletest': gmock will be built
-- Found PythonInterp: /usr/bin/python3 (found version "3.8.10")
-- Using Python nosetests: /usr/bin/nosetests3
-- catkin 0.8.10
-- BUILD_SHARED_LIBS is on
-- BUILD_SHARED_LIBS is on
-- ~~~~~~~~~~~~~~~~~~~~~~~~~~~~~~~~~~~~~~~~~~~~~~~~~
-- ~~  traversing 1 packages in topological order:
-- ~~  - beginner_tutorials
-- ~~~~~~~~~~~~~~~~~~~~~~~~~~~~~~~~~~~~~~~~~~~~~~~~~
-- +++ processing catkin package: 'beginner_tutorials'
-- ==> add_subdirectory(beginner_tutorials)
-- Configuring done
-- Generating done
-- Build files have been written to: /home/jym/catkin_ws/build
####
#### Running command: "make -j2 -l2" in "/home/jym/catkin_ws/build"
####
jym@ubuntu:~/catkin_ws$ . ~/catkin_ws/devel/setup.bash
描述标签:内容是描述信息。
<description>The beginner_tutorials package</description>
维护者标签:它能够让其他人联系到软件包的相关人员。
  <!-- One maintainer tag required, multiple allowed, one person per tag -->
  <!-- Example:  -->
  <!-- <maintainer email="jane.doe@example.com">Jane Doe</maintainer> -->
  <maintainer email="jym@todo.todo">jym</maintainer>
许可证标签:些常见的开源许可协议有BSD、MIT、Boost Software License、GPLv2、GPLv3、LGPLv2.1和LGPLv3
  <!-- One license tag required, multiple allowed, one license per tag -->
  <!-- Commonly used license strings: -->
  <!--   BSD, MIT, Boost Software License, GPLv2, GPLv3, LGPLv2.1, LGPLv3 -->
  <license>TODO</license>
依赖项标签:标签描述了软件包的依赖关系,这些依赖项分为build_depend、buildtool_depend、run_depend、test_depend。
<?xml version="1.0"?>
<package format="2">
  <name>beginner_tutorials</name>
  <version>0.0.0</version>
  <description>The beginner_tutorials package</description>

  <!-- One maintainer tag required, multiple allowed, one person per tag -->
  <!-- Example:  -->
  <!-- <maintainer email="jane.doe@example.com">Jane Doe</maintainer> -->
  <maintainer email="jym@todo.todo">jym</maintainer>


  <!-- One license tag required, multiple allowed, one license per tag -->
  <!-- Commonly used license strings: -->
  <!--   BSD, MIT, Boost Software License, GPLv2, GPLv3, LGPLv2.1, LGPLv3 -->
  <license>TODO</license>


  <!-- Url tags are optional, but multiple are allowed, one per tag -->
  <!-- Optional attribute type can be: website, bugtracker, or repository -->
  <!-- Example: -->
  <!-- <url type="website">http://wiki.ros.org/beginner_tutorials</url> -->


  <!-- Author tags are optional, multiple are allowed, one per tag -->
  <!-- Authors do not have to be maintainers, but could be -->
  <!-- Example: -->
  <!-- <author email="jane.doe@example.com">Jane Doe</author> -->


  <!-- The *depend tags are used to specify dependencies -->
  <!-- Dependencies can be catkin packages or system dependencies -->
  <!-- Examples: -->
  <!-- Use depend as a shortcut for packages that are both build and exec dependencies -->
  <!--   <depend>roscpp</depend> -->
  <!--   Note that this is equivalent to the following: -->
  <!--   <build_depend>roscpp</build_depend> -->
  <!--   <exec_depend>roscpp</exec_depend> -->
  <!-- Use build_depend for packages you need at compile time: -->
  <!--   <build_depend>message_generation</build_depend> -->
  <!-- Use build_export_depend for packages you need in order to build against this package: -->
  <!--   <build_export_depend>message_generation</build_export_depend> -->
  <!-- Use buildtool_depend for build tool packages: -->
  <!--   <buildtool_depend>catkin</buildtool_depend> -->
  <!-- Use exec_depend for packages you need at runtime: -->
  <!--   <exec_depend>message_runtime</exec_depend> -->
  <!-- Use test_depend for packages you need only for testing: -->
  <!--   <test_depend>gtest</test_depend> -->
  <!-- Use doc_depend for packages you need only for building documentation: -->
  <!--   <doc_depend>doxygen</doc_depend> -->
  <buildtool_depend>catkin</buildtool_depend>
  <build_depend>roscpp</build_depend>
  <build_depend>rospy</build_depend>
  <build_depend>std_msgs</build_depend>
  <build_export_depend>roscpp</build_export_depend>
  <build_export_depend>rospy</build_export_depend>
  <build_export_depend>std_msgs</build_export_depend>
  <exec_depend>roscpp</exec_depend>
  <exec_depend>rospy</exec_depend>
  <exec_depend>std_msgs</exec_depend>


  <!-- The export tag contains other, unspecified, tags -->
  <export>
    <!-- Other tools can request additional information be placed here -->

  </export>
</package>
可以结合具体情况进行修改 ,修改后的package.xml
<?xml version="1.0"?>
<package format="2">
  <name>beginner_tutorials</name>
  <version>0.1.0</version>
  <description>The beginner_tutorials package</description>
  <maintainer email="jym@todo.todo">jym</maintainer>
  <license>BSD</license>
  <buildtool_depend>catkin</buildtool_depend>
  <build_depend>roscpp</build_depend>
  <build_depend>rospy</build_depend>
  <build_depend>std_msgs</build_depend>
  <build_export_depend>roscpp</build_export_depend>
  <build_export_depend>rospy</build_export_depend>
  <build_export_depend>std_msgs</build_export_depend>
  <exec_depend>roscpp</exec_depend>
  <exec_depend>rospy</exec_depend>
  <exec_depend>std_msgs</exec_depend>
  <!-- The export tag contains other, unspecified, tags -->
  <export>
    <!-- Other tools can request additional information be placed here -->
  </export>
</package>
计算图(Computation Graph)是一个由ROS进程组成的点对点网络,它们能够共同处理数据。
ROS的基本计算图概念有节点(Nodes)、主节点(Master)、参数服务器(Parameter Server)、消息(Messages)、服务(Services)、话题(Topics)和袋(Bags),它们都以不同的方式向图(Graph)提供数据。
节点(Nodes):节点是一个可执行文件,它可以通过ROS来与其他节点进行通信。
消息(Messages):订阅或发布话题时所使用的ROS数据类型。
话题(Topics):节点可以将消息发布到话题,或通过订阅话题来接收消息。
主节点(Master):ROS的命名服务,例如帮助节点发现彼此。
rosout:在ROS中相当于stdout/stderr(标准输出/标准错误)。
roscore:主节点 + rosout + 参数服务器。
节点实际上只不过是ROS软件包中的一个可执行文件。ROS节点使用ROS客户端库与其他节点通信。节点可以发布或订阅话题,也可以提供或使用服务。
机器人和遥控器开始工作后,就是两个节点。机器人是一个节点、遥控器也是一个节点。
遥控器起到了下达指 令的作用;机器人负责监听遥控器下达的指令,完成相应动作。
节点是一个能执行特定工作任务的工作单元,并且能够相互通信,从而实现一个机器人系统整体的功能。
ROS客户端库可以让用不同编程语言编写的节点进行相互通信:
- rospy = Python客户端库
- roscpp = C++客户端库
roscore = ros+core:主节点(为ROS提供命名服务) + rosout (stdout/stderr) + 参数服务器
roscore是你在运行所有ROS程序前首先要运行的命令。
打开一个新终端,可以使用rosnode看看roscore运行时干了些什么。
要保持以前的终端开着。
rosnode显示当前正在运行的ROS节点信息。rosnode list命令会列出这些活动的节点。
jym@ubuntu:~$ roscore
... logging to /home/jym/.ros/log/13b5ebe2-3581-11ec-8099-99fb076f9407/roslaunch-ubuntu-4683.log
Checking log directory for disk usage. This may take a while.
Press Ctrl-C to interrupt
Done checking log file disk usage. Usage is <1GB.

started roslaunch server http://ubuntu:41325/
ros_comm version 1.15.13


SUMMARY
========

PARAMETERS
 * /rosdistro: noetic
 * /rosversion: 1.15.13

NODES

auto-starting new master
process[master]: started with pid [4694]
ROS_MASTER_URI=http://ubuntu:11311/

setting /run_id to 13b5ebe2-3581-11ec-8099-99fb076f9407
process[rosout-1]: started with pid [4710]
started core service [/rosout]
jym@ubuntu:~$ rosnode list
/rosout
rosout这个节点用于收集和记录节点的调试输出,所以它总是在运行的。
rosnode info命令返回的是某个指定节点的信息。
可以进一步查看rosout的信息, 比如说实际上它是发布了一个/rosout_agg话题。
jym@ubuntu:~$ rosnode info /rosout
--------------------------------------------------------------------------------
Node [/rosout]
Publications:
 * /rosout_agg [rosgraph_msgs/Log]

Subscriptions:
 * /rosout [unknown type]

Services:
 * /rosout/get_loggers
 * /rosout/set_logger_level


contacting node http://ubuntu:45389/ ...
Pid: 4710
rosrun可以用包名直接运行软件包内的节点。
开一个新终端,运行turtlesim包中的turtlesim_node。
rosrun turtlesim turtlesim_node
会看到turtlesim窗口。
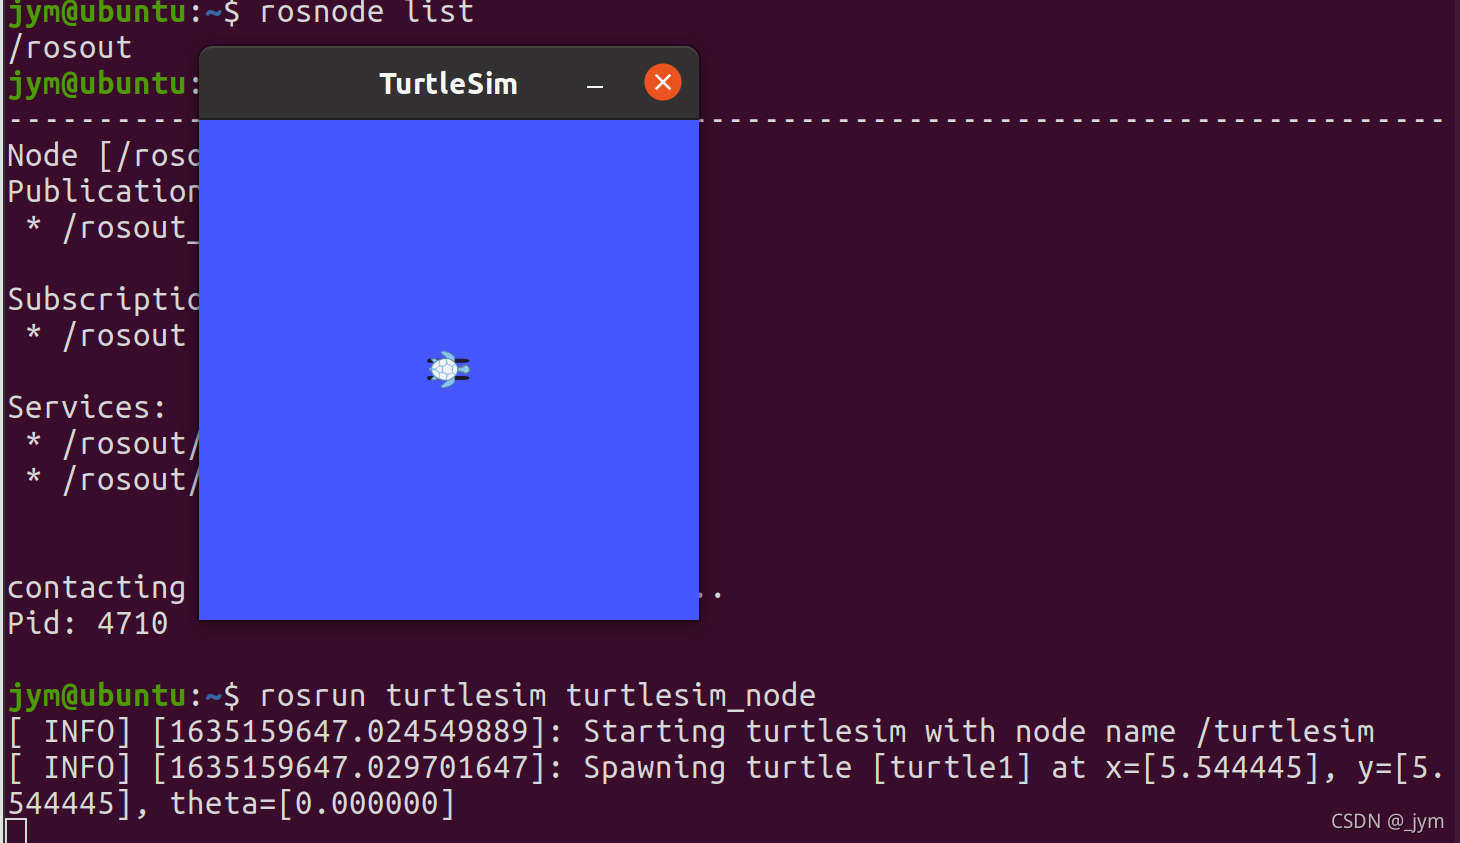
再开一个新终端,输入rosnode list,会看到下面的输出信息:
jym@ubuntu:~$ rosnode list
/rosout
/turtlesim
停止节点:关闭turtlesim窗口以停止节点(或回到rosrun turtlesim的终端并按Ctrl+C)。
改变节点名称:使用重映射参数来改变节点名称:
$ rosrun turtlesim turtlesim_node __name:=my_turtle
测试节点是否正常运行:ping,来测试它是否正常。
rosnode ping my_turtle
jym@ubuntu:~$ rosnode ping my_turtle
rosnode: node is [/my_turtle]
pinging /my_turtle with a timeout of 3.0s
xmlrpc reply from http://ubuntu:45307/	time=0.414848ms
xmlrpc reply from http://ubuntu:45307/	time=1.438141ms
xmlrpc reply from http://ubuntu:45307/	time=1.352310ms
xmlrpc reply from http://ubuntu:45307/	time=0.378132ms
xmlrpc reply from http://ubuntu:45307/	time=0.369549ms
xmlrpc reply from http://ubuntu:45307/	time=0.383854ms
xmlrpc reply from http://ubuntu:45307/	time=0.408173ms
^Cping average: 0.677858ms
三个终端输入:
$ roscore
$ rosrun turtlesim turtlesim_node
$ rosrun turtlesim turtle_teleop_key
选中turtle_teleop_key的终端窗口以确保按键输入能够被捕获。
可以使用键盘上的方向键来控制turtle运动了。
turtlesim_node节点和turtle_teleop_key节点之间是通过一个ROS话题来相互通信的。
turtle_teleop_key在话题上发布键盘按下的消息,turtlesim则订阅该话题以接收消息。
使用rqt_graph来显示当前运行的节点和话题。
打开一个新终端:
$ rosrun rqt_graph rqt_graph
会看到一个窗口:
如果把鼠标放在/turtle1/command_velocity上方,相应的ROS节点(这里是蓝色和绿色)和话题(这里是红色)就会高亮显示。可以看到,turtlesim_node和turtle_teleop_key节点正通过一个名为/turtle1/command_velocity的话题来相互通信。

rostopic命令工具能让你获取ROS话题的信息。
使用帮助选项查看可用的rostopic的子命令
rostopic -h
jym@ubuntu:~$ rostopic -h
rostopic is a command-line tool for printing information about ROS Topics.

Commands:
	rostopic bw	display bandwidth used by topic
	rostopic delay	display delay of topic from timestamp in header
	rostopic echo	print messages to screen
	rostopic find	find topics by type
	rostopic hz	display publishing rate of topic
	rostopic info	print information about active topic
	rostopic list	list active topics
	rostopic pub	publish data to topic
	rostopic type	print topic or field type

Type rostopic <command> -h for more detailed usage, e.g. 'rostopic echo -h'
接下来,将使用其中的一些子命令来了解turtlesim
rostopic echo可以显示在某个话题上发布的数据。
打开新终端输入:
rostopic echo /turtle1/cmd_vel
可以通过按下键盘方向键让turtle_teleop_key节点发布数据。
然后按下向上键时可以看到:
jym@ubuntu:~$ rostopic echo /turtle1/cmd_vel
linear:
  x: 2.0
  y: 0.0
  z: 0.0
angular:
  x: 0.0
  y: 0.0
  z: 0.0
---
linear:
  x: 2.0
  y: 0.0
  z: 0.0
angular:
  x: 0.0
  y: 0.0
  z: 0.0
---
此时再看一下rqt_graph:

rostopic echo现在也订阅了turtle1/command_velocity话题。
rostopic list能够列出当前已被订阅和发布的所有话题。
开一个新终端:查看一下list子命令需要的参数
rostopic list -h
jym@ubuntu:~$ rostopic list -h
Usage: rostopic list [/namespace]

Options:
  -h, --help            show this help message and exit
  -b BAGFILE, --bag=BAGFILE
                        list topics in .bag file
  -v, --verbose         list full details about each topic
  -p                    list only publishers
  -s                    list only subscribers
  --host                group by host name
在rostopic list中使用verbose选项:
$ rostopic list -v
会列出所有发布和订阅的主题及其类型的详细信息。
jym@ubuntu:~$ rostopic list -v

Published topics:
 * /rosout_agg [rosgraph_msgs/Log] 1 publisher
 * /rosout [rosgraph_msgs/Log] 4 publishers
 * /turtle1/pose [turtlesim/Pose] 1 publisher
 * /turtle1/color_sensor [turtlesim/Color] 1 publisher
 * /turtle1/cmd_vel [geometry_msgs/Twist] 1 publisher

Subscribed topics:
 * /rosout [rosgraph_msgs/Log] 1 subscriber
 * /turtle1/cmd_vel [geometry_msgs/Twist] 2 subscribers
 * /statistics [rosgraph_msgs/TopicStatistics] 1 subscriber
话题的通信是通过节点间发送ROS消息实现的。为了使发布者(turtle_teleop_key)和订阅者(turtulesim_node)进行通信,发布者和订阅者必须发送和接收相同类型的消息。这意味着话题的类型是由发布在它上面消息的类型决定的。使用rostopic type命令可以查看发布在话题上的消息的类型。
rostopic type命令用来查看所发布话题的消息类型。
运行:
$ rostopic type /turtle1/cmd_vel
可以使用rosmsg查看消息的详细信息
$ rosmsg show geometry_msgs/Twist
jym@ubuntu:~$ rostopic type /turtle1/cmd_vel
geometry_msgs/Twist
jym@ubuntu:~$ rosmsg show geometry_msgs/Twist
geometry_msgs/Vector3 linear
  float64 x
  float64 y
  float64 z
geometry_msgs/Vector3 angular
  float64 x
  float64 y
  float64 z
现在已经知道了turtlesim节点想要的消息类型,然后就可以发布命令给turtle了。
rostopic pub可以把数据发布到当前某个正在广播的话题上。
$ rostopic pub -1 /turtle1/cmd_vel geometry_msgs/Twist -- '[2.0, 0.0, 0.0]' '[0.0, 0.0, 1.8]'
以上命令会发送一条消息给turtlesim,告诉它以2.0大小的线速度和1.8大小的角速度移动。
jym@ubuntu:~$ rostopic pub -1 /turtle1/cmd_vel geometry_msgs/Twist -- '[2.0, 0.0, 0.0]' '[0.0, 0.0, 1.8]'
publishing and latching message for 3.0 seconds
- rostopic pub命令将消息发布到指定的话题
- -1 这一选项会让rostopic只发布一条消息,然后退出
- /turtle1/cmd_vel是要发布到的话题的名称
- geometry_msgs/Twist是发布到话题时要使用的消息的类型
- – 这一选项(两个破折号)用来告诉选项解析器,表明之后的参数都不是选项。如果参数前有破折号(-)比如负数,那么这是必需的。
- 如前所述,一个turtlesim/Velocity消息有两个浮点型元素:
linear和angular。在本例中,'[2.0, 0.0, 0.0]'表示linear的值为x=2.0,y=0.0,z=0.0,而'[0.0, 0.0, 1.8]'是说angular的值为x=0.0,y=0.0,z=1.8
这行命令发出后,turtle移动了一下就停了。这是因为turtle需要一个稳定的频率为1Hz的指令流才能保持移动状态。我们可以使用rostopic pub -r命令来发布源源不断的命令:
$ rostopic pub /turtle1/cmd_vel geometry_msgs/Twist -r 1 -- '[2.0, 0.0, 0.0]' '[0.0, 0.0, -1.8]'
将以1 Hz的速度发布velocity指令到velocity话题上。
rqt_graph中。可以看到rostopic pub节点正在与rostopic echo节点进行通信:

新终端中通过rostopic echo命令来查看turtlesim所发布的数据:rostopic echo /turtle1/pose
---
linear:
  x: 2.0
  y: 0.0
  z: 0.0
angular:
  x: 0.0
  y: 0.0
  z: -1.8
---
linear:
  x: 2.0
  y: 0.0
  z: 0.0
angular:
  x: 0.0
  y: 0.0
  z: -1.8
---
rostopic hz报告数据发布的速率。
看一下turtlesim_node发布/turtle/pose得有多快:
$ rostopic hz /turtle1/pose
jym@ubuntu:~$ rostopic hz /turtle1/pose
subscribed to [/turtle1/pose]
average rate: 62.521
	min: 0.014s max: 0.018s std dev: 0.00067s window: 63
average rate: 62.479
	min: 0.014s max: 0.018s std dev: 0.00056s window: 125
average rate: 62.486
	min: 0.014s max: 0.018s std dev: 0.00057s window: 188
可以知道,turtlesim正以大约60Hz的频率发布有关乌龟的数据。
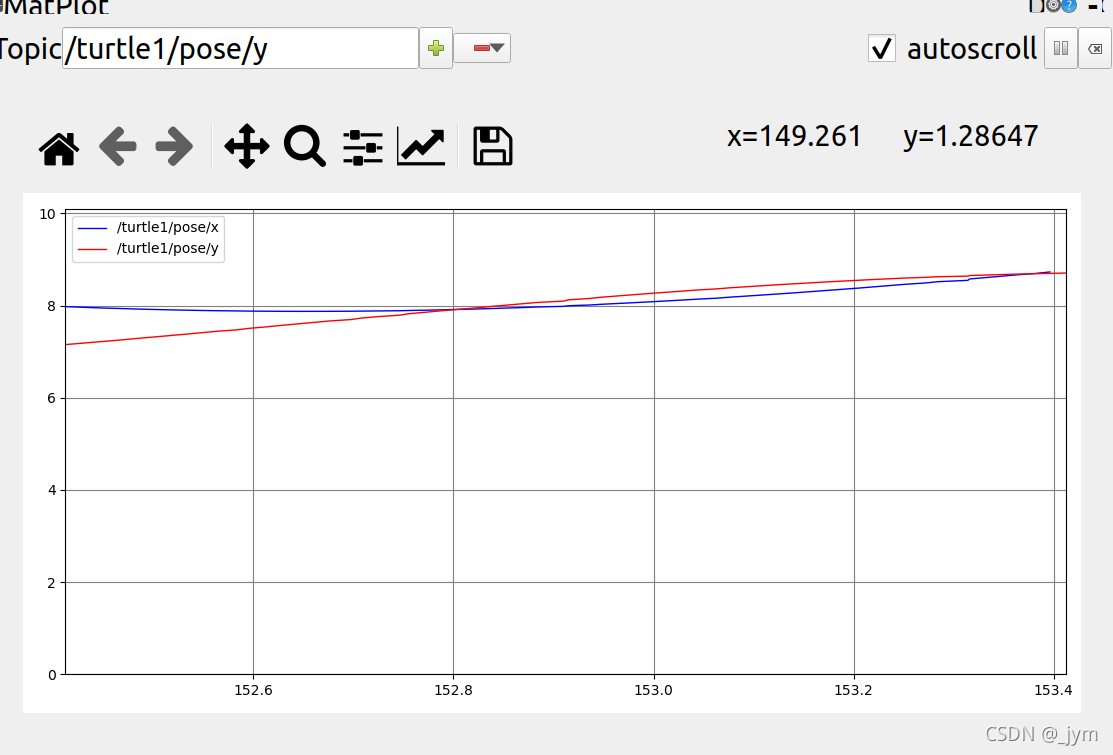
rqt_plot命令可以在滚动时间图上显示发布到某个话题上的数据。这里我们将使用rqt_plot命令来绘制正被发布到/turtle1/pose话题上的数据。
新终端输入rosrun rqt_plot rqt_plot
可以在左上角的文本框里面添加任何想要绘制的话题。在里面输入/turtle1/pose/x后,之前不能按下的加号按钮将会变亮。按一下该按钮,并对/turtle1/pose/y重复相同的过程。现在你会在图中看到turtle的x-y位置。
服务(Services)是节点之间通讯的另一种方式。服务允许节点发送一个请求(request)并获得一个响应(response)。
rosservice可以很容易地通过服务附加到ROS客户端/服务器框架上。rosservice有许多可用于服务的命令,如下所示:
rosservice list         输出活跃服务的信息
rosservice call         用给定的参数调用服务
rosservice type         输出服务的类型
rosservice find         按服务的类型查找服务
rosservice uri          输出服务的ROSRPC uri
jym@ubuntu:~$ rosservice list
/clear
/kill
/reset
/rosout/get_loggers
/rosout/set_logger_level
/spawn
/teleop_turtle/get_loggers
/teleop_turtle/set_logger_level
/turtle1/set_pen
/turtle1/teleport_absolute
/turtle1/teleport_relative
/turtlesim/get_loggers
/turtlesim/set_logger_level
使用rosservice type命令进一步查看clear(清除)服务:
jym@ubuntu:~$ rosservice type /clear
std_srvs/Empty
服务的类型为empty(空),这表明调用这个服务时不需要参数(即,它在发出请求时不发送数据,在接收响应时也不接收数据)。
查看有参服务:
$ rosservice type /spawn | rossrv show
jym@ubuntu:~$ rosservice type /spawn | rossrv show
float32 x
float32 y
float32 theta
string name
---
string name
这个服务能让我们可以在给定的位置和角度生成一只新的乌龟。name字段是可选的。
调用无参服务:
$ rosservice call /clear
清除了turtlesim_node背景上的轨迹。
调用有参服务:
jym@ubuntu:~$ rosservice call /spawn 2 2 2 ""
name: "turtle2"
该调用返回了新产生的乌龟的名字。然后turtlesim里面出现了个新乌龟。
rosparam能在ROS参数服务器(Parameter Server)上存储和操作数据。参数服务器能够存储整型(integer)、浮点(float)、布尔(boolean)、字典(dictionaries)和列表(list)等数据类型。
rosparam使用YAML标记语言的语法。一般而言,YAML的表述很自然:1是整型,1.0是浮点型,one是字符串,true是布尔型,[1, 2, 3]是整型组成的列表,{a: b, c: d}是字典。
rosparam有很多命令可以用来操作参数,如下所示:
rosparam set            设置参数
rosparam get            获取参数
rosparam load           从文件中加载参数
rosparam dump           向文件中转储参数
rosparam delete         删除参数
rosparam list           列出参数名
jym@ubuntu:~$ rosparam list
/rosdistro
/roslaunch/uris/host_ubuntu__36577
/rosversion
/run_id
/turtlesim/background_b
/turtlesim/background_g
/turtlesim/background_r
修改背景颜色的红色通道值:
$ rosparam set /turtlesim/background_r 150
上述指令修改了参数的值,现在我们需要调用clear服务使得参数的修改能生效:
$ rosservice call /clear
查看参数服务器上其他参数的值。获取背景的绿色通道的值:
$ rosparam get /turtlesim/background_g
也可以用rosparam get /来显示参数服务器上的所有内容:
$ rosparam get /
jym@ubuntu:~$ rosparam get /
rosdistro: 'noetic

  '
roslaunch:
  uris:
    host_ubuntu__36577: http://ubuntu:36577/
rosversion: '1.15.13

  '
run_id: 7f07518e-3585-11ec-8099-99fb076f9407
turtlesim:
  background_b: 255
  background_g: 86
  background_r: 150
rqt_console连接到了ROS的日志框架,以显示节点的输出信息。
rqt_logger_level允许我们在节点运行时改变输出信息的详细级别,包括Debug、Info、Warn和Error`。
接下来,看一下turtlesim在rqt_console中输出的信息,同时在使用turtlesim时切换rqt_logger_level中的日志级别。
在启动turtlesim之前先在两个新终端中运行rqt_console和rqt_logger_level:
$ rosrun rqt_console rqt_console
$ rosrun rqt_logger_level rqt_logger_level
在另一个新终端中启动turtlesim:
$ rosrun turtlesim turtlesim_node
因为默认的日志级别是Info,所以你会看到turtlesim启动后发布的所有信息。
把乌龟撞到墙上,rqt_console上会显示:

日志级别的优先级按以下顺序排列:
Fatal (致命)
Error (错误)
Warn  (警告)
Info  (信息)
Debug (调试)
Fatal是最高优先级,Debug是最低优先级。通过设置日志级别,你可以获得所有优先级级别,或只是更高级别的消息。比如,将日志级别设为Warn时,你会得到Warn、Error和Fatal这三个等级的日志消息。

roslaunch可以用来启动定义在launch(启动)文件中的节点。
首先,按照创建catkin工作空间后面的步骤使环境变量生效
然后,切换到之前创建和构建的beginner_tutorials软件包目录下
然后,创建一个launch目录
jym@ubuntu:~$ cd ~/catkin_ws
jym@ubuntu:~/catkin_ws$ source devel/setup.bash
jym@ubuntu:~/catkin_ws$ roscd beginner_tutorials
jym@ubuntu:~/catkin_ws/src/beginner_tutorials$ mkdir launch
jym@ubuntu:~/catkin_ws/src/beginner_tutorials$ cd launch
jym@ubuntu:~/catkin_ws/src/beginner_tutorials/launch$
创建一个名为turtlemimic.launch的launch文件
$ gedit turtlemimic.launch
然后粘贴进去
<launch>

  <group ns="turtlesim1">
    <node pkg="turtlesim" name="sim" type="turtlesim_node"/>
  </group>

  <group ns="turtlesim2">
    <node pkg="turtlesim" name="sim" type="turtlesim_node"/>
  </group>

  <node pkg="turtlesim" name="mimic" type="mimic">
    <remap from="input" to="turtlesim1/turtle1"/>
    <remap from="output" to="turtlesim2/turtle1"/>
  </node>

</launch>
<launch>
首先用launch标签开头,以表明这是一个launch文件。
  <group ns="turtlesim1">
    <node pkg="turtlesim" name="sim" type="turtlesim_node"/>
  </group>

  <group ns="turtlesim2">
    <node pkg="turtlesim" name="sim" type="turtlesim_node"/>
  </group>
此处我们创建了两个分组,并以命名空间(namespace)标签来区分,其中一个名为turtulesim1,另一个名为turtlesim2,两个分组中都有相同的名为sim的turtlesim节点。这样可以让我们同时启动两个turtlesim模拟器,而不会产生命名冲突。
  <node pkg="turtlesim" name="mimic" type="mimic">
    <remap from="input" to="turtlesim1/turtle1"/>
    <remap from="output" to="turtlesim2/turtle1"/>
  </node>
在这里我们启动模仿节点,话题的输入和输出分别重命名为turtlesim1和turtlesim2,这样就可以让turtlesim2模仿turtlesim1了。
</launch>
这一行使得launch文件的XML标签闭合。
通过roslaunch命令来运行launch文件:
$ roslaunch beginner_tutorials turtlemimic.launch
现在将会有两个turtlesim被启动,然后我们在一个新终端中使用rostopic命令发送:
$ rostopic pub /turtlesim1/turtle1/cmd_vel geometry_msgs/Twist -r 1 -- '[2.0, 0.0, 0.0]' '[0.0, 0.0, -1.8]'
两个turtlesims同时开始移动,虽然发布命令只发送给了turtlesim1。

实现过程中,有三个终端:
第一个:输入roscore
jym@ubuntu:~$ roscore
... logging to /home/jym/.ros/log/bd42545e-3598-11ec-8099-99fb076f9407/roslaunch-ubuntu-10960.log
Checking log directory for disk usage. This may take a while.
Press Ctrl-C to interrupt
Done checking log file disk usage. Usage is <1GB.

started roslaunch server http://ubuntu:43275/
ros_comm version 1.15.13


SUMMARY
========

PARAMETERS
 * /rosdistro: noetic
 * /rosversion: 1.15.13

NODES

auto-starting new master
process[master]: started with pid [10968]
ROS_MASTER_URI=http://ubuntu:11311/
第二个:运行launch文件
jym@ubuntu:~$ cd ~/catkin_ws
jym@ubuntu:~/catkin_ws$ source devel/setup.bash
jym@ubuntu:~/catkin_ws$ roscd beginner_tutorials
jym@ubuntu:~/catkin_ws/src/beginner_tutorials$ roslaunch beginner_tutorials turtlemimic.launch
... logging to /home/jym/.ros/log/bd42545e-3598-11ec-8099-99fb076f9407/roslaunch-ubuntu-11191.log
Checking log directory for disk usage. This may take a while.
Press Ctrl-C to interrupt
Done checking log file disk usage. Usage is <1GB.

started roslaunch server http://ubuntu:36829/

SUMMARY
========

PARAMETERS
 * /rosdistro: noetic
 * /rosversion: 1.15.13

NODES
  /
    mimic (turtlesim/mimic)
  /turtlesim1/
    sim (turtlesim/turtlesim_node)
  /turtlesim2/
    sim (turtlesim/turtlesim_node)

ROS_MASTER_URI=http://localhost:11311

process[turtlesim1/sim-1]: started with pid [11205]
process[turtlesim2/sim-2]: started with pid [11206]
process[mimic-3]: started with pid [11208]
第三个终端:使用rostopic命令发送
jym@ubuntu:~$ rostopic pub /turtlesim1/turtle1/cmd_vel geometry_msgs/Twist -r 1 -- '[2.0, 0.0, 0.0]' '[0.0, 0.0, -1.8]'

 浙公网安备 33010602011771号