
Nginx反向代理负载均衡配置
1.反向代理概述
反向代理(Reverse Proxy)方式是指以代理服务器来接受internet上的连接请求,然后将请求转发给内部网络上的服务器,并将从服务器上得到的结果返回给internet上请求连接的客户端,此时代理服务器对外就表现为一个反向代理服务器。
环境准备:
| 主机名 | IP地址 | 角色 | 系统 |
|---|---|---|---|
| web-node1.com | eth0:192.168.90.201 | web-node1节点 | CentOS7.2 |
| web-node2.com | eth0:192.168.90.202 | web-node2节点 | CentOS7.2 |
| lb-node1.com | eth0:192.168.90.203 | Nginx反向代理 | CentOS7.2 |
2.Node节点部署
在两台web-node节点中均使用Yum安装一个Apache用于做真实机,监听8080端口
web-node1.com部署
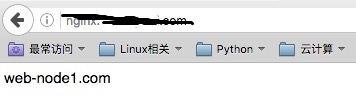
[root@web-node1 ~]# rpm -ivh \
http://mirrors.aliyun.com/epel/epel-release-latest-7.noarch.rpm
[root@web-node1 ~]# yum install -y gcc glibc gcc-c++ make screen tree lrzsz
##部署web-node1 httpd服务
[root@web-node1 ~]# yum install -y httpd
[root@web-node1 ~]# sed -i 's/Listen 80/Listen 8080/g' /etc/httpd/conf/httpd.conf
[root@web-node1 ~]# systemctl start httpd
[root@web-node1 ~]# echo "web-node1.com" > /var/www/html/index.html
[root@web-node1 ~]# curl  http://192.168.90.201:8080/
web-node1.com
web-node2.com部署
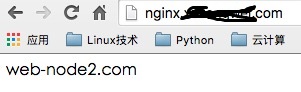
[root@web-node1 ~]# rpm -ivh \
http://mirrors.aliyun.com/epel/epel-release-latest-7.noarch.rpm
[root@web-node1 ~]# yum install -y gcc glibc gcc-c++ make screen tree lrzsz
##部署web-node2 httpd服务
[root@web-node2 ~]# yum install -y httpd
[root@web-node2 ~]# sed -i 's/Listen 80/Listen 8080/g' /etc/httpd/conf/httpd.conf
[root@web-node2 ~]# systemctl start httpd
[root@web-node2 ~]# echo "web-node2.com" > /var/www/html/index.html
[root@web-node2 ~]# curl  http://192.168.90.202:8080/
web-node2.com
3.反向代理部署
Nginx 源码编译安装,使其支持4层,并监听80端口
[root@lb-node1 ~]# useradd -s /sbin/nologin -M www
[root@lb-node1 ~]# cd /usr/local/src/
[root@lb-node1 src]# wget http://nginx.org/download/nginx-1.15.8.tar.gz
[root@lb-node1 src]# tar xf nginx-1.15.8.tar.gz
[root@lb-node1 src]# cd nginx-1.15.8
[root@lb-node1 nginx-1.10.2]# ./configure --prefix=/usr/local/nginx-1.15.8 \
--user=www --group=www --with-http_ssl_module \
--with-http_stub_status_module --with-http_sub_module --with-file-aio --with-stream
[root@lb-node1 nginx-1.10.2]# make && make install
[root@web-node1 ~]# ln -s /usr/local/nginx-1.15.8/ /usr/local/nginx
## 测试配置并启动Nginx
[root@lb-node1 ~]# /usr/local/nginx/sbin/nginx -t
nginx: the configuration file /usr/local/nginx-1.15.8/conf/nginx.conf syntax is ok
nginx: configuration file /usr/local/nginx-1.15.8/conf/nginx.conf test is successful
[root@lb-node1 ~]# /usr/local/nginx/sbin/nginx
3.1配置Nginx7层反向代理
1.配置Nginx反向代理
##http段配置
    upstream web-cluster {
        # ip_hash; #会话保持,如果有登录认证的网站需要开启
        server 192.168.90.201:8080 weight=1 max_fails=3 fail_timeout=3;
        server 192.168.90.202:8080 weight=1 max_fails=3 fail_timeout=3;
    }
    server {
        listen 80;
        server_name 192.168.90.203;
    location / {
        proxy_pass http://web-cluster;
        include proxy.conf;
        }
    }
测试代理
[root@lb-node1 ~]# curl http://192.168.90.203/
web-node1.com
[root@lb-node1 ~]# curl http://192.168.90.203/
web-node2.com
[root@lb-node1 ~]# curl http://192.168.90.203/
web-node1.com
[root@lb-node1 ~]# curl http://192.168.90.203/
web-node2.com
2.通过分组方式,以及User-agent实现不同代理
#http段配置
         upstream static-cluster {
                server 192.168.90.201:8080 weight=1 max_fails=3 fail_timeout=3;
        }
         upstream dynamic-cluster {
                server 192.168.90.202:8080 weight=1 max_fails=3 fail_timeout=3;
        }
         upstream default-cluster {
                server 192.168.90.202:8080 weight=1 max_fails=3 fail_timeout=3;
        }
#需要配置本地host解析测试
        server {
                listen 80;
                server_name nginx.domain.com;
        location / {
        if ($http_user_agent ~* "Firefox"){
                    proxy_pass http://static-cluster;
                    }
        if ($http_user_agent ~* "Chrome") {
            proxy_pass http://dynamic-cluster;
            }
        proxy_pass http://default-cluster;
            }
    }
测试分组
##默认浏览器交给default处理
[root@lb-node1 ~]# curl http://nginx.domain.com
web-node2.com
3.2配置Nginx4层反向代理
配置ssh以及msql反向代理
stream {
        upstream ssh_proxy {
        hash $remote_addr consistent;
        server 192.168.90.201:22;
    }
        upstream mysql_proxy {
        hash $remote_addr consistent;
        server 192.168.90.202:3306;
        }
    server {
    listen 2222;
    proxy_connect_timeout 1s;
        proxy_timeout 300s;
        proxy_pass ssh_proxy;
    }
        server {
        listen 3333;
        proxy_connect_timeout 1s;
        proxy_timeout 300s;
        proxy_pass mysql_proxy;
        }
  }
2222端口代理至于node1的SSH、3333端口代理至于node2的MYSQL
## 测试连接ssh
[root@lb-node1 ~]# ssh -p2222 root@192.168.90.203
root@192.168.90.203's password:
Last login: Wed Oct 19 11:53:04 2016 from 192.168.80.143
[root@web-node1 ~]#
## 测试连接mysql
[root@lb-node1 ~]# mysql -h192.168.90.203 -uroot -p1 -P3333
Welcome to the MariaDB monitor.  Commands end with ; or \g.
Your MariaDB connection id is 273
Server version: 5.5.47-MariaDB MariaDB Server
Copyright (c) 2000, 2016, Oracle, MariaDB Corporation Ab and others.
Type 'help;' or '\h' for help. Type '\c' to clear the current input statement.
MariaDB [(none)]>

 浙公网安备 33010602011771号