Haproxy源码安装
Haproxy源码安装
了解haproxy
Haproxy比nginx的代理功能更强,可以达到10W以上的访问并发,但没有LVS的并发访问能力强大。
Haproxy既可以代理7层,又可以代理4层。
在公有云架构中:
阿里云上的四层代理用LVS,七层代理用tingine自己的代理功能。
提供负载均衡的软件有三款:LVS、Nginx、Haproxy
LVS并发数可以达到百万级,而Haproxy并发数可以达到十万级
三款负载均衡软件区别:
LVS:工作在内核空间,后端服务器端看到的IP是来自访问客户端的
Nginx:工作在用户空间,,后端服务器端看到的IP是来自Nginx代理端的
Haproxy:并非真正的4层,而是伪4层
硬件:
F5
Netscaler
Array
深信服
北京灵州
Haproxy配置文件
默认监听端口:5000
安装Haproxy
安装环境:
系统:centos7
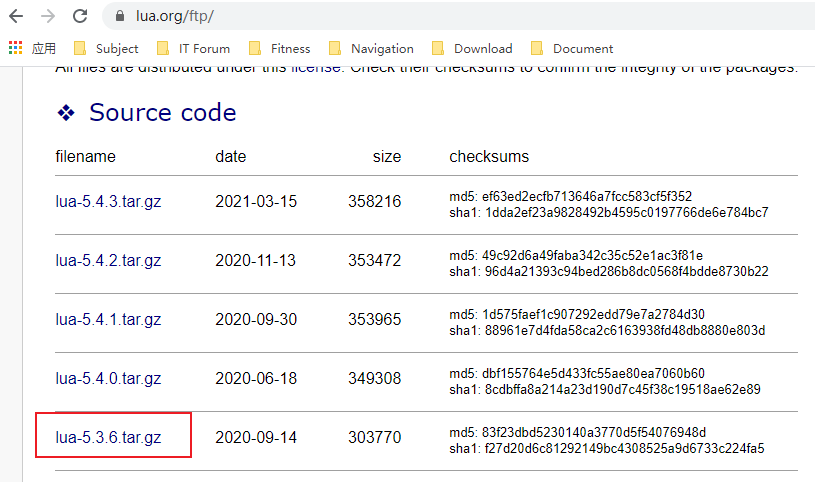
lua版本:Lua 5.3.6
Haproxy版本:HA-Proxy version 2.0.22
1、解决lua环境
Lua官网:www.lua.org

Lua安装文档:https://www.lua.org/start.html


将下载好的lua软件上传到linux上

安装基础命令及编译依赖环境:
[root@db02 ~]# yum install gcc readline-devel -y
解压缩并安装:
[root@db02 ~]# tar zxf lua-5.3.6.tar.gz
[root@db02 ~]# cd lua-5.3.6/
[root@db02 ~]# make linux
查看lua版本
[root@db02 lua-5.3.6]# pwd
/root/lua-5.3.6
[root@db02 lua-5.3.6]# ./src/lua -v
Lua 5.3.6  Copyright (C) 1994-2020 Lua.org, PUC-Rio
2、安装Haproxy
安装基础命令及编译依赖环境:
[root@db02 ~]# yum -y install gcc openssl-devel pcre-devel systemd-devel
haproxy官网:http://www.haproxy.org/

下载haproxy 2.0 版本:
http://www.haproxy.org/download/2.0/src/haproxy-2.0.22.tar.gz
将下载好的lua软件上传到linux上

安装基础命令及编译依赖环境:
[root@db02 ~]# yum -y install gcc openssl-devel pcre-devel systemd-devel
解压缩并安装:
[root@db02 ~]# tar zxf haproxy-2.0.22.tar.gz
[root@db02 ~]# cd haproxy-2.0.22/
参考INSTALL文件进行编译安装:
[root@db02 haproxy-2.0.22]# cat INSTALL
[root@db02 haproxy-2.0.22]# make -j 4 TARGET=linux-glibc USE_OPENSSL=1 USE_ZLIB=1 USE_PCRE=1 USE_SYSTEMD=1 USE_LUA=1 LUA_INC=/root/lua-5.3.6/src LUA_LIB=/root/lua-5.3.6/src
[root@db02 haproxy-2.0.22]# make install PREFIX=/apps/haproxy
[root@db02 haproxy-2.0.22]# ln -s /apps/haproxy/sbin/haproxy /usr/sbin/
[root@db02 ~]# tree /apps/haproxy
/apps/haproxy
├── doc
│   └── haproxy
│       ├── 51Degrees-device-detection.txt
│       ├── architecture.txt
│       ├── close-options.txt
│       ├── configuration.txt
│       ├── cookie-options.txt
│       ├── DeviceAtlas-device-detection.txt
│       ├── intro.txt
│       ├── linux-syn-cookies.txt
│       ├── lua.txt
│       ├── management.txt
│       ├── netscaler-client-ip-insertion-protocol.txt
│       ├── network-namespaces.txt
│       ├── peers.txt
│       ├── peers-v2.0.txt
│       ├── proxy-protocol.txt
│       ├── regression-testing.txt
│       ├── seamless_reload.txt
│       ├── SOCKS4.protocol.txt
│       ├── SPOE.txt
│       └── WURFL-device-detection.txt
├── sbin
│   └── haproxy
└── share
    └── man
        └── man1
            └── haproxy.1

6 directories, 22 files
3、验证Haproxy版本
[root@db02 ~]# which haproxy
/usr/sbin/haproxy
[root@db02 ~]# /usr/sbin/haproxy -v
HA-Proxy version 2.0.22-d4759ba 2021/04/12 - https://haproxy.org/
4、创建配置文件
查看配置文件范例:
[root@db02 ~]# tree /apps/haproxy-2.0.22/examples/
/apps/haproxy-2.0.22/examples/
├── acl-content-sw.cfg
├── content-sw-sample.cfg
├── errorfiles
│?? ├── 400.http
│?? ├── 403.http
│?? ├── 408.http
│?? ├── 500.http
│?? ├── 502.http
│?? ├── 503.http
│?? ├── 504.http
│?? └── README
├── haproxy.init
├── option-http_proxy.cfg
├── socks4.cfg
├── transparent_proxy.cfg
└── wurfl-example.cfg

1 directory, 15 files
创建自定义的配置文件:
[root@db02 ~]# mkdir /etc/haproxy
[root@db02 ~]# vim /etc/haproxy/haproxy.cfg
[Unit]
Description=HAProxy Load Balancer
After=syslog.target network.target
Documentation=man:haproxy(1)
Documentation=file:/apps/haproxy/doc/haproxy/configuration.txt

[Service]
ExecStartPre=/usr/sbin/haproxy -f /etc/haproxy/haproxy.cfg -c -q
ExecStart=/usr/sbin/haproxy -Ws -f /etc/haproxy/haproxy.cfg -p /var/lib/haproxy/haproxy.pid
ExecReload=/bin/kill -USR2 $MAINPID

[Install]
WantedBy=multi-user.target
创建socket文件的目录:

[root@db02 ~]# mkdir /var/lib/haproxy/

创建运行haproxy的用户:

[root@db02 ~]# useradd -r -s /sbin/nologin -d /var/lib/haproxy haproxy

将haproxy的帮助文档,加入到帮助里边
[root@db02 ~]# tree /apps/haproxy/share/man/

[root@db02 ~]# vim /etc/man_db.conf
MANDATORY_MANPATH                       /apps/haproxy/share/man/

更新man的数据库:

[root@db02 ~]# mandb
5、启动haproxy
[root@db02 ~]# systemctl enable --now haproxy
[root@db02 ~]# systemctl start haproxy
[root@db02 ~]# systemctl status haproxy
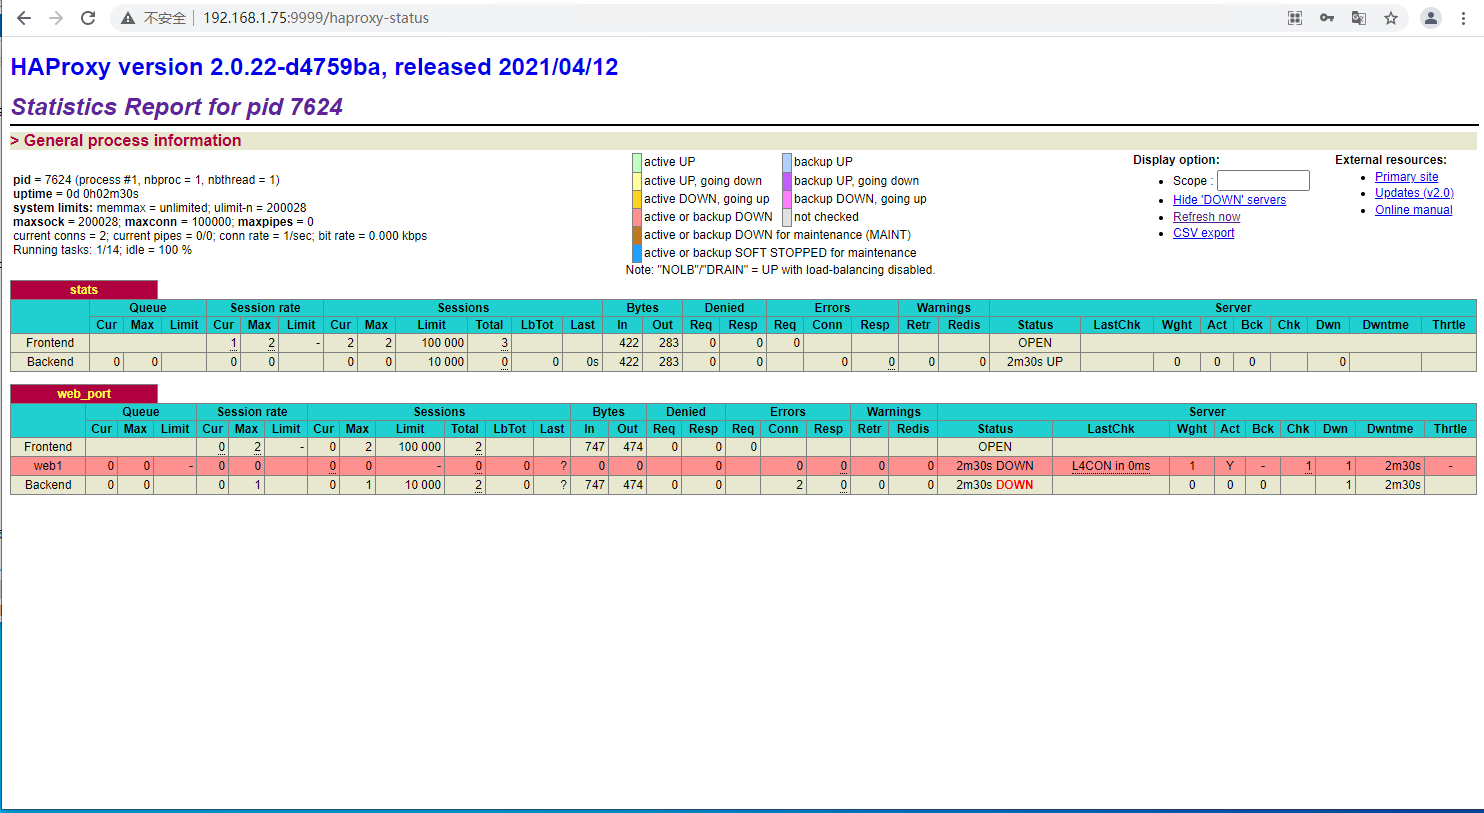
6、查看haproxy的状态页面
浏览器访问:http://192.168.1.75:9999/haproxy-status


