使用Moco框架的mock技术
一、moco概述
Moco可以通过简单的配置request和response 对象,达到模拟后端返回的效果;
- 支持HTTP、HTTPS、socket协议;
- 支持在request中设置Headers、cookies、statusCode;
- 支持get、post、put、delete请求;
- 无需环境配置,只需要java运行环境即可
二、环境准备
moco安装使用只需要下载moco jar包即可
三、moco的使用
1)新建json配置文件(test.json),用于配置请求和响应内容,可根据需求自定义配置,内容如下:
[
  {
    "request":{
        "uri":"/"
    },
    "response":{
        "text":"第一个mock文件"
    }
  }
]
2)启动moco服务
在moco服务器cmd窗口,进入moco jar包所在目录,执行命令:
java –jar moco-runner-1.1.0-standalone.jar http –p 9999 –c test.json
http:指定http协议
-p:指定启动服务的端口号
-c:指定启动服务使用的json文件
成功启动界面如下:

3)接口请求调用
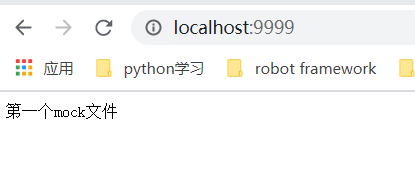
通过浏览器或者通过接口调用工具(postman、jmeter等)输入接口请求地址,http://localhost:9999/
调用结果如下:

四、更多的JSON文件配置
1、get请求
[
  {
    "description":"不带参数的get请求",
    "request":{
      "uri":"/withGetDemo",
      "method":"get"
    },
    "response":{
      "text":"这是不带参数的get请求"
    }
  },
  {
    "description":"带参数的get请求,p1,p2分别的参数1,参数2,名称可随便起,个数也可随便加",
    "request":{
      "uri":"/wihtGetDemobyParam",
      "method":"get",
      "queries":{
        "p1":"hh",
        "p2":"good"
      }
    },
    "response":{
      "text":"this is a get method with paramter"
    }
  }
]
2、post请求
[
  {
    "description":"post 请求",
    "request":{
      "uri":"/postDemo",
      "method":"post"
    },
    "response":{
      "text":"This is post request"
    }
  },
  {
    "description":"带参数的post请求",
    "request":{
      "uri":"/postDemoWithParam",
      "method":"post",
      "forms":{
        "param1":"one",
        "param2":"two"
      }
    },
    "response":{
      "text":"this is post request with param"
    }
  }
]
3、post请求,(请求参数为json格式、请求带cookies)
[
  {
    "description":"这是一个带cookies的Post请求",
    "request":{
      "uri":"/postDemoWithCookies",
      "cookies":{
        "login":"true"
      },
      "json":{
        "name":"hi",
        "age":"3"
      }
    },
    "response":{
      "status":"200",
      "json":{
        "name":"success",
        "status":"1"
      }
    }
  }
]
4、请求带header
[
  {
    "description":"带header请求",
    "request": {
      "uri": "/withHeader",
      "method": "post",
      "headers": {
        "content-type": "application/json"
      },
      "json": {
        "name": "xiaoming",
        "age": "18"
      }
    },
      "response":{
        "json":{
          "message":"success",
          "status":"1"
        }
      }
    }
]
五、总结
Moco还可以通过在json文件中添加cookies、header、重定向这些参数,来模拟各种情况下的请求和 返回值,可以根据自己工作的需求去对这些东西进行了解。 Moco是热更新的,所以启动了jar包的服务之后,即使修改了json文件中的内容,也不需要重启服务就 生效。 掌握了mock测试的技术,可以让我们在开发没有完成对应接口的时候,有接口文档就提前进入到测试 状态,是现在敏捷模式下不可或缺的技术,也是持续集成中一个重要的组成部分


