dotNet Core WEB程序使用 Nginx反向代理
之前记录过一篇 使用 jexus 作为dotNetCore的反向代理,发现jexus的内存占用较大,最终选择使用Nginx的原因就是占用内存较小,以及性能较优(https://www.cnblogs.com/jhy55/p/9229933.html)
Jexux与 Nginx性能对比参考(https://www.aliyun.com/jiaocheng/202277.html)

直入正题。。。。。。。。。。
Nginx 安装
安装所需环境
Nginx 是 C语言 开发,建议在 Linux 上运行,当然,也可以安装 Windows 版本,本篇则使用 CentOS 7 作为安装环境。
一. gcc 安装
安装 nginx 需要先将官网下载的源码进行编译,编译依赖 gcc 环境,如果没有 gcc 环境,则需要安装:
yum install gcc-c++
二. PCRE pcre-devel 安装
PCRE(Perl Compatible Regular Expressions) 是一个Perl库,包括 perl 兼容的正则表达式库。nginx 的 http 模块使用 pcre 来解析正则表达式,所以需要在 linux 上安装 pcre 库,pcre-devel 是使用 pcre 开发的一个二次开发库。nginx也需要此库。命令:
yum install -y pcre pcre-devel
三. zlib 安装
zlib 库提供了很多种压缩和解压缩的方式, nginx 使用 zlib 对 http 包的内容进行 gzip ,所以需要在 Centos 上安装 zlib 库。
yum install -y zlib zlib-devel
四. OpenSSL 安装
OpenSSL 是一个强大的安全套接字层密码库,囊括主要的密码算法、常用的密钥和证书封装管理功能及 SSL 协议,并提供丰富的应用程序供测试或其它目的使用。
nginx 不仅支持 http 协议,还支持 https(即在ssl协议上传输http),所以需要在 Centos 安装 OpenSSL 库。
yum install -y openssl openssl-devel
官网下载
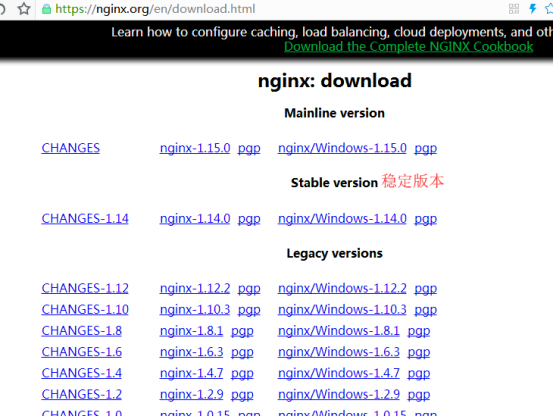
1.直接下载.tar.gz安装包,地址:https://nginx.org/en/download.html

2.使用wget命令下载(推荐)。
wget -c https://nginx.org/download/nginx-1.14.0.tar.gz

我下载的是1.14.0版本,这个是目前的稳定版。
解压
依然是直接命令:
tar -zxvf nginx-1.14.0.tar.gz cd nginx-1.14.0
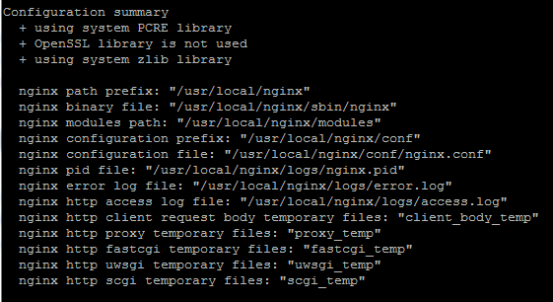
其实在 nginx-1.10.1 版本中你就不需要去配置相关东西,默认就可以了。当然,如果你要自己配置目录也是可以的。
1.使用默认配置
./configure

编译安装
make make install
查找安装路径:
whereis nginx

启动、停止nginx
cd /usr/local/nginx/sbin/ ./nginx ./nginx -s stop ./nginx -s quit ./nginx -s reload
./nginx -s quit:此方式停止步骤是待nginx进程处理任务完毕进行停止。
./nginx -s stop:此方式相当于先查出nginx进程id再使用kill命令强制杀掉进程。
查询nginx进程:
ps aux|grep nginx
重启 nginx
1.先停止再启动(推荐):
对 nginx 进行重启相当于先停止再启动,即先执行停止命令再执行启动命令。如下:
./nginx -s quit ./nginx
2.重新加载配置文件:
当 ngin x的配置文件 nginx.conf 修改后,要想让配置生效需要重启 nginx,使用-s reload不用先停止 ngin x再启动 nginx 即可将配置信息在 nginx 中生效,如下:
./nginx -s reload
启动成功后,在浏览器可以看到这样的页面:

添加到系统服务,开机自启动
vim /etc/init.d/nginx
添加内容如下
#!/bin/bash
#chkconfig:- 99 20
#description:Nginx Service Control Script
cmd='/usr/local/nginx/sbin/nginx'
pid='/usr/local/nginx/logs/nginx.pid'
case "$1" in
start)
$cmd
;;
stop)
kill -s QUIT $(cat $pid)
;;
restart)
$0 stop
$0 start
;;
reload)
kill -s HUP $(cat $pid)
;;
*)
echo 'Usage:$0 {start|stop|restart|reload}'
exit 1
esac
exit 0
重启服务
service nginx restart
到这里nginx安装完成了
站点配置
HTTP配置代理
如果在 nginx.conf 文件中添加站点配置,多站点的情况下,不利于管理
多站点配置,需要启用这个配置,然后在conf.d文件夹下,创建多个配置文件即可。比如lotteryAdmin.conf、lotteryAPI.conf
新建文件夹
mkdir /usr/local/nginx/conf.d/
vim /usr/local/nginx/conf/nginx.conf
在尾部 http { }内添加
include /usr/local/nginx/conf.d/*.conf;
然后 :wq!保存

vim /usr/local/nginx/conf.d/lotteryAdmin.conf
添加内容
server {
listen 80;
index /Main/index;
server_name admin1.lottery.com; #域名
location / {
# 传递真实IP到后端
proxy_set_header Host $http_host;
proxy_set_header X-Real-IP $remote_addr;
proxy_set_header X-Forwarded-For $proxy_add_x_forwarded_for;
proxy_pass http://localhost:5001;#dotNetCore程序的端口号
}
}
然后 :wq!保存
重启 Nginx 服务
service nginx restart
查看Nginx配置是否正常
/usr/local/nginx/sbin/nginx -t

现在可以访问你的站点了

HTTPS配置代理
申请到证书之后,我这里有 xxx.key和xxx.pem两个文件
server {
listen 443;
server_name api.lottery.com;
ssl on;
index index.html index.htm;
ssl_certificate /dotnet/httpsKey/cretc.pem;
ssl_certificate_key /dotnet/httpsKey/cretc.key;
ssl_session_timeout 5m;
ssl_ciphers ECDHE-RSA-AES128-GCM-SHA256:ECDHE:ECDH:AES:HIGH:!NULL:!aNULL:!MD5:!ADH:!RC4;
ssl_protocols TLSv1 TLSv1.1 TLSv1.2;
ssl_prefer_server_ciphers on;
location / {
proxy_set_header Host $http_host;
proxy_set_header X-Real-IP $remote_addr;
proxy_set_header X-Forwarded-For $proxy_add_x_forwarded_for;
proxy_pass https://localhost:5003;#dotNetCore程序的端口号
}
}
按 :wq!保存
service nginx restart
如果报错
unknown directive "ssl"............
切换到你解压的nginx目录下
####### 下载你当前版本的nginx包,并且解压 进到目录
./configure --with-http_ssl_module
####### 切记千万不要make install 那样就覆盖安装了
make
####### 将原来的nginx备份 备份之前先kill当前正在启动的nginx
cp /usr/local/nginx/sbin/nginx /usr/local/nginx/sbin/nginx.bak
####### make之后会在当前目录生成 objs 目录
cp objs/nginx /usr/local/nginx/sbin/nginx
####### 然后重新启动nginx
/usr/local/nginx/sbin/nginx
在重启nginx服务
service nginx restart
这个时候可以访问你的站点了


