Jenkins 部署 Nginx 前后端分离应用
前置:https://www.cnblogs.com/jhxxb/p/11407842.html
一、后台
打包
clean package -Dmaven.test.skip=true -P prod

下面配置 jar 包中不含依赖,执行 mvn dependency:copy-dependencies 会将项目依赖复制到 target/dependency 目录中,然后将依赖拷贝到 lib 目录下即可
<plugin>
    <groupId>org.springframework.boot</groupId>
    <artifactId>spring-boot-maven-plugin</artifactId>
    <version>${spring-boot-dependencies.version}</version>
    <configuration>
        <layout>ZIP</layout>
        <includes>
            <include><!--不打包依赖到 jar 包中-->
                <groupId>nothing</groupId>
                <artifactId>nothing</artifactId>
            </include>
        </includes>
    </configuration>
    <executions>
        <execution>
            <goals>
                <goal>repackage</goal>
            </goals>
        </execution>
    </executions>
</plugin>
启动,start.sh
#!/bin/bash

# 关闭 ipv6
ipv6_config() {
  echo "NETWORKING_IPV6=no" >/etc/sysconfig/network
  echo 1 >/proc/sys/net/ipv6/conf/all/disable_ipv6
  echo 1 >/proc/sys/net/ipv6/conf/default/disable_ipv6
  echo "127.0.0.1   localhost   localhost.localdomain" >/etc/hosts
  #sed -i 's/IPV6INIT=yes/IPV6INIT=no/g' /etc/sysconfig/network-scripts/ifcfg-enp0s8
  for line in $(ls -lh /etc/sysconfig/network-scripts/ifcfg-* | awk -F '[ ]+' '{print $9}'); do
    if [ -f $line ]; then
      sed -i 's/IPV6INIT=yes/IPV6INIT=no/g' $line
      echo $i
    fi
  done
}
ipv6_config

# 根据进程名称结束进程,这里为 spis
count=$(jps | grep spis | wc -l)
if [ $count -gt 0 ]; then
  jps | grep spis | awk '{print $1}' | xargs kill -9
fi

# 根据端口号结束进程,这里为 80 端口,sudo yum install -y lsof
count=$(lsof -i:80 | awk 'NR>=2' | awk '{print $2}' | wc -l)
if [ $count -gt 0 ]; then
  lsof -i:80 | awk 'NR>=2' | awk '{print $2}' | xargs kill -9
else
  echo $count
fi

# 清理之前的 jar,复制新打包好的 jar 到指定位置
cd /home/springboot/spis/
rm -rf nohup.out spis.jar
cp /opt/jenkins/workspace/spis-springboot/spis-server/target/spis.jar ./
# 避免 jenkins job 完成后杀进程
export BUILD_ID=dontKillMe
# 启动 jar 应用,使用全路径 jps 查看才会显示名称,否则名称会显示为 jar
nohup java -Xms4096m -Xmx4096m -Xmn1024m -Dloader.path=lib -Dspring.profiles.active=prod -Dserver.port=9000 -jar /home/springboot/spis/spis.jar &
Jenkins 配置
# 使脚本具有执行权限
sudo chmod +x /home/springboot/spis/start.sh
# 执行脚本
sh /home/springboot/spis/start.sh 1 > /dev/null 2 > &1 &

在远程主机执行需要 https://plugins.jenkins.io/ssh/ 插件
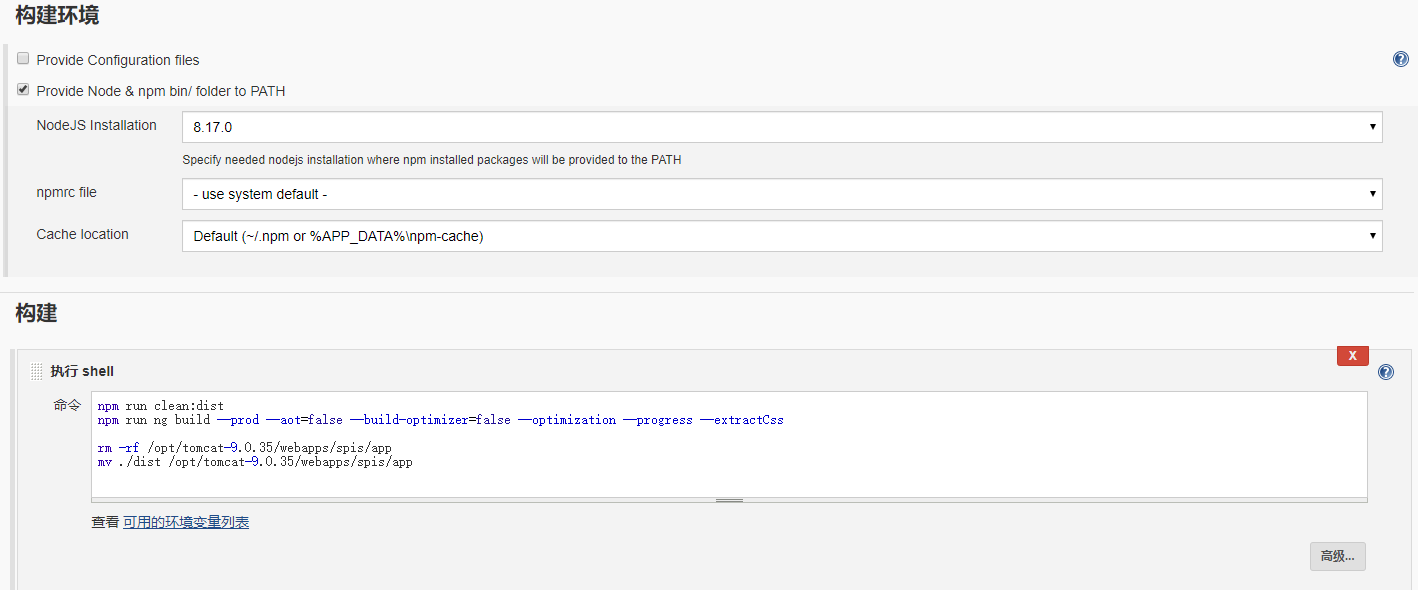
二、前端
需要 https://plugins.jenkins.io/nodejs/ 插件
#!/bin/bash

# 构建
npm run clean:dist
npm run ng build --prod --aot=false --build-optimizer=false --optimization --progress --extractCss

# 结束进程
count=$(lsof -i:8080 | awk 'NR>=2' | awk '{print $2}' | wc -l)
if [ $count -gt 0 ]; then
  lsof -i:8080 | awk 'NR>=2' | awk '{print $2}' | xargs kill -9
else
  echo $count
fi

# 清理
rm -rf /opt/spis/app
mv ./dist /opt/spis/app/

# 启动
cd /opt/nginx-1.18.0/
rm -rf nohup.out
export BUILD_ID=dontKillMe
nohup ./sbin/nginx &

https://www.cnblogs.com/g2thend/p/11702852.html
https://blog.csdn.net/qq_37334435/article/details/100994238


