一、添加用户
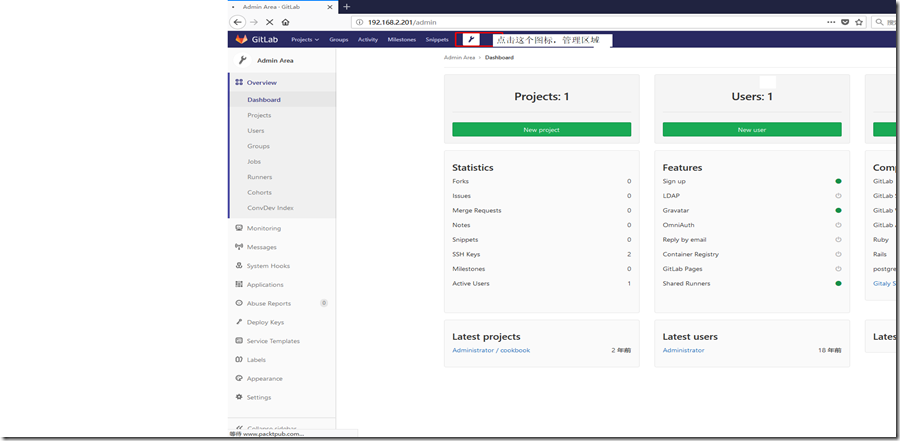
# 1. 用root 管理员登陆。
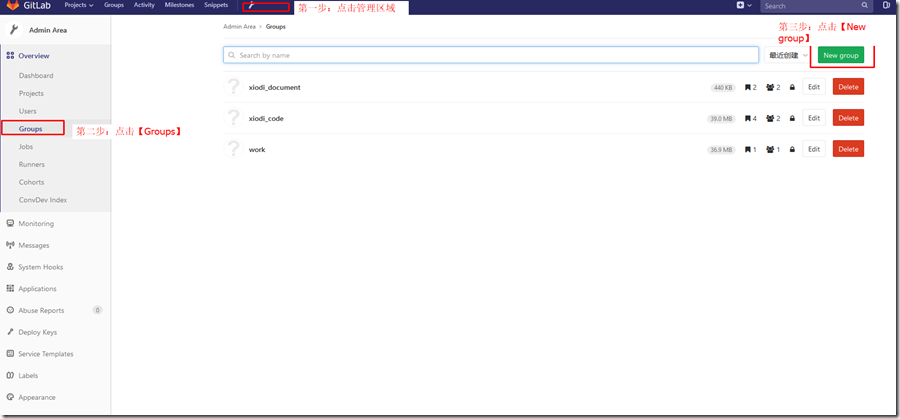
# 2. 点击管理区域
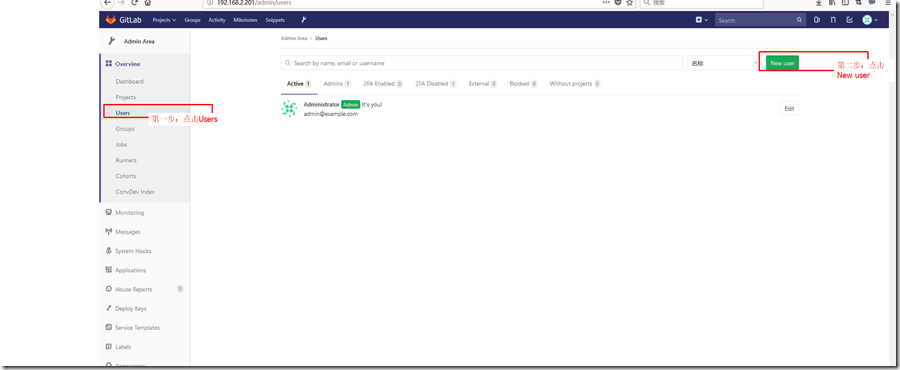
#3. 点击New User
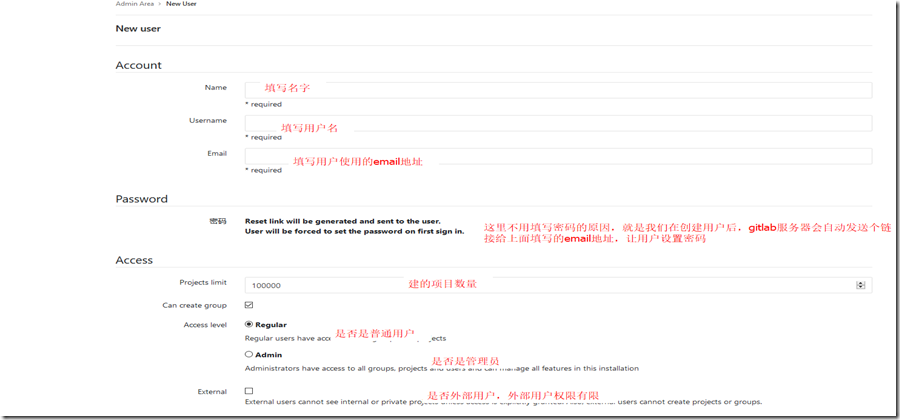
#4. 输入用户相关信息
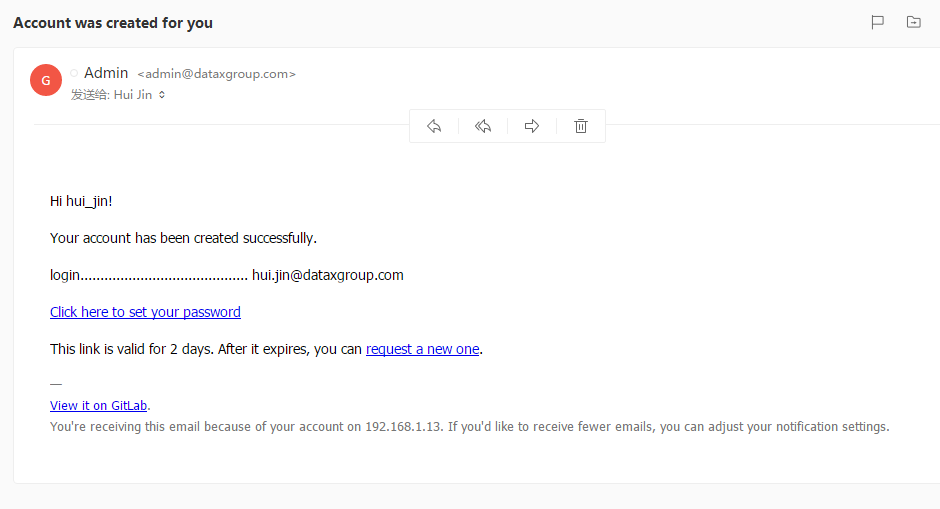
#5. 用户会收到邮件如下画面,点击设置密码即可。
二、普通用户升级为管理员用户
1. 使用root 用户登录gitlab服务器。
2. 查看数据库配置信息 cat /var/opt/gitlab/gitlab-rails/etc/database.yml
3. 登录用户 su - gitlab-psql
4. 连接库 psql -h /var/opt/gitlab/postgresql -d gitlabhq_production
5. 查询用户 select * from users where email = ‘普通用户邮箱地址’;
6. 更新为管理员 update users set admin=‘t’ where id = 普通用户ID;
7.在admin 视图中验证
三、 创建组
# 1. 使用管理员登陆gitlab服务器。

# 2. 点击管理区域—Group-Add group
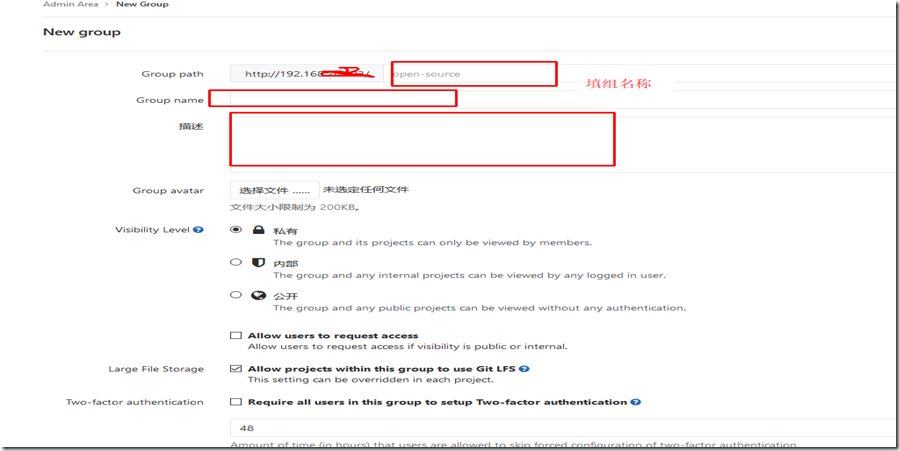
#3. 依次填入组路径,名称和描述等信息
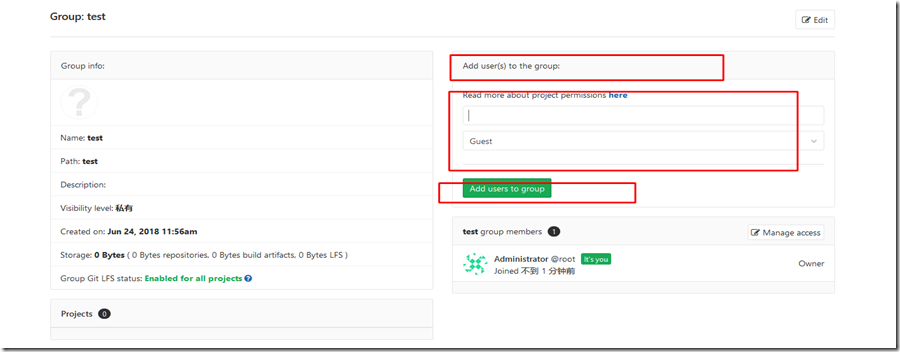
# 4. 在如下画面选择用户加入到刚创建的组、权限等 。
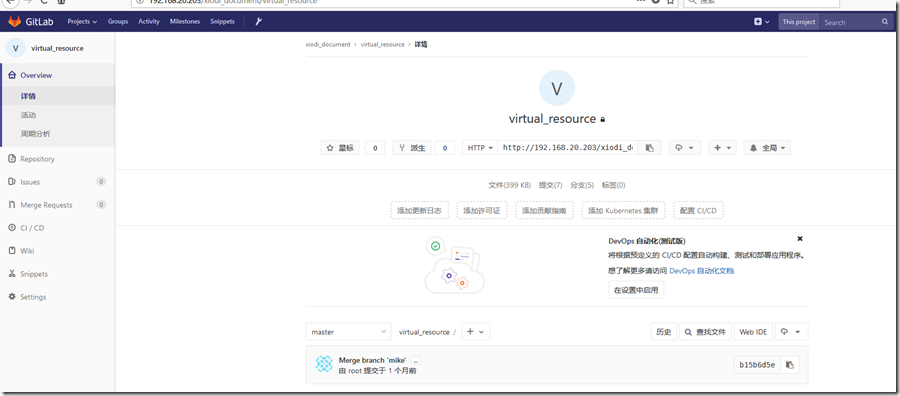
四、 用户权限
#1. 使用管理员打开要设置权限的项目。
#2. 点击【Settings】--【Members】
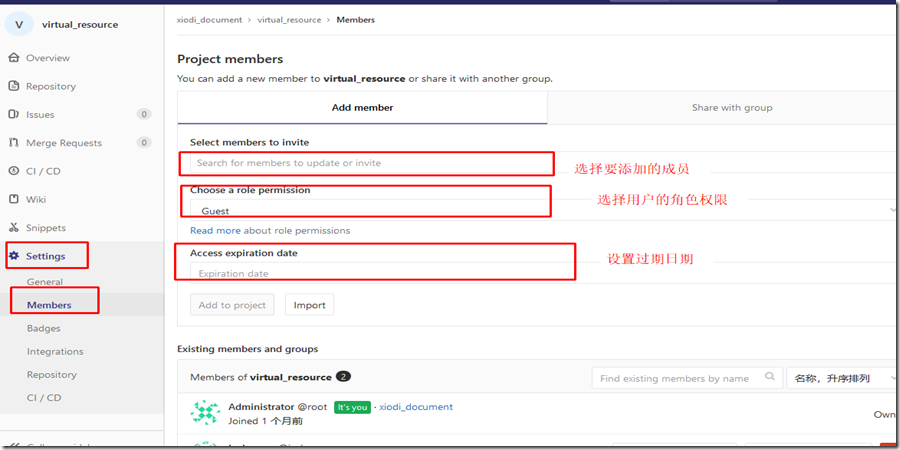
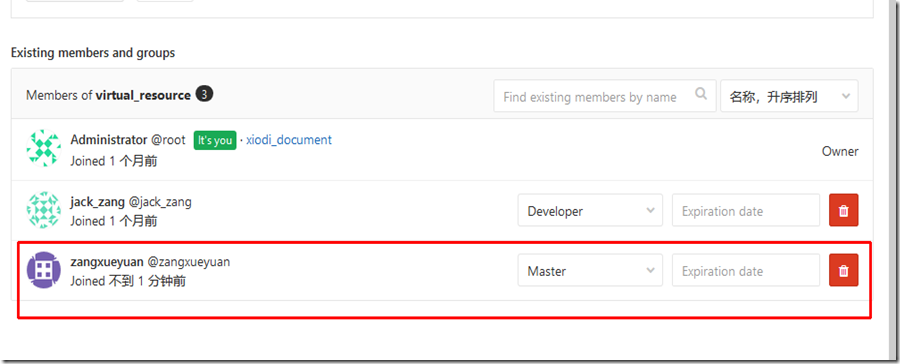
#3. 添加完成后,如下图所示
#4. 下表完整的列出了Guest,Reporter,Developer,Master,Owner对应的权限。
|
Guest |
Reporter |
Developer |
Master |
Owner |
| Create new issues |
* |
* |
* |
* |
* |
| Leave comments |
* |
* |
* |
* |
* |
| Pull the project code |
|
* |
* |
* |
* |
| Download a project |
|
* |
* |
* |
* |
| Create code snippets |
|
* |
* |
* |
* |
| Create new merge requests |
|
|
* |
* |
* |
| Push changes to nonprotected branches |
|
|
* |
* |
* |
| Remove nonprotected branches |
|
|
* |
* |
* |
| Add tags |
|
|
* |
* |
* |
| Write a wiki |
|
|
* |
* |
* |
| Manage the issue tracker |
|
|
* |
* |
* |
| Add new team members |
|
|
|
* |
* |
| Push changes to protected branches |
|
|
|
* |
* |
| Manage the branch protection |
|
|
|
* |
* |
| Manage Git tags |
|
|
|
* |
* |
| Edit the project |
|
|
|
* |
* |
| Add deploy keys to the project |
|
|
|
* |
* |
| Configure the project hooks |
|
|
|
* |
* |

 浙公网安备 33010602011771号