Spring Security
参考文档:https://www.springcloud.cc/spring-security.html#overall-architecture
一、入门案例
当前案例pom.xml配置
    <parent>
        <groupId>org.springframework.boot</groupId>
        <artifactId>spring-boot-starter-parent</artifactId>
        <version>2.2.1.RELEASE</version>
        <relativePath/> <!-- lookup parent from repository -->
    </parent>
<dependencies>
        <!-- spring security -->
        <dependency>
            <groupId>org.springframework.boot</groupId>
            <artifactId>spring-boot-starter-security</artifactId>
        </dependency>
        <!-- spring web -->
        <dependency>
            <groupId>org.springframework.boot</groupId>
            <artifactId>spring-boot-starter-web</artifactId>
        </dependency>

        <dependency>
            <groupId>org.springframework.boot</groupId>
            <artifactId>spring-boot-starter-test</artifactId>
            <scope>test</scope>
        </dependency>
        <dependency>
            <groupId>org.springframework.security</groupId>
            <artifactId>spring-security-test</artifactId>
            <scope>test</scope>
        </dependency>
    </dependencies>
测试Controller
@RestController
@RequestMapping("/test")
public class TestController {

    @GetMapping("/hello")
    public String hello(){
        return "Spring Security";
    }
}
演示效果:
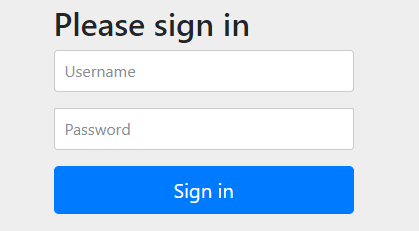
当引入了security时,spring会自动实现认证功能,此时访问 http://localhost:8080/test/hello时,会自动跳转到 http://localhost:8080/login处;
默认用户名:user
默认密码:当前项目运行控制台打印出来的uuid

此时通过用户名和密码可以正常进行认证;
二、基本原理
Spring Security本质是一个过滤器链;
1、过滤器:以下列举其中三个过滤器
FilterSecurityInterceptor:是一个方法级别的权限过滤器,位于过滤器链的最底部;
ExceptionTranslationFilter:是一个异常过滤器,用来处理认证授权过程中抛出的异常;
UsernamePasswordAuthenticationFilter:对/login的post请求做拦截,校验表单中的用户名、密码;
2、过滤器加载过程:
使用SpringSecurity配置过滤器(DelegatingFilterProxy);
public class DelegatingFilterProxy extends GenericFilterBean {

    public void doFilter(ServletRequest request, ServletResponse response, FilterChain filterChain) throws ServletException, IOException {
        Filter delegateToUse = this.delegate;
        if (delegateToUse == null) {
            synchronized(this.delegateMonitor) {
                delegateToUse = this.delegate;
                if (delegateToUse == null) {
                    WebApplicationContext wac = this.findWebApplicationContext();
                    if (wac == null) {
                        throw new IllegalStateException("No WebApplicationContext found: no ContextLoaderListener or DispatcherServlet registered?");
                    }
                    //进行初始化
                    delegateToUse = this.initDelegate(wac);
                }

                this.delegate = delegateToUse;
            }
        }

        this.invokeDelegate(delegateToUse, request, response, filterChain);
    }

    //初始化方法
    protected Filter initDelegate(WebApplicationContext wac) throws ServletException {
        //FilterChainProxy
        String targetBeanName = this.getTargetBeanName();
        Assert.state(targetBeanName != null, "No target bean name set");
        Filter delegate = (Filter)wac.getBean(targetBeanName, Filter.class);
        if (this.isTargetFilterLifecycle()) {
            delegate.init(this.getFilterConfig());
        }

        return delegate;
    }
}
FilterChainProxy
public class FilterChainProxy extends GenericFilterBean {

    public void doFilter(ServletRequest request, ServletResponse response, FilterChain chain) throws IOException, ServletException {
        boolean clearContext = request.getAttribute(FILTER_APPLIED) == null;
        if (clearContext) {
            try {
                request.setAttribute(FILTER_APPLIED, Boolean.TRUE);
                this.doFilterInternal(request, response, chain);
            } finally {
                SecurityContextHolder.clearContext();
                request.removeAttribute(FILTER_APPLIED);
            }
        } else {
            this.doFilterInternal(request, response, chain);
        }

    }

    private void doFilterInternal(ServletRequest request, ServletResponse response, FilterChain chain) throws IOException, ServletException {
        FirewalledRequest fwRequest = this.firewall.getFirewalledRequest((HttpServletRequest)request);
        HttpServletResponse fwResponse = this.firewall.getFirewalledResponse((HttpServletResponse)response);
        List<Filter> filters = this.getFilters((HttpServletRequest)fwRequest);
        if (filters != null && filters.size() != 0) {
            FilterChainProxy.VirtualFilterChain vfc = new FilterChainProxy.VirtualFilterChain(fwRequest, chain, filters);
            vfc.doFilter(fwRequest, fwResponse);
        } else {
            if (logger.isDebugEnabled()) {
                logger.debug(UrlUtils.buildRequestUrl(fwRequest) + (filters == null ? " has no matching filters" : " has an empty filter list"));
            }

            fwRequest.reset();
            chain.doFilter(fwRequest, fwResponse);
        }
    }

    private List<Filter> getFilters(HttpServletRequest request) {
        Iterator var2 = this.filterChains.iterator();

        SecurityFilterChain chain;
        do {
            if (!var2.hasNext()) {
                return null;
            }

            chain = (SecurityFilterChain)var2.next();
        } while(!chain.matches(request));

        return chain.getFilters();
    }
}
3、两个重要接口
UserDetailsService接口
当没有配置时,用户名和密码由spring security定义生成,我们需要自定义逻辑控制认证;
1、创建一个类 继承 UsernamePasswordAuthenticationFilter
2、实现 UserDetailsService接口,编写查询数据库过程,返回User对象(安全框架提供的对象)
3、重写 attemptAuthentication(HttpServletRequest request, HttpServletResponse response) throws AuthenticationException
4、成功调用successfulAuthentication,失败调用unsuccessfulAuthentication
PasswordEncoder接口
通过encode();对数据进行加密;
三、web权限方案
1、设置用户名、密码
方法一:通过配置文件设置;
application.properties文件如下所示:
spring.security.user.name=ithailin
spring.security.user.password=123456
方法二:通过配置类设置;
@Configuration
public class SecurityConfig extends WebSecurityConfigurerAdapter {

    @Override
    protected void configure(AuthenticationManagerBuilder auth) throws Exception {
        //Security加密对象
        BCryptPasswordEncoder passwordEncoder = new BCryptPasswordEncoder();
        //密码加密
        String password = passwordEncoder.encode("123456");
        //设置用户名,密码,权限
        auth.inMemoryAuthentication().withUser("ithailin").password(password).roles("admin");
    }

    //创建一个BCryptPasswordEncoder对象,否则使用BCryptPasswordEncoder对象会报错 java.lang.IllegalArgumentException: There is no PasswordEncoder mapped for the id "null"
    @Bean
    public PasswordEncoder password(){
        return new BCryptPasswordEncoder();
    }
}
方法三:自定义实现类设置
1、创建配置类,设置使用哪个UserDetailsService实现类
@Configuration
public class SecurityConfigTest extends WebSecurityConfigurerAdapter {

    @Autowired
    MyUserDetailsService userDetailsService;

    @Override
    protected void configure(AuthenticationManagerBuilder auth) throws Exception {
        auth.userDetailsService(userDetailsService).passwordEncoder(password());
    }

    //创建一个BCryptPasswordEncoder对象,否则使用BCryptPasswordEncoder对象会报错 java.lang.IllegalArgumentException: There is no PasswordEncoder mapped for the id "null"
    @Bean
    public PasswordEncoder password(){
        return new BCryptPasswordEncoder();
    }
}
2、编写配置类,返回User对象,User对象包含用户名、密码、权限
@Service
public class MyUserDetailsService implements UserDetailsService {

    @Override
    public UserDetails loadUserByUsername(String s) throws UsernameNotFoundException {
        //权限集合
        List<GrantedAuthority> authorities = AuthorityUtils.commaSeparatedStringToAuthorityList("role");
        //权限参数不能为null
        return new User("ithailin",new BCryptPasswordEncoder().encode("123456"),authorities);
    }
}
拓展
设置自定义登录页面、不进行拦截的请求等相关配置:重写 protected void configure(HttpSecurity http){};修改配置类如下所示:
@Configuration
public class SecurityConfigTest extends WebSecurityConfigurerAdapter {

    @Autowired
    MyUserDetailsService userDetailsService;

    @Override
    protected void configure(AuthenticationManagerBuilder auth) throws Exception {
        auth.userDetailsService(userDetailsService).passwordEncoder(password());
    }

    //创建一个BCryptPasswordEncoder对象,否则使用BCryptPasswordEncoder对象会报错 java.lang.IllegalArgumentException: There is no PasswordEncoder mapped for the id "null"
    @Bean
    public PasswordEncoder password(){
        return new BCryptPasswordEncoder();
    }

    //设置自定义登录表单
    @Override
    protected void configure(HttpSecurity http) throws Exception {
        //自定义登录页面
        http.formLogin()
                //登录页面设置
                .loginPage("/login.html")
                //登录访问路径
                .loginProcessingUrl("/user/login")
                //登录成功之后跳转路径
                .defaultSuccessUrl("/test/index").permitAll()
                .and().authorizeRequests()
                //设置哪些路径可以直接访问,不需要认证
                .antMatchers("/","/test/hello","/user/login").permitAll()
                .anyRequest().authenticated()
                //关闭csrf防护
                .and().csrf().disable();
    }
}
2、基于角色或权限进行访问控制
1、hasAuthority:当前资源需要指定的权限(单个权限),用户具有则返回true,否则返回false;
1、在配置类设置当前访问路径需要的权限
新增
//当前登录用户,只有具有admin权限才可以访问这个路径
.antMatchers("/test/index").hasAuthority("admin")
新增后如下所示:
@Configuration
public class SecurityConfigTest extends WebSecurityConfigurerAdapter {

    @Autowired
    MyUserDetailsService userDetailsService;

    @Override
    protected void configure(AuthenticationManagerBuilder auth) throws Exception {
        auth.userDetailsService(userDetailsService).passwordEncoder(password());
    }

    //创建一个BCryptPasswordEncoder对象,否则使用BCryptPasswordEncoder对象会报错 java.lang.IllegalArgumentException: There is no PasswordEncoder mapped for the id "null"
    @Bean
    public PasswordEncoder password(){
        return new BCryptPasswordEncoder();
    }

    //设置自定义登录表单
    @Override
    protected void configure(HttpSecurity http) throws Exception {
        //自定义登录页面
        http.formLogin()
                //登录页面设置
                .loginPage("/login.html")
                //登录访问路径
                .loginProcessingUrl("/user/login")
                //登录成功之后跳转路径
                .defaultSuccessUrl("/test/index").permitAll()
                .and().authorizeRequests()
                //设置哪些路径可以直接访问,不需要认证
                .antMatchers("/","/test/hello","/user/login").permitAll()
                //当前登录用户,只有具有admin权限才可以访问这个路径
                .antMatchers("/test/index").hasAuthority("admin")
                .anyRequest().authenticated()
                //关闭csrf防护
                .and().csrf().disable();
    }
}
2、在UserDetailsService中loadUserByUsername给用户新增权限
//给用户设置权限
List<GrantedAuthority> authorities = AuthorityUtils.commaSeparatedStringToAuthorityList("admin");
UserDetailsService如下所示:
@Service
public class MyUserDetailsService implements UserDetailsService {

    @Autowired
    UserMapper userMapper;

    @Override
    public UserDetails loadUserByUsername(String username) throws UsernameNotFoundException {
        //调用userMapper方法,根据用户名查询数据库
        QueryWrapper<com.ithailin.pojo.User> wrapper = new QueryWrapper<>();
        //where username = ?
        wrapper.eq("username",username);
        com.ithailin.pojo.User user = userMapper.selectOne(wrapper);
        if (user == null){
            //数据库没有用户名,认证失败
            throw new UsernameNotFoundException("用户名不存在!");
        }

        //给用户设置权限
        List<GrantedAuthority> authorities = AuthorityUtils.commaSeparatedStringToAuthorityList("admin");
        //权限参数不能为null
        return new User(user.getUsername(),new BCryptPasswordEncoder().encode(user.getPassword()),authorities);
    }
}
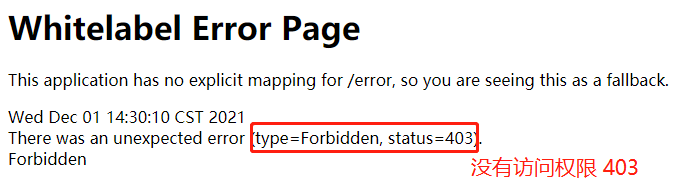
若没有访问权限,如下所示:
2、hasAnyAuthority:当前资源需要指定的权限(多个权限),用户只需要具有其中一个就可以访问,具有返回true,否则返回false;
更新配置
//当前用户只需具有一下其中一个权限,就可以访问
.antMatchers("/test/index").hasAnyAuthority("admin,manager")
更新后配置如下所示:
    //设置自定义登录表单
    @Override
    protected void configure(HttpSecurity http) throws Exception {
        //自定义登录页面
        http.formLogin()
                //登录页面设置
                .loginPage("/login.html")
                //登录访问路径
                .loginProcessingUrl("/user/login")
                //登录成功之后跳转路径
                .defaultSuccessUrl("/test/index").permitAll()
                .and().authorizeRequests()
                //设置哪些路径可以直接访问,不需要认证
                .antMatchers("/","/test/hello","/user/login").permitAll()
                //当前登录用户,只有具有admin权限才可以访问这个路径
                //.antMatchers("/test/index").hasAuthority("admin")
                //当前用户只需具有一下其中一个权限,就可以访问
                .antMatchers("/test/index").hasAnyAuthority("admin,manager")
                .anyRequest().authenticated()
                //关闭csrf防护
                .and().csrf().disable();
    }
相关源码
        public ExpressionUrlAuthorizationConfigurer<H>.ExpressionInterceptUrlRegistry hasAuthority(String authority) {
            return this.access(ExpressionUrlAuthorizationConfigurer.hasAuthority(authority));
        }

        //单个参数
        private static String hasAuthority(String authority) {
            //当前权限
            return "hasAuthority('" + authority + "')";
        }

        public ExpressionUrlAuthorizationConfigurer<H>.ExpressionInterceptUrlRegistry hasAnyAuthority(String... authorities) {
            return this.access(ExpressionUrlAuthorizationConfigurer.hasAnyAuthority(authorities));
        }

        //多个参数
        private static String hasAnyAuthority(String... authorities) {
            //权限之间英文逗号隔开
            String anyAuthorities = StringUtils.arrayToDelimitedString(authorities, "','");
            return "hasAnyAuthority('" + anyAuthorities + "')";
        }
3、hasRole:当前资源需要指定的用户角色(单个角色),用户具有则返回true,否则返回false;
//hasRole,当前用户需要具有 ROLE_sale角色才能访问
.antMatchers("/test/index").hasRole("sale")
4、hasAnyRole:当前资源需要指定的用户角色(多个角色),用户具有其中一个就可以访问,具体则返回true,否则返回false;
//hasAnyRole,当前用户需要具有 多个角色(ROLE_sale,ROLE_admin)中的其中一个,就可以访问
.antMatchers("/test/index").hasAnyRole("sale,admin")
相关源码
        public ExpressionUrlAuthorizationConfigurer<H>.ExpressionInterceptUrlRegistry hasRole(String role) {
            return this.access(ExpressionUrlAuthorizationConfigurer.hasRole(role));
        }

        //单个角色
        private static String hasRole(String role) {
            Assert.notNull(role, "role cannot be null");
            if (role.startsWith("ROLE_")) {
                throw new IllegalArgumentException("role should not start with 'ROLE_' since it is automatically inserted. Got '" + role + "'");
            } else {
                //拼接前缀“ROLE_”
                return "hasRole('ROLE_" + role + "')";
            }
        }


        public ExpressionUrlAuthorizationConfigurer<H>.ExpressionInterceptUrlRegistry hasAnyRole(String... roles) {
            return this.access(ExpressionUrlAuthorizationConfigurer.hasAnyRole(roles));
        }

        //多个角色
        private static String hasAnyRole(String... authorities) {
            String anyAuthorities = StringUtils.arrayToDelimitedString(authorities, "','ROLE_");
            //拼接前缀“ROLE_”
            return "hasAnyRole('ROLE_" + anyAuthorities + "')";
        }
5、自定义页面(403:没有访问权限页面)
新增配置
        //配置没有权限跳转到自定义的页面
        http.exceptionHandling().accessDeniedPage("/unauth.html");
3、基于角色或权限进行访问控制(注解)
1、@Secured:若标注在方法上
需要在启动类上开启注解
@EnableGlobalMethodSecurity(securedEnabled = true)
    //当前用户具有其中一个角色,才可以访问该方法
    @Secured({"ROLE_sale","ROLE_manager"})
若标注在类上:所有方法都将进行角色验证;
2、@PreAuthorize:若标注在方法上
需要在启动类上开启注解
@EnableGlobalMethodSecurity(prePostEnabled = true)
    //在进入方法前验证,是否具有相应权限,具体才可以访问
    @PreAuthorize("hasAnyAuthority('admin,system')")
若标注在类上:所有方法都将进行权限验证;
3、@PostAuthorize:若标注在方法上
需要在启动类上开启注解
@EnableGlobalMethodSecurity(prePostEnabled = true)
    //在方法执行之后,进行权限验证,具有才可以访问,若不具有,会提示没有访问权限,但方法已经执行
    @PostAuthorize("hasAnyAuthority('admin,system')")
若标注在类上:所有方法都将在执行之后进行权限验证;
4、@PostFilter:若标注在方法上
需要在启动类上开启注解
@EnableGlobalMethodSecurity(prePostEnabled = true)
对当前方法返回的数据进行过滤,满足条件的数据则进行返回,不满足条件的数据被筛选掉;
    @GetMapping("/list")
    //当前返回集合中,username == test1的被返回,其余数据被筛选掉,不返回
    @PostFilter(value = "filterObject.username == 'test1'")
    public List list(){
        System.out.println("list...........");
        List list = new ArrayList();
        User user1 = new User(1,"test1","123456");
        User user2 = new User(2,"test2","123456");
        list.add(user1);
        list.add(user2);
        return list;
    }

若标注在类上:所有方法都将对返回的数据进行过滤,满足条件的数据则进行返回,不满足条件的数据被筛选掉;
注意:当标注在类上时,若其中某一方法,返回的数据结构不满足,会报错:java.lang.IllegalArgumentException: Filter target must be a collection, array, or stream type, but was Spring Security
5、@PreFilter:若标注在方法上
需要在启动类上开启注解
@EnableGlobalMethodSecurity(prePostEnabled = true)
对当前方法传入的参数进行过滤,满足条件的参数进行传入,不满足条件的参数被筛选掉,不进行传入;
4、注销
新增配置
//退出
http.logout().logoutUrl("/logout").logoutSuccessUrl("/test/hello").permitAll();
配置如下所示:
    //设置自定义登录表单
    @Override
    protected void configure(HttpSecurity http) throws Exception {
        //退出
        http.logout().logoutUrl("/logout").logoutSuccessUrl("/test/hello").permitAll();
        //配置没有权限跳转到自定义的页面
        http.exceptionHandling().accessDeniedPage("/unauth.html");
        //自定义登录页面
        http.formLogin()
                //登录页面设置
                .loginPage("/login.html")
                //登录访问路径
                .loginProcessingUrl("/user/login")
                //登录成功之后跳转路径
                .defaultSuccessUrl("/success.html").permitAll()
                .and().authorizeRequests()
                //设置哪些路径可以直接访问,不需要认证
                .antMatchers("/","/test/hello","/user/login").permitAll()
                //当前登录用户,只有具有admin权限才可以访问这个路径
                //.antMatchers("/test/index").hasAuthority("admin")
                //当前用户只需具有一下其中一个权限,就可以访问
                //.antMatchers("/test/index").hasAnyAuthority("admin,manager")
                //hasRole,当前用户需要具有 ROLE_sale角色才能访问
                //.antMatchers("/test/index").hasRole("sale")
                //hasAnyRole,当前用户需要具有 多个角色(ROLE_sale,ROLE_admin)中的其中一个,就可以访问
                //.antMatchers("/test/index").hasAnyRole("sale,admin")
                .anyRequest().authenticated()
                //关闭csrf防护
                .and().csrf().disable();
    }
<body>
<h1>success</h1>
<a href="/logout">注销</a>
</body>
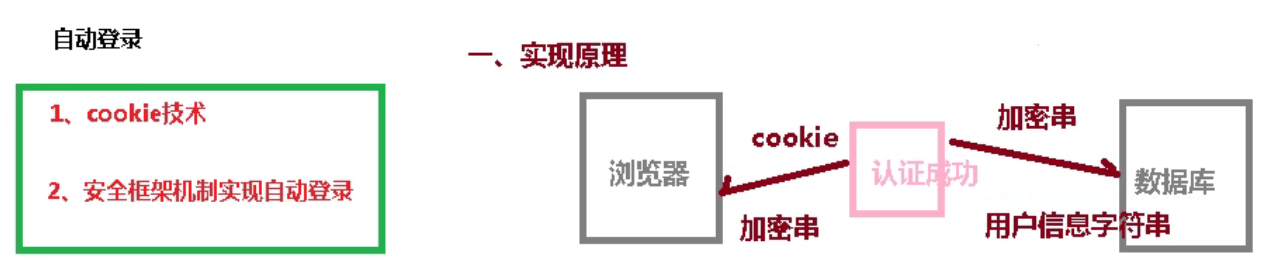
5、自动登录(记住我)
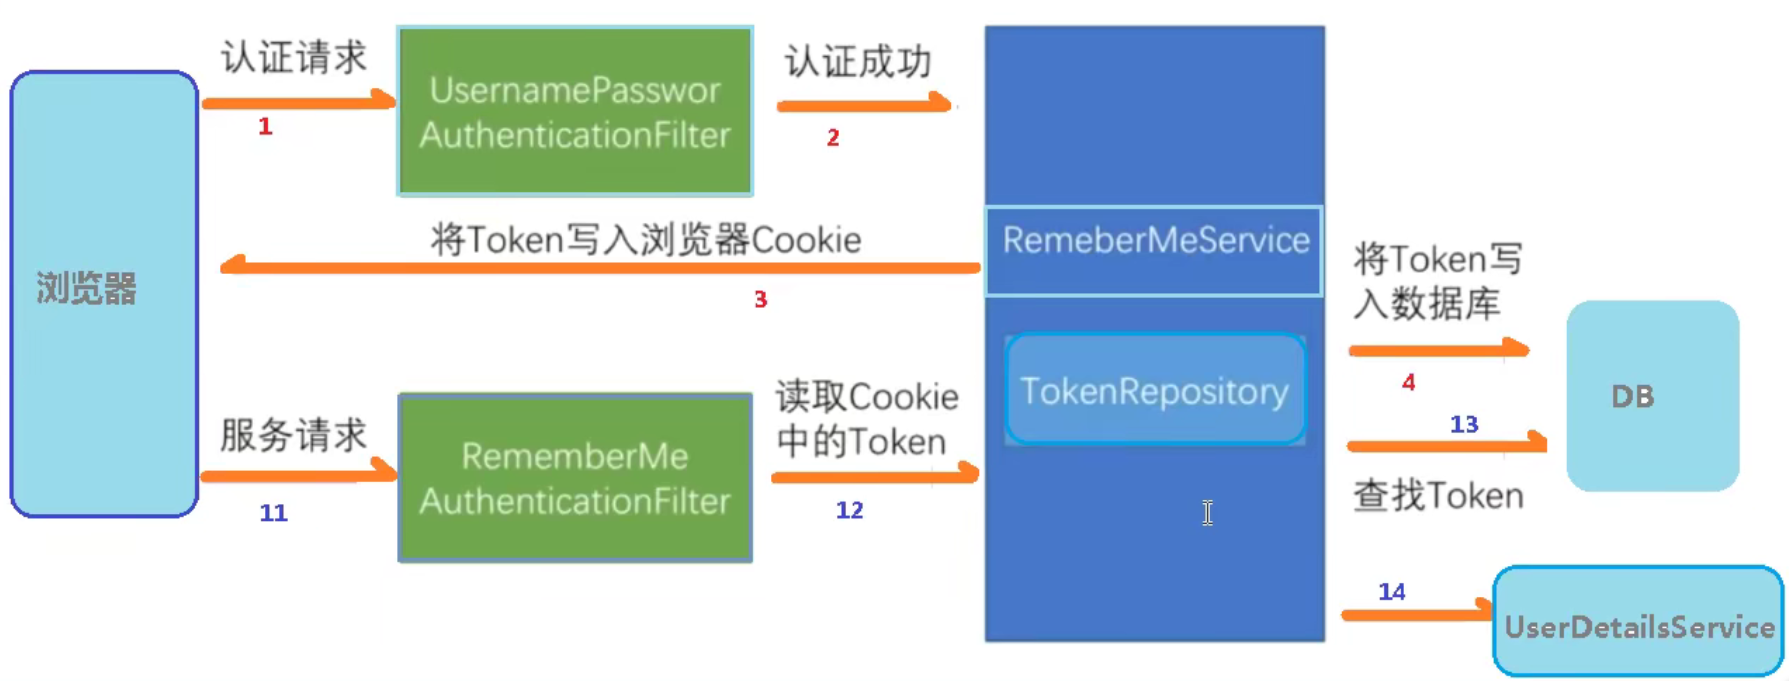
新增以下配置:
    @Autowired
    DataSource dataSource;

    @Bean
    public PersistentTokenRepository persistentTokenRepository(){
        JdbcTokenRepositoryImpl jdbcTokenRepository = new JdbcTokenRepositoryImpl();
        //设置数据源
        jdbcTokenRepository.setDataSource(dataSource);
        //自动创建表
        jdbcTokenRepository.setCreateTableOnStartup(true);
        return jdbcTokenRepository;
    }
                //记住我
                .and().rememberMe().tokenRepository(persistentTokenRepository())
                //设置60秒有效期
                .tokenValiditySeconds(60)
                .userDetailsService(userDetailsService)
    <!-- 当前框架“记住我” name值是固定值 “remember-me” -->
    <input type="checkbox" name="remember-me"/>记住我
    <br/>
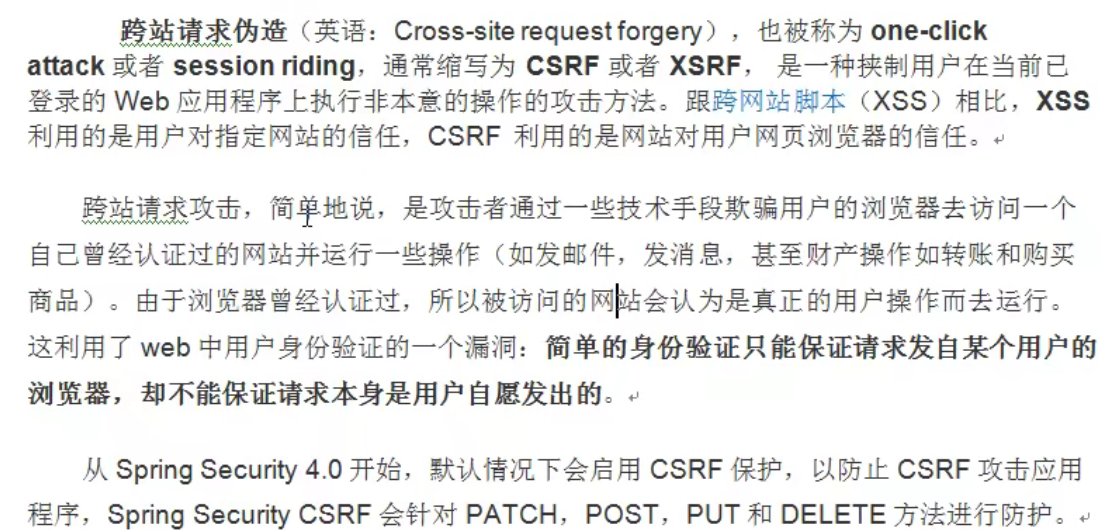
6、csrf
功能主要实现是基于CsrfFilter.class类中的doFilterInternal方法
    protected void doFilterInternal(HttpServletRequest request, HttpServletResponse response, FilterChain filterChain) throws ServletException, IOException {
        request.setAttribute(HttpServletResponse.class.getName(), response);
        //生成一个token,并且将token存入到session中
        CsrfToken csrfToken = this.tokenRepository.loadToken(request);
        boolean missingToken = csrfToken == null;
        if (missingToken) {
            csrfToken = this.tokenRepository.generateToken(request);
            this.tokenRepository.saveToken(csrfToken, request, response);
        }

        request.setAttribute(CsrfToken.class.getName(), csrfToken);
        //得到表单传过来的token值
        request.setAttribute(csrfToken.getParameterName(), csrfToken);
        //表单传过来token与session中的token值进行比较
        if (!this.requireCsrfProtectionMatcher.matches(request)) {
            /**
             * this.requireCsrfProtectionMatcher
             *
             *   public static final RequestMatcher DEFAULT_CSRF_MATCHER = new CsrfFilter.DefaultRequiresCsrfMatcher();
             *   private RequestMatcher requireCsrfProtectionMatcher;
             *        new CsrfFilter.DefaultRequiresCsrfMatcher();
             *
             *         以下请求,CSRF不做防护,直接放行
             *        private DefaultRequiresCsrfMatcher() {
             *            this.allowedMethods = new HashSet(Arrays.asList("GET", "HEAD", "TRACE", "OPTIONS"));
             *        }
             */
            filterChain.doFilter(request, response);
        } else {
            String actualToken = request.getHeader(csrfToken.getHeaderName());
            if (actualToken == null) {
                actualToken = request.getParameter(csrfToken.getParameterName());
            }

            if (!csrfToken.getToken().equals(actualToken)) {
                if (this.logger.isDebugEnabled()) {
                    this.logger.debug("Invalid CSRF token found for " + UrlUtils.buildFullRequestUrl(request));
                }

                if (missingToken) {
                    this.accessDeniedHandler.handle(request, response, new MissingCsrfTokenException(actualToken));
                } else {
                    this.accessDeniedHandler.handle(request, response, new InvalidCsrfTokenException(csrfToken, actualToken));
                }

            } else {
                filterChain.doFilter(request, response);
            }
        }
    }
在pom.xml中引入thymeleaf模板
        <!-- https://mvnrepository.com/artifact/org.springframework.boot/spring-boot-starter-thymeleaf -->
        <dependency>
            <groupId>org.springframework.boot</groupId>
            <artifactId>spring-boot-starter-thymeleaf</artifactId>
            <version>2.5.6</version>
        </dependency>
当我们关闭csrf防护时,需要进行配置(默认开启),注释不写则默认开启
                //关闭csrf防护
                .and().csrf().disable();
若开启csrf防护,此时已经登录不上去了,因为进行了csrf防护验证,需要验证表单提交的token值,进行以下配置
1、在login.html新增token值,将其与表单一起提交,验证成功放行
<input type="hidden" th:name="${_csrf.parameterName}" th:value="${_csrf.token}"/>
2、我们在登录成功打印出token值看看
<span th:text="${_csrf.token}"></span>
未完待续。。。

 浙公网安备 33010602011771号