DHCP IPv4和IPv6服务搭建
OS: CentOS 7.6
DHCP IPv4 来源 >> https://www.zutuanxue.com/home/4/5_257
1. 关闭防火墙和selinux
systemctl stop firewalld.service
systemctl disable firewalld.service
vim /etc/selinux/config
SELINUX=enforcing 改为 SELINUX=disabled
reboot
2. 67端口来自于服务端,68端口来自于客户端
3. 安装DHCP > yum -y install dhcp
4. Server端必须配置当前DHCP网段中的一个静态地址,才能启动DHCP服务
5. 配置文件 /etc/dhcp/dhcpd.conf
option domain-name "example.org";
option domain-name-servers ns1.example.org, ns2.example.org;
default-lease-time 600;
max-lease-time 7200;
# If this DHCP server is the official DHCP server for the local
# network, the authoritative directive should be uncommented.
#authoritative;
log-facility local7;
# No service will be given on this subnet, but declaring it helps the
# DHCP server to understand the network topology.
subnet 10.10.1.0 netmask 255.255.255.0 {
range 10.10.1.1 10.10.1.253;
option domain-name-servers 202.106.0.20, 114.114.114.114;
option routers 10.10.1.254;
option broadcast-address 10.10.1.255;
default-lease-time 7200;
max-lease-time 10800;
}
6. 保留地址方式,让固定机器的IP保持不变
在配置文件末尾加入以下内容
host print {
hardware ethernet <MAC address>
fixed-address <IP address>
}
host print host为指令,print是个名字,随便起,但是最好有意义,要不过一段你也记不住了。
hardware ethernet 指定以太网网卡MAC地址
fixed-address 指定要绑定的IP
7. 查看DHCP租约地址信息 /var/lib/dhcpd/dhcpd.leases
8. 超级作用域,支持多个网段分发IP
修改配置文件内容
shared-network supper {
subnet ...{
}
subnet ...{
}
}
DHCP IPv6
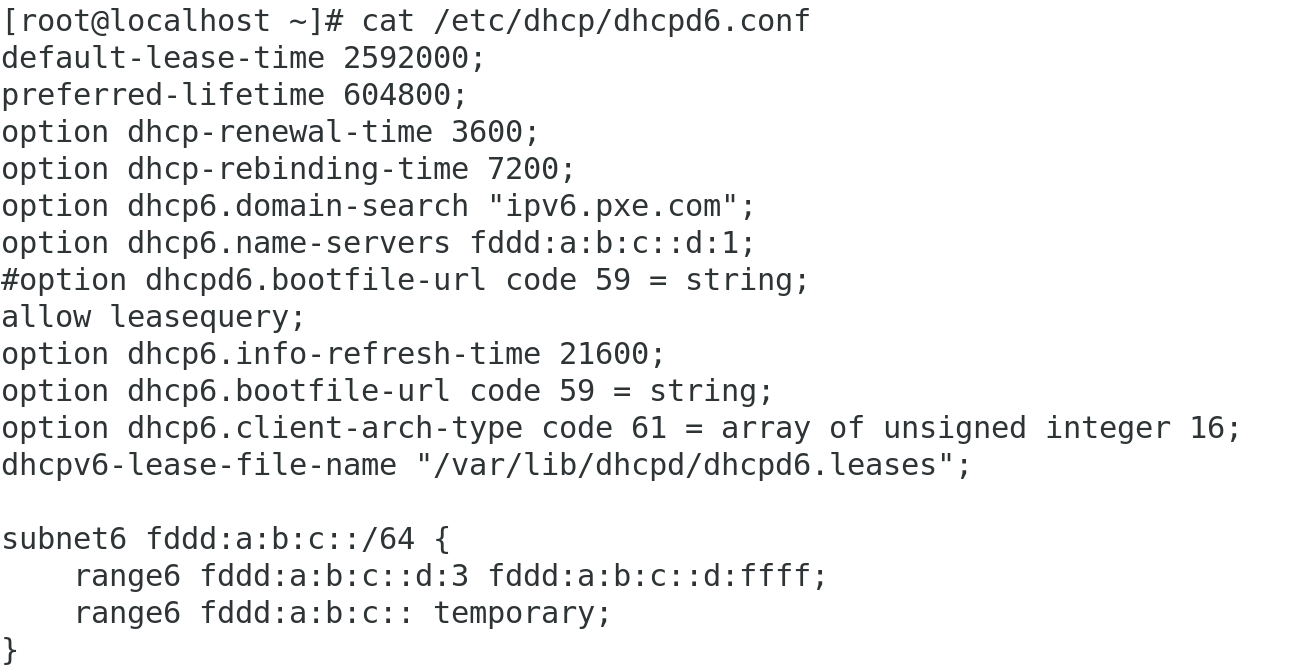
1. 配置dhcpd6.conf文件,vim /etc/dhcp/dhcpd6.conf
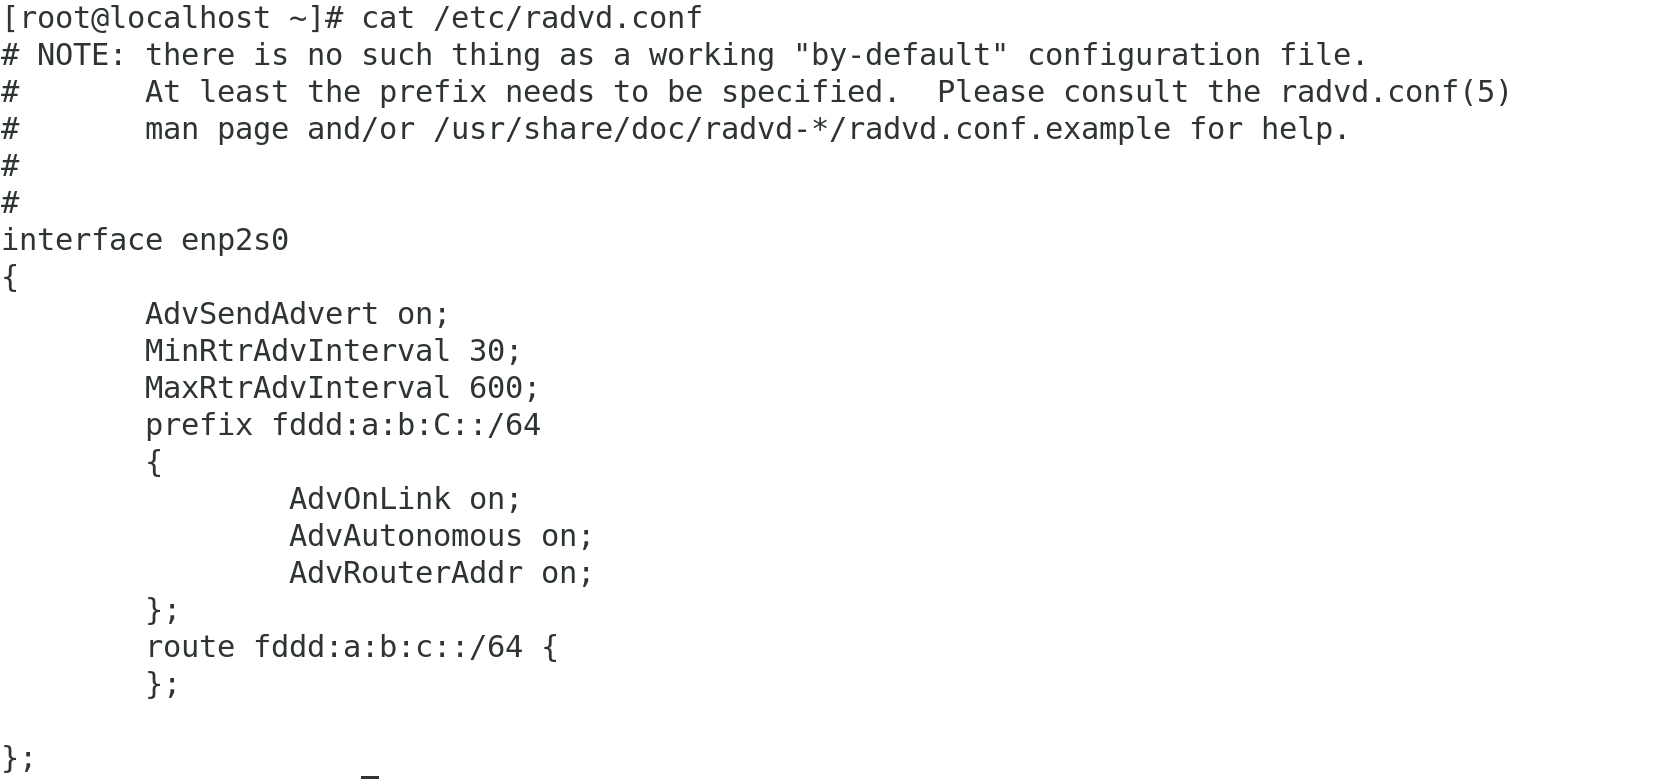
2. 安装radvd, yum -y install radvd. 配置radvd.conf, vim /etc/radvd.conf
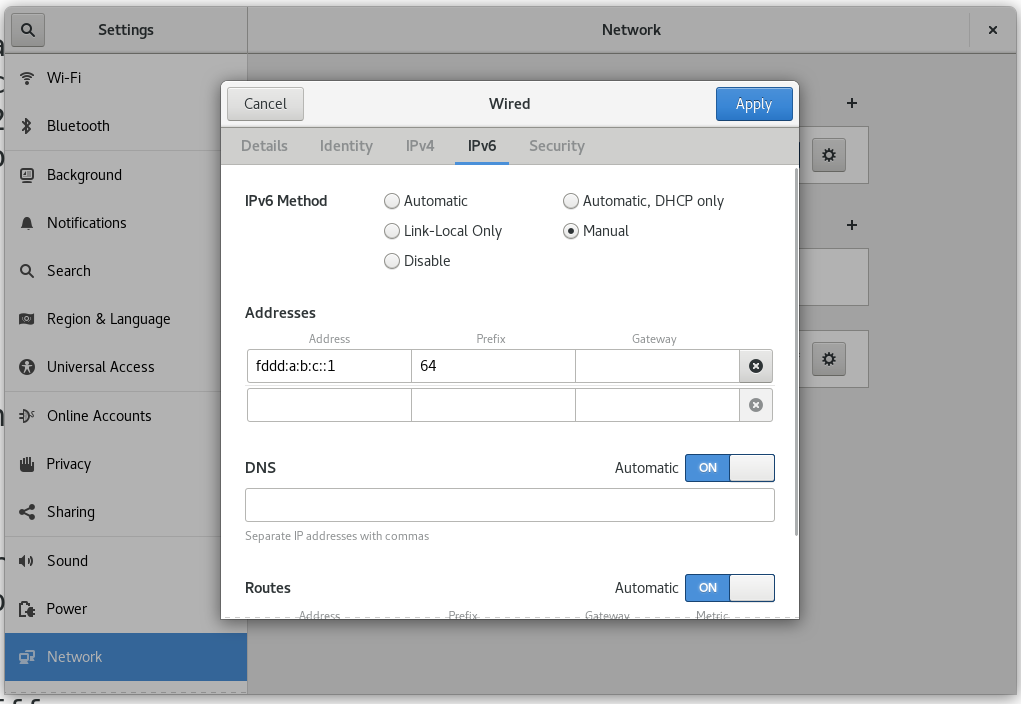
3. 服务端需要先配置当前网段的任意一静态ipv6地址,否则无法启动dhcpd6服务
4. 启动服务,systemctl start dhcpd6、systemctl start radvd
5. server端添加ipv6转发功能,echo "net.ipv6.conf.all.forwarding=1" >> /etc/sysctl.conf
5. 查看server与client是否能正常通信

 浙公网安备 33010602011771号