[AWS] Deploy GeoDjango to AWS EC2
VPC的选择导致自动生成IPv4。
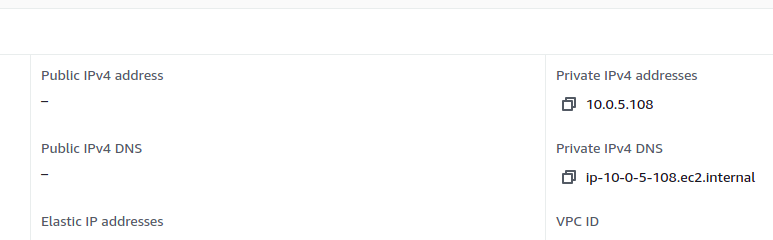
VPC
Installing Geo Server and PostGIS on AWS EC2 Instance
一、资源列表
10 May 2020
实践:https://remotely360.com/blog/geospatial-location-intelligence/geoserver-postgis-aws【***】
参考:How to Provision a Cheap PostgreSQL Database in AWS EC2
Django的部署:How to create ec2 instance in aws | Part 1 | Django Deployment【注意端口 2:45】
参考:How to install PostgreSQL on AWS EC2【**】
不错的样子:Setting up a Django + MySQL Development Environment on AWS EC2 Linux 2【*** 可用】
EC2 Terminal 不需要密码,直接sudo。
设置完postgresql,记得重启服务。
ubuntu@ip-172-xx-xx-xx:/var/lib/tomcat8/webapps$ sudo systemctl restart postgresql
二、Apache部署Django
Ref: Python Django Tutorial: Deploying Your Application (Option #1) - Deploy to a Linux Server since 44:50
部署成功,会有相关的配置:/etc/apache2/sites-available/django_project.conf


ubuntu@ip-172-30-0-93:~$ sudo apt-get install apache2
Reading package lists... Done
Building dependency tree
Reading state information... Done
apache2 is already the newest version (2.4.29-1ubuntu4.16).
apache2 set to manually installed.
0 upgraded, 0 newly installed, 0 to remove and 3 not upgraded.
ubuntu@ip-172-30-0-93:~$
ubuntu@ip-172-30-0-93:~$
ubuntu@ip-172-30-0-93:~$ sudo apt-get install libapache2-mod-wsgi-py3
Reading package lists... Done
Building dependency tree
Reading state information... Done
The following NEW packages will be installed:
  libapache2-mod-wsgi-py3
0 upgraded, 1 newly installed, 0 to remove and 3 not upgraded.
Need to get 88.3 kB of archives.
After this operation, 278 kB of additional disk space will be used.
Get:1 http://us-east-1.ec2.archive.ubuntu.com/ubuntu bionic-updates/universe amd64 libapache2-mod-wsgi-py3 amd64 4.5.17-1ubuntu1 [88.3 kB]
Fetched 88.3 kB in 0s (6622 kB/s)
Selecting previously unselected package libapache2-mod-wsgi-py3.
(Reading database ... 112393 files and directories currently installed.)
Preparing to unpack .../libapache2-mod-wsgi-py3_4.5.17-1ubuntu1_amd64.deb ...
Unpacking libapache2-mod-wsgi-py3 (4.5.17-1ubuntu1) ...
Setting up libapache2-mod-wsgi-py3 (4.5.17-1ubuntu1) ...
apache2_invoke: Enable module wsgi
ubuntu@ip-172-30-0-93:~$
ubuntu@ip-172-30-0-93:~$
ubuntu@ip-172-30-0-93:~$ cd /etc/apache2/sites-available/
ubuntu@ip-172-30-0-93:/etc/apache2/sites-available$
ubuntu@ip-172-30-0-93:/etc/apache2/sites-available$ ls
000-default.conf  default-ssl.conf
ubuntu@ip-172-30-0-93:/etc/apache2/sites-available$
ubuntu@ip-172-30-0-93:/etc/apache2/sites-available$ sudo cp 000-default.conf django_project.conf
复制一个模板建立django_project.conf后,修改如下。
 30         Alias /static /home/ubuntu/mobilar-multi-users/static
 31         <Directory /home/ubuntu/mobilar-multi-users/static>
 32                 Require all granted
 33         </Directory>
 34
 35         Alias /media /home/ubuntu/mobilar-multi-users/media
 36         <Directory /home/ubuntu/mobilar-multi-users/media>
 37                 Require all granted
 38         </Directory>
 39
 40         <Directory /home/ubuntu/mobilar-multi-users/django_project>
 41                 <Files wsgi.py>
 42                         Require all granted
 43                 </Files>
 44         </Directory>
 45
 46         WSGIScriptAlias / /home/ubuntu/mobilar-multi-users/django_project/wsgi.py
 47         WSGIDaemonProcess django_app python-path=/home/ubuntu/mobilar-multi-users python-home=/home/ubuntu/mobilar-multi-users/venv
 48         WSGIProcessGroup django_app
然后,就启动自己的,关闭掉之前默认的。
ubuntu@ip-172-30-0-93:/etc/apache2/sites-available$ sudo vim django_project.conf
ubuntu@ip-172-30-0-93:/etc/apache2/sites-available$ sudo a2ensite django_project
Enabling site django_project.
To activate the new configuration, you need to run:
  systemctl reload apache2
ubuntu@ip-172-30-0-93:/etc/apache2/sites-available$ sudo a2ensite mobilar-multi-users
ERROR: Site mobilar-multi-users does not exist!
ubuntu@ip-172-30-0-93:/etc/apache2/sites-available$
ubuntu@ip-172-30-0-93:/etc/apache2/sites-available$ sudo a2dissite 000-default.conf
Site 000-default disabled.
To activate the new configuration, you need to run:
  systemctl reload apache2
权利下放给apache。
ubuntu@ip-172-30-0-93:~$ sudo chown :www-data mobilar-multi-users/db.sqlite3
ubuntu@ip-172-30-0-93:~$ sudo chmod 664 mobilar-multi-users/db.sqlite3
ubuntu@ip-172-30-0-93:~$ sudo chown :www-data mobilar-multi-users/

ubuntu@ip-172-30-0-93:~$ mkdir mobilar-multi-users/media
ubuntu@ip-172-30-0-93:~$ sudo chown -R :www-data mobilar-multi-users/media/
ubuntu@ip-172-30-0-93:~$ sudo chmod -R 755 mobilar-multi-users/media/
Rule的设置。
ubuntu@ip-172-30-0-93:~$ sudo ufw delete allow 8000
Could not delete non-existent rule
Could not delete non-existent rule (v6)
ubuntu@ip-172-30-0-93:~$ sudo ufw allow http/tcp
Rules updated
Rules updated (v6)
ubuntu@ip-172-30-0-93:~$ sudo service apache2 restart
之后内容,具体参见视频。
三、enable HTTPS with a free SSL/TLS Certificate
Ref: Python Django Tutorial: How to enable HTTPS with a free SSL/TLS Certificate using Let's Encrypt
-
更为简单的策略
Ref: https://github.com/teddziuba/django-sslserver
打开ec2的https的security group,无需 Apache2,但要注意 ALLOWED_HOSTS。
End.

 浙公网安备 33010602011771号