[Django] 11 - Template, JS and CSS
创建一个简单的 Django 项目
Ref: https://www.runoob.com/django/django-first-app.html
Ref: https://www.runoob.com/django/django-template.html
一、基本套路
|-- HelloWorld
|   |-- __init__.py
|   |-- asgi.py
|   |-- settings.py
|   |-- urls.py
|   |-- views.py
|   `-- wsgi.py
`-- manage.py
首先 view,但如何被调用?
from django.http import HttpResponse

def hello(request):
    return HttpResponse("Hello world ! ")  # <---- 可以使用 template
在 url 中,直接import 并调用即可。
from django.conf.urls import url

from . import views

urlpatterns = [
    url(r'^$', views.hello),
]
二、使用模板
-
配置模板路径
...
TEMPLATES = [
    {
        'BACKEND': 'django.template.backends.django.DjangoTemplates',
        'DIRS': [os.path.join(BASE_DIR, 'templates')],       # 修改位置
        'APP_DIRS': True,
        'OPTIONS': {
            'context_processors': [
                'django.template.context_processors.debug',
                'django.template.context_processors.request',
                'django.contrib.auth.context_processors.auth',
                'django.contrib.messages.context_processors.messages',
            ],
        },
    },
]
...
-
带 template 的 view
不同于上面的 hello,这个开始使用 模板。 url调用也是上述的套路。
from django.shortcuts import render

defhello_runoob(request):
    context          = {}
    context['hello'] = 'Hello World!'
    return render(request, 'runoob.html', context)  # context 改为: {"hello": 'Hello World!'}
context 作为参数进 template html。
三、模板中常用的语法规则
-
列表
.0 是通过 点,而不是[ ]。
<p>{{ views_list }}</p>   # 取出整个列表
<p>{{ views_list.0 }}</p> # 取出列表的第一个元素
-
字典
name 就是 key
<p>{{ views_dict }}</p>
<p>{{ views_dict.name }}</p>
-
过滤器
将列表中的第一个元素大写化。也可以有参数。
{{ my_list|first|upper }}
{{ pub_date|date:"F j, Y" }} # date : 按指定的格式字符串参数格式化 date 或者 datetime 对象
-
-
空则默认值
-
当 name 是空值时,提供一个默认值。
# 这些是默认值: 0  0.0  False  0j  ""  []  ()  set()  {}  None

{{ name|default:"菜鸟教程666" }}
-
-
返回长度
-
{{ name|length}}
filesizeformat, 以更易读的方式显示文件的大小
date, 根据给定格式对一个日期变量进行格式化。
truncatechars, 如果字符串包含的字符总个数多于指定的字符数量,那么会被截断掉后面的部分。
safe, 将字符串标记为安全,不需要转义。
-
if/else 标签
{% if condition1 %}
   ... display 1
{% elif condition2 %}
   ... display 2
{% else %}
   ... display 3
{% endif %}
-
-
ifequal / ifnotequal 标签
-
看上去 跟if/else没有 大区别。
{% ifequal section 'sitenews' %}
    <h1>Site News</h1>
{% else %}
    <h1>No News Here</h1>
{% endifequal %}
-
for 标签
{% for i in views_list %}
{{ i }}
{% endfor %}
-
-
遍历字典
-
{% for i,j in views_dict.items %}
{{ i }}---{{ j }}
{% endfor %}
-
-
forloop
-
在 {% for %} 标签里可以通过 {{forloop}} 变量获取循环序号。
-
-
- forloop.counter: 顺序获取循环序号,从 1 开始计算
- forloop.counter0: 顺序获取循环序号,从 0 开始计算
- forloop.revcounter: 倒叙获取循环序号,结尾序号为 1
- forloop.revcounter0: 倒叙获取循环序号,结尾序号为 0
- forloop.first(一般配合if标签使用): 第一条数据返回 True,其他数据返回 False
- forloop.last(一般配合if标签使用): 最后一条数据返回 True,其他数据返回 False
-
注意,这里只是显示index,i的内容可自行填补的每行的后边。
{% for i in listvar %}
    {{ forloop.counter }}
    {{ forloop.counter0 }}
    {{ forloop.revcounter }}
    {{ forloop.revcounter0 }}
    {{ forloop.first }}
    {{ forloop.last }}
{% endfor %}
-
-
{% empty %}
-
如果列表是空,则显示默认的内容。可以理解为 list 的默认值。
{% for i in listvar %}
    {{ forloop.counter0 }}
{% empty %}
    空空如也~
{% endfor %}
-
-
嵌套 {% for %} 标签
-
{% for athlete in athlete_list %}
    <h1>{{ athlete.name }}</h1>
    <ul>
    {% for sport in athlete.sports_played %}
        <li>{{ sport }}</li>
    {% endfor %}
    </ul>
{% endfor %}
-
注释标签
{# 这是一个注释 #}
-
include 标签
允许在模板中包含其它的模板的内容。,例如,包含了 nav.html 模板
{% include "nav.html" %}
四、模板继承
-
父模板 与 子模板
{% block 名称 %}
预留给子模板的区域,可以设置设置默认内容
{% endblock 名称 %}
先准备一个父模板:HelloWorld/templates/base.html
<!DOCTYPE html>
<html>
<head>
<meta charset="utf-8">
<title>菜鸟教程(runoob.com)</title>
</head>
<body>
    <h1>Hello World!</h1>
    <p>菜鸟教程 Django 测试。</p>

    {% block mainbody %}
       <p>original</p>
    {% endblock %}
</body>
</html>
子模板:HelloWorld/templates/runoob.html
{% extends "base.html" %}

{% block mainbody %}
<p>继承了 base.html 文件</p>
{% endblock %}
本地 css/js
一、普通套路
Ref: 小猿圈python之Django怎么使用本地css/js文件
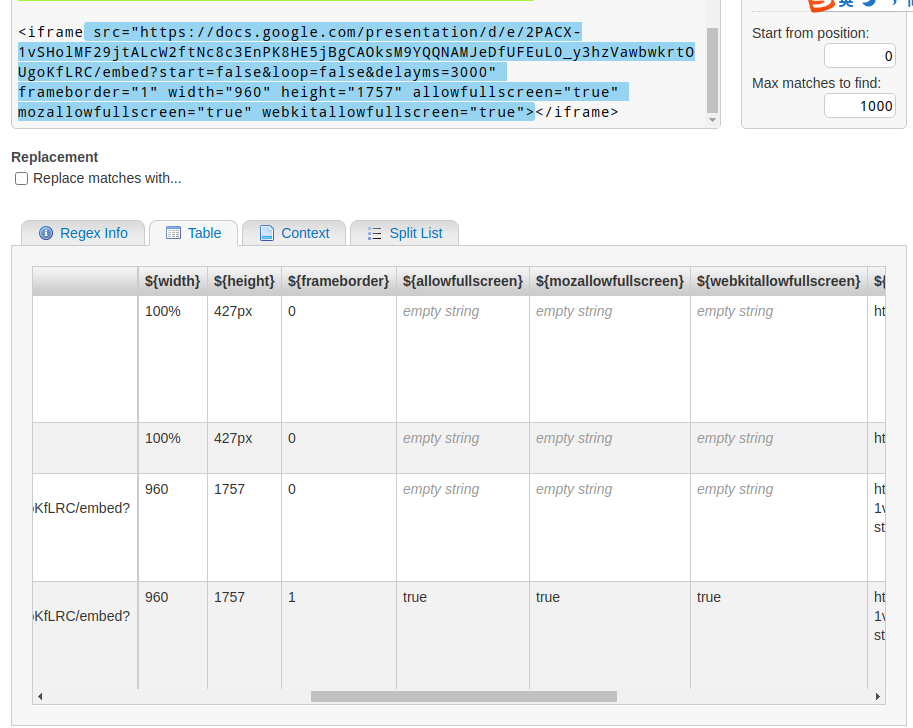
Ref: 正则解析iframe,非常好

(\S+)=["']?((?:.(?!["']?\s+(?:\S+)=|[>"']))+.)["']?
二、ADMIN UI
INSTALLED_APPS = INSTALLED_APPS + [
    'debug_toolbar',
    'django_extensions',
    'wagtail.contrib.styleguide',
]
Ref: https://github.com/CodingForEverybody/learn-wagtail/commit/bd533b96e6f6297e5c5ebf011f6d544f56f6ab88
暫時不實用,以後有用到再研究。
Template Fragment Caching
Ref: Wagtail CMS: How to Add Template Fragment Caching
一、缓存配置
首先确保,打开这部分内容。
Ref: Django 缓存框架,可见下面是使用了缓存中的一种。
# Uncomment this line to enable template caching
# Dont forget to change the LOCATION path
# CACHES = {
#     "default": {
#         "BACKEND": "django.core.cache.backends.filebased.FileBasedCache",
#         "LOCATION": "/path/to/your/site/cache"
#     }
# }
二、缓存 template 的某个片段
-
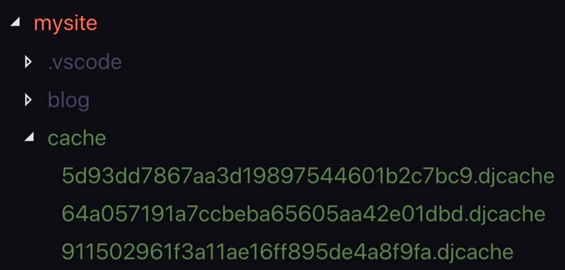
清空 .djcache 文件

手动清空。
from django.core.cache import cache

cache.clear()
-
为片段添加缓存
例如:blog_listing_page.html,以 目录页为例。
{% load wagtailimages_tags wagtailroutablepage_tags cache %}


    <div class="container">
        {% for post in posts %}
            {% cache 604800 blog_post_preview post.id %}

                <div class="row mt-5 mb-5">

                    <div class="col-sm-3">
                        {% image post.banner_image fill-250x250 as blog_img %}
                        <a href="{{ post.url }}">
                            <img src="{{ blog_img.url }}" alt="{{ blog_img.alt }}" style='width: 100%;'>
                        </a>
                    </div>

                    <div class="col-sm-9">
                        <a href="{{ post.url }}">
                            <h2>{{ post.custom_title }}</h2>
                            {% if post.specific.subtitle %}
                                <p>{{ post.specific.subtitle }}</p>
                            {% endif %}

                            {# @todo add a summary field to BlogDetailPage; make it a RichTextField with only Bold and Italic enabled. #}
                            <a href="{{ post.url }}" class="btn btn-primary mt-4">Read More</a>
                        </a>
                    </div>

                </div>

            {% endcache %}
        {% endfor %}
    </div>
三、适时 Remove Caching
Ref: Wagtail CMS: Using the save() method to remove template fragment caching
如果加了缓存,内容修改后,比如博客文章标题修改后,客户端无法及时看到,既然在利用缓存,此时就需要“及时地”放弃缓存内容。
修改,点击save按钮保存,出发一个函数,如下:
from django.core.cache import cache
from django.core.cache.utils import make_template_fragment_key

... ...

def save(self, *args, **kwargs):
  """Create a template fragment key.

  Then delete the key."""
  key = make_template_fragment_key(
    "blog_post_preview",
    [self.id]
  )

  cache.delete(key)
  return super().save(*args, **kwargs)
End.


【推荐】国内首个AI IDE,深度理解中文开发场景,立即下载体验Trae
【推荐】编程新体验,更懂你的AI,立即体验豆包MarsCode编程助手
【推荐】抖音旗下AI助手豆包,你的智能百科全书,全免费不限次数
【推荐】轻量又高性能的 SSH 工具 IShell:AI 加持,快人一步