[Django] 10 - Routable Pages & Sitemaps of Wagtail
Ref: Blog Listing Page, Blog Detail Pages, and Adding Custom Context to your Wagtail CMS Site【创建 blog list】
Ref: How to Add Routable Pages to your Wagtail CMS Website
与路由、URL有关系,本篇从几个角度展开来。
Blog and Blog List
一、需求
博客 page,与 博客 list 的关系。
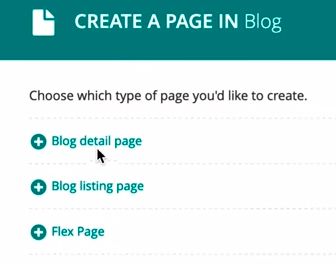
二、套路
(1) 在模型中,将博客对象都复制到了 context["posts"] 中。
    def get_context(self, request, *args, **kwargs):
        """Adding custom stuff to our context."""
        context = super().get_context(request, *args, **kwargs)

        # 类名.objects 代表了所有的blogs,并且要是 live public 的
        context["posts"] = BlogDetailPage.objects.live().public()  # 表示,多一个 blog page, blog list page就会自动多一个 item。
        return context
(2) 在模板中,就能如此调用。可见,上述返回的key值,是可以被模板中调用的呐。
    <a href="{% routablepageurl page "latest_posts" %}">View Latest Posts Only</a>
    <div class="container">
        {% for post in posts %}
            <div class="row mt-5 mb-5">
                <div class="col-sm-3">
                    {% image post.blog_image fill-250x250 as blog_img %}
                    <a href="{{ post.url }}">
                        <img src="{{ blog_img.url }}" alt="{{ blog_img.alt }}">
                    </a>
                </div>
                <div class="col-sm-9">
                    <a href="{{ post.url }}">
                        <h2>{{ post.custom_title }}</h2>
                        {# @todo add a summary field to BlogDetailPage; make it a RichTextField with only Bold and Italic enabled. #}
                        <a href="{{ post.url }}" class="btn btn-primary mt-4">Read More</a>
                    </a>
                </div>
            </div>
        {% endfor %}
    </div>
重点就在于:通过 内置方法 get_content 将两个 page 联系了起来。
URL也是按照默认的树型目录结构自动设置。
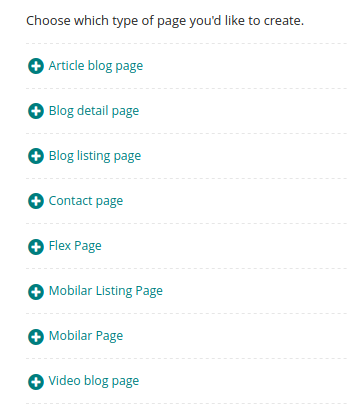
三、目录结构 “限制”
Ref: Wagtail CMS: Restricting Parent and Child Page Types
-
閹割 子page
如下技巧方法,第一個爲空,第二個僅一個類型。
subpage_types = []
parent_page_types = ['home.HomePage']
-
控制數量
    # Controls the maximum number of pages of this type that can be created
    # through the Wagtail administration interface.
    # This is useful when needing “allow at most 3 of these pages to exist”,
    # or for singleton pages.
    max_count = 4

    # Controls the maximum number of pages of this type that can be created
    # under any one parent page.
    max_count_per_parent = 2
Routable Pages
一、配置
setting添加app
'wagtail.contrib.routable_page',
二、添加 routable
特殊的 page,有必要添加 route,不得不添加,例如:latest 5 blogs。
    #
    # 表示在该list的url基础上再紧跟着 latest/
    #
    @route(r'^latest/?$', name="latest_posts")
    def latest_blog_posts_only_shows_last_5(self, request, *args, **kwargs):
        context = self.get_context(request, *args, **kwargs)
        # 这里控制了只显示最近5个blogs
        context["posts"] = context["posts"][:5]
        return render(request, "blog/latest_posts.html", context)
针对 name = "latest_posts" 的两个知识点。
-
模板调用方便
{% extends "base.html" %}

{% load wagtailimages_tags wagtailroutablepage_tags %}

{% block content %}

    <a href="{% routablepageurl page "latest_posts" %}">View Latest Posts Only</a>
    <div class="container">
        {% for post in posts %}
            <div class="row mt-5 mb-5">
                <div class="col-sm-3">
                    {% image post.blog_image fill-250x250 as blog_img %}
                    <a href="{{ post.url }}">
                        <img src="{{ blog_img.url }}" alt="{{ blog_img.alt }}">
                    </a>
                </div>
                <div class="col-sm-9">
                    <a href="{{ post.url }}">
                        <h2>{{ post.custom_title }}</h2>
                        {# @todo add a summary field to BlogDetailPage; make it a RichTextField with only Bold and Italic enabled. #}
                        <a href="{{ post.url }}" class="btn btn-primary mt-4">Read More</a>
                    </a>
                </div>
            </div>
        {% endfor %}
    </div>
{% endblock content %}
-
反解析
context["a_special_link"] = self.reverse_subpage('latest_posts')
Pagination
标记页数;页码
Ref: Wagtail CMS: Adding Pagination
可以考虑 django-el-pagination,但自己实现也不难。
一、效果

二、实现
from django.core.paginator import EmptyPage, PageNotAnInteger, Paginator
-
logic in model
基本上,就是固定套路如下。
    #
    # 被调用的工具函数
    # BlogListingPage 从另一个模型 BlogDetailPage 中获得内容
    #
    def get_context(self, request, *args, **kwargs):
        """Adding custom stuff to our context."""

        context = super().get_context(request, *args, **kwargs)

        #
        # 先排序,再定义每页的显示个数
        #
        # Get all posts
        all_posts = BlogDetailPage.objects.live().public().order_by('-first_published_at')
        # Paginate all posts by 2 per page
        paginator = Paginator(all_posts, 2)

        # 获得参数:要展示第几页
        # Try to get the ?page=x value
        page = request.GET.get("page")
        try:
            # If the page exists and the ?page=x is an int
            posts = paginator.page(page)
        except PageNotAnInteger:
            # If the ?page=x is not an int; show the first page
            posts = paginator.page(1)
        except EmptyPage:
            # If the ?page=x is out of range (too high most likely)
            # Then return the last page
            posts = paginator.page(paginator.num_pages)

        # 类名.objects 代表了所有的blogs,并且要是 live public 的
        # context["posts"] = BlogDetailPage.objects.live().public()
        # "posts" will have child pages; you'll need to use .specific in the template
        # in order to access child properties, such as youtube_video_id and subtitle
        context["posts"] = posts
        context["categories"] = BlogCategory.objects.all()

        # 通过 reverse_subpage,可获得 latest_blog_posts_only_shows_last_5 对应的 url.
        # context["a_special_link"] = self.reverse_subpage('latest_posts')
        return context
-
template
{# Only show pagination if there is more than one page to click through #} {% if posts.paginator.num_pages > 1 %} <div class="container"> <div class="row"> <div class="col-lg-12"> <div class="pagination"> {% if posts.has_previous %} <li class="page-item"> <a href="?page={{ posts.previous_page_number }}" class="page-link"> <span>«</span> </a> </li> {% endif %} {% for page_num in posts.paginator.page_range %} <li class="page-item {% if page_num == posts.number %} active{% endif %}"> <a href="?page={{ page_num }}" class="page-link"> {{ page_num }} </a> </li> {% endfor %} {% if posts.has_next %} <li class="page-item"> <a href="?page={{ posts.next_page_number }}" class="page-link"> <span>»</span> </a> </li> {% endif %} </div> </div> </div> </div> {% endif %}
理解 href = "?..."的含义。

三、分类、页码
Ref: Wagtail CMS: Registering Snippets (Blog Category) using Checkboxes 【关于filter,需要自己实现】
http://127.0.0.1:8000/user1/blog-listing-page/?category=life
如何结合“页码”?
-
获取 URL参数的样例
# Get all posts
#
all_posts = BlogDetailPage.objects.live().public().order_by('-first_published_at')

# --------------------------------------------------------------------------------
category_slug = request.GET.get("category", None)
if category_slug:
  # Must have a count > 0 in order to display something
  if all_posts.filter(categories__slug__contains=category_slug).count() > 0:
    all_posts = all_posts.filter(categories__slug__contains=category_slug)
  else:
    all_posts = all_posts          # Seems like repetition but it caters for the 0 count on a blog_slug.
-
页码按键的 URL
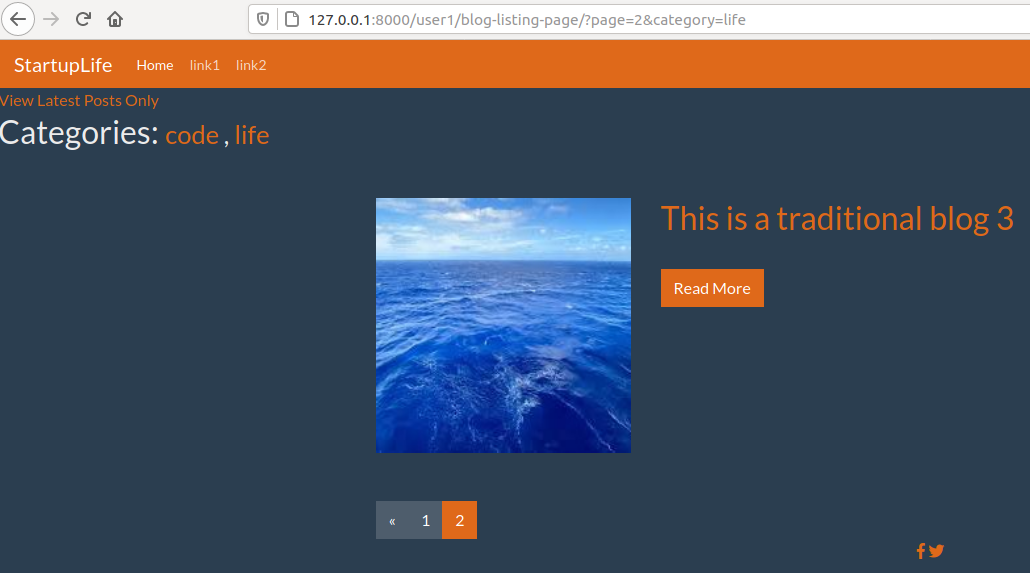
希望能支持如下 URL。
http://127.0.0.1:8000/user1/blog-listing-page/?page=2&category=life
-
更进一步
点击页码,需要先加载 记录的当前的 categories。

Goto: [Wagtail] 02 - Add Tags to Pages【在本篇中记载】
Sitemaps
Ref: Wagtail Sitemaps: Adding, Modifying and Removing Sitemap Entries
一、激活 sitemap
(1) setting 中添加应用
'wagtail.contrib.sitemaps',
'django.contrib.sitemaps',
(2) url.py 中,添加系统默认路由。
from wagtail.contrib.sitemaps.views import sitemap  # <-- 添加

urlpatterns = [
    url(r'^django-admin/', admin.site.urls),
    url(r'^admin/',        include(wagtailadmin_urls)),
    url(r'^documents/',    include(wagtaildocs_urls)),
    url(r'^search/$',      search_views.search, name='search'),

    url(r'^sitemap.xml$', sitemap),  # <-- 添加
    ... ...
]
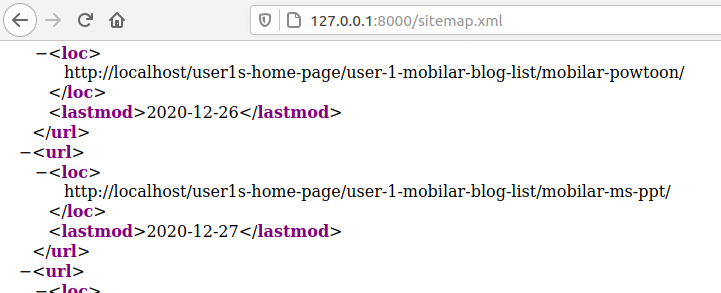
(3) 激活了 sitemap后,就可以通过如下查看所有可用 urls。【暂时不知道如何实用】
二、控制 sitemap.xml
overwrite的一种方式。
跟 search engine 有关,控制其覆盖范围。
    # 这里控制了要暴露哪些个sitemap
    def get_sitemap_urls(self, request):
    #     # Uncomment to have no sitemap for this page
    #     这个类的相关的 router就没有了
    #     # return []

        sitemap = super().get_sitemap_urls(request)
        sitemap.append(
            {
                "location": self.full_url + self.reverse_subpage("latest_posts"),
                "lastmod": (self.last_published_at or self.latest_revision_created_at),
                "priority": 0.9,
            }
        )
        return sitemap
End.


【推荐】国内首个AI IDE,深度理解中文开发场景,立即下载体验Trae
【推荐】编程新体验,更懂你的AI,立即体验豆包MarsCode编程助手
【推荐】抖音旗下AI助手豆包,你的智能百科全书,全免费不限次数
【推荐】轻量又高性能的 SSH 工具 IShell:AI 加持,快人一步