[Django] 07 - Build a Simple Blog by Wagtail
传统方法
一、资源
-
namespace
Ref: 实战Django的URL命名空间namespace【多用户时可能会用到】
-
model.manager
Post.objects.all() --> 但本意是 只关心:published的条目,所以需要自定义(overwrite)。

改为如下:
[views.py]

def home(request):
    # newmanager自定义了filter
    all_posts = Post.newmanager.all()
    # all_posts 给模板的参数
    return render(request, 'index.html', {'posts': all_posts})
object的默认定义,以及newmanager的自定义替代者的形式。
[models.py]

class NewManager(models.Manager):
    def get_queryset(self):
        return super().get_queryset() .filter(status='published')

objects    = models.Manager()  # default manager
newmanager = NewManager()      # custom manager
-
urls
urlpatterns = [
    path('admin/', admin.site.urls),
    path('blog/', include('blog.urls', namespace='blog')),  # ---->
]
<key:value>
[blog.urls]

urlpatterns = [
    path('',             views.home,        name='homepage'),
    path('<slug:post>/', views.post_single, name='post_single'),
]
查看数据库(model) 中是否有对应的数据。没有就返回默认的404页面。
[views.py]

def post_single(request, post):
    # 如果有,且还是published,就好;否则,自动返回内置的404页面。
    post = get_object_or_404(Post, slug=post, status='published')
    # post 给模板的参数
    return render(request, 'single.html', {'post': post})
-
reverse
{% for post in posts %}
  <div class="col-12"><h1>
    <a class="text-dark" href="{{post.get_absolute_url}}">{{post.title}}</a>
  </h1></div>
  <div class="col-12"><p>{{post.excerpt}}</p></div>
{% endfor %}
Django reverse() 反转 url。
def get_absolute_url(self):
    return reverse('blog:post_single', args=[self.slug])
Ref: Django URL重定向的3种方法详解
Ref: Django基础(10): URL重定向的HttpResponseDirect, redirect和reverse的用法详解【为主】
- [HttpResponseDirect方法]
- [redirect方法]
- [reverse方法]
详见:彻底搞懂Django的get_absolute_url方法
可见,还是比较麻烦,不少细节都要自己去处理。
Wagtail CMS
总体思路
一、跟着的资源
-
新建项目
wagtail start mysite
cd mysite

# 修改version in requirements.txt: Wagtail 2.5.1 and Django 2.2.2
pip install -r requirements.txt

python manage.py migrate
python manage.py createsuperuser
python manage.py runserver

python manage.py runserver 0.0.0.0:800
Django version plan: https://www.djangoproject.com/download/#supported-versions
-
补充 Home Page
添加最简单的 banner_title。
class HomePage(Page):
    """
        Home Page Model
    """

    #
    # 新增一个 banner_title,添加到默认的 content_panels
    # 在 html 中可以通过 self.banner_title 读取
    #
    templates = "home/home_page.html"banner_title= models.CharField(max_length=100, blank=False, null=True)

    content_panels = Page.content_panels + [
        FieldPanel("banner_title"),
    ]
其他panels依次类推。
-
Django的Template
千锋Python教程:23 HelloTemplate,变量,标签,常见语法1
二、前四节效果
定制了:
    content_panels = Page.content_panels + [
        FieldPanel("banner_title"),
        FieldPanel("banner_subtitle"),
        ImageChooserPanel("banner_image"),
        PageChooserPanel("banner_cta")
    ]
http://127.0.0.1:8000/ 默认自动加载 “项目目录下template”,这里可以调到app中的model的内容。
有点奇怪:urls.py没有,也没看到view.py。继续,拭目以待。
Debugging
一、django-debug-toolbar
Ref: https://django-debug-toolbar.readthedocs.io/en/latest/installation.html
相比 Django,settings.py演变为了如下:

-
补充 settings/dev.py
# 添加如下三个配置 from https://django-debug-toolbar.readthedocs.io/en/latest/installation.html
INSTALLED_APPS = INSTALLED_APPS + [
    'debug_toolbar',
]

MIDDLEWARE = MIDDLEWARE + [
    'debug_toolbar.middleware.DebugToolbarMiddleware',
]

INTERNAL_IPS = [
    '127.0.0.1',
]
-
补充 mysite/urls.py
(1) 注意 from import的两行内容。
(2) 再补充 urlpatterns 的内容。
from django.conf.urls import include, url
from django.urls import include, pat


import debug_toolbar

urlpatterns = urlpatterns + [
    # For anything not caught by a more specific rule above, hand over to
    # Wagtail's page serving mechanism. This should be the last pattern in
    # the list:
    path("", include(wagtail_urls)),

    # Alternatively, if you want Wagtail pages to be served from a subpath
    # of your site, rather than the site root:
    #    path("pages/", include(wagtail_urls)),

    path('__debug__/', include(debug_toolbar.urls)),
]
更多详见:Django 开发:django-debug-toolbar使用详解
二、shell_plus
会自动导入各种ORM的类,直接以命令行的形式去debug/test接口。
教学视频:Wagtail CMS: Setting up Django Shell, shell_plus and ipython to explore your Wagtail Application
pip install django-extensions
pip install ipython
python manage.py shell_plus
UI 模板美化
一、添加 Jumbotron
第一步:css, js 都要天添加 from https://getbootstrap.com/docs/4.2/getting-started/introduction/
第二步:html 代码再添加 from https://getbootstrap.com/docs/4.2/components/jumbotron/
二、添加 Navbar
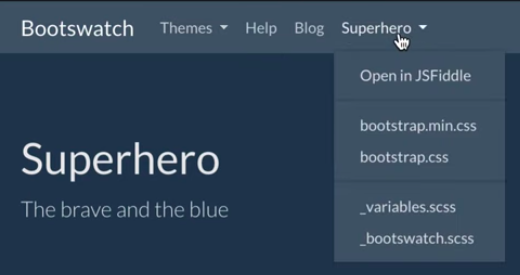
直接插入 superhero风格的 nav 代码 from: https://bootswatch.com/superhero/

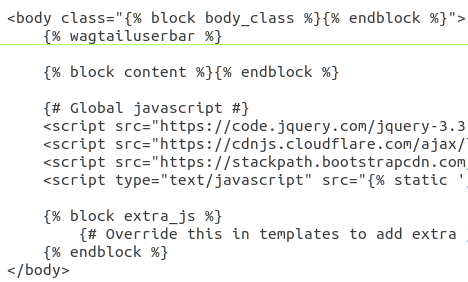
base.html中添加:
{# Global stylesheets #}

<link rel="stylesheet" href="https://bootswatch.com/4/superhero/bootstrap.min.css" crossorigin="anonymous">
<link rel="stylesheet" type="text/css" href="{% static 'css/mysite.css' %}">
以及 html 添加处:

添加一个全新页面
Ref: How to Add a New Wagtail CMS Page From Scratch【添加一个flex page】
Wagtail,model和view关系更紧密一些。
一、添加套路
第一步,创建
(wagtail) jeffrey@unsw-ThinkPad-T490:mysite$ python manage.py startapp flex

(wagtail) jeffrey@unsw-ThinkPad-T490:mysite$ ls
db.sqlite3  Dockerfile  flex  home  manage.py  media  mysite  requirements.txt  search

(wagtail) jeffrey@unsw-ThinkPad-T490:mysite$ ls flex/
admin.py  apps.py  __init__.py  migrations  models.py  tests.py  views.py
Next, 添加"flex" 到INSTALLED_APPS in settings/base.py.
第二步,写模型

from django.db import models

from wagtail.admin.edit_handlers import FieldPanel
from wagtail.core.models import Page


class FlexPage(Page):
    """Flexible page class."""

    template = "flex/flex_page.html"

    # @todo add streamfields
    # content = StreamField()

    subtitle = models.CharField(max_length=100, null=True, blank=True)

    content_panels = Page.content_panels + [
        FieldPanel("subtitle"),
    ]

    class Meta:  # noaq
        verbose_name = "Flex Page"
        verbose_name_plural = "Flex Pages"
第三步,写模板

{% extends "base.html" %}
{% load wagtailcore_tags %}

{% block content %}
    <div class="jumbotron">
        <div class="container">
            <div class="row">
                <div class="col-sm-12 text-center">
                    <h1 class="display-4">{{ self.title }}</h1>
                    <div class="lead">{{ self.subtitle }}</div>
                </div>
            </div>
        </div>
    </div>

{% endblock %}
基本上,套路明白了。
二、数据库
[Page list]

[Page detail]

End.


 浙公网安备 33010602011771号