[Vue] 11 - Amplify: CI/CD Pipeline
Ref: [AWS] Amazon Cognito
最终的目的是:Vue结合Cognito,搞一个简单的登录功能。
跟着教程,一步一步来,构建完整的网页开发。
构建CI/CD
一、准备项目和Amplify
$ npm install -g @aws-amplify/cli
$ amplify configure
自动打开浏览器网页,登录,进入 AWS Management Console。
配置AWS Region, User name。
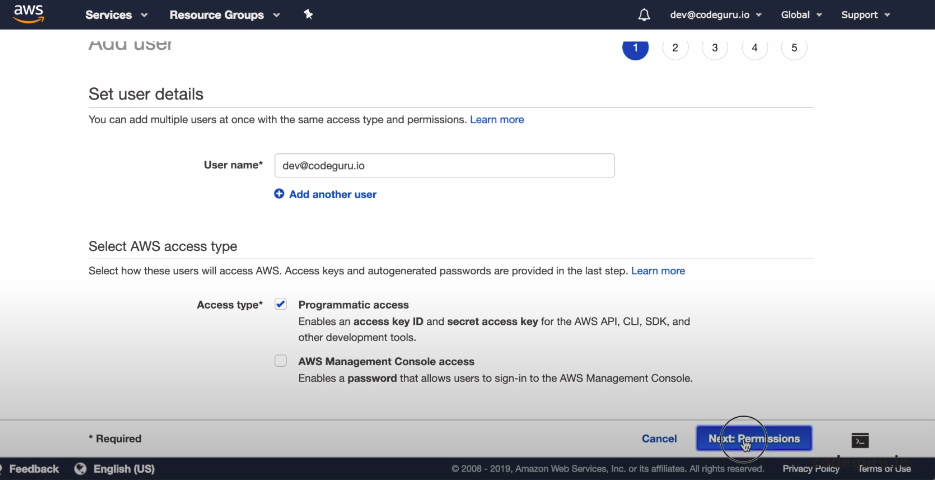
默认点击下去:
User and Access key ID
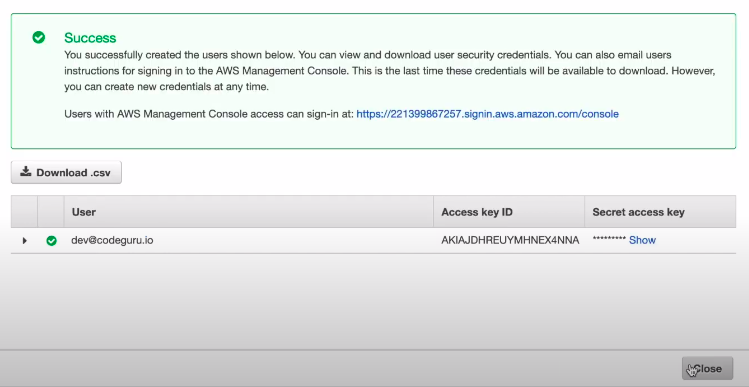
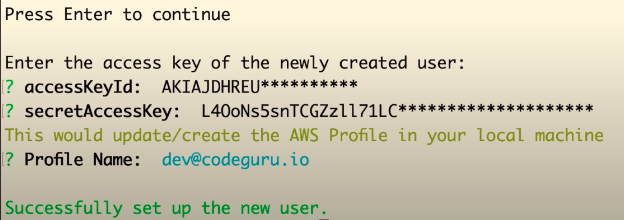
重返终端,输入上图获得的key值。
npm install -g @vue/cli
开始创建一个新的vue项目。
二、配置Amplify
$ amplify init
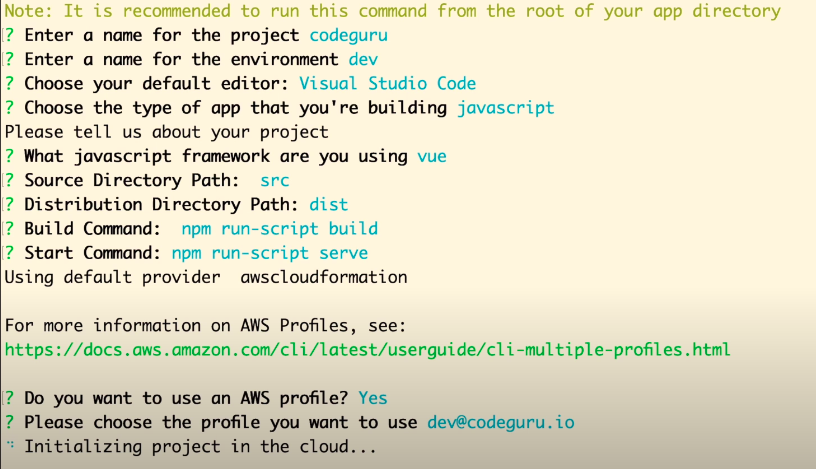
在aws上做了一些基本的vue配置。
Some next steps:

"amplify status" will show you what you've added already and if it's locally configured or deployed
"amplify add <category>" will allow you to add features like user login or a backend API
"amplify push" will build all your local backend resources and provision it in the cloud
"amplify console" to open the Amplify Console and view your project status
"amplify publish" will build all your local backend and frontend resources (if you have hosting category added) and provision it in the cloud

Pro tip:
Try "amplify add api" to create a backend API and then "amplify publish" to deploy everything
$ amplify add hosting
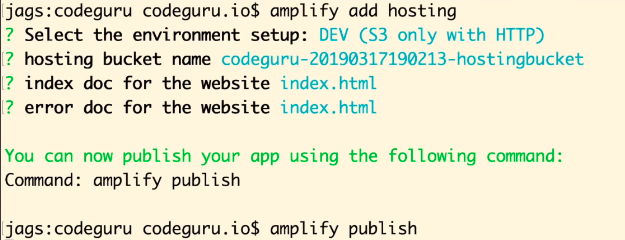
Are you sure you want to continue? Yes.
Updating resources in the cloud. This may take a few minutes...
Vue.js的默认"静态页面"放在了s3上,可通过链接打开。
三、配置GIT工程代码
Step 1: Add repository service
Step 2: Add repository branch
Step 3: Configure build settings
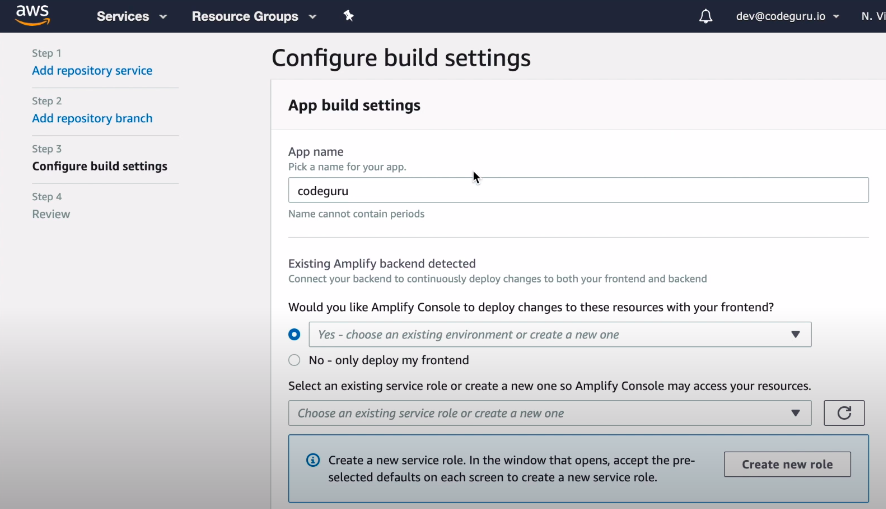
选择:Create new environment.
点击:Create new role

Policy name: AdministratorAccess
创建role后,就可以选了,继续这个流程。

In a nutshell, 配置了 repo 和 App settings.
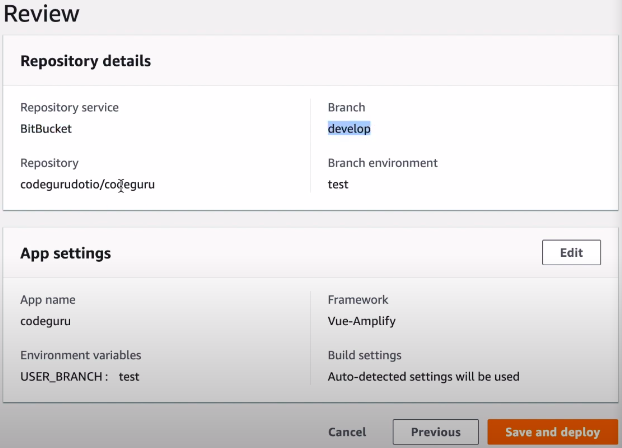
四、Pipeline
将整个项目,流程化,形成 pipeline。
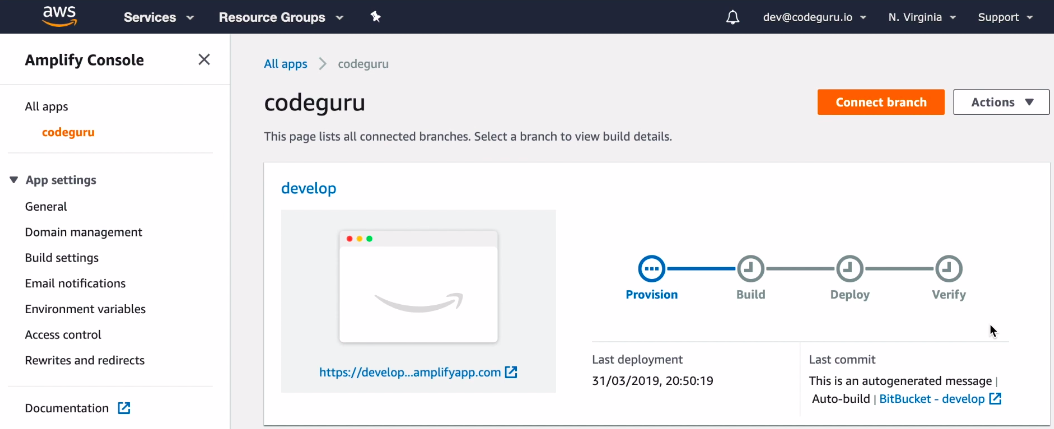
CI/CD的过程,提交代码,自动编译,直接看到结果。
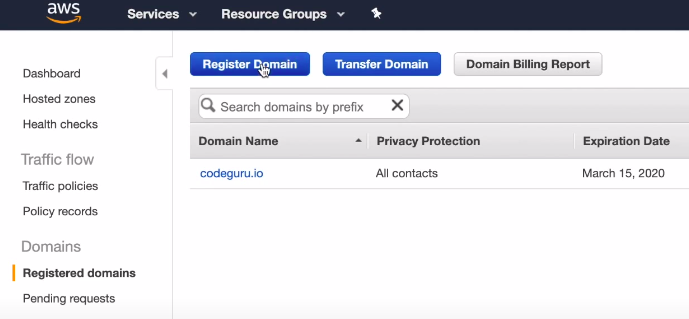
Setting Up Custom Domain
没有域名,看上去“不正式”。所以,这里我们解决这个问题。
进入Service: Route 53,注册域名。
AWS Amplify --> Domain management
可见,domain与git branch的对应关系。

Add domain --> 在Domain中配置新的网址访问网页。
End.


【推荐】国内首个AI IDE,深度理解中文开发场景,立即下载体验Trae
【推荐】编程新体验,更懂你的AI,立即体验豆包MarsCode编程助手
【推荐】抖音旗下AI助手豆包,你的智能百科全书,全免费不限次数
【推荐】轻量又高性能的 SSH 工具 IShell:AI 加持,快人一步
· AI与.NET技术实操系列:向量存储与相似性搜索在 .NET 中的实现
· 基于Microsoft.Extensions.AI核心库实现RAG应用
· Linux系列:如何用heaptrack跟踪.NET程序的非托管内存泄露
· 开发者必知的日志记录最佳实践
· SQL Server 2025 AI相关能力初探
· 震惊!C++程序真的从main开始吗?99%的程序员都答错了
· 【硬核科普】Trae如何「偷看」你的代码?零基础破解AI编程运行原理
· 单元测试从入门到精通
· 上周热点回顾(3.3-3.9)
· winform 绘制太阳,地球,月球 运作规律