[OpenCV] Image Scaling
Introduce
This is a commonly useful function. Sometimes we don't want to integrate the whole OpenCV only due to the little requirement for Scaling.
| 插值类型 | 主观感受 | 图像轮廓 | 总体评价 | 处理耗时 |
|
最临近点插值 N earrst_ N eighbour |
马赛克现象严重 | 不清晰 | 最差 | 5秒 |
|
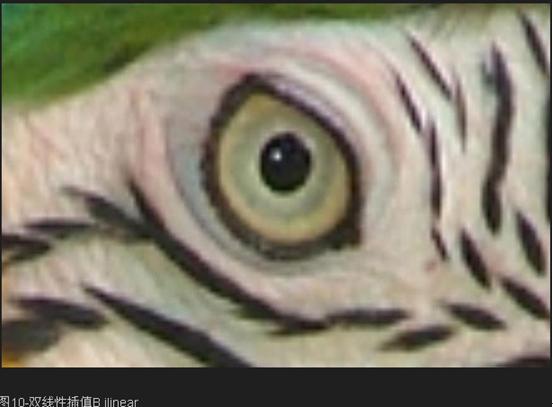
双线性插值 B ilinear |
图像模糊,不锐利 | 边缘不清晰,有锯齿现象 | 差 | 6秒 |
|
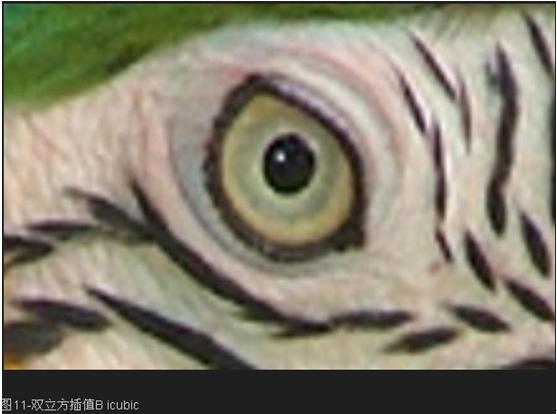
双立方插值 B icubic |
图像较模糊,较锐利 | 锯齿现象有所改善 | 折中 | 8秒 |
|
自适应样条插值 S-S pline |
图像相对清晰,锐利 | 边缘变得清晰,锯齿现象消失 | 好 | 18秒 |
|
自适应样条增强 S-S pline_ XL |
图像清晰,锐利 | 边缘锐利,清晰 | 最好 | 20秒 |
附加题之智能缩放:https://github.com/esimov/caire
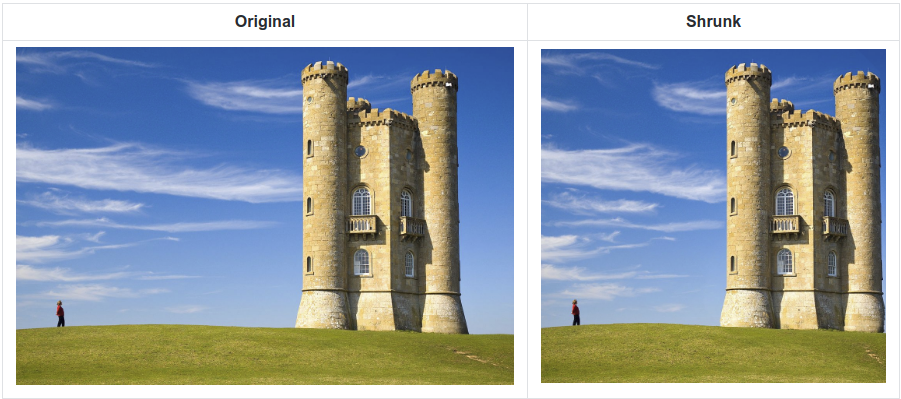
Effect Comparison
From: http://www.cnblogs.com/celerychen/archive/2010/11/25/3588222.html
模糊后其实也差不多。
Code Implement
https://github.com/yglukhov/bicubic-interpolation-image-processing/blob/master/libimage.c
IplImage * bilinear(IplImage *img, int newWidth, int newHeight)
{
    int w= newWidth;
    int h = newHeight;
    IplImage * img2 =0;
    img2 = cvCreateImage(cvSize(w,h),IPL_DEPTH_8U,3);
    uchar * Data = img2->imageData;
    uchar * data = img->imageData;
    int a,b,c,d,x,y,index;
    float tx = (float)(img->width-1)/w;
    float ty = (float)(img->height-1)/h;
    float x_diff, y_diff;
    int i,j,k;

     for(i=0; i<h; i++)
     for(j=0; j<w; j++)
     {
              x = (int)(tx * j);
              y = (int)(ty * i);

              x_diff = ((tx * j) -x);
              y_diff = ((ty * i) -y );

              index = y*img->widthStep + x*img->nChannels;
              // cac diem lan can
              a = (int)index;
              b = (int)(index + img->nChannels);
              c = (int)(index + img->widthStep);
              d = (int)(index + img->widthStep + img->nChannels);

              for(k=0; k<3; k++)
              Data[i*img2->widthStep + j*img2->nChannels  +k] =
              data[a+k]*(1-x_diff)*(1-y_diff)
              +data[b+k]*(1-y_diff)*(x_diff)
              +data[c+k]*(y_diff)*(1-x_diff)
              +data[d+k]*(y_diff)*(x_diff);
     }
     return img2;
}
https://github.com/Seo-Hyung/Bilinear-Interpolation
#include <opencv2/core/core.hpp>
#include <opencv2/imgcodecs.hpp>
#include <opencv2/imgproc.hpp>
#include <opencv2/highgui/highgui.hpp>
#include <math.h>
#include <iostream>
#include <string>

using namespace cv;
using namespace std;

int main(int argc, char** argv) {

    Mat image = imread("C:/Users/westbro/Desktop/Lenna.png");

    double h_rate = 2.0;
    double w_rate = 2.0;

    int h = image.rows*h_rate;
    int w = image.cols*w_rate;

    Mat result_img(h, w, CV_8UC3, Scalar(0));

    for (int y = 0; y < result_img.rows - 1; y++) {
        for (int x = 0; x < result_img.cols - 1; x++) {
            int px = (int)(x / w_rate);
            int py = (int)(y / h_rate);

            if (px >= image.cols - 1 || py >= image.rows - 1) break;

            double fx1 = (double)x / (double)w_rate - (double)px;
            double fx2 = 1 - fx1;
            double fy1 = (double)y / (double)h_rate - (double)py;
            double fy2 = 1 - fy1;

            double w1 = fx2*fy2;
            double w2 = fx1*fy2;
            double w3 = fx2*fy1;
            double w4 = fx1*fy1;

            Vec3b p1 = image.at<Vec3b>(py, px);
            Vec3b p2 = image.at<Vec3b>(py, px + 1);
            Vec3b p3 = image.at<Vec3b>(py + 1, px);
            Vec3b p4 = image.at<Vec3b>(py + 1, px + 1);
            result_img.at<Vec3b>(y, x) = w1*p1 + w2*p2 + w3*p3 + w4*p4;
        }
    }

    /// Create Windows
    namedWindow("Original Image", WINDOW_AUTOSIZE);
    namedWindow("result Image", WINDOW_AUTOSIZE);

    /// Show stuff
    imshow("Original Image", image);
    imshow("result Image", result_img);

    /// Wait until user press some key
    waitKey(0);
    return 0;
}
End.

 浙公网安备 33010602011771号