Windows11[虚拟机] Kettle 通过SSH隧道 连接远程[Mac] Mysql数据库
Kettle无法直接连接使用SSH通道的MySQL,需要通过SSH隧道(推荐),具体操作如下所示:
一、搭建Xshell SSH 隧道转发
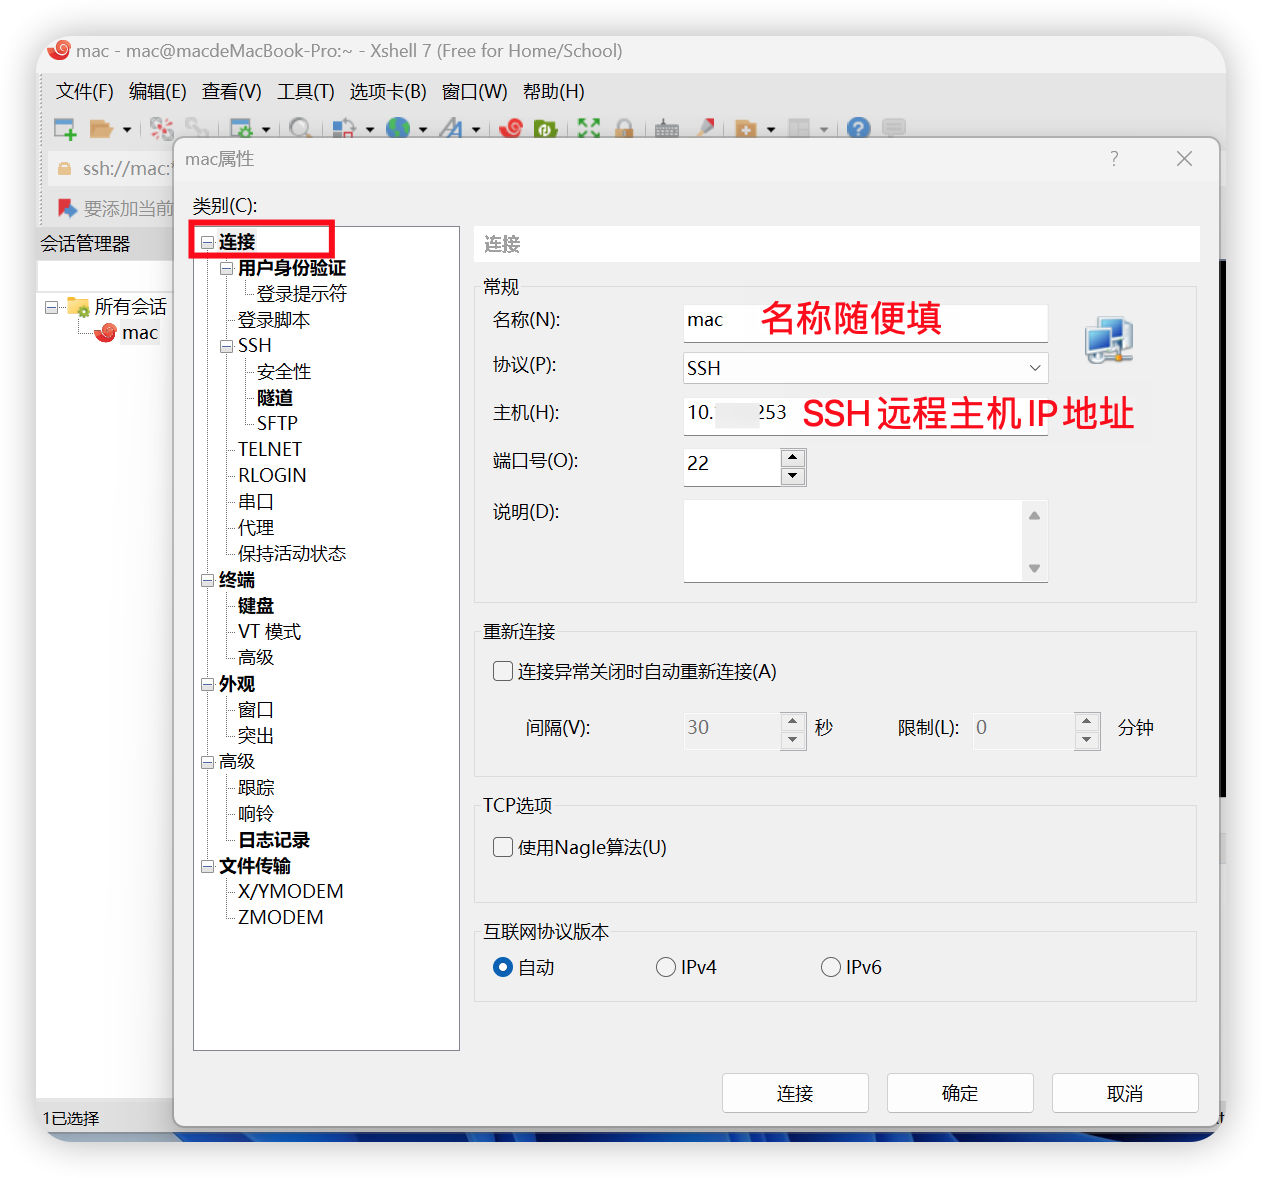
1、点击“连接”
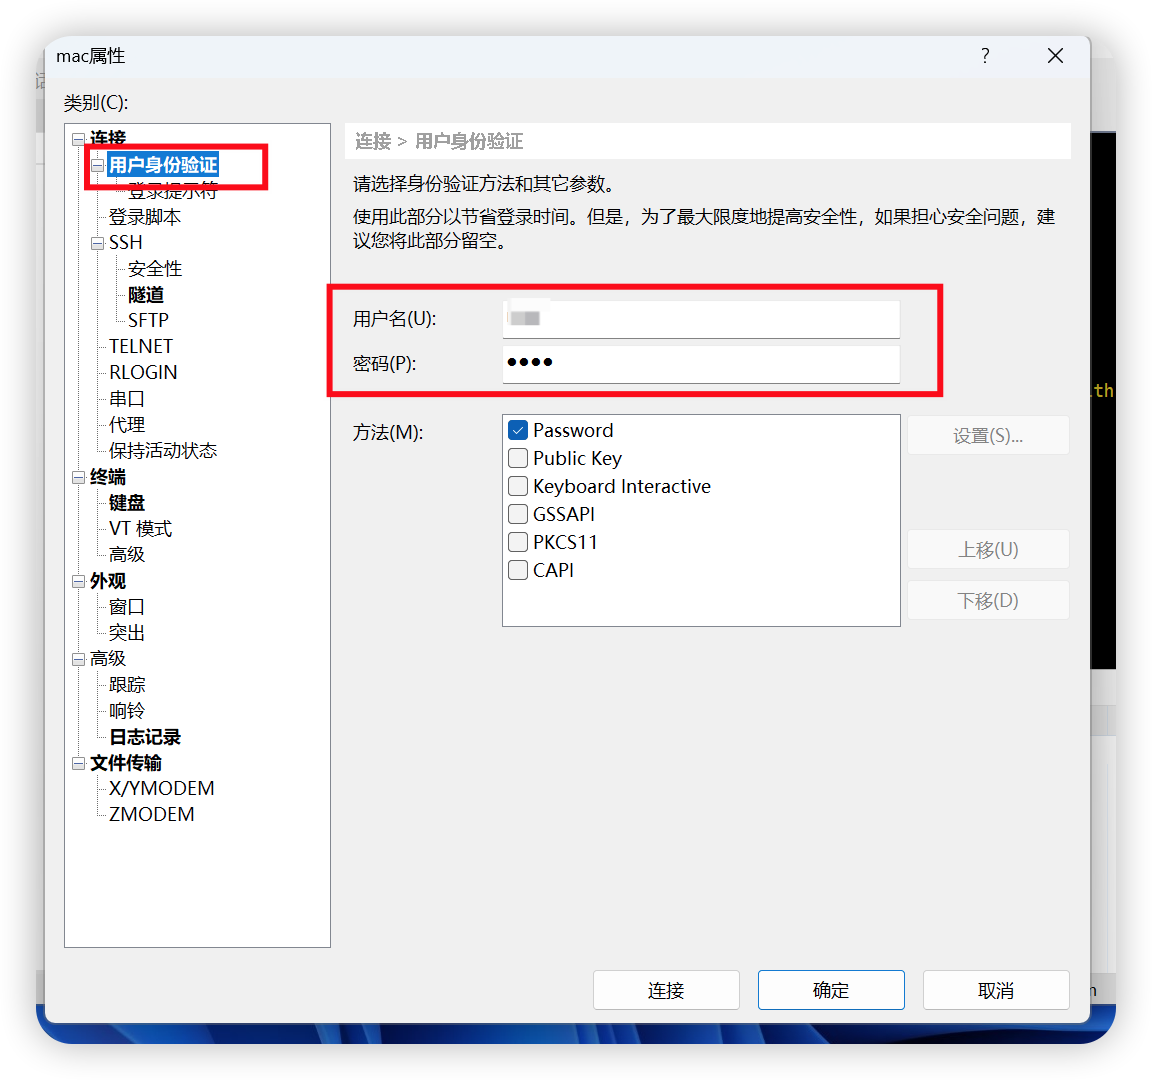
借助Xshell7,首先创建会话mac(名字随便写),右键-->属性,在弹出窗口中填写名称(随便写),填写主机:SSH隧道的ip地
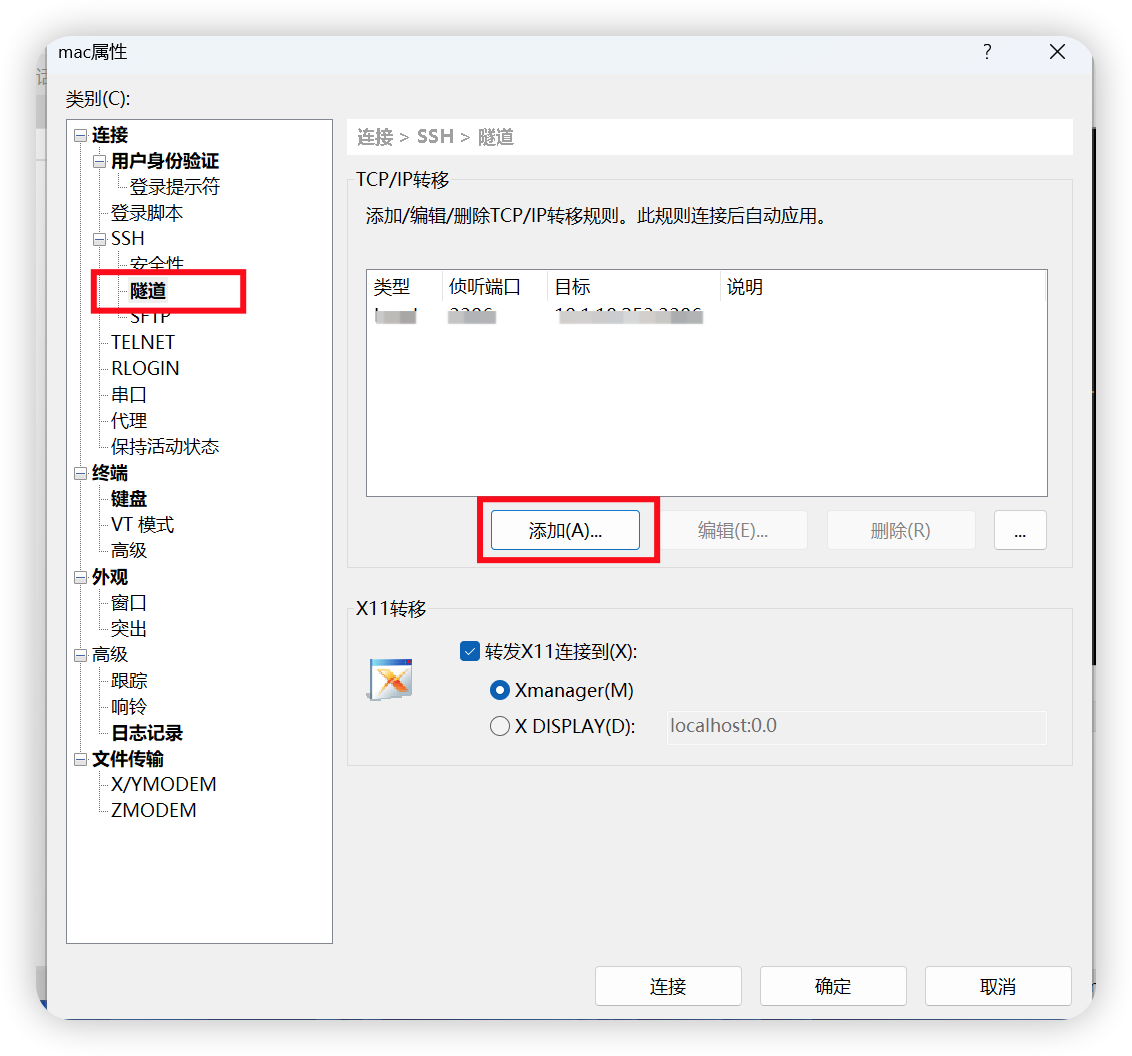
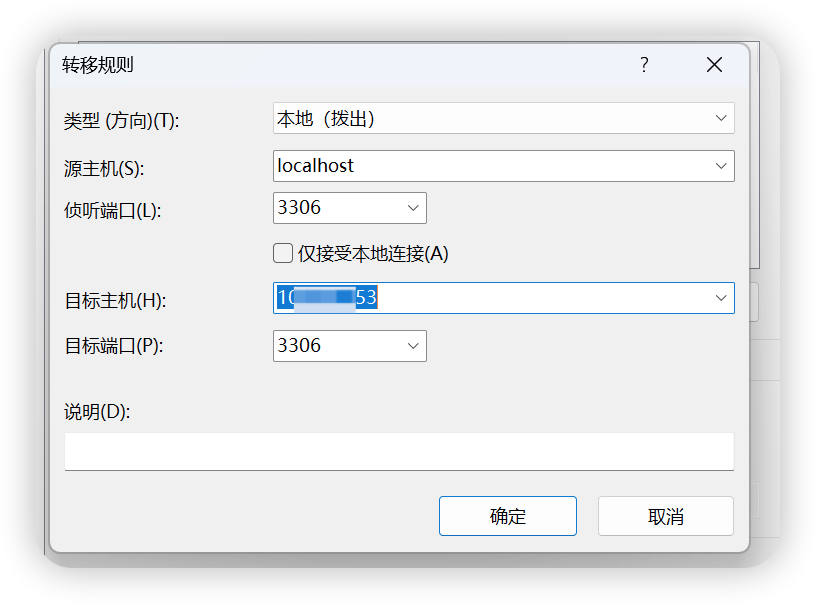
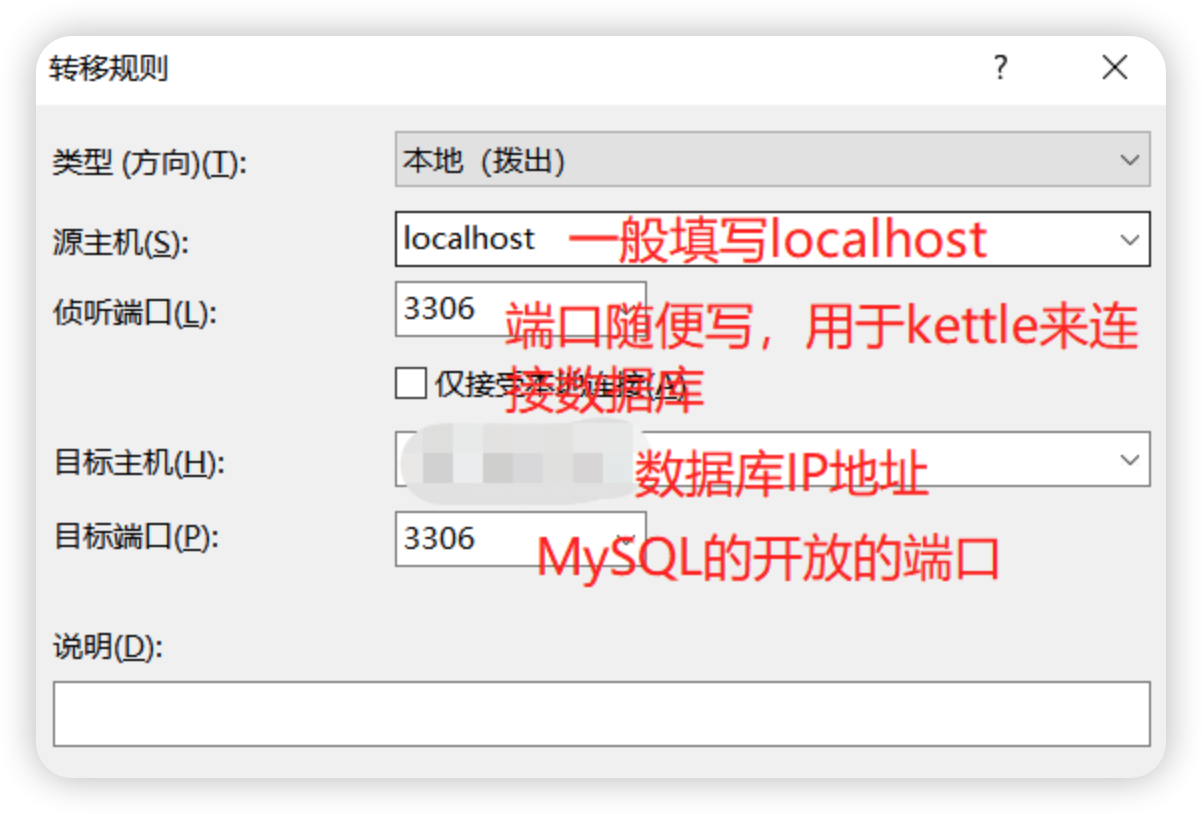
点击“添加”按钮出现如下,填写源主机:localhost(一般填写localhost), 侦听端口:XXX(端口随便写,但是一定要记住,用于kettle连接数据库) , 目标主机:数据库IP地址(远程主机的IP地址) , 目标端口:3306(mysql开放的端口)
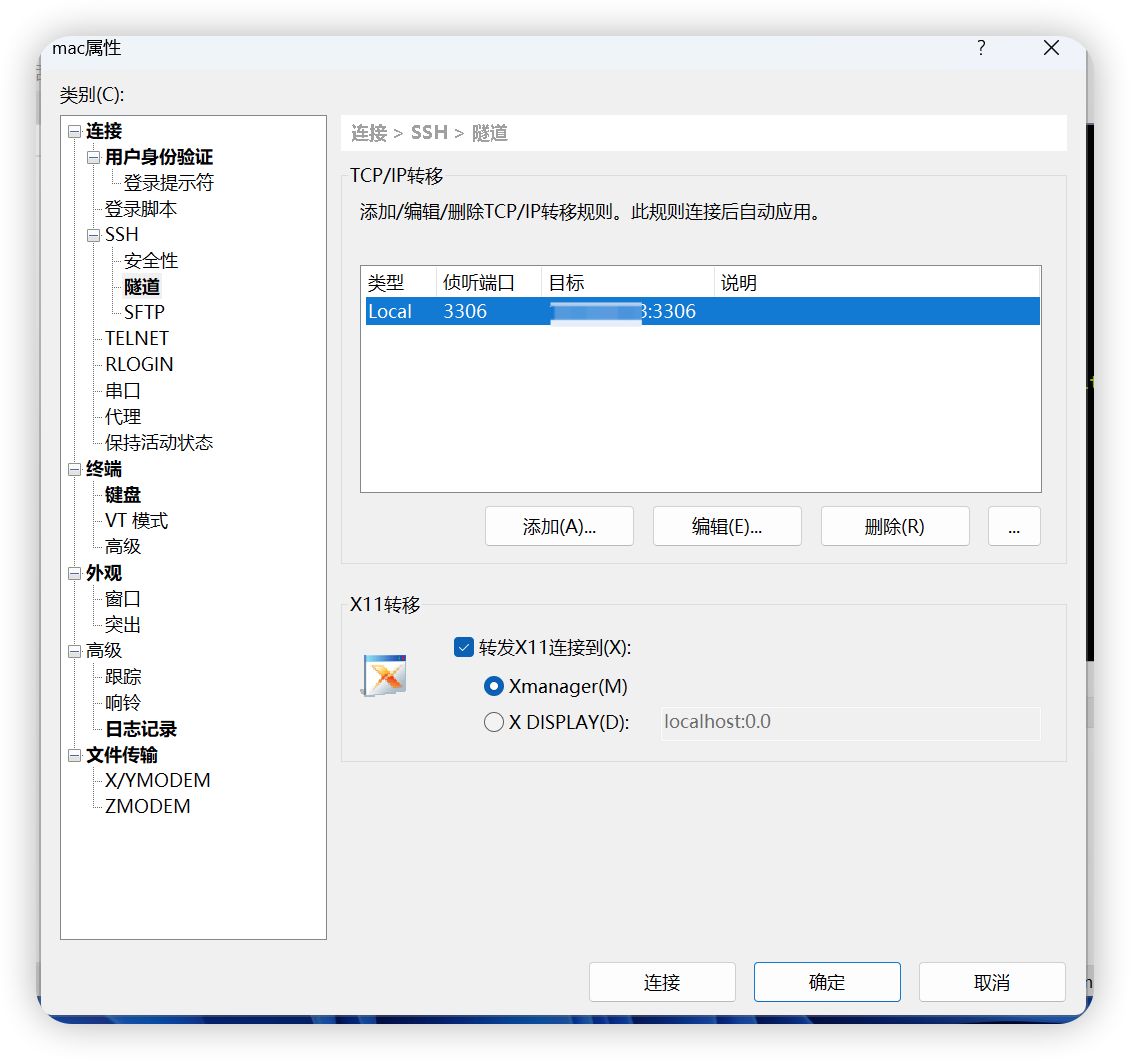
点击连接,连接到远程服务器,在Xshell下方的"隧道窗格"中,将看到我们配置的转发规则,如下

注意看规则的第一行转发配置,确保状态是打开,如果显示的是失败可能是3306这个本地端口已经被占用了,可以尝试将侦听端口修改为其它端口进行重新设置。
二、检查远程服务器MySql文件配置
1、netstat -anp tcp | grep 3306

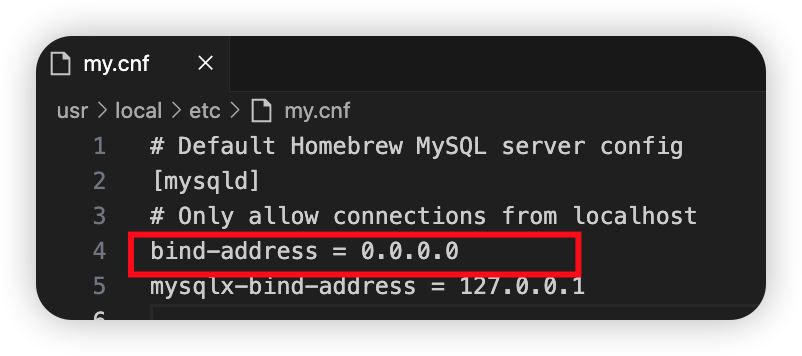
注意地方,这说明3306被绑定到了本地。检查一下my.cnf的配置,这里可以配置绑定ip地址。
cd /usr/local/etc
找到my.cnf文件,修改如下:bind-address=0.0.0.0
不配置或者IP配置为0.0.0.0,表示监听所有客户端连接。

三、开启SSH远程转发功能
SSH默认不允许远程转发
#	$OpenBSD: sshd_config,v 1.103 2018/04/09 20:41:22 tj Exp $

# This is the sshd server system-wide configuration file.  See
# sshd_config(5) for more information.

# This sshd was compiled with PATH=/usr/bin:/bin:/usr/sbin:/sbin

# The strategy used for options in the default sshd_config shipped with
# OpenSSH is to specify options with their default value where
# possible, but leave them commented.  Uncommented options override the
# default value.

# This Include directive is not part of the default sshd_config shipped with
# OpenSSH. Options set in the included configuration files generally override
# those that follow.  The defaults only apply to options that have not been
# explicitly set.  Options that appear multiple times keep the first value set,
# unless they are a multivalue option such as HostKey.
Include /etc/ssh/sshd_config.d/*

#Port 22
#AddressFamily any
#ListenAddress 0.0.0.0
#ListenAddress ::

HostKey /etc/ssh/ssh_host_rsa_key
HostKey /etc/ssh/ssh_host_ecdsa_key
HostKey /etc/ssh/ssh_host_ed25519_key

# Ciphers and keying
#RekeyLimit default none

# Logging
#SyslogFacility AUTH
#LogLevel INFO

# Authentication:

#LoginGraceTime 2m
#PermitRootLogin prohibit-password
#StrictModes yes
#MaxAuthTries 6
#MaxSessions 10

#PubkeyAuthentication yes

# The default is to check both .ssh/authorized_keys and .ssh/authorized_keys2
# but this is overridden so installations will only check .ssh/authorized_keys
AuthorizedKeysFile	.ssh/authorized_keys

#AuthorizedPrincipalsFile none

#AuthorizedKeysCommand none
#AuthorizedKeysCommandUser nobody

# For this to work you will also need host keys in /etc/ssh/ssh_known_hosts
#HostbasedAuthentication no
# Change to yes if you don't trust ~/.ssh/known_hosts for
# HostbasedAuthentication
#IgnoreUserKnownHosts no
# Don't read the user's ~/.rhosts and ~/.shosts files
#IgnoreRhosts yes

# To disable tunneled clear text passwords, change to no here!
PasswordAuthentication yes
#PermitEmptyPasswords no

# Change to no to disable s/key passwords
#ChallengeResponseAuthentication yes

# Kerberos options
#KerberosAuthentication no
#KerberosOrLocalPasswd yes
#KerberosTicketCleanup yes
#KerberosGetAFSToken no

# GSSAPI options
GSSAPIAuthentication yes
GSSAPICleanupCredentials no

# Set this to 'yes' to enable PAM authentication, account processing,
# and session processing. If this is enabled, PAM authentication will
# be allowed through the ChallengeResponseAuthentication and
# PasswordAuthentication.  Depending on your PAM configuration,
# PAM authentication via ChallengeResponseAuthentication may bypass
# the setting of "PermitRootLogin without-password".
# If you just want the PAM account and session checks to run without
# PAM authentication, then enable this but set PasswordAuthentication
# and ChallengeResponseAuthentication to 'no'.
#UsePAM no

#AllowAgentForwarding yes
#AllowTcpForwarding yes
#GatewayPorts no
X11Forwarding yes
X11DisplayOffset 10
X11UseLocalhost yes
#PermitTTY yes
#PrintMotd yes
#PrintLastLog yes
#TCPKeepAlive yes
#PermitUserEnvironment no
#Compression delayed
#ClientAliveInterval 0
#ClientAliveCountMax 3
#UseDNS no
#PidFile /var/run/sshd.pid
#MaxStartups 10:30:100
#PermitTunnel no
#ChrootDirectory none
#VersionAddendum none

# no default banner path
#Banner none

# override default of no subsystems
#Subsystem	sftp	/usr/libexec/sftp-server

# Example of overriding settings on a per-user basis
#Match User anoncvs
#	X11Forwarding no
#	AllowTcpForwarding no
#	PermitTTY no
#	ForceCommand cvs server

# XAuthLocation added by XQuartz (https://www.xquartz.org)
XAuthLocation /opt/X11/bin/xauth
四、在本地测试远程连接
打开终端
1、ping 远程ip,如果可以ping通,代表主机可以正常连接。
2、telnet ip地址 端口号

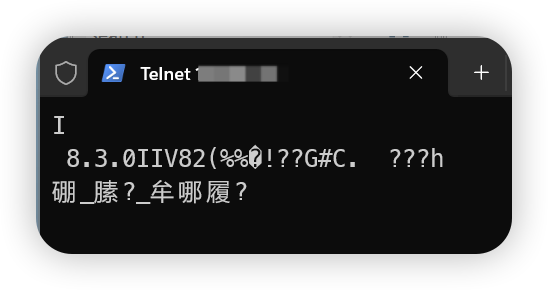
以上代表成功。
telnet 主机3306端口不可以;
telnet 主机22端口可以;
说明与本机网络没有关系;
端口检测
1)netstat -ntpl |grep 3306
tcp 0 0 :::3306 :::* LISTEN -
2)netstat -ntpl |grep 22
tcp 0 0 0.0.0.0:22 0.0.0.0:* LISTEN -
可以看出22端口监听所有地址,而3306只监听本机地址(绑定了到了本地),所以远程无法访问。
对于端口只允许本机访问,有两个地方启用,一个是防火墙启用3306,一个就是mysql配置绑定本机地址。
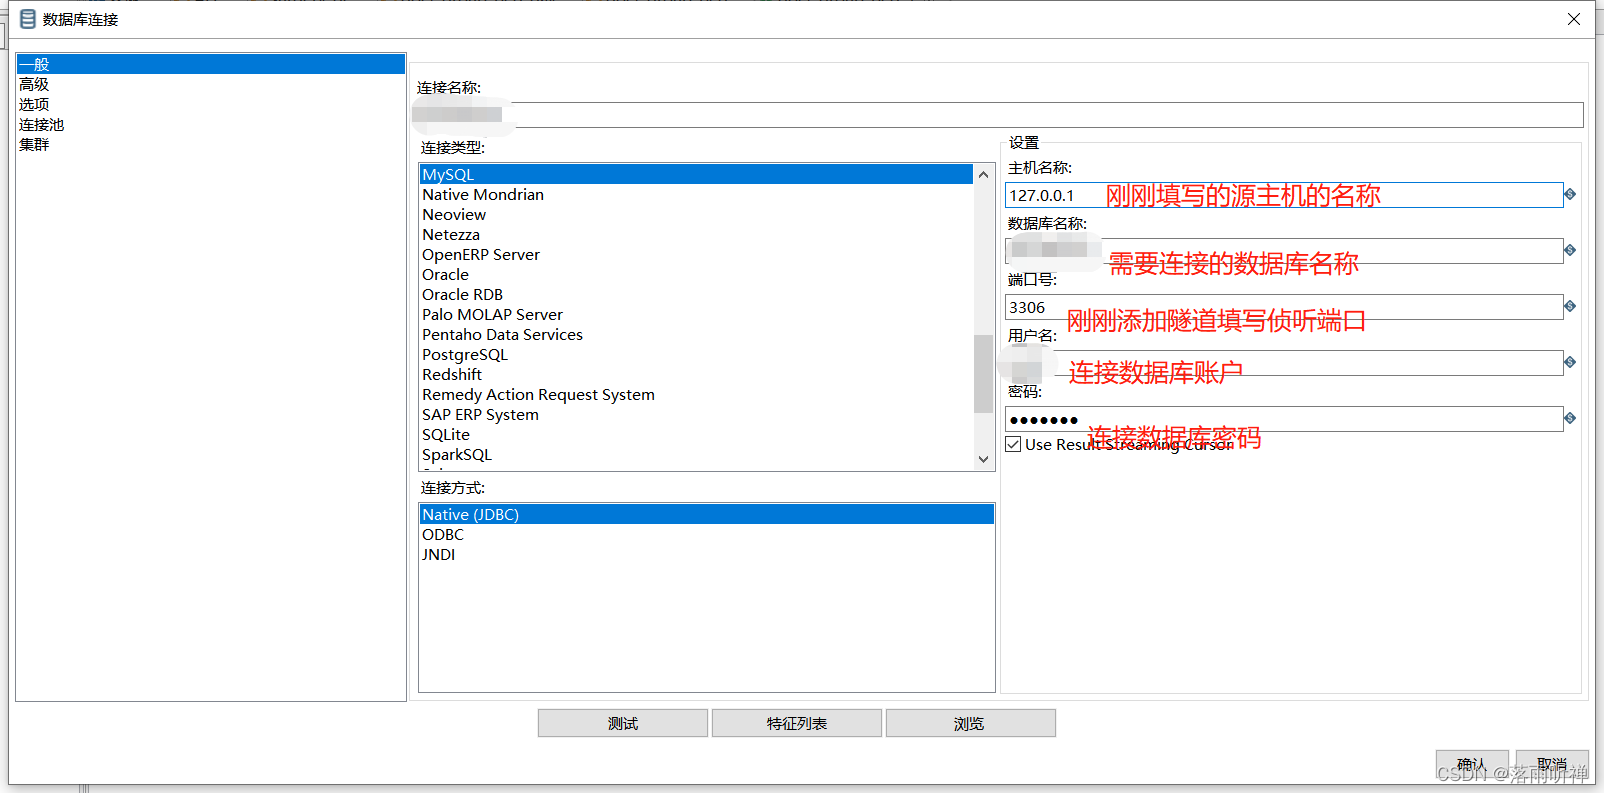
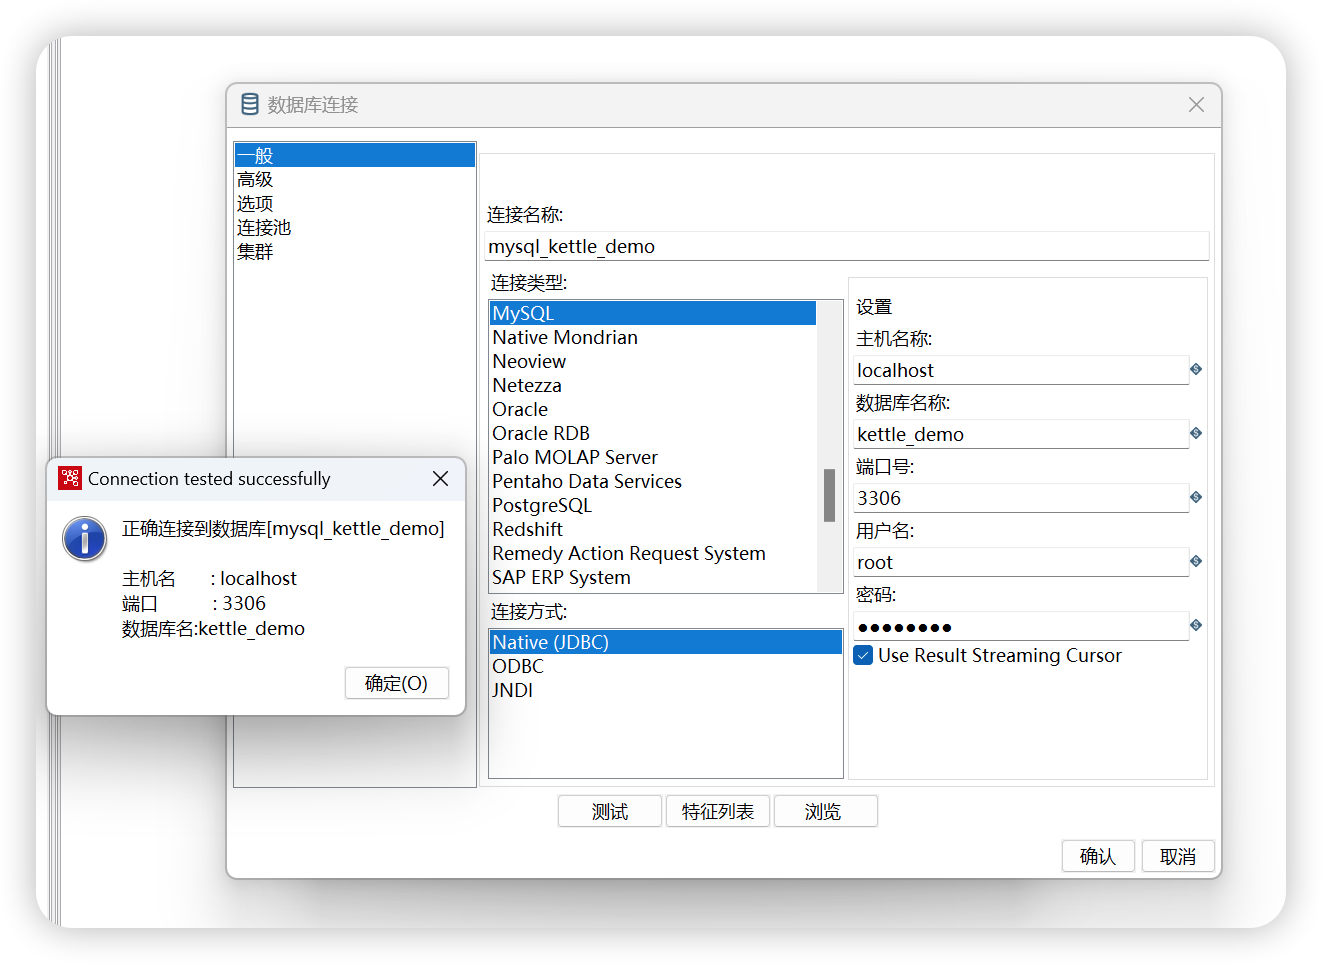
五、kettle使用SSH隧道建立数据库连接
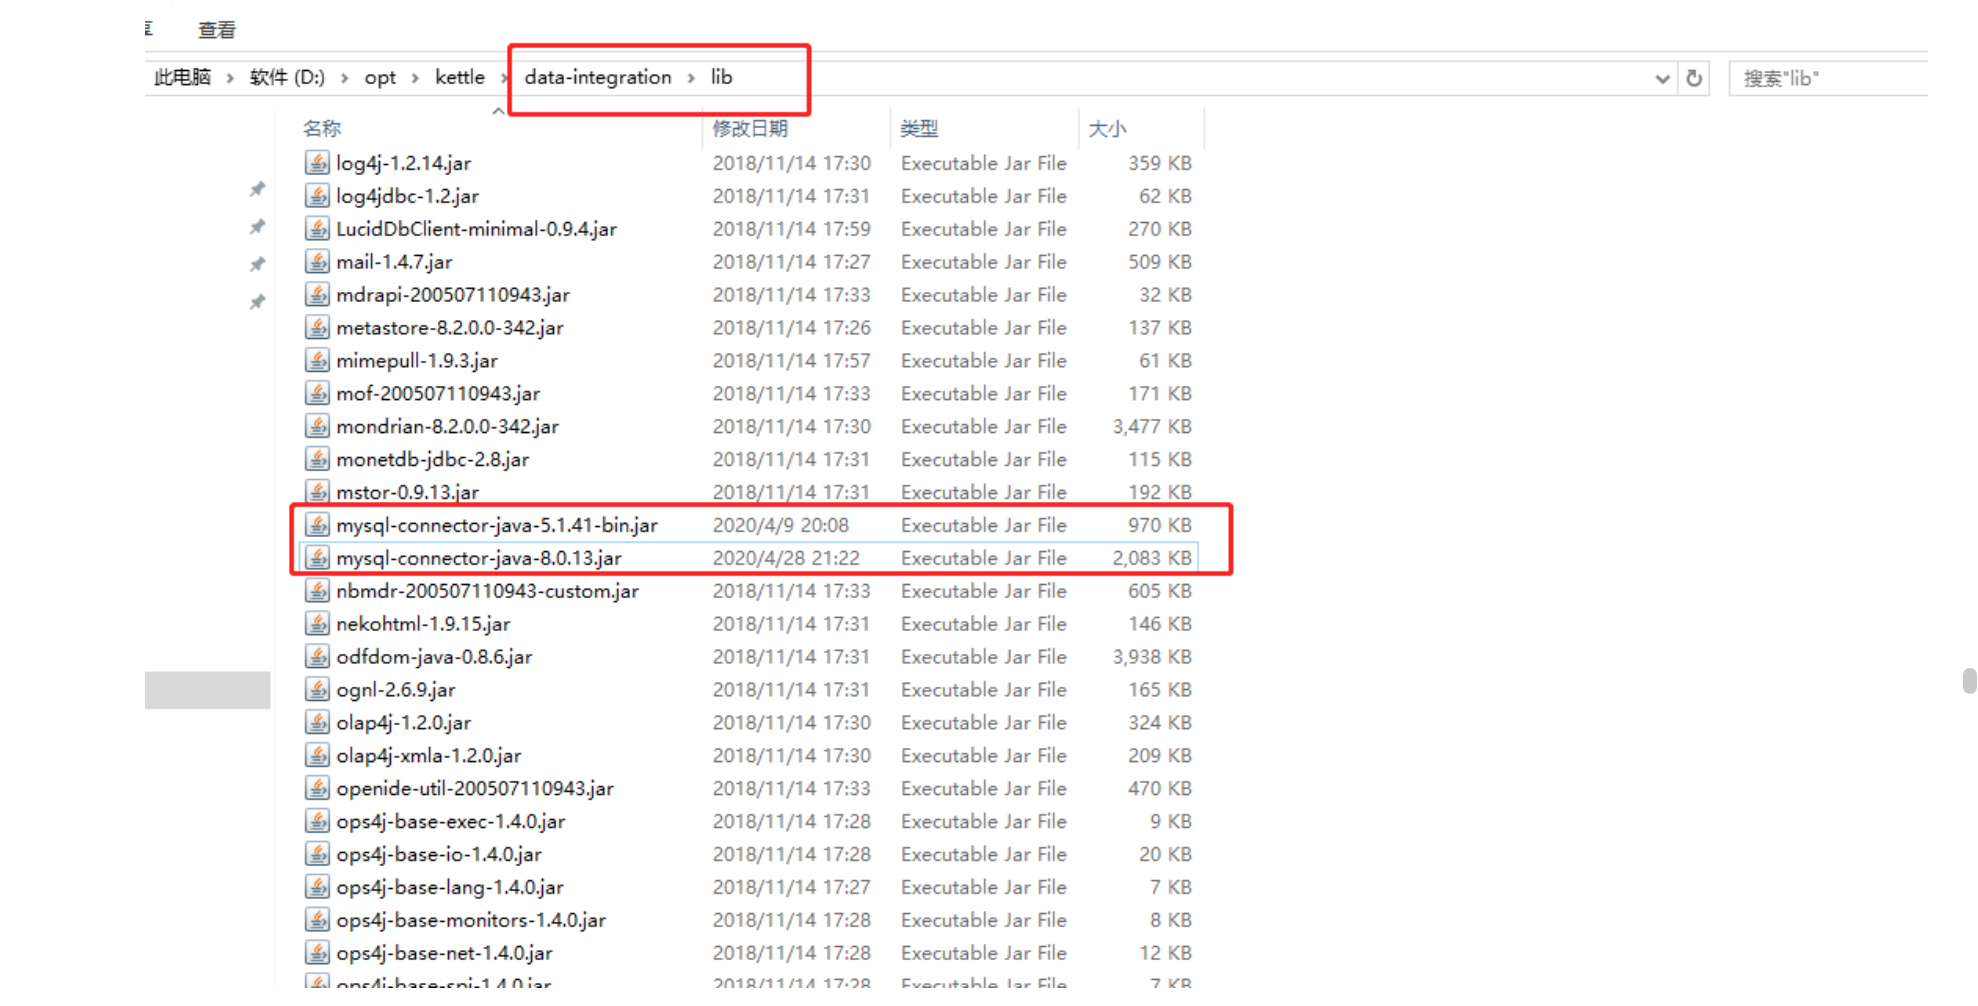
在连接mysql之前需要将连接mysql的工具放入kettle的lib目录中
