WSL-CentOS7-MySQL8主从实战记录
CentOS7 MySQL8主从实战记录
WSL中部署单台MySQL
以MySQL8.0为例,坑比较多
官方安装文档
https://dev.mysql.com/doc/refman/8.0/en/linux-installation.html
表格中列举的,使用压缩文件(.xz)安装
https://dev.mysql.com/doc/refman/8.0/en/binary-installation.html
$> groupadd mysql
$> useradd -r -g mysql -s /bin/false mysql
$> cd /usr/local
$> tar xvf /path/to/mysql-VERSION-OS.tar.xz
$> ln -s full-path-to-mysql-VERSION-OS mysql
$> cd mysql
$> mkdir mysql-files
$> chown mysql:mysql mysql-files
$> chmod 750 mysql-files
$> bin/mysqld --initialize --user=mysql
$> bin/mysql_ssl_rsa_setup
$> bin/mysqld_safe --user=mysql &
# Next command is optional
$> cp support-files/mysql.server /etc/init.d/mysql.server
参考文档
- 缺点
无 my.cnf 需要手动创建
- libaio依赖
yum search libaio
yum install libaio
- 下载.xz(以
mysql-8.0.20-linux-glibc2.12-x86_64.tar.xz为例)
解压到 /usr/local/
tar xvf mysql-8.0.20-linux-glibc2.12-x86_64.tar.xz -C /usr/local/
- 进入
/usr/local/
cd /usr/local/
- 建立软链接(后续可以方便进入mysql根目录)
ln -s mysql-8.0.20-linux-glibc2.12-x86_64 mysql
- 为centos添加mysql用户组和mysql用户
(-s /bin/false参数指定mysql用户仅拥有所有权,而没有登录权限):
groupadd mysql
useradd -r -g mysql -s /bin/false mysql
- 进入MySQL根目录
cd /usr/local/mysql
- 修改MySQL根目录拥有者为新建的mysql用户
chown -R mysql:mysql ./
- 安装MySQL
./bin/mysqld --user=mysql --basedir=/usr/local/mysql --datadir=/usr/local/mysql/data --initialize
日常报错
./bin/mysqld: error while loading shared libraries: libnuma.so.1: cannot open shared object file: No such file or directory
yum -y install numactl
记录初始密码
A temporary password is generated for root@localhost: voe1Pki%6nmI
- 使用的WSL,将 根目录/bin 加入PATH
vim /root/.bash_profile
# 或者
vim ~/.bash_profile
# 文件尾, 加入 下面的文本
# ==============================================
# PATH=$PATH:/usr/local/mysql/bin #MySQL
# export PATH
# export LANG=zh_CN.UTF-8 # 这里顺便设置编码为UTF-8
- 建议查看
/usr/local/mysql/support-files/mysql.server
# 基本路径
# 这里建议修改和 my.cnf 一致, 记得保存
basedir=/usr/local/mysql
datadir=/usr/local/mysql/data

# 配置文件的地址
  # Try to find basedir in /etc/my.cnf
  conf=/etc/my.cnf
extra_args=""


if test -r "$basedir/my.cnf"
then
  extra_args="-e $basedir/my.cnf"
fi
- 在
/etc/或者/usr/local/mysql/下建立my.cnf
[mysql]
# 设置mysql客户端默认字符集
default-character-set=utf8
[mysqld]
skip-name-resolve
#设置3307端口
port = 3307
# 设置mysql的安装目录
basedir=/usr/local/mysql
# 设置mysql数据库的数据的存放目录
datadir=/usr/local/mysql/data
# 允许最大连接数
max_connections=200
# 服务端使用的字符集默认为8比特编码的latin1字符集
character-set-server=utf8
# 创建新表时将使用的默认存储引擎
default-storage-engine=INNODB
lower_case_table_names=1
max_allowed_packet=16M
- 开启mysql服务(使用上面创建的
mysql用户)
mysqld --user=mysql --port=3307
端口冲突错误(3306 in use)
# 假如启动 mysqld 没有指定端口 默认3306 并且已经被占用了,那么
Can't start server: Bind on TCP/IP port: Address already in use
Do you already have another mysqld server running on port: 3306 ?
- 启动一个新的会话,使用默认密码登录
./mysql -uroot -p
- 为root用户设置新密码(这里设置为
root)
https://cloud.tencent.com/developer/article/2115190
MySQL8更改密码需要绕弯子0....0
# 不开启远程登录, 仅允许 localhost
ALTER USER 'root'@'localhost' IDENTIFIED WITH mysql_native_password BY "root";
# 开启远程登录权限
ALTER USER 'root'@'%' IDENTIFIED WITH mysql_native_password BY "root";
- 刷新权限
flush privileges;
- 启动服务
mysqld --user=mysql --port=3307
- 关闭服务
mysqladmin -uroot -p shutdown
WSL 部署多台MySQL
这里使用WSL复制已有的(配置MySQL的发行版,上文的)
- 查看WSL列表
> lxrunoffline.exe l
CentOS
- 保证原有的WSL已关闭
> wsl -t CentOS
- 复制(路径有错别字)
> lxrunoffline.exe d -n CentOS -N CentOS_slave -d D:\liunx\centos_slave
- 查看
> wsl -l
适用于 Linux 的 Windows 子系统:
CentOS (默认)
CentOS_slave
- 坑
复制前要先关闭被复制的WSL发行版,让其处于stop状态,否则会失败。
如果复制失败,再次复制会提示复制发行版的名称已经被占用,使用下面命令进行删除
> lxrunoffline.exe ur -n CentOS_slave
- 创建快捷方式
# 目标位置
C:\....\LxRunOffline.exe run -w -n "CentOS_slave"
- 改my.cnf, 略
主从配置
情景概述
#Win:
#	localhost:3306
(Master,id=1000)WSL_CentOS:
	localhost:3307
(Slave,id=1001)WSL_CentOS_slave:
	localhost:3308
主
配置主 my.cnf
[mysqld]
# [必须] 启用二进制日志
log-bin=mysql-bin
# [必须] 服务器唯一id
server-id=1000
重启MySQL
# 关
mysqladmin -uroot -p shutdown
# 开
mysqld --user=mysql --port=3307
执行SQL,创建一个 salve 账户
slave必须被master授予对应权限的用户
(username=ming, password=ming@slave,允许远程登录)
-- MySQL8 之前直接使用命令
GRANT REPLICATION SLAVE ON *.* to 'ming'@'%' IDENTIFIED BY 'ming@slave';


-- MySQL8之后 需要先创建账户 root.password = 'root'
CREATE USER 'ming'@'%' IDENTIFIED BY 'root';
ALTER USER 'ming'@'%' IDENTIFIED WITH mysql_native_password BY 'ming@slave';
GRANT REPLICATION CLIENT ON *.* TO 'ming'@'%';
GRANT REPLICATION SLAVE ON *.* TO 'ming'@'%';
查看(之后不要操作master), 记录 File 和 Position
SHOW MASTER STATUS;
从
配置从 my.cnf
[mysqld]
# [必须] 服务器唯一id
server-id=1001
重启MySQL
# 关
mysqladmin -uroot -p shutdown
# 开
mysqld --user=mysql --port=3308
登录并执行SQL
CHANGE MASTER TO
MASTER_HOST='127.0.0.1'
,MASTER_USER='ming'
,MASTER_PASSWORD='ming@slave'
,MASTER_PORT=3307 --主库端口号
,MASTER_LOG_FILE='mysql-bin.000003' -- 主库的 File 字段, 如: mysql-bin.000003
,MASTER_LOG_POS=1411; -- 主库的 Position 字段, 如: 1411

START SLAVE;
-- 停止 slave
-- STOP SLAVE;
查看 slave状态
SHOW SLAVE STATUS \G;
由于我们使用了复制WSL的做法,导致了MySQL的UUID一致,查看两台MySQL的UUID
show variables like '%server_uuid%';
修改uuid(这里并不严谨,仍然有可能出现重复的UUID,建议重新初始化....凑合用也行)
vim /usr/local/mysql/data/auto.cnf
#########################################
# 手动赋予一个 uuid即可
最终的 SHOW SLAVE STATUS \G;表示成功
             Slave_IO_Running: Yes
            Slave_SQL_Running: Yes
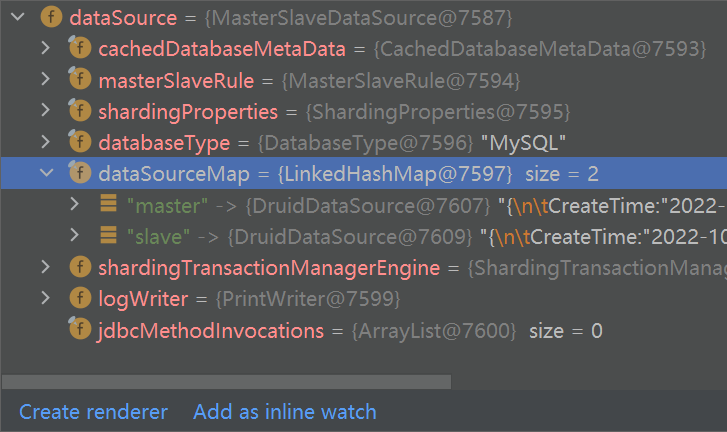
基于Sharding-JDBC的读写分离
maven坐标(spring-boot 整合)
<dependency>
    <groupId>org.apache.shardingsphere</groupId>
    <artifactId>sharding-jdbc-spring-boot-starter</artifactId>
    <version>4.0.0-RC1</version>
</dependency>
测试数据库rw
application.yaml
spring:
  shardingsphere:
    datasource:
      names:
        master,slave
      # 主数据源
      master:
        type: com.alibaba.druid.pool.DruidDataSource
        driver-class-name: com.mysql.cj.jdbc.Driver
        url: jdbc:mysql://localhost:3307/rw?serverTimezone=Asia/Shanghai&useUnicode=true&characterEncoding=utf-8&zeroDateTimeBehavior=convertToNull&useSSL=false&allowPublicKeyRetrieval=true
        username: root
        password: root
      # 从数据源
      slave:
        type: com.alibaba.druid.pool.DruidDataSource
        driver-class-name: com.mysql.cj.jdbc.Driver
        url: jdbc:mysql://localhost:3308/rw?serverTimezone=Asia/Shanghai&useUnicode=true&characterEncoding=utf-8&zeroDateTimeBehavior=convertToNull&useSSL=false&allowPublicKeyRetrieval=true
        username: root
        password: root
    masterslave:
      # 读写分离配置, 从库的负载均衡配置, round_robin 轮询
      load-balance-algorithm-type: round_robin
      # 最终的数据源名称
      name: dataSource
      # 主库数据源名称
      master-data-source-name: master
      # 从库数据源名称列表,多个逗号分隔
      slave-data-source-names: slave
    props:
      sql:
        show: true #开启SQL显示,默认false
  main:
    allow-bean-definition-overriding: true

发送查找请求(getUserById)
// [get]127.0.0.1:8080/user/123
@GetMapping("/{id}")
public User getById(@PathVariable Long id){
    User user = userService.getById(id);
    return user;
}
控制台SQL(使用了3308端口,slave)
....::: DataSources: slave
jdbc:mysql://localhost:3308/rw...,
jdbcUrl : jdbc:mysql://localhost:3308/rw...,
lastPacketReceivedIdleMillis : 167422
==> Parameters: 123(Long)
<==      Total: 0
发送创建请求
// [post]127.0.0.1:8080/user/
// [body] {}
@PostMapping
public User save(User user){
    userService.save(user);
    return user;
}
控制台SQL(给到了3307端口,master)
==>  Preparing: INSERT INTO user ( id, name, age, address ) VALUES ( ?, ?, ?, ? )

name,
age,
address )  VALUES  ( ?,
?,
?,
? ) ::: DataSources: master

jdbc:mysql://localhost:3307/rw...,
jdbcUrl : jdbc:mysql://localhost:3307/rw...,
lastPacketReceivedIdleMillis : 92166
==> Parameters: 1587029507603152898(Long), zhangsan(String), 20(Integer), 无(String)
<==    Updates: 1

