在现代 Web 开发中,使用 Vue 框架构建项目已经成为一种常见的选择。而 JeecgBoot 作为一个优秀的后台管理系统框架,也提供了丰富的功能和组件,方便开发人员快速搭建企业级应用。本文将介绍如何在 JeecgBoot 项目中基于 Vue 3 配置多页面入口,实现更灵活的页面管理和定制化需求。
前提
首先,确保您已经下载好 JeecgBoot 的 Vue 3 的前端项目。
源码地址:https://github.com/jeecgboot/JeecgBoot
前端 vue3 配置项目多页面入口
1. 项目根目录新建 home.html
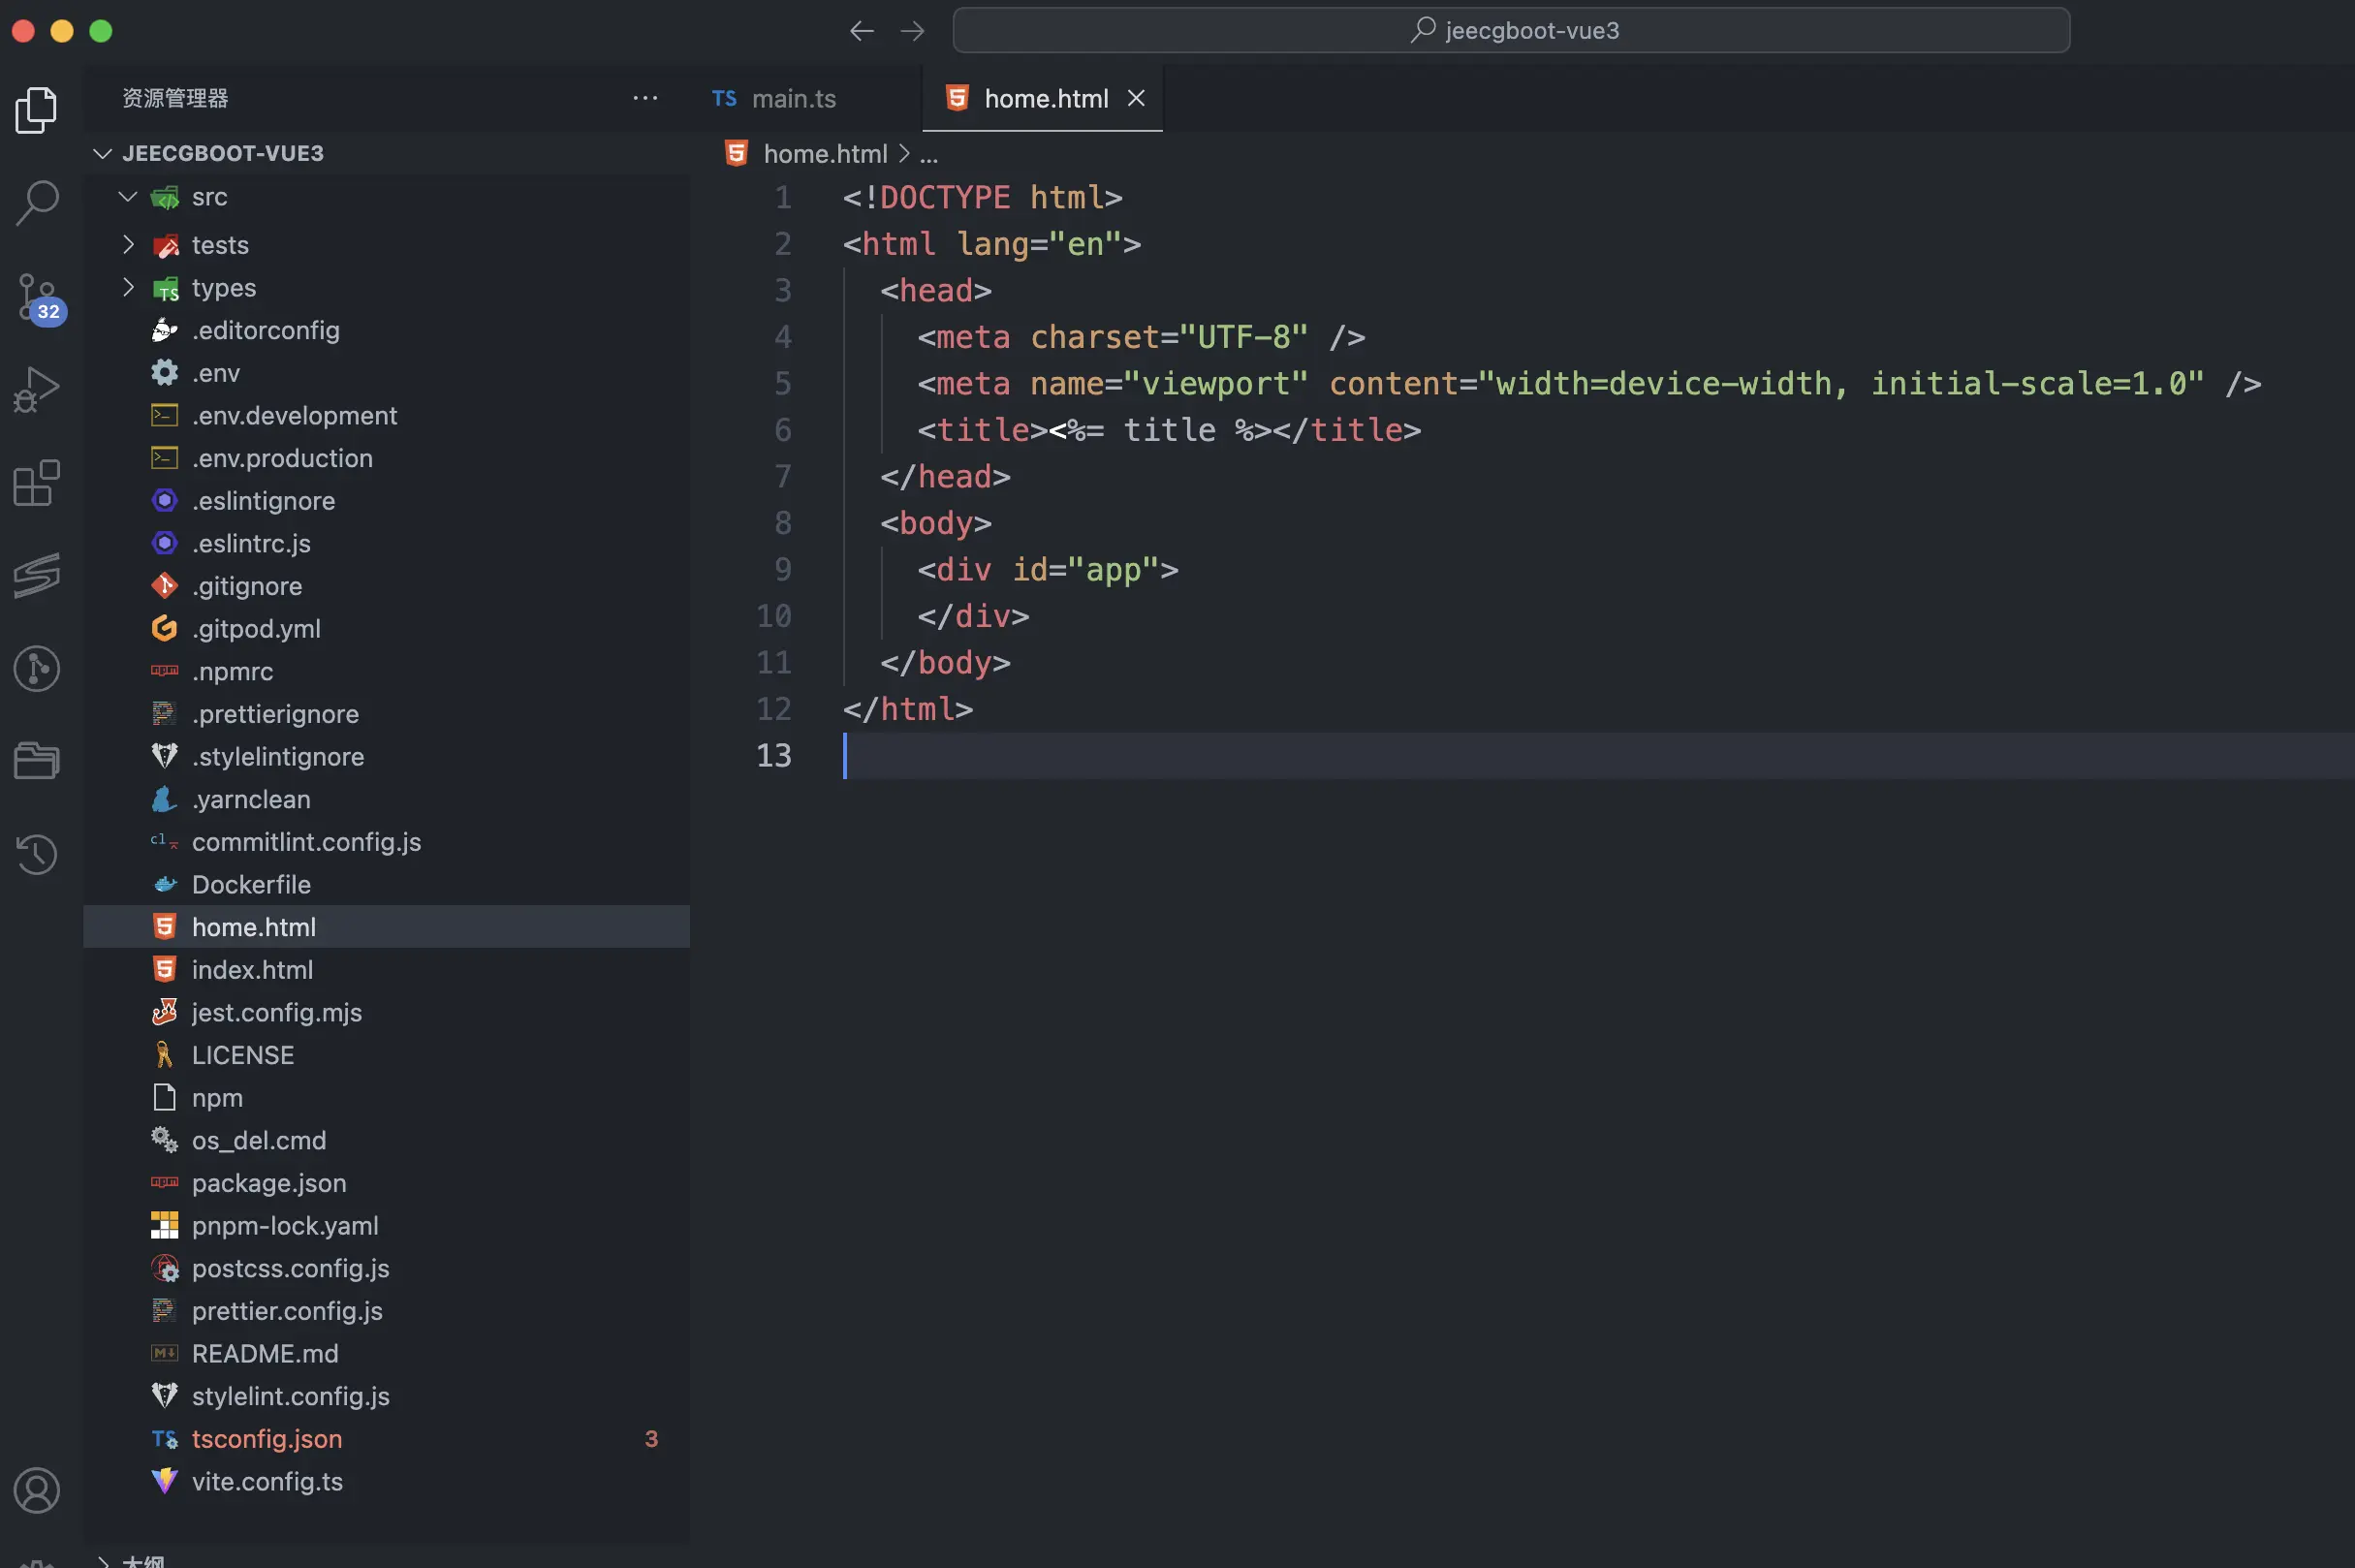
<!DOCTYPE html>
<html lang="en">
	<head>
		<meta charset="UTF-8" />
		<meta name="viewport" content="width=device-width, initial-scale=1.0" />
		<title><%= title %></title>
	</head>
	<body>
		<div id="app">
		</div>
	</body>
</html>
2.src 目录下新建 multiPage/home 目录及 App.vue 和 main.ts 文件
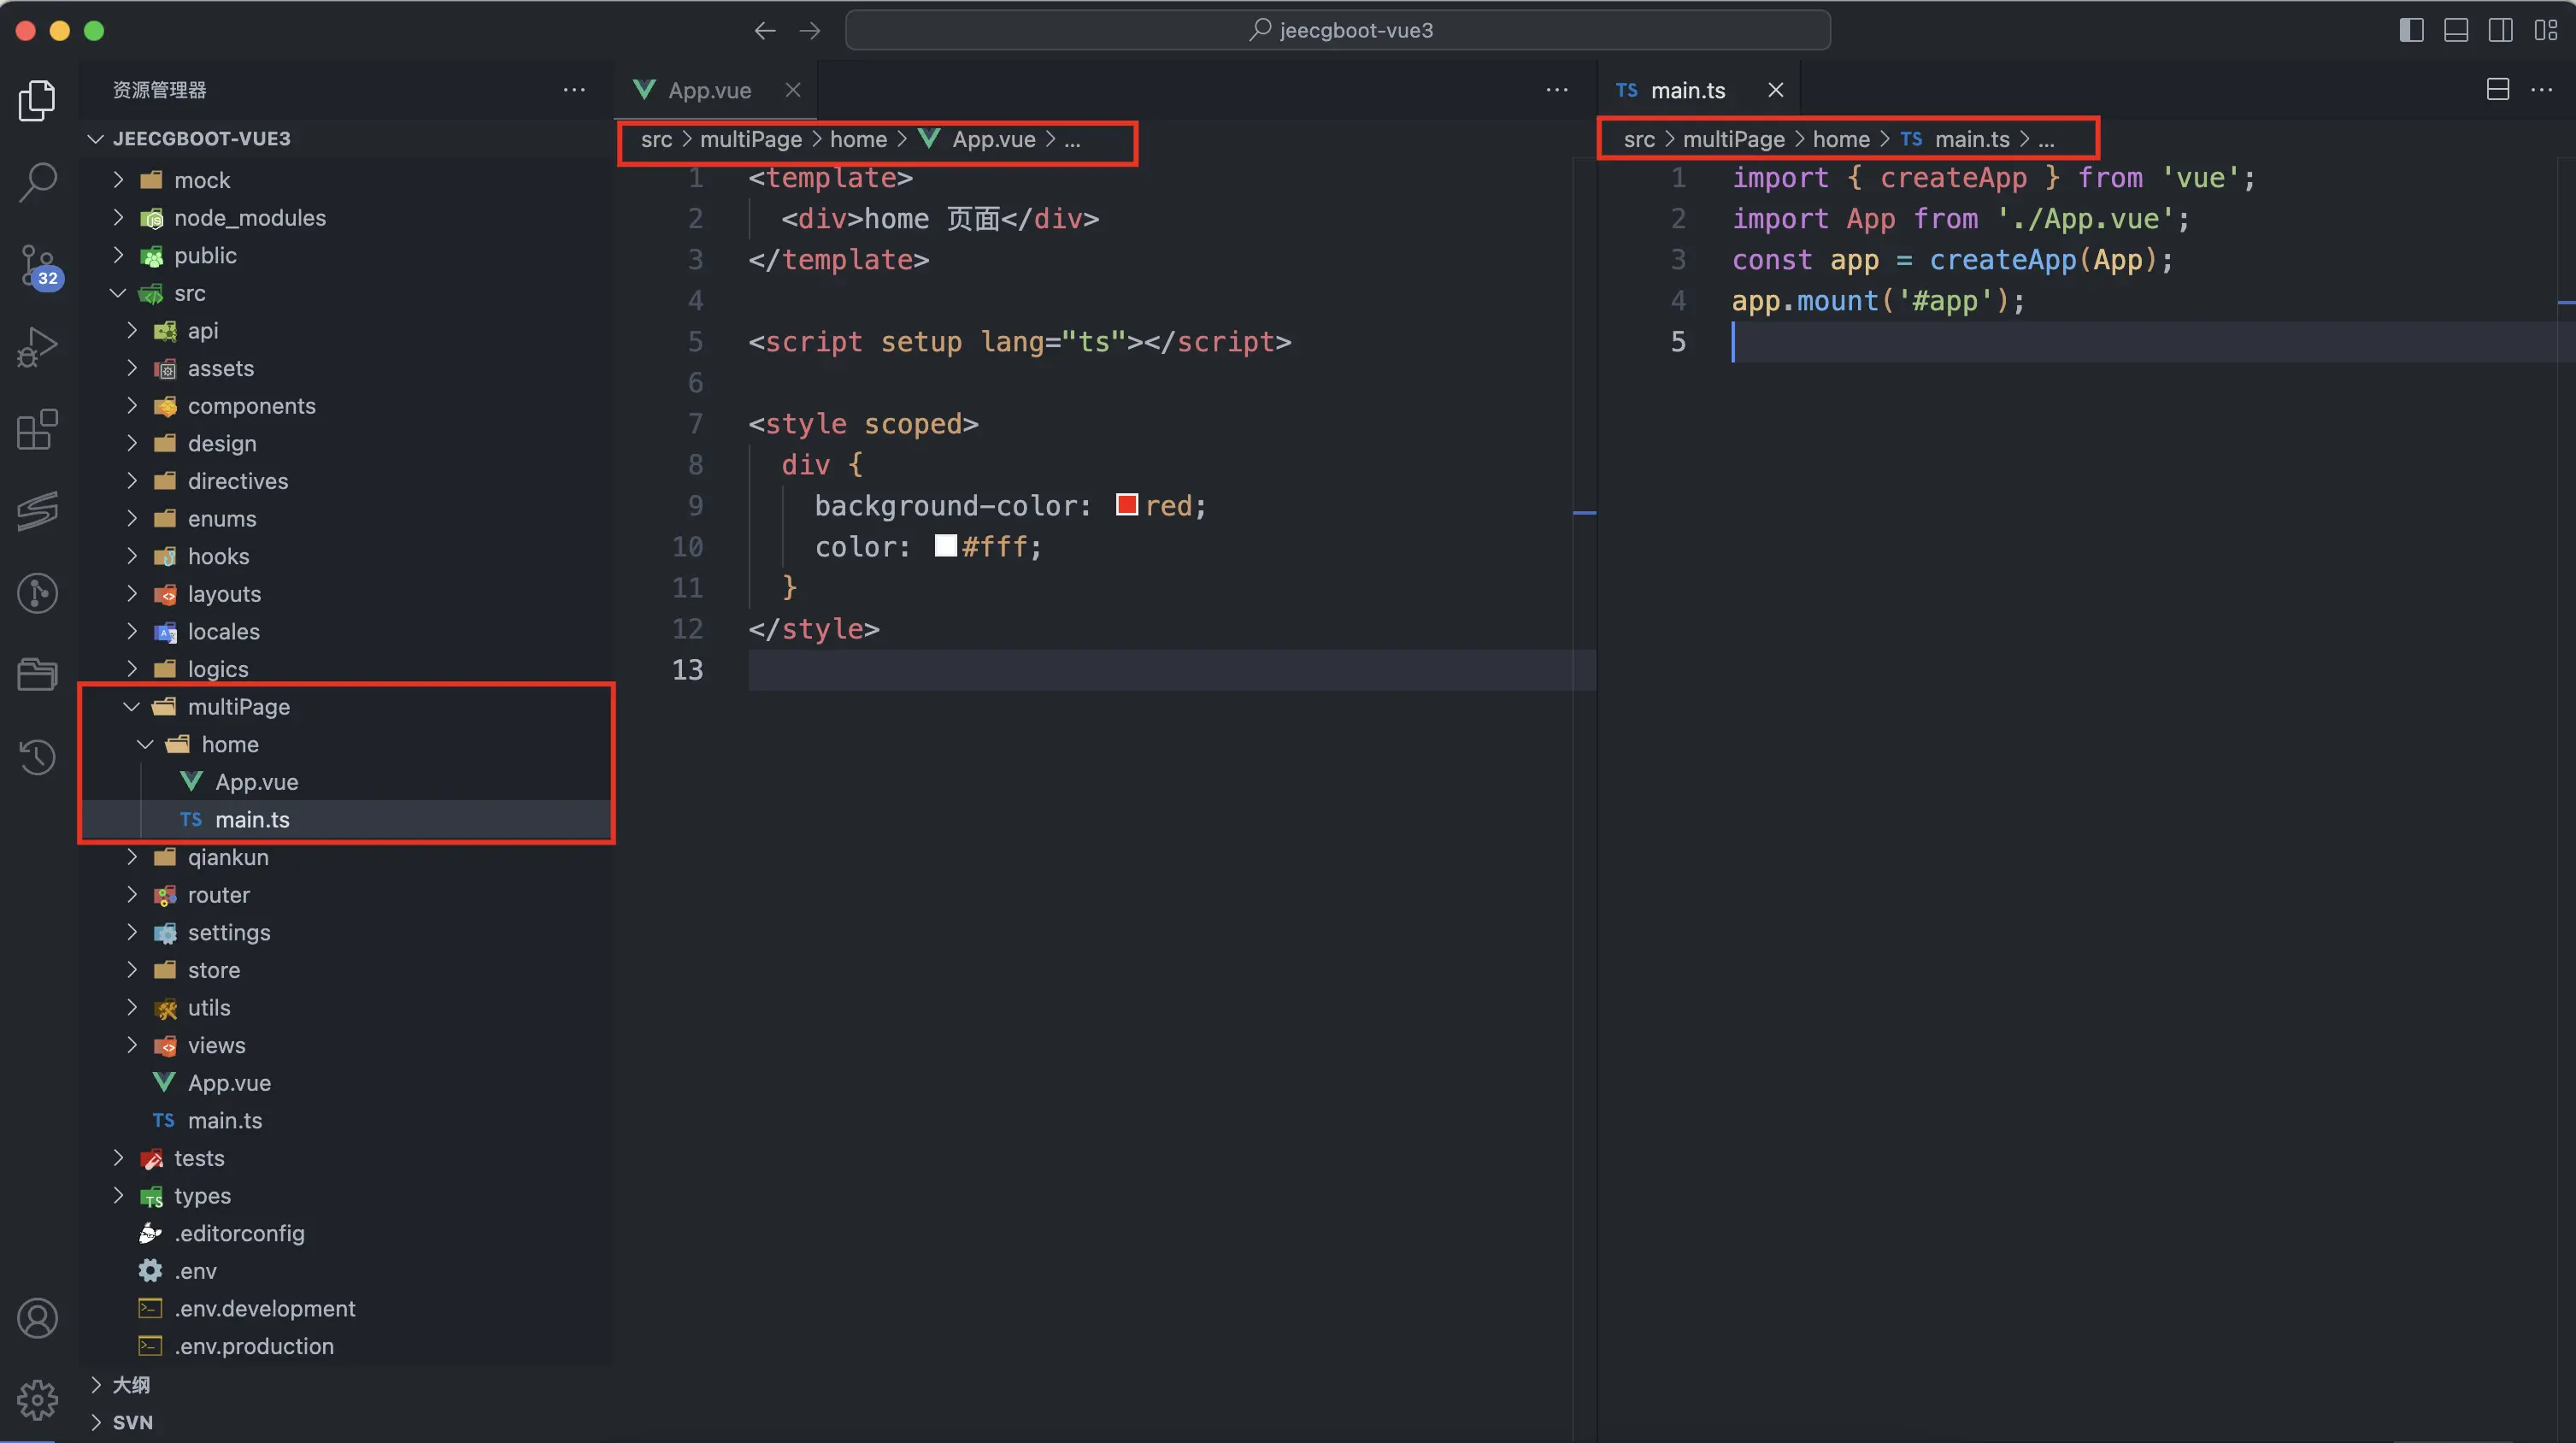
<template>
  <div>home 页面</div>
</template>
<script setup lang="ts"></script>
<style scoped>
  div {
    background-color: red;
    color: #fff;
  }
</style>
import { createApp } from 'vue';
import App from './App.vue';
const app = createApp(App);
app.mount('#app');
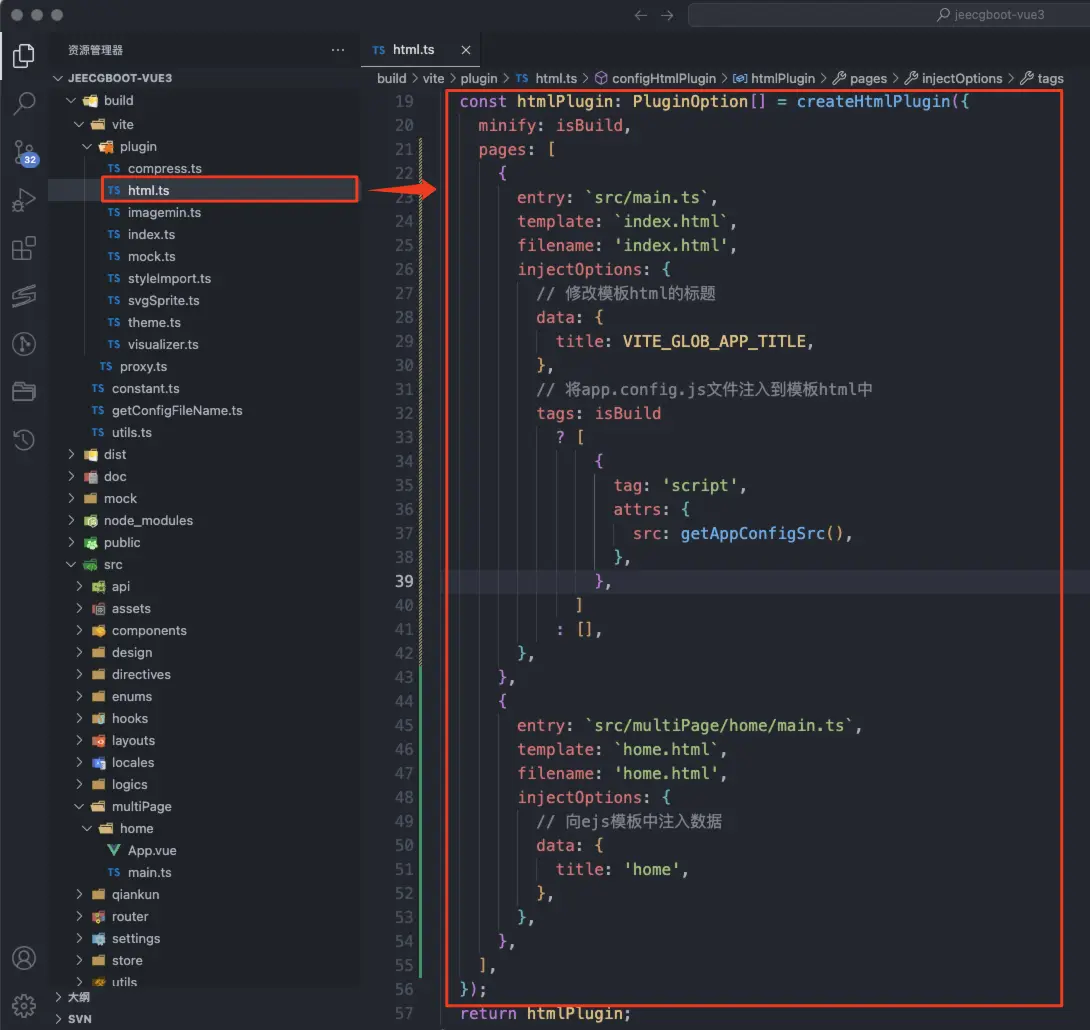
3. 替换 build/vite/plugin/html.ts 中的 htmlPlugin
const htmlPlugin: PluginOption[] = createHtmlPlugin({
    minify: isBuild,
    pages: [
      {
        entry: `src/main.ts`,
        template: `index.html`,
        filename: 'index.html',
        injectOptions: {
          // 修改模板html的标题
          data: {
            title: VITE_GLOB_APP_TITLE,
          },
          // 将app.config.js文件注入到模板html中
          tags: isBuild
            ? [
                {
                  tag: 'script',
                  attrs: {
                    src: getAppConfigSrc(),
                  },
                },
              ]
            : [],
        },
      },
      {
        entry: `src/multiPage/home/main.ts`,
        template: `home.html`,
        filename: 'home.html',
        injectOptions: {
          // 向ejs模板中注入数据
          data: {
            title: 'home',
          },
        },
      },
    ],
  });
效果: