MySQL安装二:linux下安装MySQL
1 上传mysql-5.7.26-linux-glibc2.12-x86_64.tar.gz至目录/usr/local
2 解压,重命名
tar xf mysql-5.7.26-linux-glibc2.12-x86_64.tar.gz
mv mysql-5.7.26-linux-glibc2.12-x86_64 mysql
3 创建mysql用户,添加环境变量
useradd mysql
vim /etc/profile
export PATH=/usr/local/mysql/bin:$PATH
source /etc/profile
检查是否成功 mysql -V

4 创建数据目录并授权
mkdir -p /data/mysql/data
chown -R mysql.mysql /data/mysql/data /usr/local/mysql
5 初始化
mysqld --initialize-insecure --basedir=/usr/local/mysql --datadir=/data/mysql/data --user=mysql
如果出现如下错误:

这是没有安装libaio-devel 软件包所致,安装:yum install -y libaio-devel
安装完后再执行初始化命令,结果如下:

root@localhost is created with an empty password !
6 编写配置文件
[root@izwz94fgyfy9i6g659owj8z local]# \rm -f /etc/my.cnf
[root@izwz94fgyfy9i6g659owj8z local]# cat >/etc/my.cnf<<EOF
> [mysqld]
> user=mysql
> basedir=/usr/local/mysql
> datadir=/data/mysql/data
> socket=/tmp/mysql.sock
> [mysql]
> socket=/tmp/mysql.sock
> EOF
7 启动
[root@izwz94fgyfy9i6g659owj8z support-files]# cd /usr/local/mysql/support-files/
[root@izwz94fgyfy9i6g659owj8z support-files]# ./mysql.server start

8 使用service管理启停
./mysql.server stop
cp mysql.server /etc/init.d/mysqld

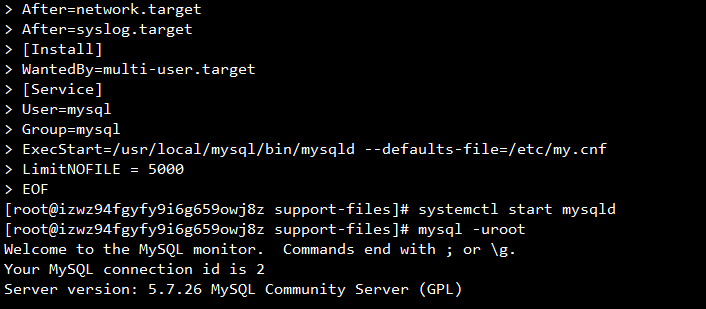
9 使用systemd管理mysql
cat > /etc/systemd/system/mysqld.service <<EOF
[Unit]
Description=MySQL Server
Documentation=man:mysqld(8)
Documentation=http://dev.mysql.com/doc/refman/en/using-systemd.html
After=network.target
After=syslog.target
[Install]
WantedBy=multi-user.target
[Service]
User=mysql
Group=mysql
ExecStart=/usr/local/mysql/bin/mysqld --defaults-file=/etc/my.cnf
LimitNOFILE = 5000
EOF

 浙公网安备 33010602011771号