NGINX虚拟主机
一、基于域名的nginx虚拟主机
1.1、基于域名的nginx虚拟主机的操作步骤
1.1.1 为虚拟主机提供域名和IP的映射(也可以使用DNS正向解析)
echo "192.168.2.66 www.xkq.com www.wy.com" >> /etc/hosts
1.2 为虚拟主机准备网页文档
mkdir -p /var/www/html/ly/
mkdir -p /var/www/html/weq/
echo "<h1>www.xkq.com</h1>" > /var/www/html/ly/index.html
echo "<h1>www.wwy.com</h1>" > /var/www/html/weq/index.html
1.3 修改nginx主配置文件
vim /usr/local/nginx/conf/nginx.conf

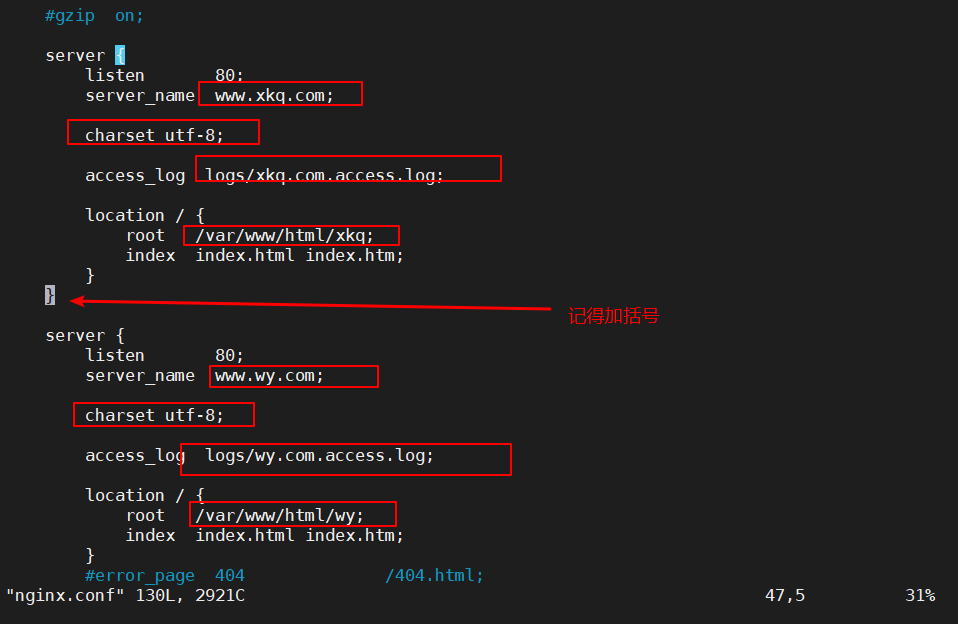
server {
        listen       80;
        server_name  www.xkq.com;                        #设置域名
        charset utf-8;                                  #设置网页字符集
        access_log  logs/xkq.com.access.log;         #设置日志名
        location / {
            root   /var/www/html/xkq;                    #设置www.xkq.com的工作目录
            index  index.html index.htm;
        }
        error_page   500 502 503 504  /50x.html;
        location = /50x.html {
            root   html;
        }
    }
    server {
        listen       80;
        server_name  www.wy.com;                       #设置域名
        charset utf-8;                                  #设置网页字符集
        access_log  logs/wy.com.access.log;            #设置日志名
        location / {
            root   /var/www/html/wy;                   #设置www.weq.com的工作目录
            index  index.html index.htm;
        }
1.4 重启nginx后进行访问测试
systemctl restart nginx
浏览器访问http://www.xkq.com
浏览器访问http://www.wy.com
2、实例操作:基于域名的nginx虚拟主机
2.1 为虚拟主机提供域名解析

2.2 为虚拟主机准备网页文档

2.3 修改Nginx的配置文件


2.4 重启服务,访问测试

二、基于IP的nginx虚拟主机
1、基于IP的nginx虚拟主机的操作步骤
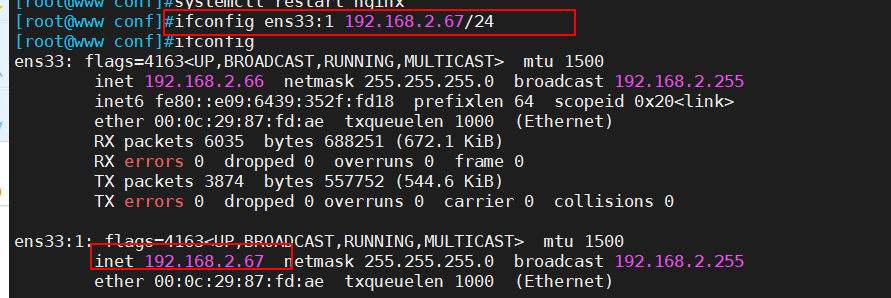
1.1 添加虚拟网卡,修改主配置文件
ifconfig ens33:1 192.168.2.67/24
vim /usr/local/nginx/conf/nginx.conf
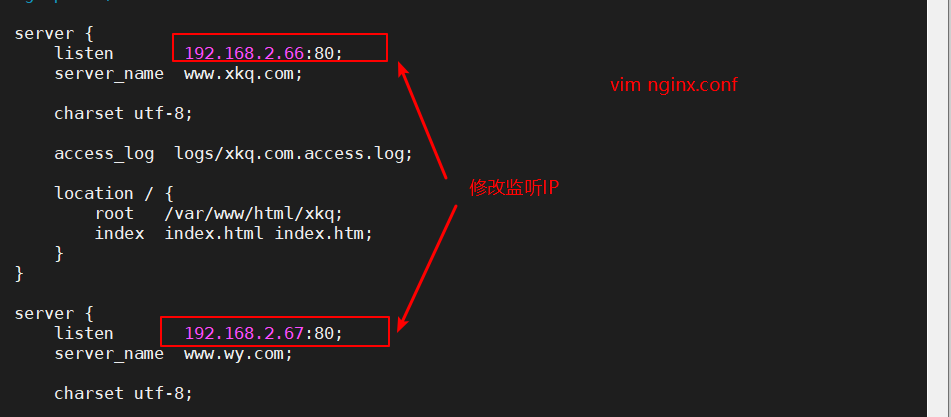
server {
       listen       192.168.2.66:80;             #修改监听的为ip
       server_name  www.ly.com;
       charset utf-8;
       access_log  logs/ly.com.access.log;
       location / {
           root   /var/www/html/ly;
           index  index.html index.htm;
       }
       error_page   500 502 503 504  /50x.html;
       location = /50x.html {
           root   html;
       }
   }
   server {
       listen       192.168.2.67:80;             #修改监听的为ip
       server_name  www.weq.com;
       charset utf-8;
       access_log  logs/weq.com.access.log;
       location / {
           root   /var/www/html/weq;
           index  index.html index.htm;
       }
1.2 检查配置文件,重启服务并访问测试
nginx -t
systemctl restart nginx
浏览器访问http://192.168.229.66:80
浏览器访问http://192.168.229.67:80
2、实例操作:基于IP的nginx虚拟主机
2.1 添加虚拟网卡
2.2 修改主配置文件,并重启服务


2.3 浏览器访问测试

三、基于端口的nginx虚拟主机
1、基于端口的nginx虚拟主机的操作步骤
1.1 修改主配置文件
vim /usr.local/nginx/conf/nginx.conf
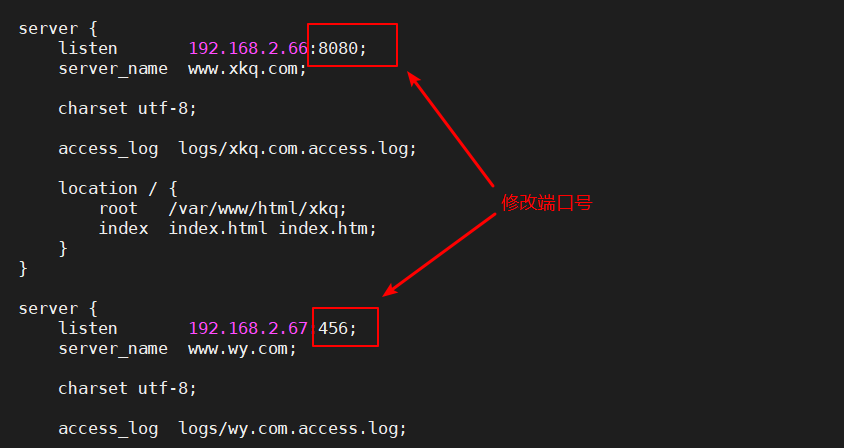
server {
        listen       192.168.2.66:8080;               #修改监听的为ip
        server_name  www.ly.com;
        charset utf-8;
        access_log  logs/ly.com.access.log;
        location / {
            root   /var/www/html/ly;
            index  index.html index.htm;
        }
        error_page   500 502 503 504  /50x.html;
        location = /50x.html {
            root   html;
        }
    }
    server {
        listen       192.168.2.67:456;                #修改监听的为ip
        server_name  www.weq.com;
        charset utf-8;
        access_log  logs/weq.com.access.log;
        location / {
            root   /var/www/html/weq;
            index  index.html index.htm;
        }
1.2 检查配置文件,重启服务并访问测试
nginx -t
systemctl restart nginx.service
浏览器访问http://192.168.2.66:8080
浏览器访问http://192.168.2.67:456
2、实例操作:基于端口的nginx虚拟主机
2.1 修改主配置文件,并重启服务


2.2 浏览器访问测试


