Django实现OSS日志下载
Django实现OSS日志下载
一、python3.7安装
1、下载安装python3.7
[root@lvs-nginx1 ~]# wget https://www.python.org/ftp/python/3.7.3/Python-3.7.3.tgz
[root@lvs-nginx1 ~]# tar -xf Python-3.7.3.tgz
[root@lvs-nginx1 ~]# mkdir /usr/local/python3.7.3
[root@lvs-nginx1 ~]# cd Python-3.7.3
[root@lvs-nginx1 ~]# ./configure --prefix=/usr/local/python3.7.3 --enable-optimizations
[root@lvs-nginx1 ~]# make && make install
[root@lvs-nginx1 Python-3.7.3]# ln -s /usr/local/python3.7.3/bin/python3.7 /usr/bin/python3.7
[root@lvs-nginx1 Python-3.7.3]# python3.7
Python 3.7.3 (default, Nov  7 2019, 16:07:52)
[GCC 4.4.7 20120313 (Red Hat 4.4.7-23)] on linux
Type "help", "copyright", "credits" or "license" for more information.
>>> exit()
二、创建Django
1、创建django
[root@k8s-es7 python]# /usr/local/python3.7/bin/django-admin startproject getoslogs
[root@k8s-es7 python]# cd getoslogs/
[root@k8s-es7 getoslogs]# python manage.py startapp getlogs			##创建app
[root@k8s-es7 getoslogs]# python manage.py migrate
Operations to perform:
  Apply all migrations: admin, auth, contenttypes, sessions
Running migrations:
  Applying contenttypes.0001_initial... OK
  Applying auth.0001_initial... OK
  Applying admin.0001_initial... OK
  Applying admin.0002_logentry_remove_auto_add... OK
  Applying admin.0003_logentry_add_action_flag_choices... OK
  Applying contenttypes.0002_remove_content_type_name... OK
  Applying auth.0002_alter_permission_name_max_length... OK
  Applying auth.0003_alter_user_email_max_length... OK
  Applying auth.0004_alter_user_username_opts... OK
  Applying auth.0005_alter_user_last_login_null... OK
  Applying auth.0006_require_contenttypes_0002... OK
  Applying auth.0007_alter_validators_add_error_messages... OK
  Applying auth.0008_alter_user_username_max_length... OK
  Applying auth.0009_alter_user_last_name_max_length... OK
  Applying auth.0010_alter_group_name_max_length... OK
  Applying auth.0011_update_proxy_permissions... OK
  Applying sessions.0001_initial... OK
[root@k8s-es7 getoslogs]# python manage.py createsuperuser
Username (leave blank to use 'root'): root
Email address: 547253687@qq.com
Password:
Password (again):
This password is too short. It must contain at least 8 characters.
This password is too common.
This password is entirely numeric.
Bypass password validation and create user anyway? [y/N]: y
Superuser created successfully.
此时在getoslogs/settings.py里面INSTALLED_APPS添加刚刚创建的getlogs,将ALLOWED_HOSTS替换成ALLOWED_HOSTS = ['*'],允许所有人访问,这时候就创建好了项目和app。启动
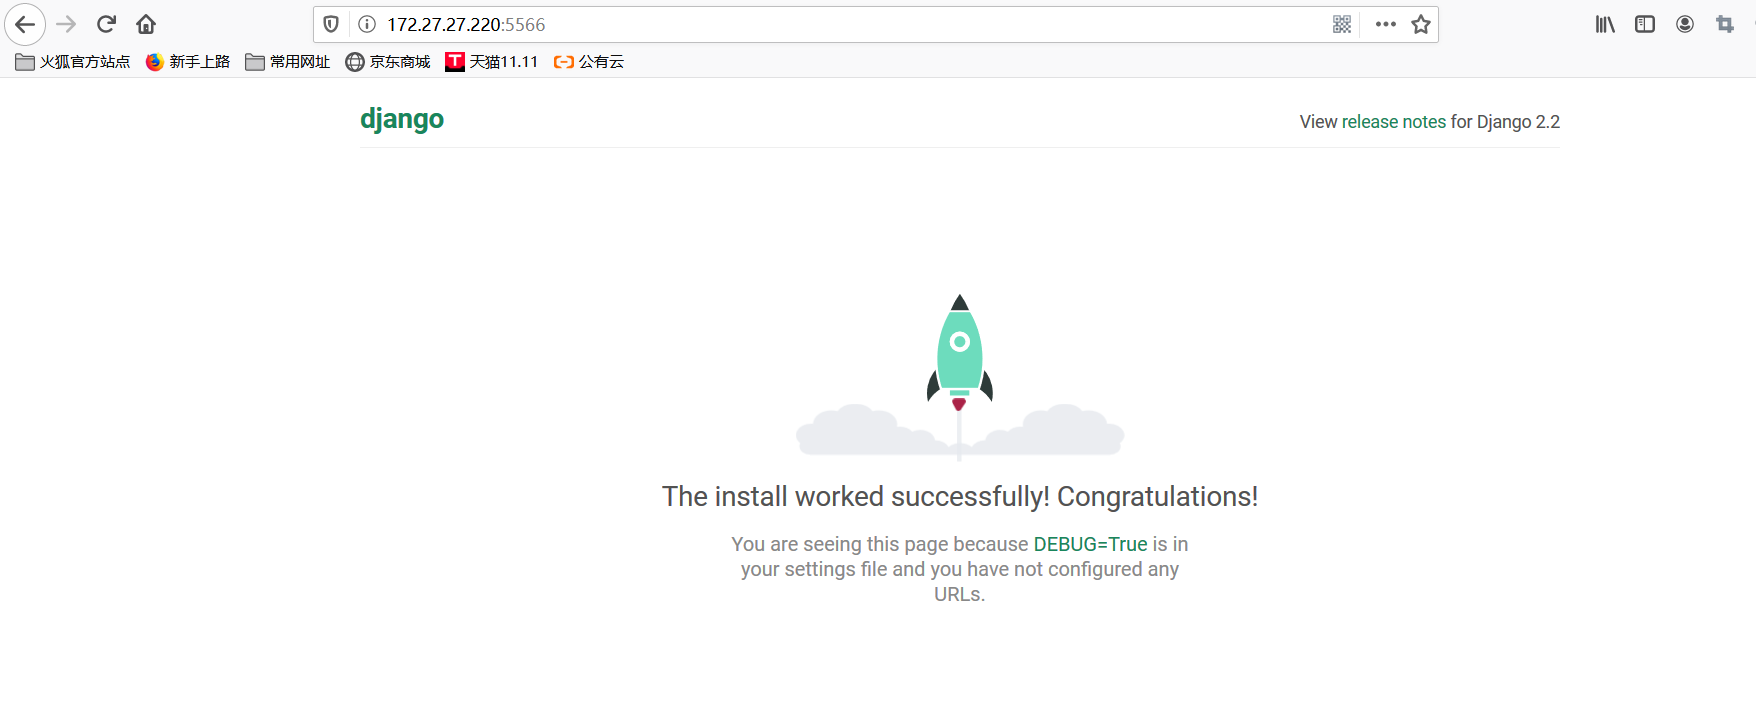
python manget.py runserver 0.0.0.0:5566,这时候django已经正常启动,访问如下图

2、添加py脚本
这个脚本很简单,就是两个函数,listfile函数用来获取前端输入的时间,oss api来获取到该时间下的备份日志文件,返回给前端。
filejiedong这个函数用来获取前段勾选的文件,解冻以及下载文件
[root@k8s-es7 getoslogs]# cd /home/pb/python/test/
[root@k8s-es7 test]# cat listdir.py
#!/usr/local/bin/python3.7
# -*- coding: utf-8 -*-

import oss2,time,sys;
from flask import Flask,send_file
from django.shortcuts import render
from django.http import HttpResponse;
sys.path.append('/home/pb/python/getoslogs/getlogs');
import views;
import threading;

def environment(aliyun):
    if aliyun == "jinrongyun":
        auth = oss2.Auth('yourAccessKeyId','yourAccessKeySecret');
        bucket = oss2.Bucket(auth, 'http://oss-cn-hangzhou.aliyuncs.com', 'yourBucketName');
        return bucket;
    else:
        auth = oss2.Auth('yourAccessKeyId','yourAccessKeySecret');
        bucket = oss2.Bucket(auth, 'http://oss-cn-hangzhou.aliyuncs.com', 'yourBucketName');
        return bucket;

def listfile(date_time,bucket):
    data = [];
    data1 = [];
    for obj in oss2.ObjectIterator(bucket, prefix = date_time):
        data.append(obj.key)
    for x in range(len(data)):
        if "tar.gz" in data[x]:
            data1.append(data[x])
    return data1;

def filejiedong(objectname,bucket,cc):
    #cc = [];
    file_list = [];
    file_list.append(objectname);
    meta = bucket.head_object(objectname);
    if "expiry-date" not in str(meta.resp.headers):
        bucket.restore_object(objectname);
        while True:
            time.sleep(3);
            meta = bucket.head_object(objectname);
            if "expiry-date"  in str(meta.resp.headers):
                requesturl=(bucket.sign_url('GET',objectname,36000));
                cc.append(requesturl);
                return cc;
                break;
            else:
                continue;
    else:
        requesturl=(bucket.sign_url('GET',objectname,36000));
        cc.append(requesturl);
        return cc;

def main(objectname,bucket):
    #存放线程的list
    cc = [];
    threads = [];
    for file_name in objectname:
        print("filename:",file_name);
        t = threading.Thread(target=filejiedong,args=(file_name,bucket,cc,));
        threads.append(t);

    for t in threads:
        t.start();
        #join方法作用是,让主线程等待该线程结束,所以join应该放在下面的循环里,放在这里就会导致这个启动线程的循环阻塞。结果就是顺序执行。
        #join也可以设置超时时间
        #join函数只在主线程进行等待的时候有用,如果主线程还有其他事情,没必要调用join阻塞自己。
        #t.join()
    for t in threads:
        t.join();
    return cc;
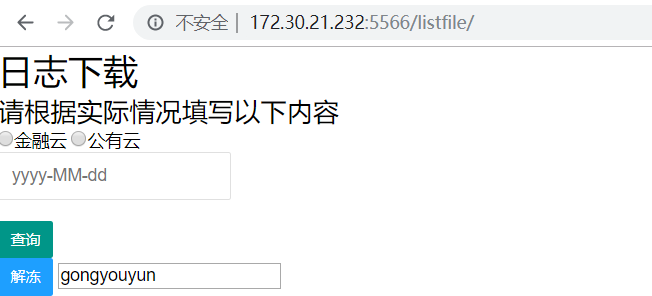
然后去前端页面准备一个简单的html页面
[root@k8s-es7 getlogs]# mkdir /home/pb/python/getoslogs/getlogs/templates
[root@k8s-es7 getlogs]# cd /home/pb/python/getoslogs/getlogs/templates
[root@k8s-es7 getlogs]# cat templates/listfile.html
<!DOCTYPE html>
<html>
<head>
<meta charset="UTF-8">
<title>日志下载</title>
<link rel="stylesheet" href="../../static/css/layui.css" media="all">
</head>
<body>
    <h1>日志下载</h1>
    <h2>请根据实际情况填写以下内容</h2>
    <form method="post" action="/listfile/">
            <!-- <input type="text" name="file_date" placeholder="日期"> -->
            <div>
                <label><input type="radio" name="aliyun" value="jinrongyun">金融云</label>
                <label><input type="radio" name="aliyun" value="gongyouyun">公有云</label>
            </div>
            <div class="layui-inline">
                <!-- 注意:这一层元素并不是必须的 -->
                <input type="text" class="layui-input" id="test1" name="file_date"
                    placeholder="yyyy-MM-dd">
            </div>
            <br> {{ error }}
            <br>
            <button id="btn" type="submit" class="layui-btn layui-btn-sm">查询</button>
            {% csrf_token %}

    </form>
    <form method="post" action="/listfile/">
        <button id="btn" type="submit"
            class="layui-btn layui-btn-normal layui-btn-sm">解冻</button>
                <input type="text" value="{{ aliyun }}" name="aliyun">
        {% for url in result %}
        </br>
            <input type="checkbox" value="{{ url }}" name="file_jiedong">
            <a> {{url}} </a>
            {% endfor %}
        {{ error }}<br>
        {% csrf_token %}

    </form>


        {% for url in result1 %}
        </br>
        <a href={{url}}>{{url}}</a>
            {% endfor %}
        {{ error }}<br>
        {% csrf_token %}


    <script src="../../static/layui.js"></script>
    <script>
        layui.use('laydate', function() {
            var laydate = layui.laydate;

            //执行一个laydate实例
            laydate.render({
                elem : '#test1' //指定元素
            });
        });
    </script>
</body>
</html>
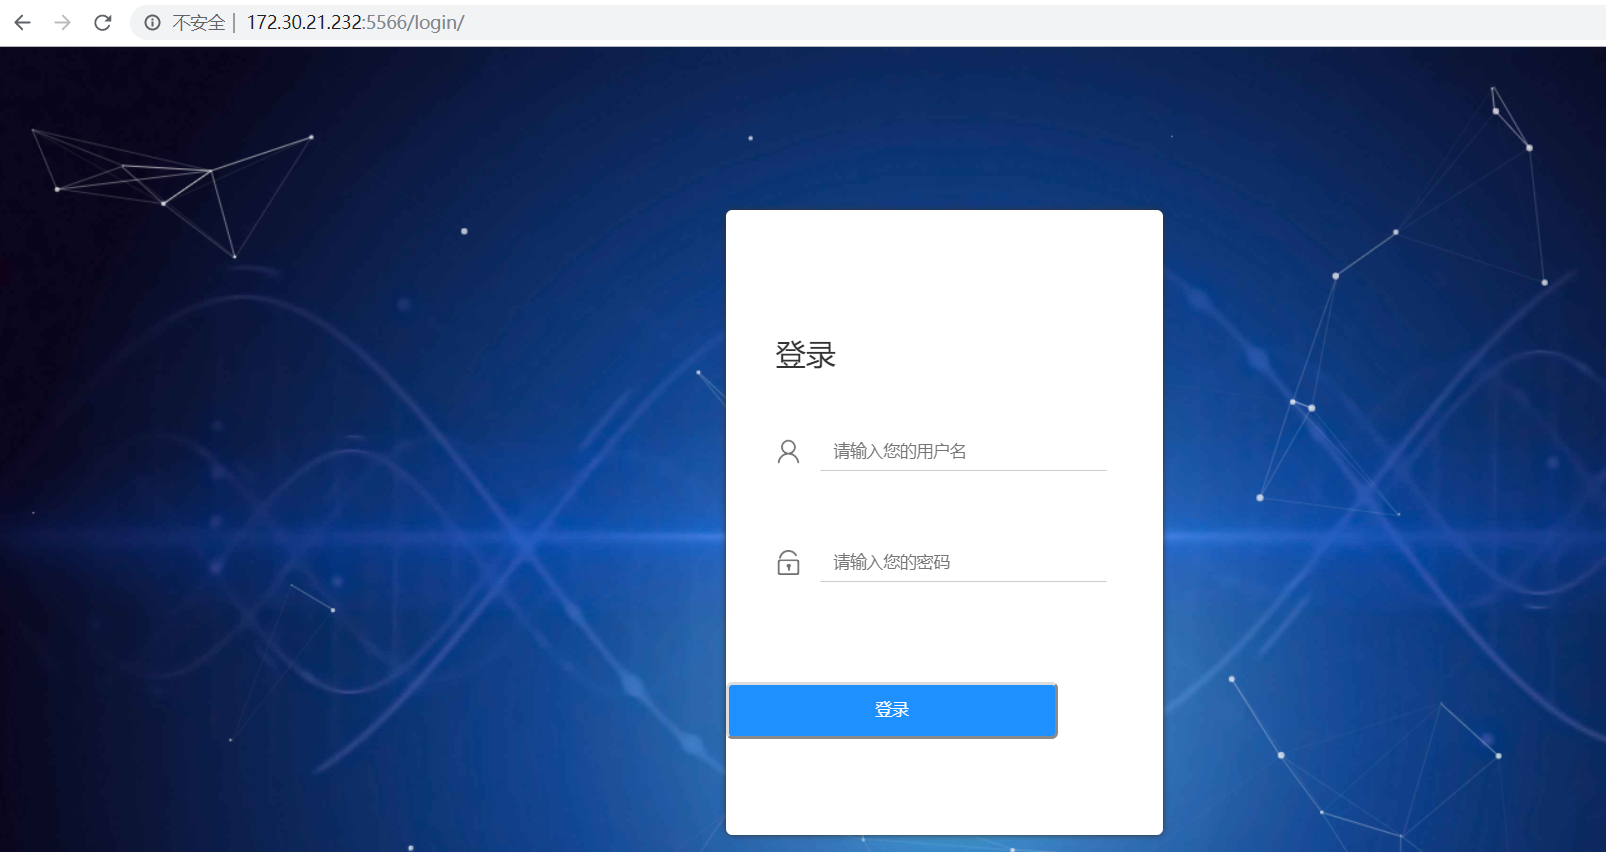
添加一个login界面,可以自己去网上找模板下载
[root@k8s-es7 getlogs]# cat templates/index.html
<!DOCTYPE html>
<html lang="en">
<head>
  <meta charset="utf-8">
  <title>HTML5响应式用户登录界面模板</title>
  <meta name="description" content="particles.js is a lightweight JavaScript library for creating particles.">
  <meta name="author" content="Vincent Garreau" />
  <meta name="viewport" content="width=device-width, initial-scale=1.0, minimum-scale=1.0, maximum-scale=1.0, user-scalable=no">
  <link rel="stylesheet" media="screen" href="/static/css/style.css">
  <link rel="stylesheet" type="text/css" href="/static/css/reset.css"/>
</head>
<body>

<form method="post" action="/login/">
<div id="particles-js">
		<div class="login">
			<div class="login-top">
				登录
			</div>
			<div class="login-center clearfix">
				<div class="login-center-img"><img src="/static/img/name.png"/></div>
				<div class="login-center-input">
					<input type="text" name="username" value="" placeholder="请输入您的用户名" onfocus="this.placeholder=''" onblur="this.placeholder='请输入您的用户名'"/>
					<div class="login-center-input-text">用户名</div>
				</div>
			</div>
			<br> {{ error }}
			<br>
			<div class="login-center clearfix">
				<div class="login-center-img"><img src="/static/img/password.png"/></div>
				<div class="login-center-input">
					<input type="password" name="password" value="" placeholder="请输入您的密码" onfocus="this.placeholder=''" onblur="this.placeholder='请输入您的密码'"/>
					<div class="login-center-input-text">密码</div>
				</div>
			</div>
			<!-- <div type="submit" class="login-button">
				登录
			</div> -->
			<button type="submit" class="login-button">
				登录
			</button>
			{% csrf_token %}
		</div>
		<div class="sk-rotating-plane"></div>
</div>
</form>

<!-- scripts -->
<script src="/static/js/particles.min.js"></script>
<script src="/static/js/app.js"></script>
<script type="text/javascript">
	function hasClass(elem, cls) {
	  cls = cls || '';
	  if (cls.replace(/\s/g, '').length == 0) return false; //当cls没有参数时,返回false
	  return new RegExp(' ' + cls + ' ').test(' ' + elem.className + ' ');
	}

	function addClass(ele, cls) {
	  if (!hasClass(ele, cls)) {
	    ele.className = ele.className == '' ? cls : ele.className + ' ' + cls;
	  }
	}

	function removeClass(ele, cls) {
	  if (hasClass(ele, cls)) {
	    var newClass = ' ' + ele.className.replace(/[\t\r\n]/g, '') + ' ';
	    while (newClass.indexOf(' ' + cls + ' ') >= 0) {
	      newClass = newClass.replace(' ' + cls + ' ', ' ');
	    }
	    ele.className = newClass.replace(/^\s+|\s+$/g, '');
	  }
	}
		document.querySelector(".login-button").onclick = function(){
				addClass(document.querySelector(".login"), "active")
				setTimeout(function(){
					addClass(document.querySelector(".sk-rotating-plane"), "active")
					document.querySelector(".login").style.display = "none"
				},800)
				setTimeout(function(){
					removeClass(document.querySelector(".login"), "active")
					removeClass(document.querySelector(".sk-rotating-plane"), "active")
					document.querySelector(".login").style.display = "block"
					alert("登录成功")

				},5000)
		}
</script>
<div style="text-align:center;">
<p>更多模板:<a href="http://www.mycodes.net/" target="_blank">源码之家</a></p>
</div>
</body>
</html>
有了页面之后,就需要创建一个url指向这个这个页面,修改编写view.py里面的listfile函数
[root@k8s-es7 getlogs]# cat /home/pb/python/getoslogs/getoslogs/urls.py
"""getoslogs URL Configuration

The `urlpatterns` list routes URLs to views. For more information please see:
    https://docs.djangoproject.com/en/2.2/topics/http/urls/
Examples:
Function views
    1. Add an import:  from my_app import views
    2. Add a URL to urlpatterns:  path('', views.home, name='home')
Class-based views
    1. Add an import:  from other_app.views import Home
    2. Add a URL to urlpatterns:  path('', Home.as_view(), name='home')
Including another URLconf
    1. Import the include() function: from django.urls import include, path
    2. Add a URL to urlpatterns:  path('blog/', include('blog.urls'))
"""
from django.contrib import admin
from django.urls import path
from getlogs import views            #将createyaml这个app的views变量插进来

urlpatterns = [
    path('admin/', admin.site.urls),
    path(r'listfile/', views.listfile),            #将这个listfile url指向getlogs/views.py里面的listfile函数
    path(r'login/', views.login),                #登录页面
]
提前安装好oss2模块 pip install aliyun-python-sdk-core-v3
[root@k8s-es7 getlogs]# cat /home/pb/python/getoslogs/getlogs/views.py
[root@k8s-es7 getlogs]# cat views.py
# -*- coding:utf-8 -*-
from django.shortcuts import render
from django.http import HttpResponse;
import subprocess;
import os,oss2,ldap3;
import sys;
import json;
from django.shortcuts import render_to_response
from django.template import RequestContext


sys.path.append('/home/pb/python/test');
import listdir;
from ldap import LdapAdmin;

##查询某个日期下oss备份的日志
def listfile(request):
    if request.method == 'POST':
        file_date = request.POST.get('file_date', '')
        file_jiedong = request.POST.getlist('file_jiedong', '')
        aliyun = request.POST.get('aliyun', '');
        bucket = listdir.environment(aliyun);
        env = request.POST.get('env')
        if file_date:
            result = listdir.listfile(file_date.strip(),bucket);
            context = {'result': result, 'aliyun': aliyun}
            return render(request,'listfile.html', context)
        else:
            pass;
        if file_jiedong:
            aliyun = request.POST.get('aliyun', '');
            bucket = listdir.environment(aliyun);
            #context = for_file(file_jiedong,bucket);
            context = {'result1': listdir.main(file_jiedong,bucket)};
            print("context",context);
            return render(request,'listfile.html', context)
        else:
            pass;
    else:
        return render(request,'listfile.html');

#def for_file(file_jiedong,bucket):
#    result_file = []
#    for i in file_jiedong:
#        #result1 = listdir.filejiedong((i).strip(),bucket);
#        result1 = listdir.main((i).strip(),bucket);
#        print("result1:",result1);
#        result_file.append(result1)
#        context = {'result1': result_file}
#    return context;

##登录脚本
def login(request):
    if request.method == 'POST':
        username = request.POST.get('username', '');
        password = request.POST.get('password', '');
        #if username:
        #    print("username: {}".format(username));
        #    #return render(request,'index.html', context)
        #else:
        #    pass;
        #if password:
        #    print("password: {}".format(password));
        #    #return render(request,'index.html', context)
        #else:
        #    pass;
        ldap_ins = LdapAdmin();
        resp = ldap_ins.login(username, password);
        if resp == True:
            return render(request,'listfile.html');
        else:
            return render(request,'index.html');
    else:
        return render(request,'index.html')
#def login_ldap(username):
#    if request.method == 'POST':
#        username = request.POST.get('username', '');
#        #password = request.POST.get('password', '');
#        print("username: ".format(username));
#        #print("password: ".format(password));
#    else:
#        return render(request,'index.html')


#def add_dict(list_test):
#    context = {}
#    a = 0
#    for i in list_test:
#        a = a + 1
#        context["result"+str(a)] = i
#    return context
添加ldap脚本
[root@k8s-es7 getlogs]# cat /home/pb/python/test/ldap.py
#! /usr/bin/python
# -*- coding:utf-8 -*-
# Author: panb

import logging
from ldap3 import Server, Connection, ALL

logger = logging.getLogger("oauth")

LDAP = {
    "server": "172.27.27.220",
    "port": 389,
    "use_ssl": False,
    "domain": "jcici.com",
    "base": "ou=People,dc=jcici,dc=com"
}


class LdapAdmin(object):
    def __init__(self):
        """
        init
        """
        self.host = LDAP['server']
        self.port = LDAP.get('port', 389)
        self.use_ssl = LDAP.get('use_ssl', False)
        self.domain = LDAP['domain']
        self.base = LDAP['base']
        self.search_filter = "uid={uid}"

    def login(self, username, password):
        """
        登录
        :return:
        """
        server = Server(host=self.host,
                        port=self.port,
                        use_ssl=self.use_ssl,
                        connect_timeout=15,
                        get_info=ALL)

        try:
            conn = Connection(server,
                              user=f"uid={username},{self.base}",
                              password=password,
                              check_names=True,
                              lazy=False,
                              auto_bind=True,
                              receive_timeout=30
                              )

        except Exception as e:
            err_msg = f'LDAP 认证失败:{e}'
            logger.error(err_msg)
            return False
        else:
            msg = conn.result
            #print(msg)
            conn.unbind()
            return True

        # print(server.info)
        # print(server.schema)
        # _username = (conn.extend.standard.who_am_i())
        # print(_username)


#ldap_ins = LdapAdmin()
#resp = ldap_ins.login(username, password)
#print(resp)
还需要在getoslogs/settings.py添加static
STATIC_URL = '/static/'
HERE = os.path.dirname(os.path.abspath(__file__))
HERE = os.path.join(HERE, '../')
STATICFILES_DIRS = (
    # Put strings here, like "/home/html/static" or "C:/www/django/static".
    # Always use forward slashes, even on Windows.
    # Don‘t forget to use absolute paths, not relative paths.
    os.path.join(HERE, 'static/'),
)
3、最终访问效果


