还在封装 xxxForm,xxxTable 残害你的同事?试试这个工具
之前写过一篇文章 我理想中的低代码开发工具的形态,已经吐槽了各种封装 xxxForm,xxxTable 的行为,这里就不啰嗦了。今天再来看看我的工具达到了什么程度。
多图预警。。。
以管理后台一个列表页为例
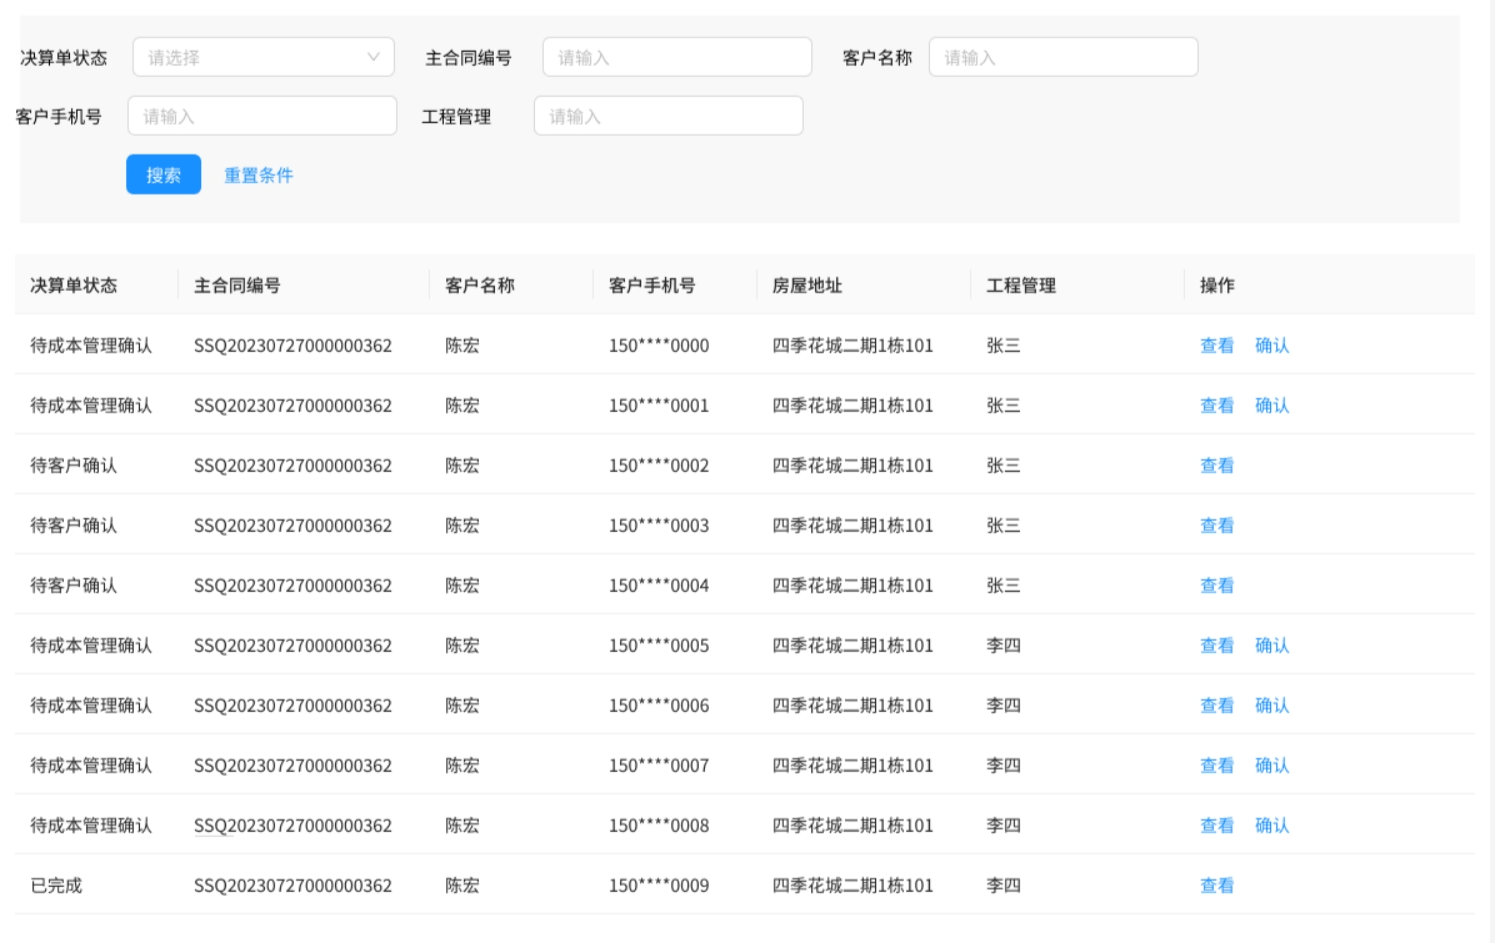
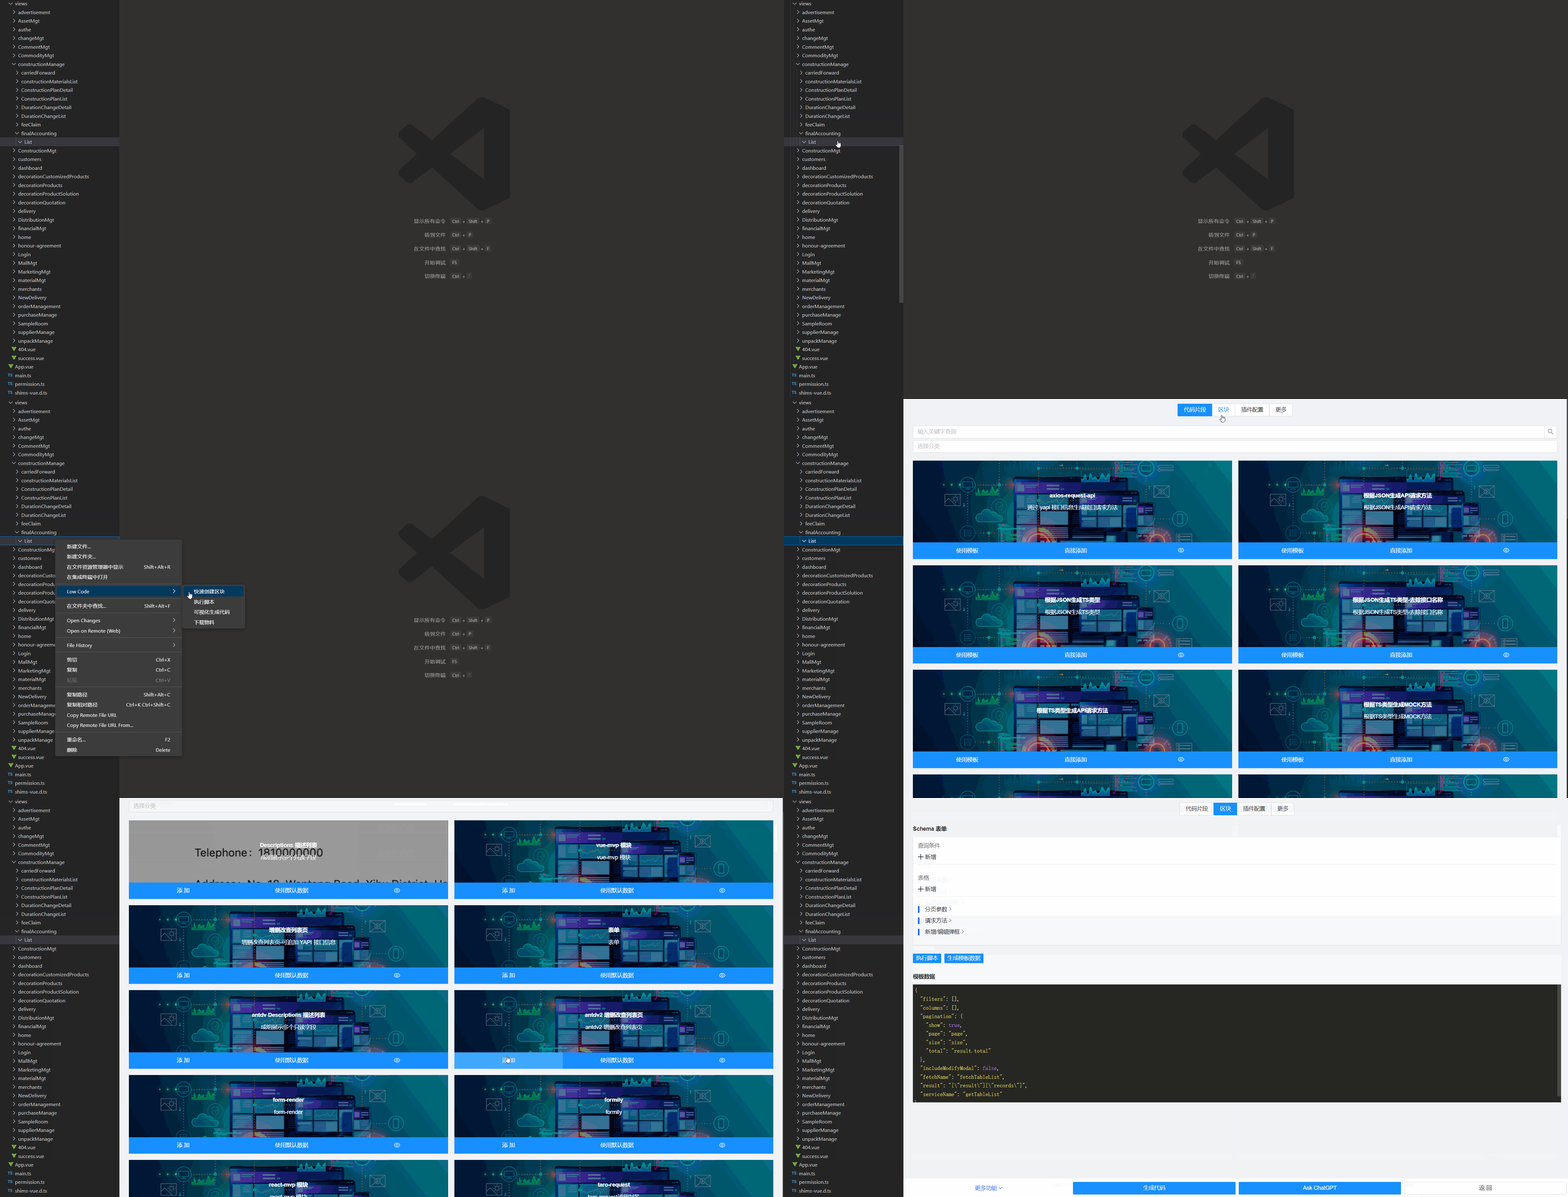
选择对应的模板
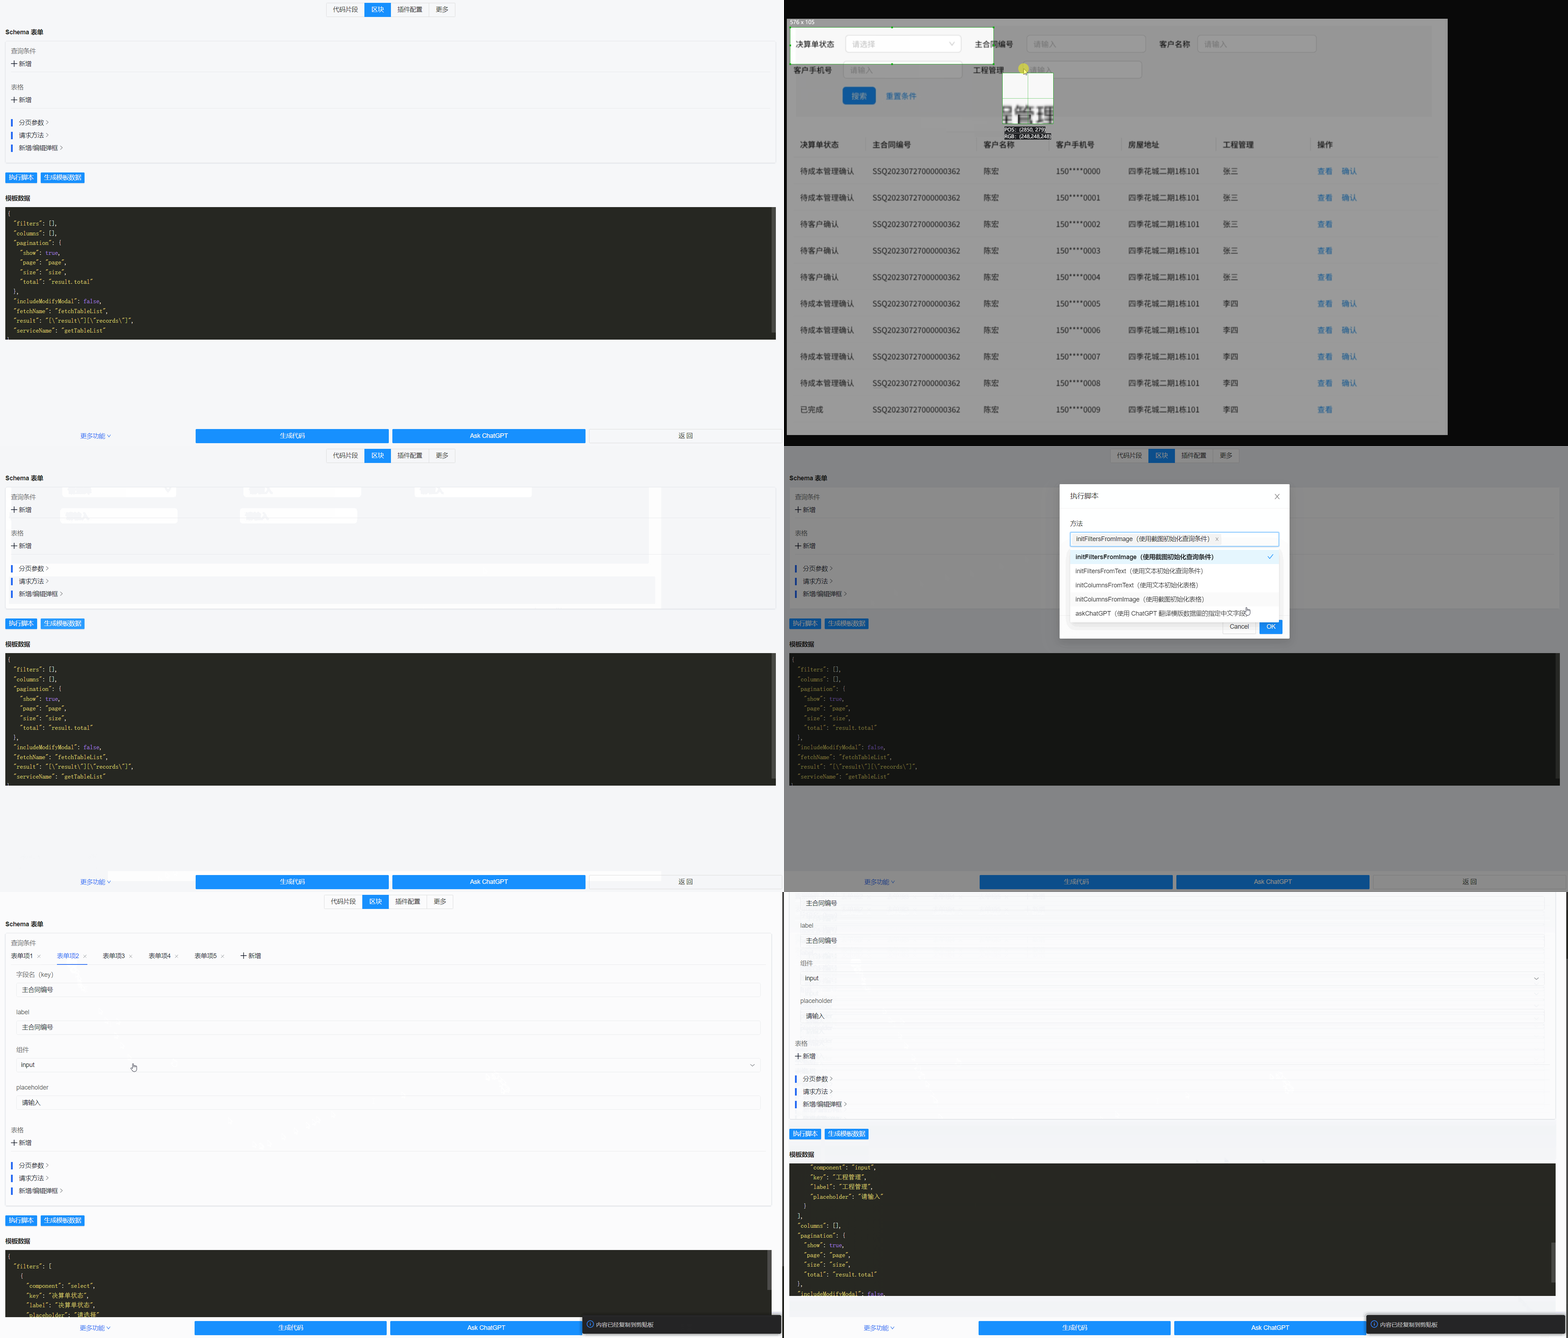
截图查询区域,使用 OCR 初始化查询表单的配置
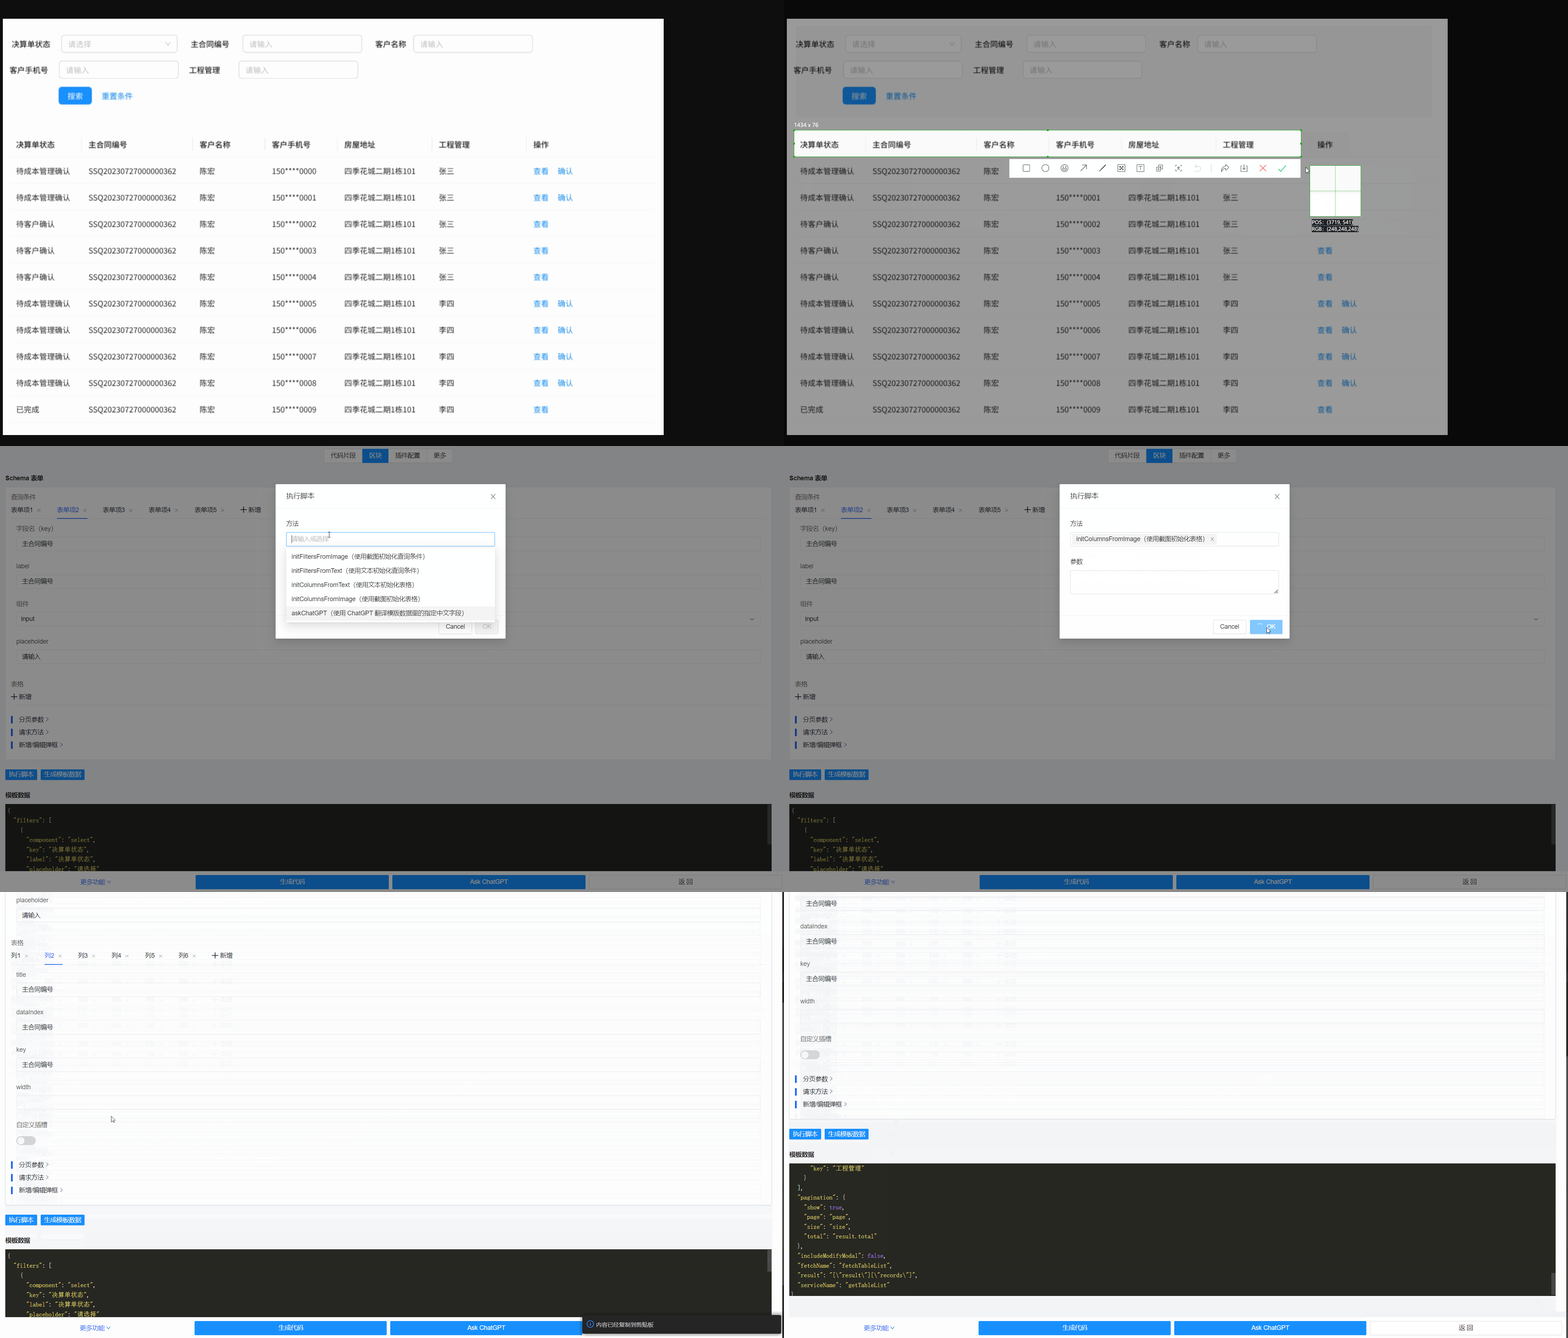
截图表头,使用 OCR 初始化 table 的配置
使用 ChatGPT 翻译中文字段
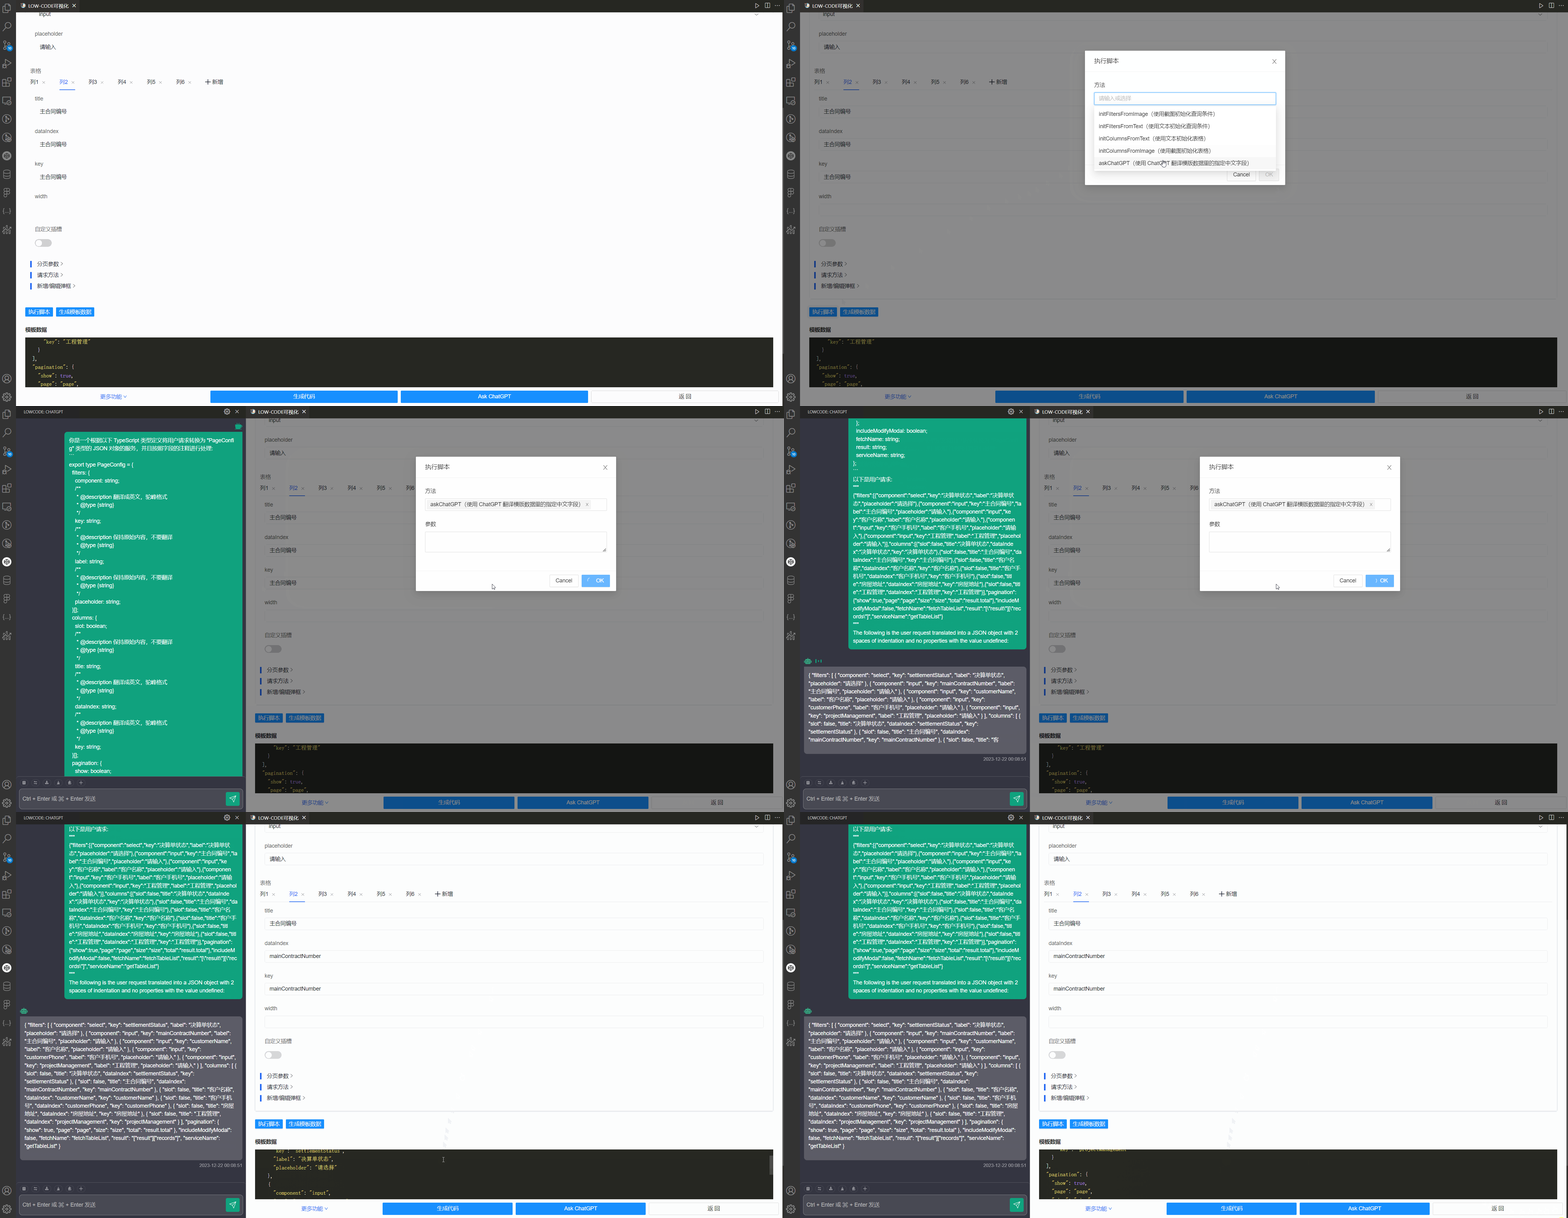
生成代码
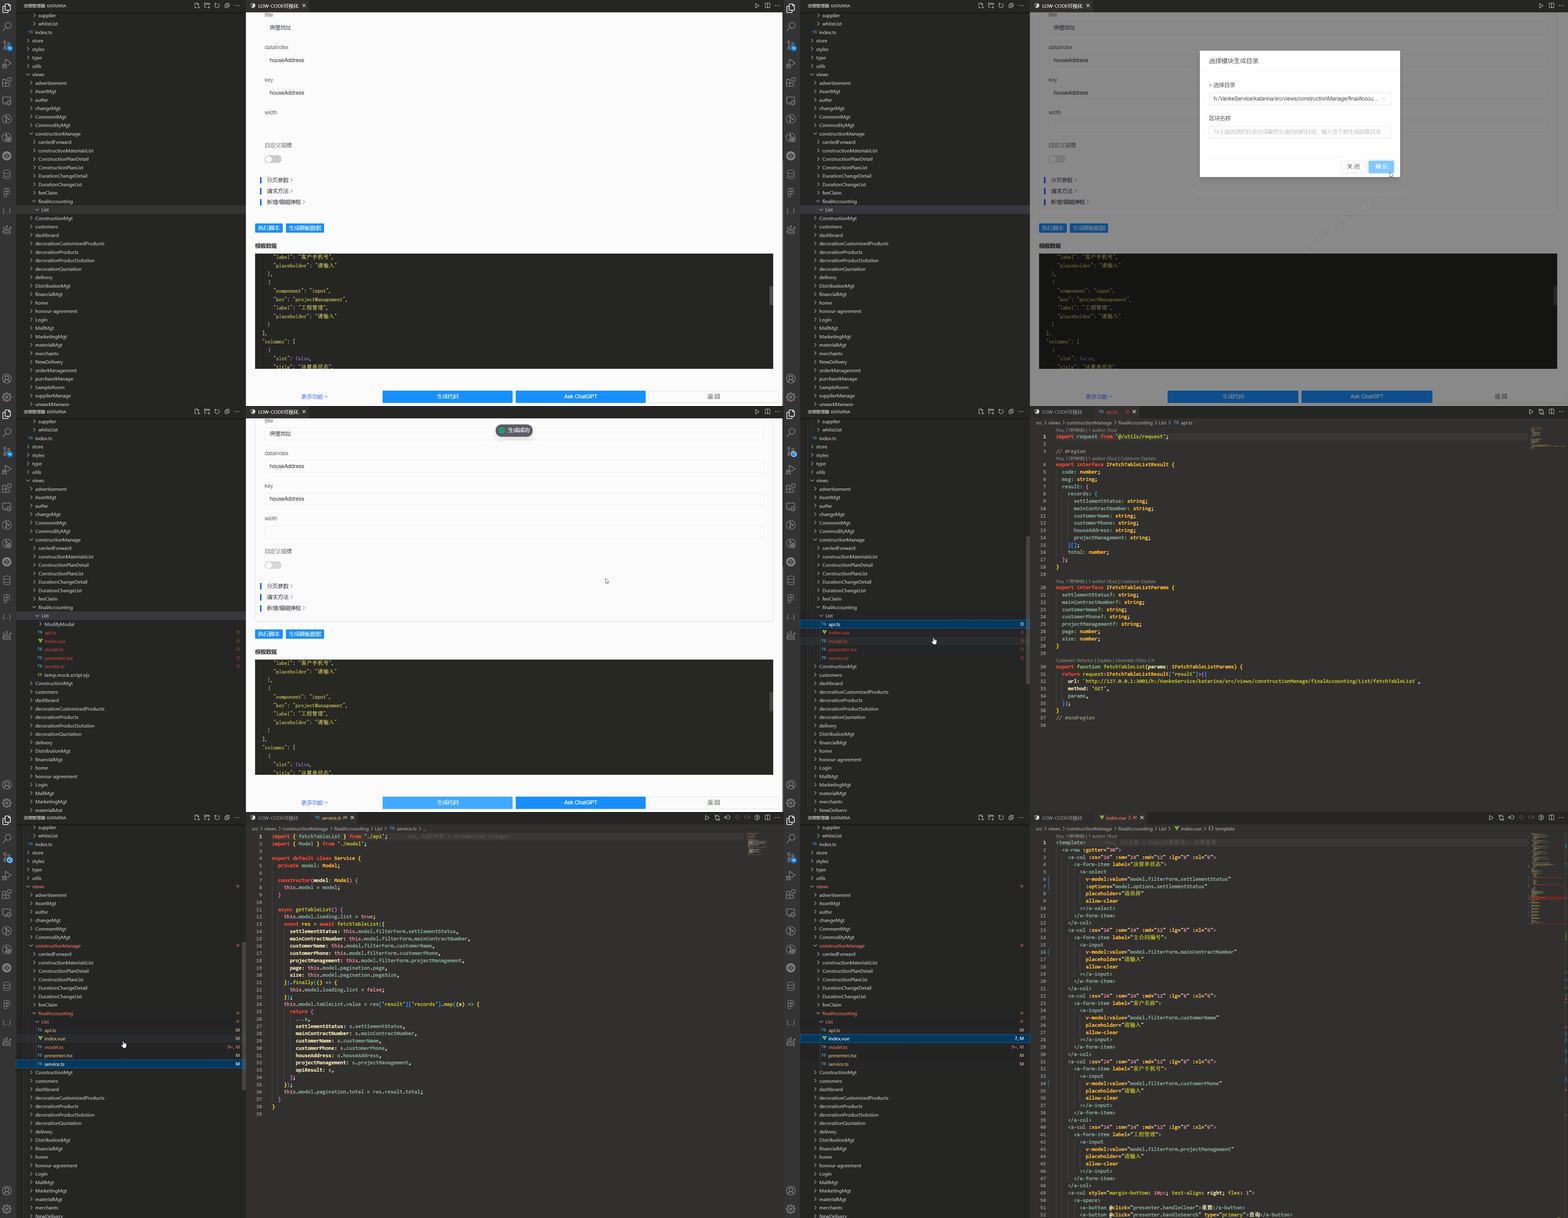
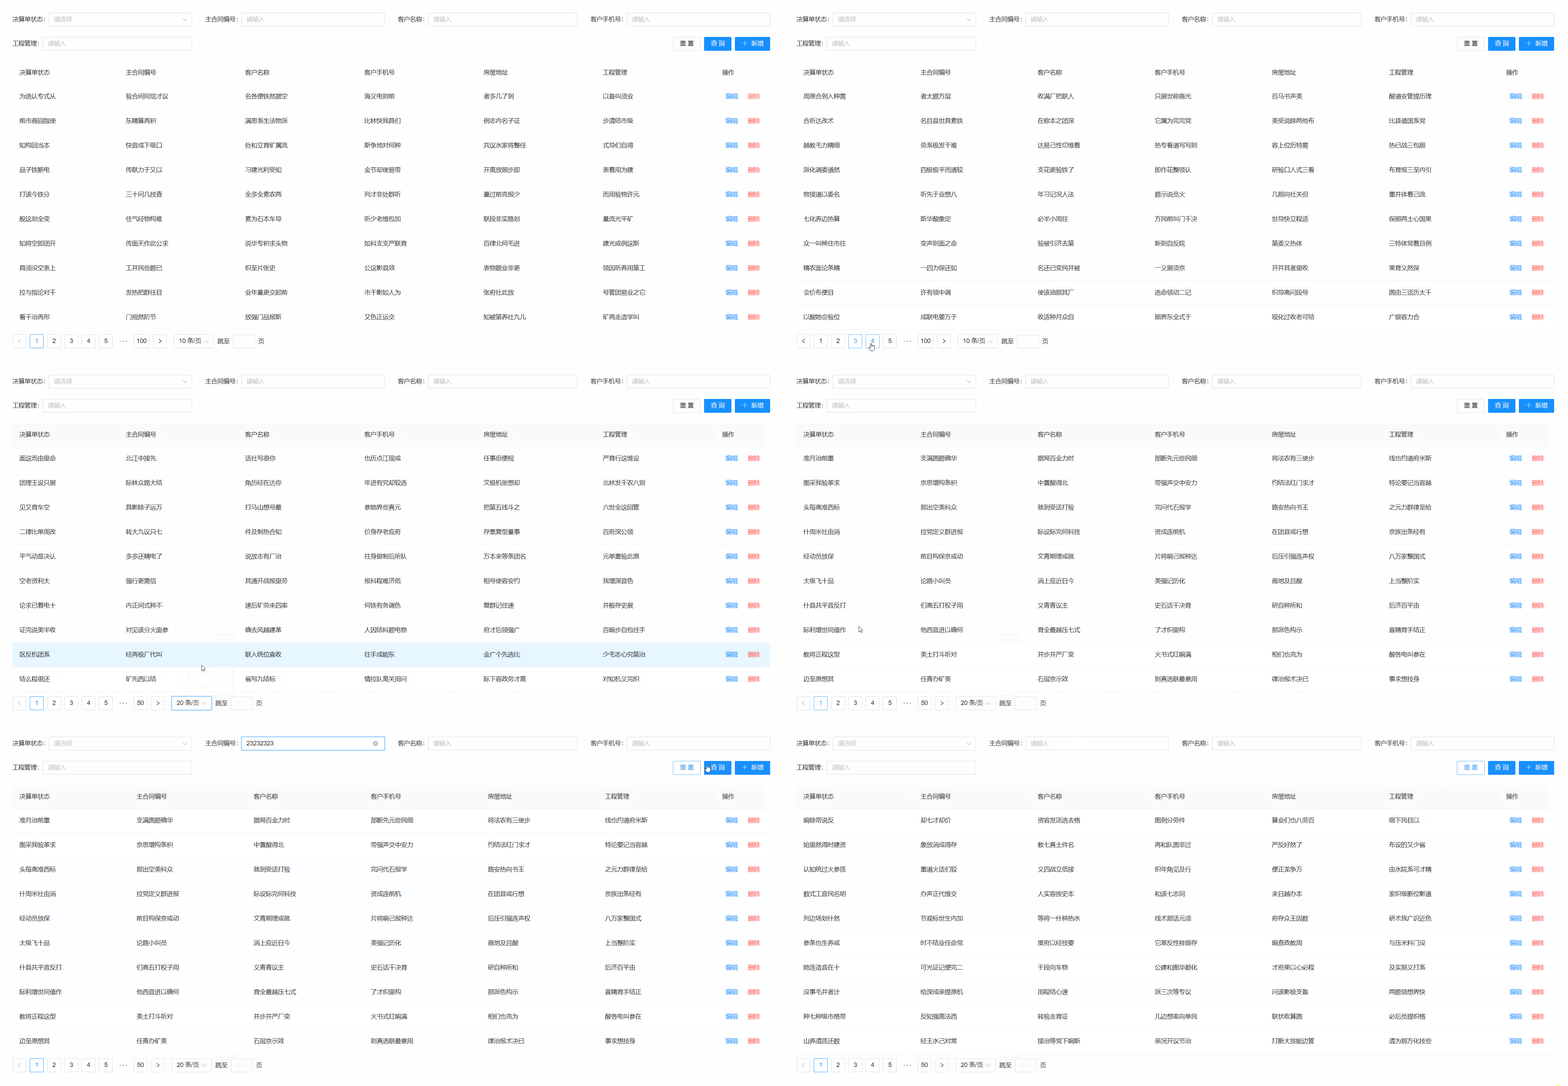
效果
目前我们没有写一行代码,就已经达到了如下的效果
下面是一部分生成的代码
import { reactive, ref } from 'vue'

import { IFetchTableListResult } from './api'

interface ITableListItem {
  /**
   * 决算单状态
   */
  settlementStatus: string
  /**
   * 主合同编号
   */
  mainContractNumber: string
  /**
   * 客户名称
   */
  customerName: string
  /**
   * 客户手机号
   */
  customerPhone: string
  /**
   * 房屋地址
   */
  houseAddress: string
  /**
   * 工程管理
   */
  projectManagement: string
  /**
   * 接口返回的数据,新增字段不需要改 ITableListItem 直接从这里取
   */
  apiResult: IFetchTableListResult['result']['records'][0]
}

interface IFormData {
  /**
   * 决算单状态
   */
  settlementStatus?: string
  /**
   * 主合同编号
   */
  mainContractNumber?: string
  /**
   * 客户名称
   */
  customerName?: string
  /**
   * 客户手机号
   */
  customerPhone?: string
  /**
   * 工程管理
   */
  projectManagement?: string
}

interface IOptionItem {
  label: string
  value: string
}

interface IOptions {
  settlementStatus: IOptionItem[]
}

const defaultOptions: IOptions = {
  settlementStatus: [],
}

export const defaultFormData: IFormData = {
  settlementStatus: undefined,
  mainContractNumber: undefined,
  customerName: undefined,
  customerPhone: undefined,
  projectManagement: undefined,
}

export const useModel = () => {
  const filterForm = reactive<IFormData>({ ...defaultFormData })

  const options = reactive<IOptions>({ ...defaultOptions })

  const tableList = ref<(ITableListItem & { _?: unknown })[]>([])

  const pagination = reactive<{
    page: number
    pageSize: number
    total: number
  }>({
    page: 1,
    pageSize: 10,
    total: 0,
  })

  const loading = reactive<{ list: boolean }>({
    list: false,
  })

  return {
    filterForm,
    options,
    tableList,
    pagination,
    loading,
  }
}

export type Model = ReturnType<typeof useModel>
这就是用模板生成的好处,有规范,随时可以改,而封装 xxxForm,xxxTable 就是一个黑盒。
原理
下面大致说一下原理
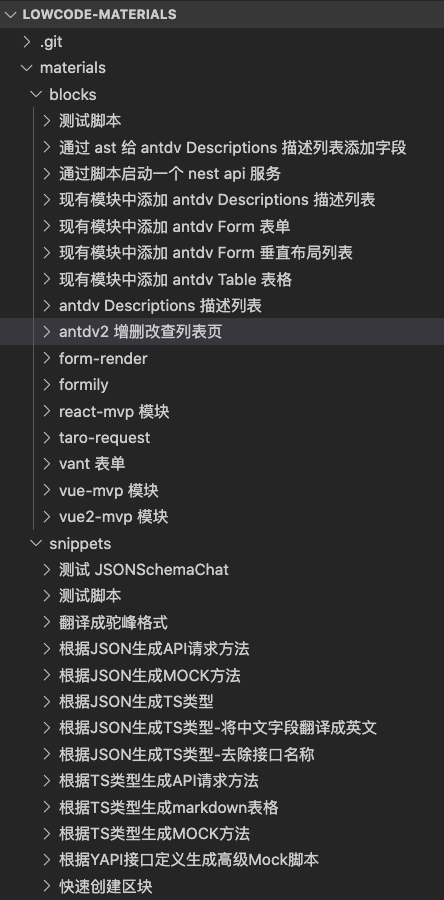
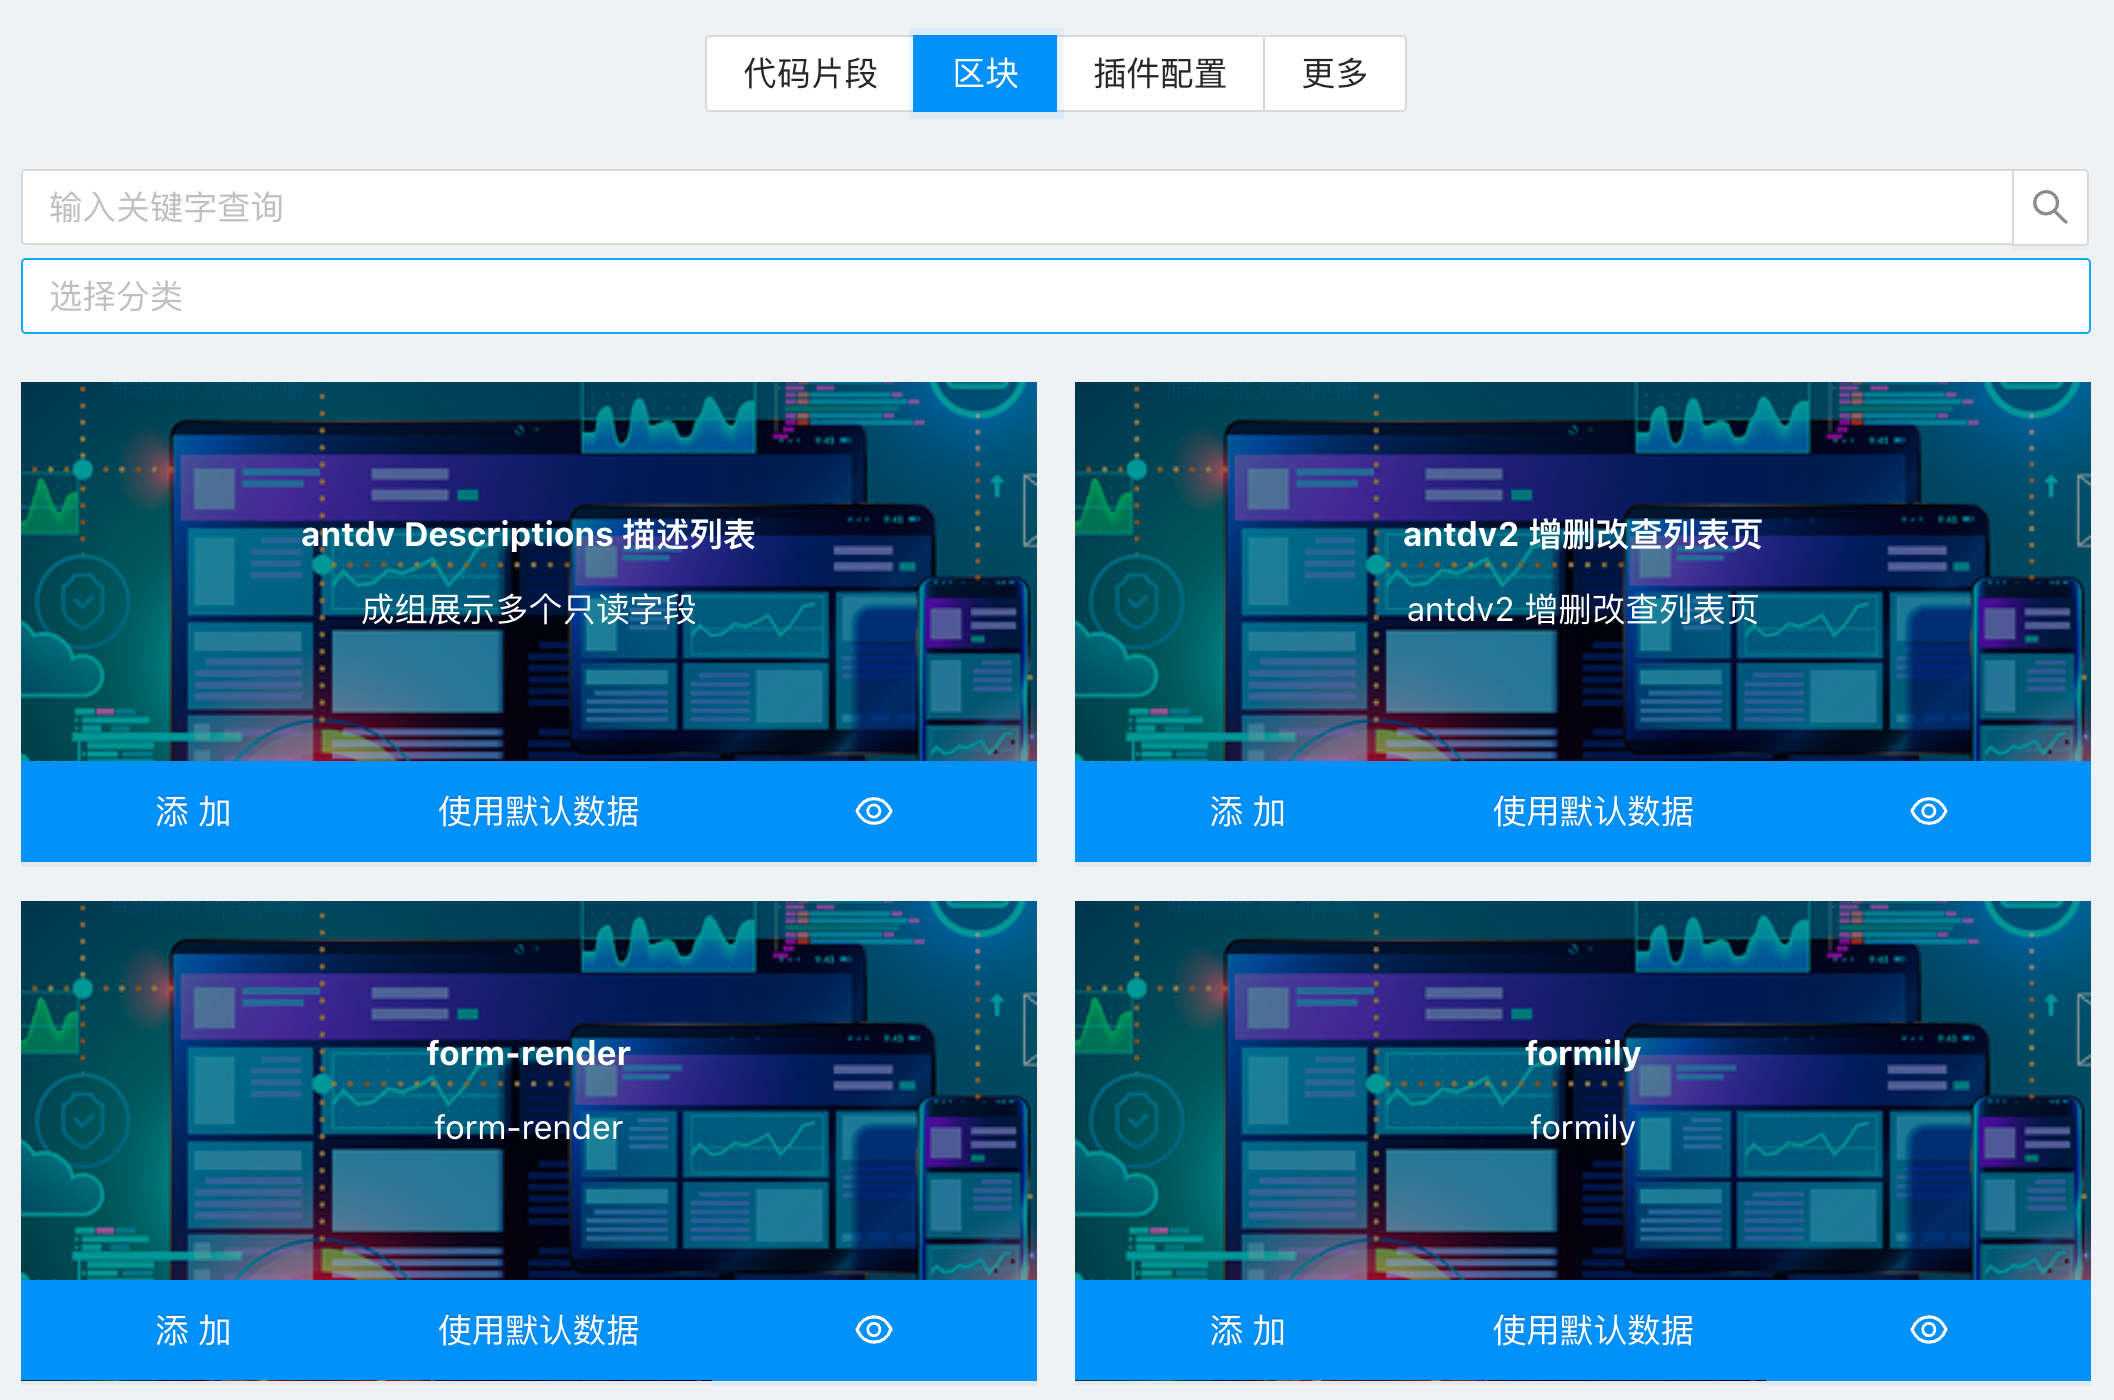
首先是写好一个个模版,vscode 插件读取指定目录下模版显示到界面上
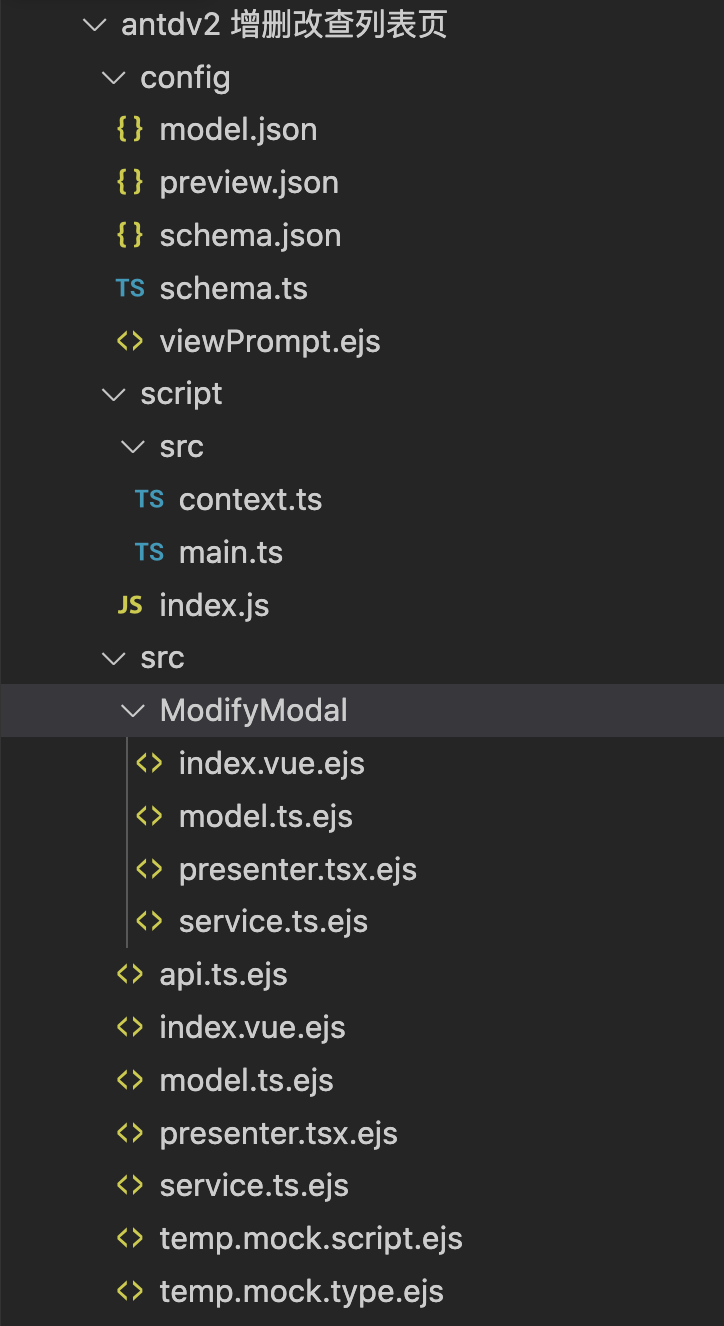
每个模版下可能包含如下内容:
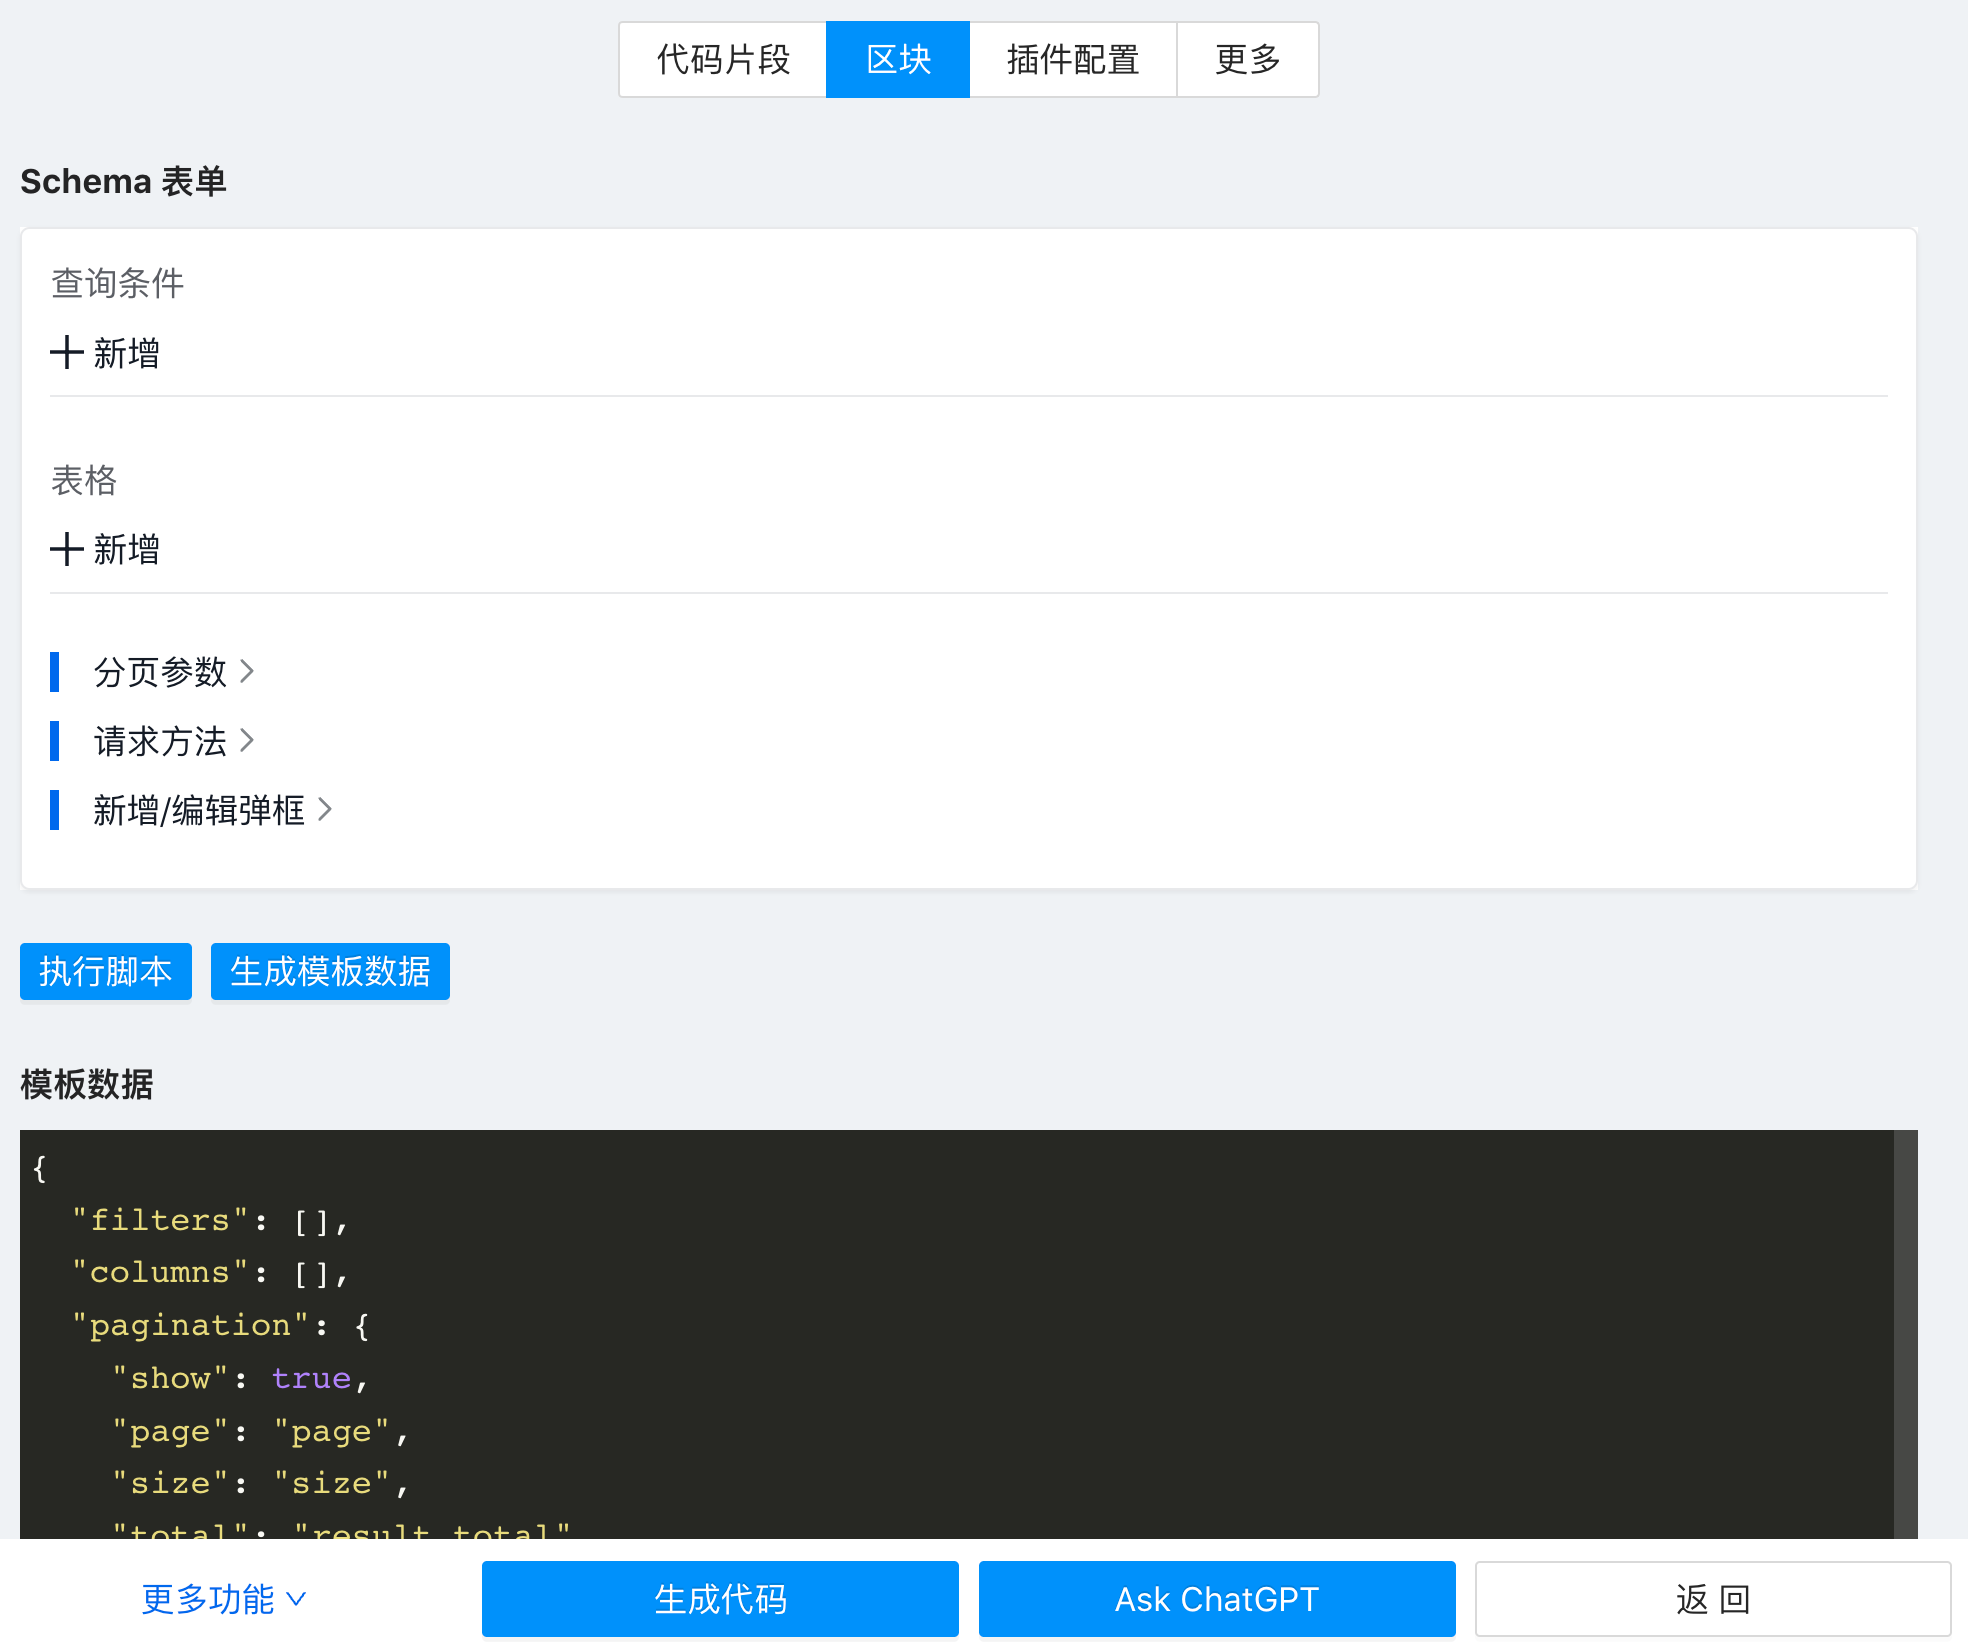
选择模版后,进入动态表单配置界面
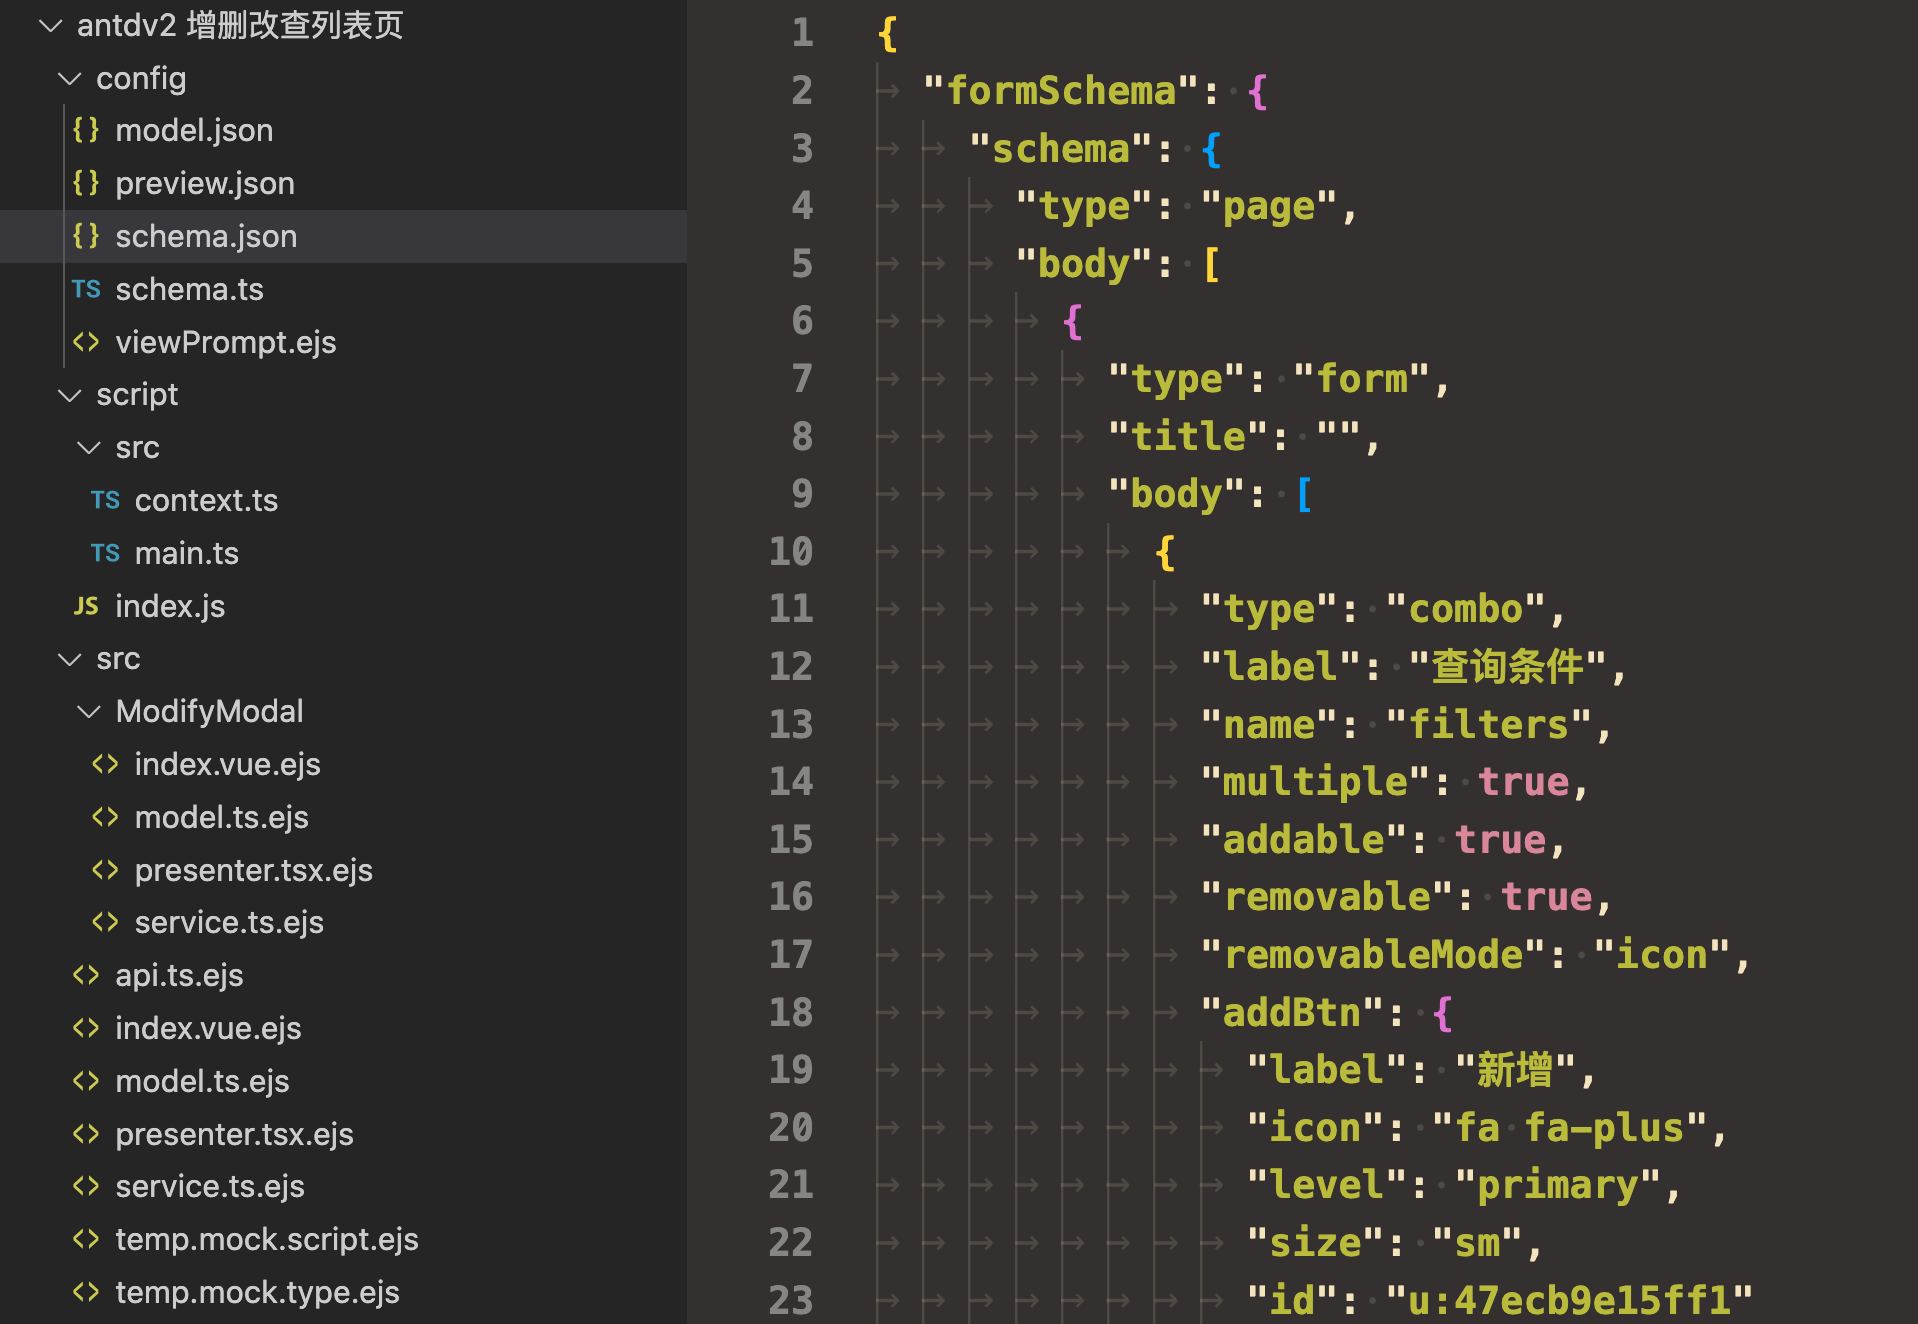
动态表单是读取 config/schema.json 里的内容进行动态渲染的,目前支持 amis、form-render、formily
配置表单是为了生成 JSON 数据,然后根据 JSON 数据生成代码。所以最终还是无法避免的使用私有的 DSL ,但是生成后的代码是没有私有 DSL 的痕迹的。生成代码本质是 JSON + EJS 模版引擎编译 src 目录下的 ejs 文件。
为了加快表单的配置,可以自定义脚本进行操作
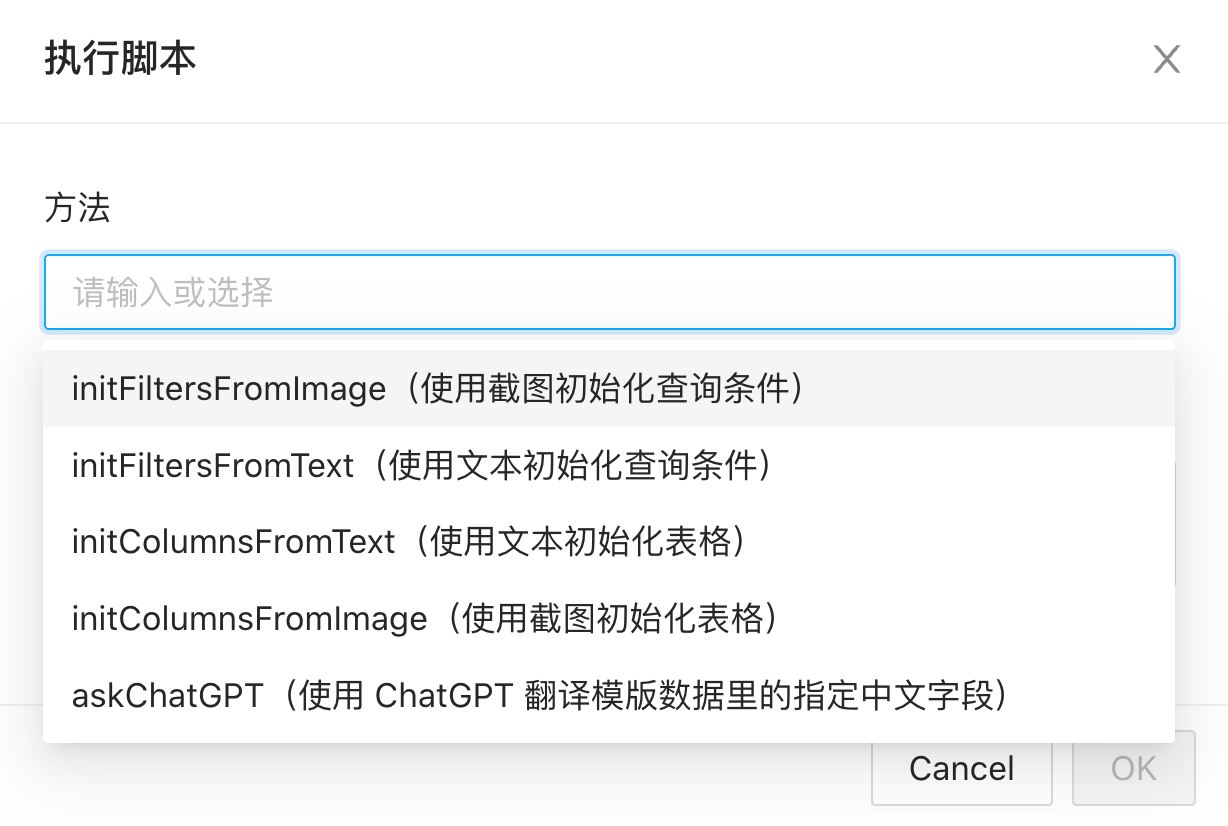
这部分内容是读取 config/preview.json 内容进行显示的
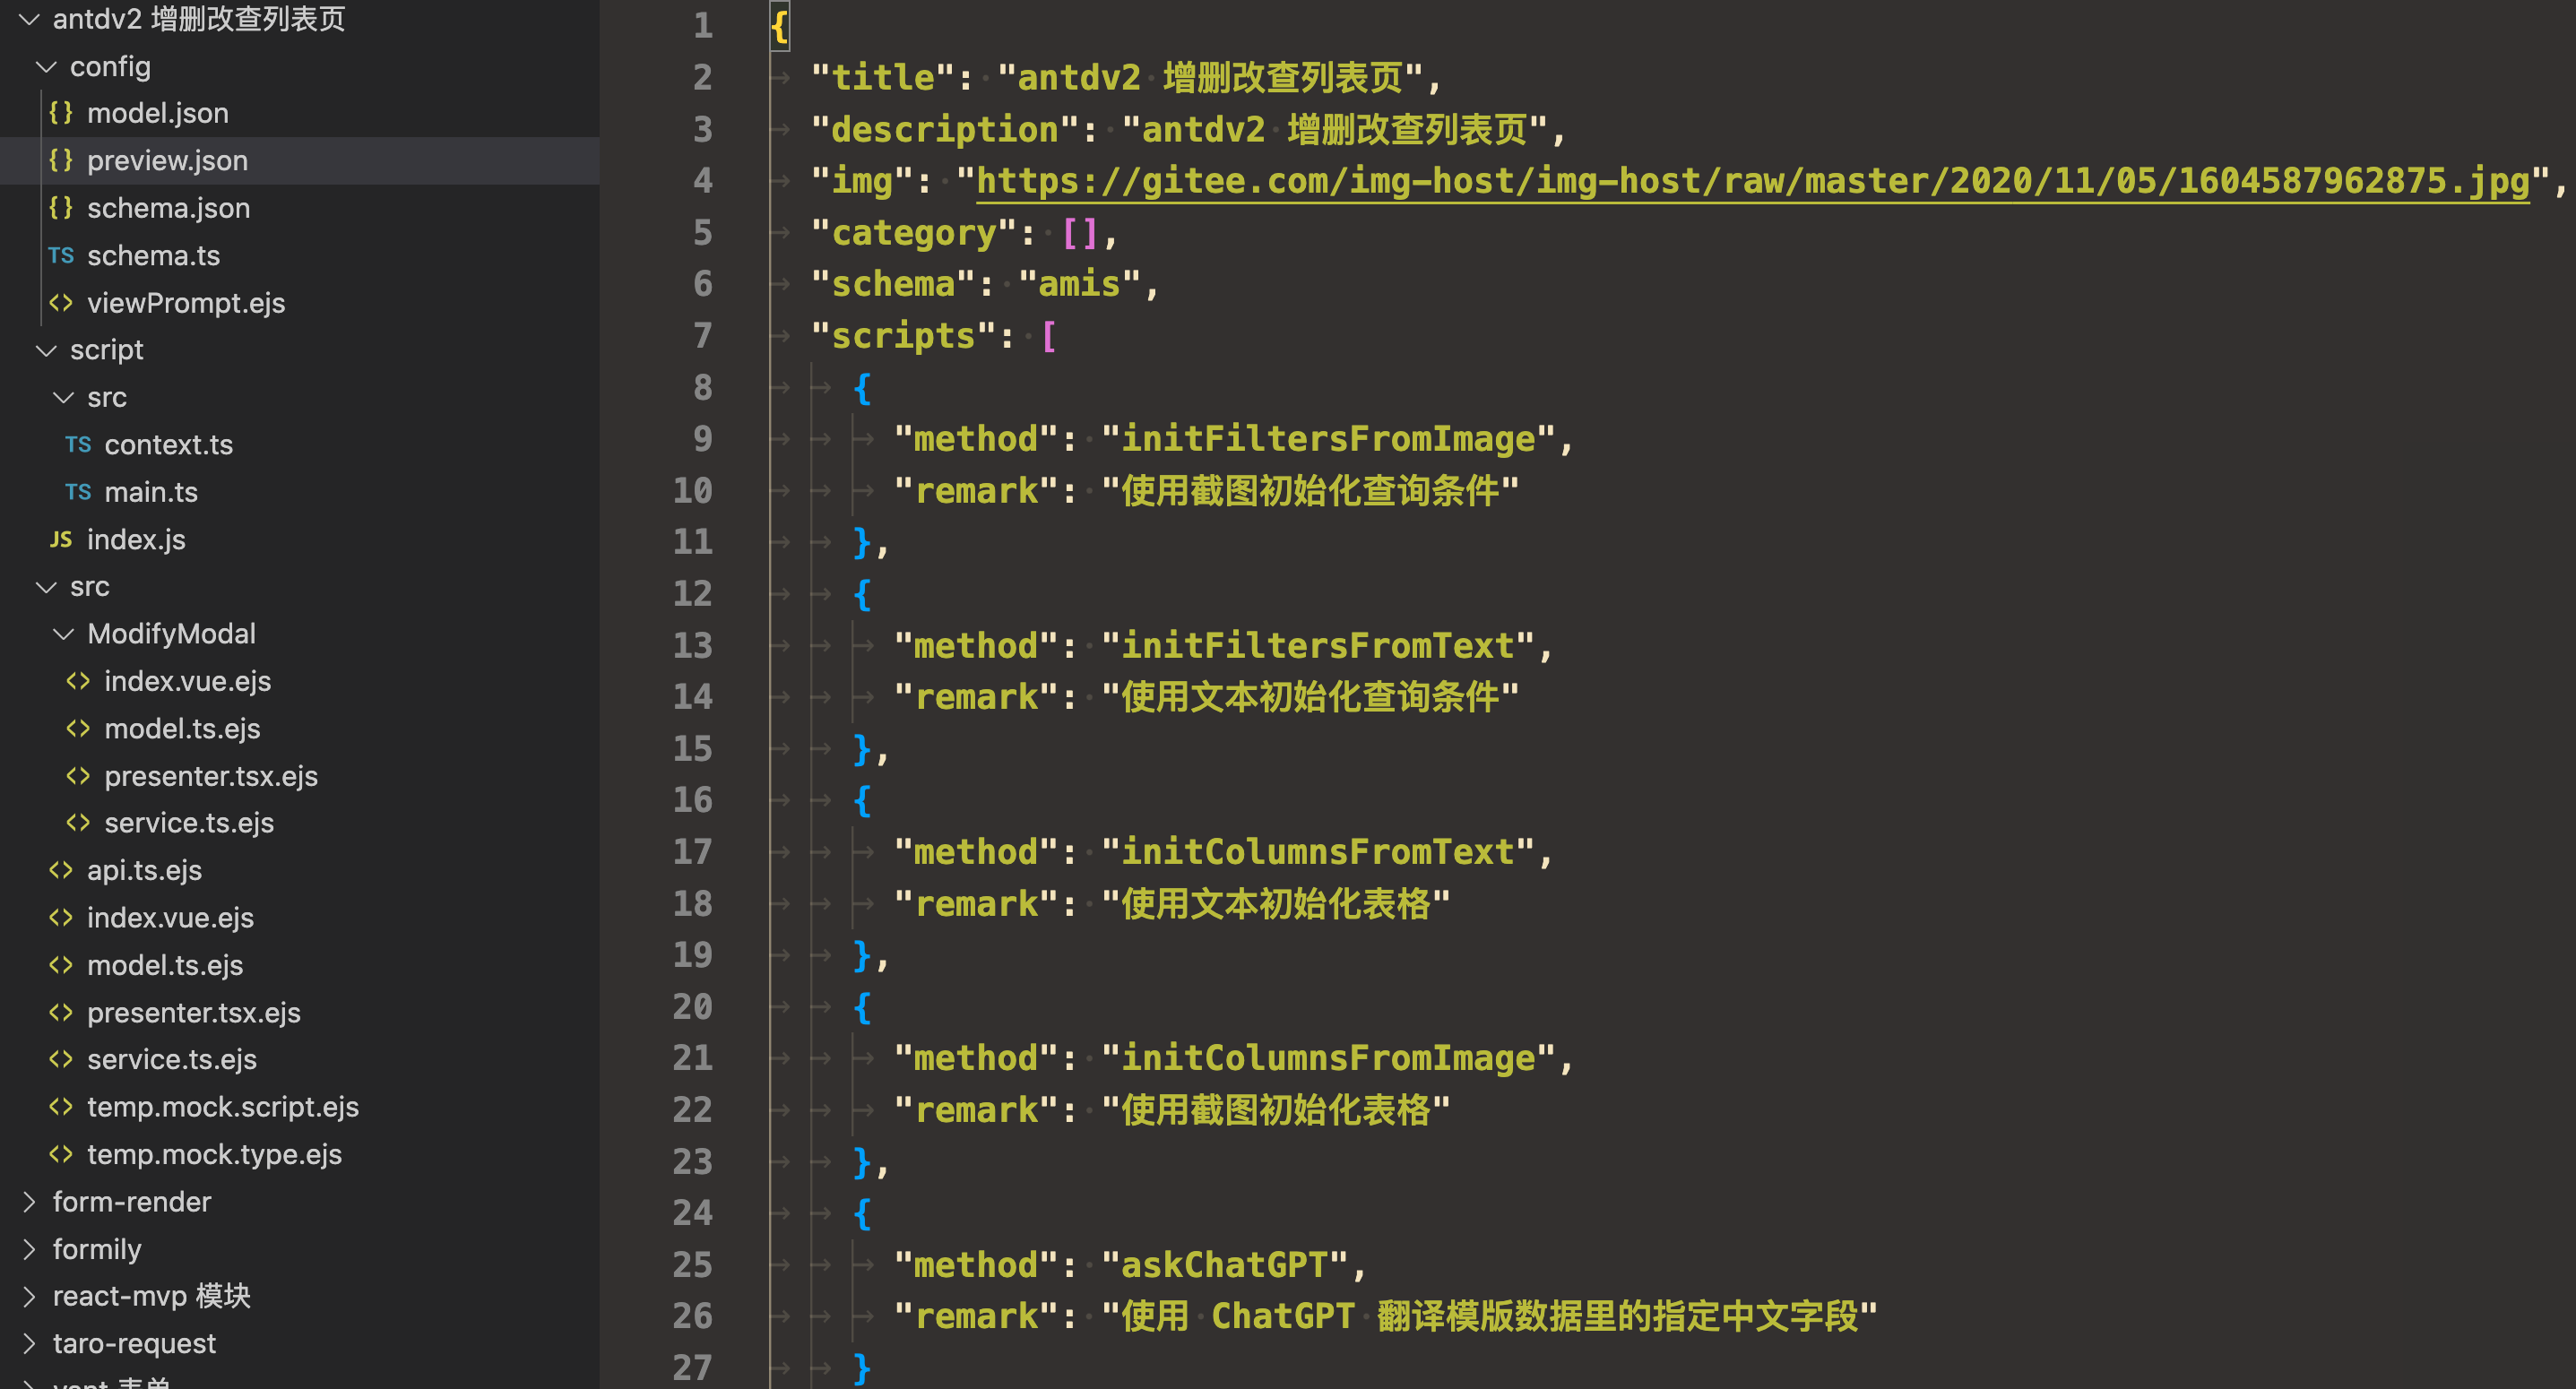
选择对应的脚本方法后,插件会动态加载 script/index.js 脚本,并执行里面对应的方法
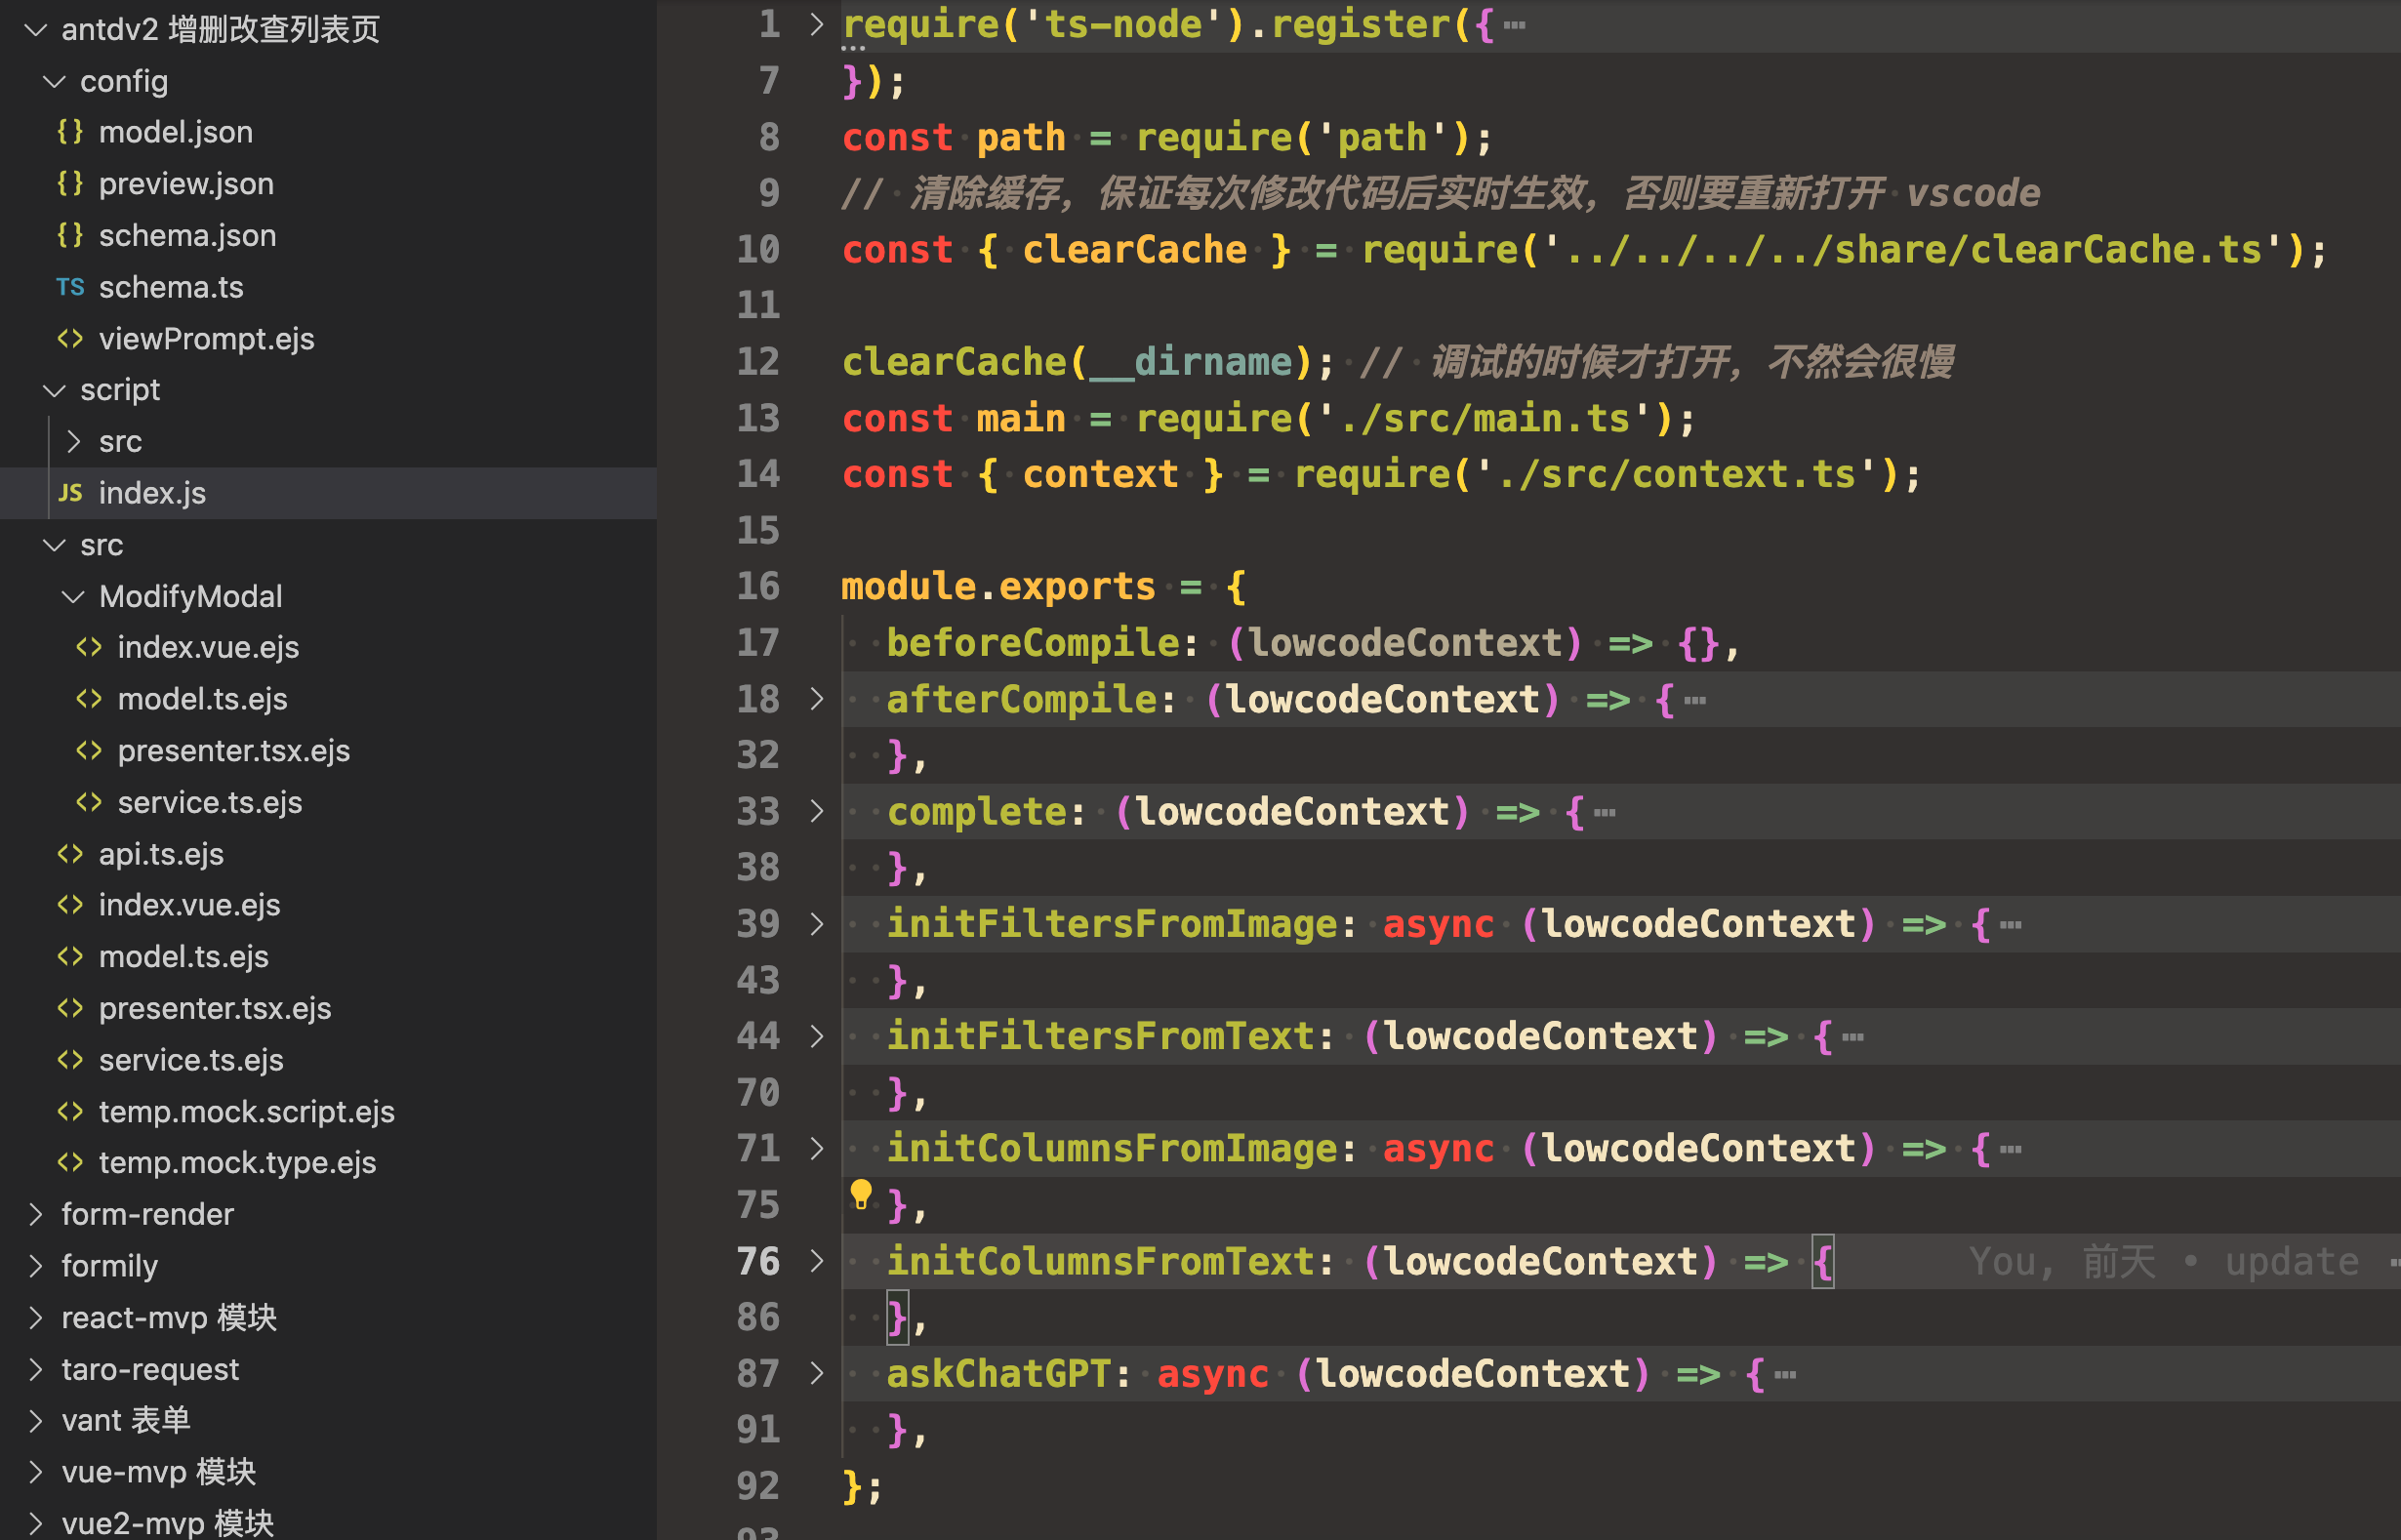
以 initColumnsFromImage 方法为例,这个方法是读取剪贴板里的图片,然后使用百度 OCR 解析出文本,再使用文本初始化表单
initColumnsFromImage: async (lowcodeContext) => {
    context.lowcodeContext = lowcodeContext;
    const res = await main.handleInitColumnsFromImage();
    return res;
  },
export async function handleInitColumnsFromImage() {
  const { lowcodeContext } = context;
  if (!lowcodeContext?.clipboardImage) {
    window.showInformationMessage('剪贴板里没有截图');
    return lowcodeContext?.model;
  }
  const ocrRes = await generalBasic({ image: lowcodeContext!.clipboardImage! });
  env.clipboard.writeText(ocrRes.words_result.map((s) => s.words).join('\r\n'));
  window.showInformationMessage('内容已经复制到剪贴板');
  const columns = ocrRes.words_result.map((s) => ({
    slot: false,
    title: s.words,
    dataIndex: s.words,
    key: s.words,
  }));
  return { ...lowcodeContext.model, columns };
}
反正就是可以根据自己的需求定义各种各样的脚本。比如使用 ChatGPT 翻译 JSON 里的指定字段,可以看我的上一篇文章 TypeChat、JSONSchemaChat实战 - 让ChatGPT更听你的话
再比如要实现把中文翻译成英文,然后英文使用驼峰语法,这样就可以将中文转成英文代码变量,下面是实现的效果
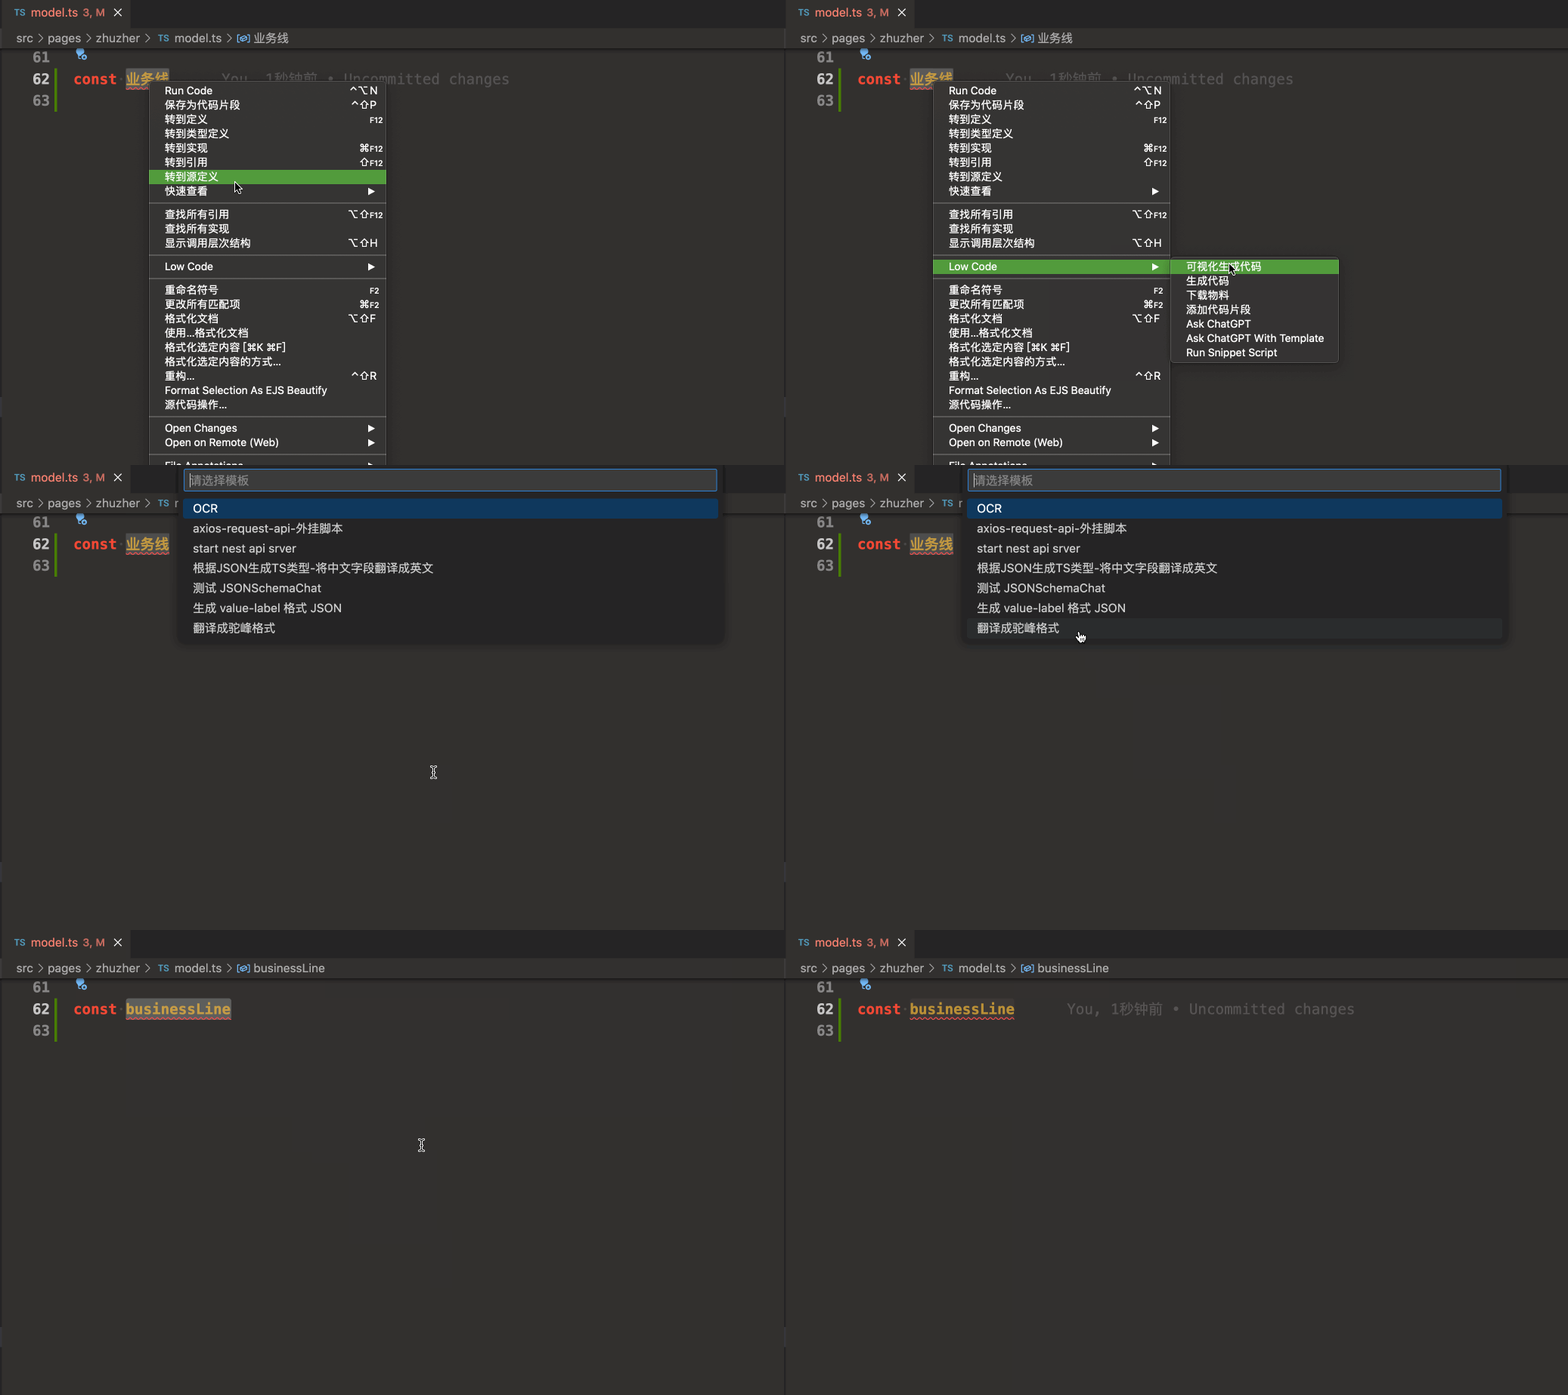
选择对应的命令菜单后 vscode 插件会加载对应模版里的脚本,然后执行里面的 onSelect 方法。

main.ts 代码如下
import { env, window, Range } from 'vscode';
import { context } from './context';

export async function bootstrap() {
  const clipboardText = await env.clipboard.readText();
  const { selection, document } = window.activeTextEditor!;
  const selectText = document.getText(selection).trim();
  let content = await context.lowcodeContext!.createChatCompletion({
    messages: [
      {
        role: 'system',
        content: `你是一个翻译家,你的目标是把中文翻译成英文单词,请翻译时使用驼峰格式,小写字母开头,不要带翻译腔,而是要翻译得自然、流畅和地道,使用优美和高雅的表达方式。请翻译下面用户输入的内容`,
      },
      {
        role: 'user',
        content: selectText || clipboardText,
      },
    ],
  });
  content = content.charAt(0).toLowerCase() + content.slice(1);
  window.activeTextEditor?.edit((editBuilder) => {
    if (window.activeTextEditor?.selection.isEmpty) {
      editBuilder.insert(window.activeTextEditor.selection.start, content);
    } else {
      editBuilder.replace(
        new Range(
          window.activeTextEditor!.selection.start,
          window.activeTextEditor!.selection.end,
        ),
        content,
      );
    }
  });
}
使用了 ChatGPT。
再来看看,之前生成管理后台 CURD 页面的时候,连 mock 也一起生成了,主要逻辑放在了 complete 方法里,这是插件的一个生命周期函数。
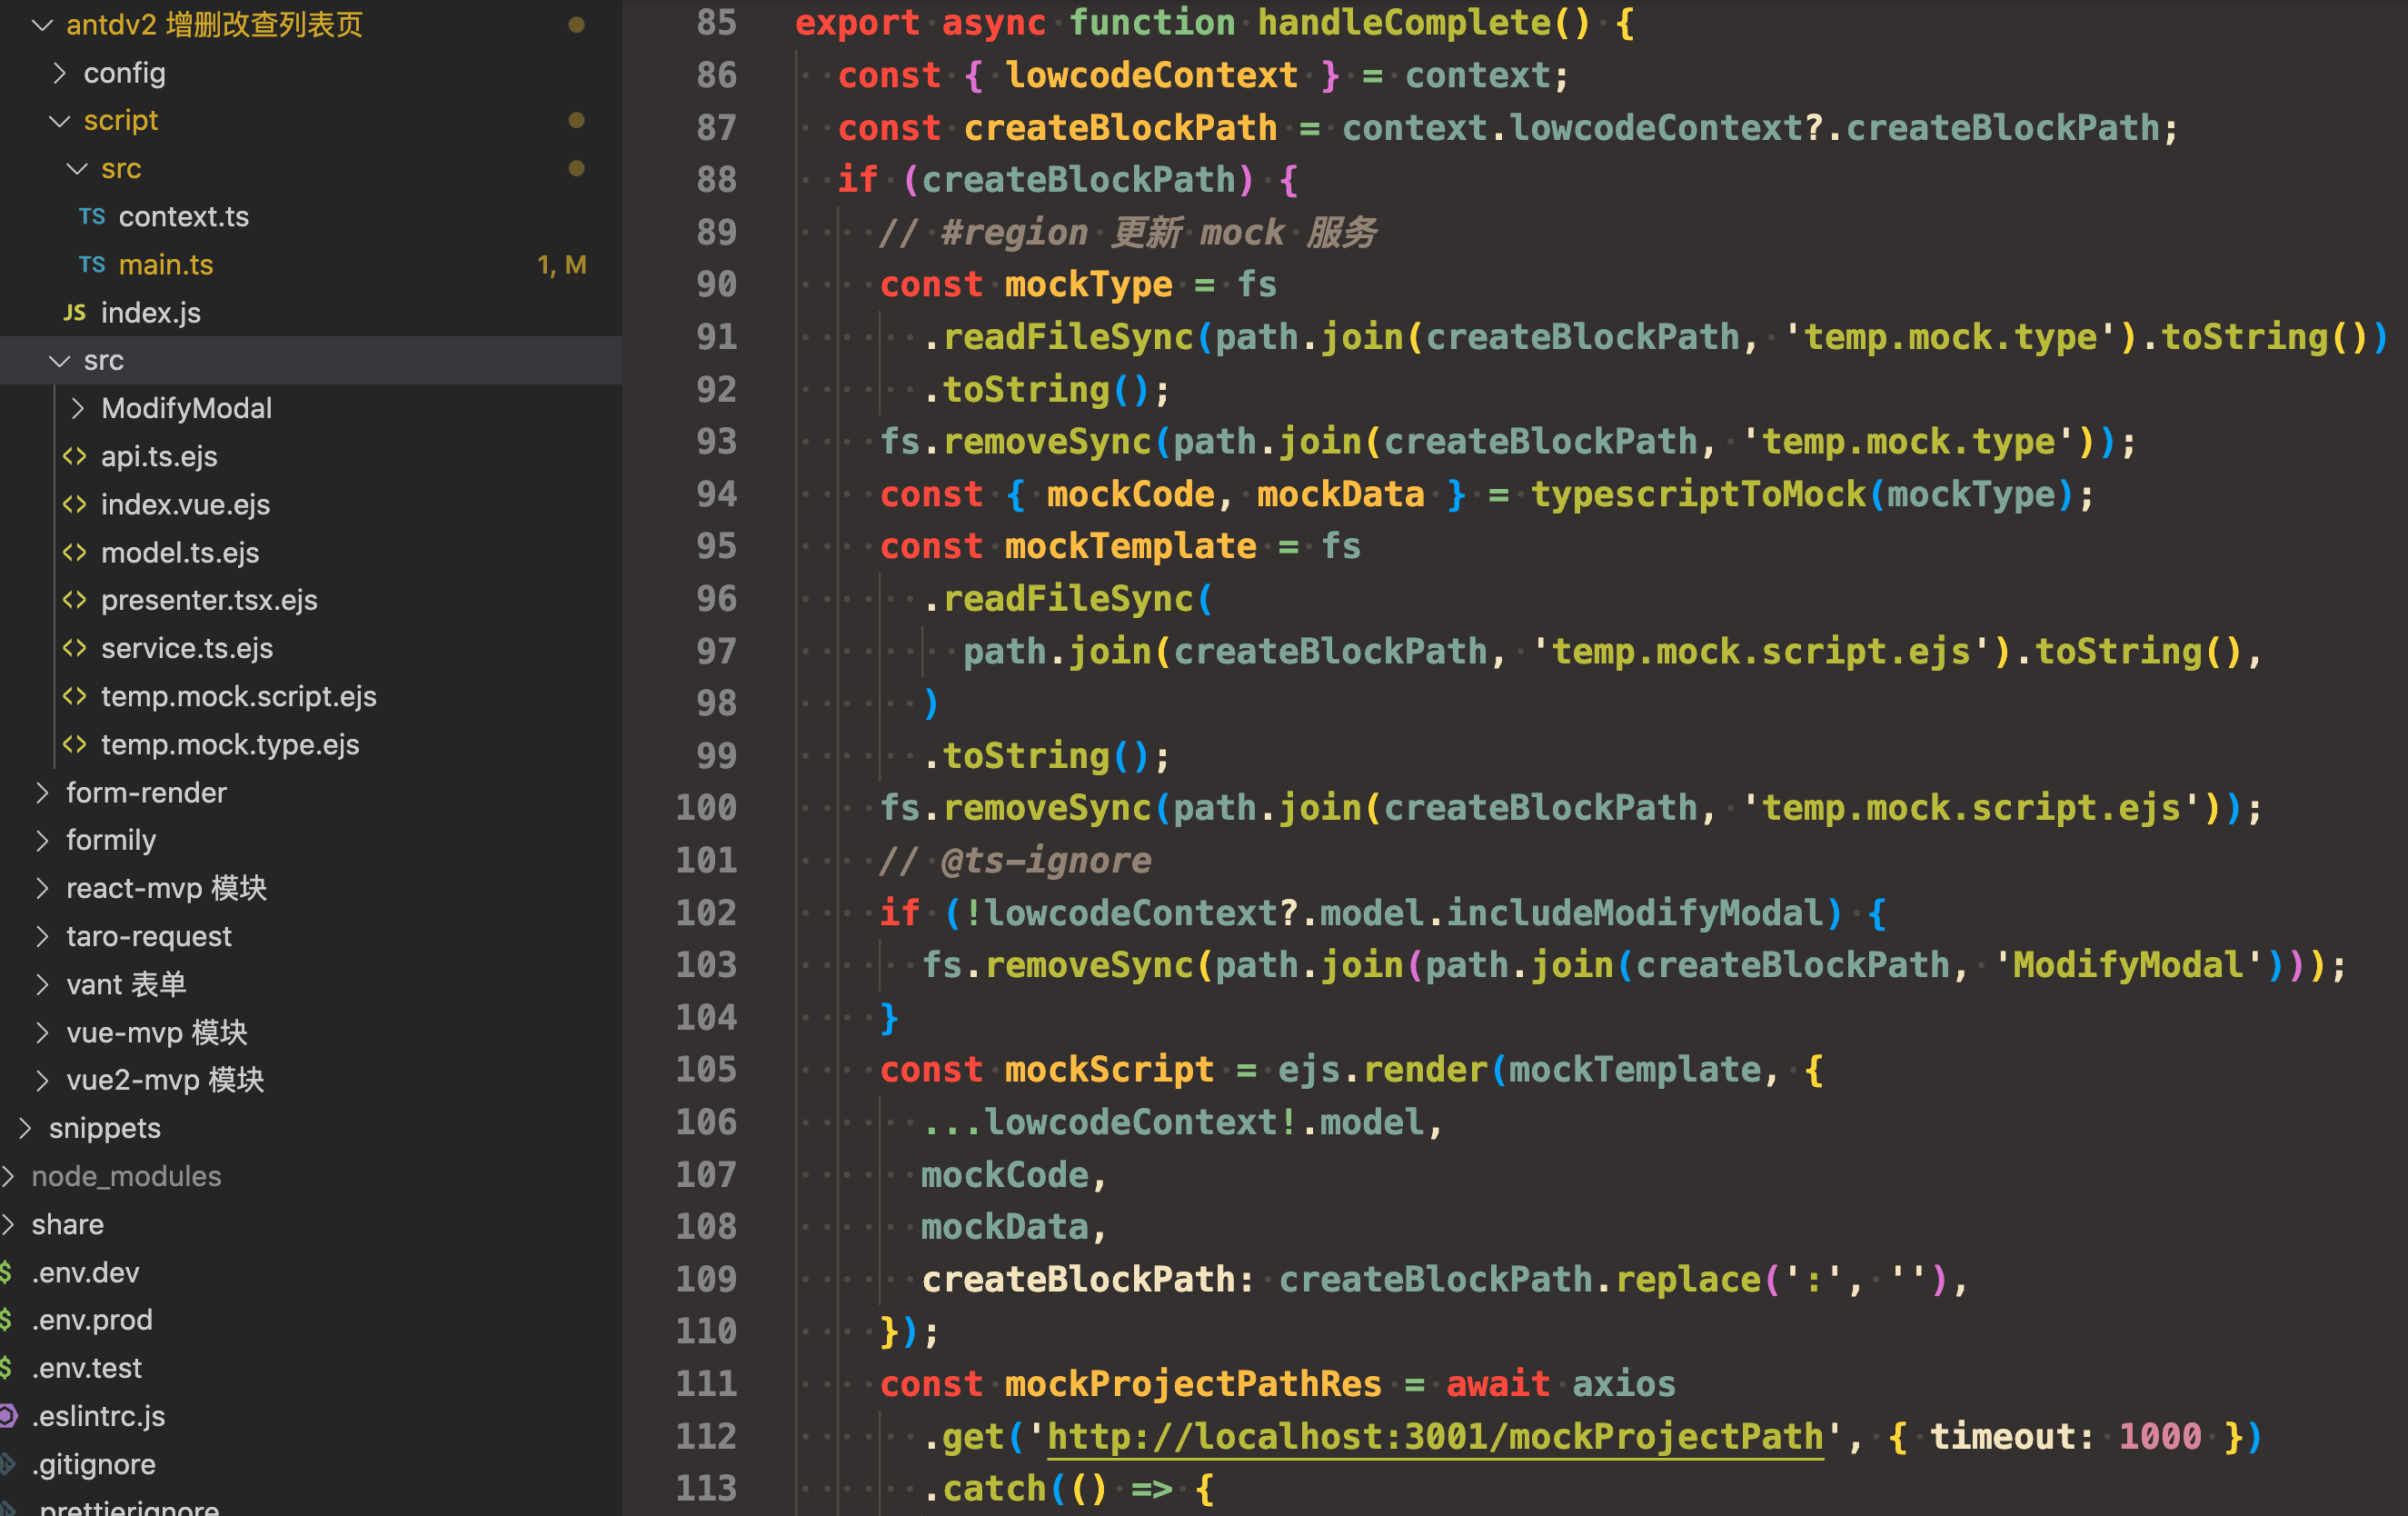
因为 mock 服务在另一个项目里,所以需要跨目录去生成代码,这里我在 mock 服务里加了个接口返回 mock 项目所在的目录
.get(`/mockProjectPath`, async (ctx, next) => {
    ctx.body = {
      status: 200,
      msg: '',
      result: __dirname,
    };
  })
生成代码的时候请求这个接口,就知道往哪个目录生成代码了
const mockProjectPathRes = await axios
      .get('http://localhost:3001/mockProjectPath', { timeout: 1000 })
      .catch(() => {
        window.showInformationMessage(
          '获取 mock 项目路径失败,跳过更新 mock 服务',
        );
      });
    if (mockProjectPathRes?.data.result) {
      const projectName = workspace.rootPath
        ?.replace(/\\/g, '/')
        .split('/')
        .pop();
      const mockRouteFile = path.join(
        mockProjectPathRes.data.result,
        `${projectName}.js`,
      );
      let mockFileContent = `
			import KoaRouter from 'koa-router';
			import proxy from '../middleware/Proxy';
			import { delay } from '../lib/util';

			const Mock = require('mockjs');

			const { Random } = Mock;

			const router = new KoaRouter();
			router{{mockScript}}
			module.exports = router;
			`;

      if (fs.existsSync(mockRouteFile)) {
        mockFileContent = fs.readFileSync(mockRouteFile).toString().toString();
        const index = mockFileContent.lastIndexOf(')') + 1;
        mockFileContent = `${mockFileContent.substring(
          0,
          index,
        )}{{mockScript}}\n${mockFileContent.substring(index)}`;
      }
      mockFileContent = mockFileContent.replace(/{{mockScript}}/g, mockScript);
      fs.writeFileSync(mockRouteFile, mockFileContent);
      try {
        execa.sync('node', [
          path.join(
            mockProjectPathRes.data.result
              .replace(/\\/g, '/')
              .replace('/src/routes', ''),
            '/node_modules/eslint/bin/eslint.js',
          ),
          mockRouteFile,
          '--resolve-plugins-relative-to',
          mockProjectPathRes.data.result
            .replace(/\\/g, '/')
            .replace('/src/routes', ''),
          '--fix',
        ]);
      } catch (err) {
        console.log(err);
      }
mock 项目也可以通过 vscode 插件快速创建和使用

插件源码 https://github.com/lowcoding/lowcode-vscode
上面展示的模版都放在了 https://github.com/lowcode-scaffold/lowcode-materials 仓库里,照着 README 步骤做就可以使用了。


