shiro与spring整合
首先需要一个简单的ssm项目:
pom配置
在项目pom.xml里面加入shiro依赖:
 <properties>
        <shiro.version>1.4.2</shiro.version>
    </properties>
	  <dependency>
          <groupId>org.apache.shiro</groupId>
          <artifactId>shiro-core</artifactId>
          <version>${shiro.version}</version>
      </dependency>
      <dependency>
          <groupId>org.apache.shiro</groupId>
          <artifactId>shiro-web</artifactId>
          <version>${shiro.version}</version>
      </dependency>
      <dependency>
          <groupId>org.apache.shiro</groupId>
          <artifactId>shiro-spring</artifactId>
          <version>${shiro.version}</version>
      </dependency>
web.xml配置
web.xml加入shiro过滤器:
	<!--shiro过滤器-->
	<filter>
		<filter-name>shiroFilter</filter-name>
		<filter-class>org.springframework.web.filter.DelegatingFilterProxy</filter-class>
		<init-param>
			<param-name>targetFilterLifecycle</param-name>
			<param-value>true</param-value>
		</init-param>
	</filter>
	<filter-mapping>
		<filter-name>shiroFilter</filter-name>
		<url-pattern>/*</url-pattern>
	</filter-mapping>
这里的filter-name的值shiroFilter需要跟spring里面配置的filter一样.
spring.xml配置
首先了解一下:
创建spring-shiro.xml配置:
首先肯定需要配置shiro的拦截过滤器bean,这个类org.apache.shiro.spring.web.ShiroFilterFactoryBean;

ShiroFilterFactoryBean里面的loginUrl,successUrl,unauthorizedUrl大致如下:

这个类的属性有SecurityManager,配置SecurityManager就使用默认的就好了,而默认的org.apache.shiro.web.mgt.DefaultWebSecurityManager有个传realm的构造方法.

配置文件需要在spring配置文件里面引入的:
<?xml version="1.0" encoding="UTF-8"?>
<beans xmlns="http://www.springframework.org/schema/beans"
       xmlns:xsi="http://www.w3.org/2001/XMLSchema-instance"
       xsi:schemaLocation="http://www.springframework.org/schema/beans http://www.springframework.org/schema/beans/spring-beans.xsd">

    <bean name="shiroFilterBean" class="org.apache.shiro.spring.web.ShiroFilterFactoryBean">
        <property name="securityManager" ref="securityManager"></property>
        <property name="filterChainDefinitions">
            <value>
                /login = anon
                /logout = logout
                /** = authc
            </value>
        </property>
        <property name="loginUrl" value="/login" />
        <property name="successUrl" value="/index" />
    </bean>

    <bean name="securityManager" class="org.apache.shiro.web.mgt.DefaultWebSecurityManager">
        <property name="realms" ref="shiroRealm"></property>
    </bean>

    <bean name="shiroRealm" class="com.txn.config.ShiroRealm">
            <!--  <property name="credentialsMatcher">
            <bean class="org.apache.shiro.authc.credential.HashedCredentialsMatcher">
                <property name="hashAlgorithmName" value="md5"></property>
                <property name="hashIterations" value="1"></property>
            </bean>
        </property>-->
        </property>
    </bean>
</beans>
自定义realm
我们自己实现一个realm,上篇讲了,自己实现realm只需要继承AuthorizingRealm就可以了,看一下三篇讲的sampleRealm的rml图:装饰者应该

import org.apache.shiro.authc.AuthenticationException;
import org.apache.shiro.authc.AuthenticationInfo;
import org.apache.shiro.authc.AuthenticationToken;
import org.apache.shiro.authc.SimpleAuthenticationInfo;
import org.apache.shiro.authz.AuthorizationInfo;
import org.apache.shiro.authz.SimpleAuthorizationInfo;
import org.apache.shiro.realm.AuthorizingRealm;
import org.apache.shiro.subject.PrincipalCollection;
import org.apache.shiro.util.ByteSource;

import java.util.HashMap;
import java.util.Map;

public class ShiroRealm extends AuthorizingRealm {

    /**
     * 认证
     */
    @Override
    protected AuthenticationInfo doGetAuthenticationInfo(AuthenticationToken token) throws AuthenticationException {
        System.out.println("-权限校验-");
        if ("admin".equals(token.getPrincipal())) {
            Map<String, Object> user = new HashMap<>();
            user.put("username", "admin");
            user.put("pass", "admin");
            user.put("user_id", 1);
            ByteSource salt = ByteSource.Util.bytes("abcd123");
            return new SimpleAuthenticationInfo(user, user.get("username"), salt, this.getName());
        }
        return null;
    }

    /**
     * 授权
     */
    @Override
    protected AuthorizationInfo doGetAuthorizationInfo(PrincipalCollection principalCollection) {
        SimpleAuthorizationInfo info = new SimpleAuthorizationInfo();
        info.addRole("role_admin");
        info.addStringPermission("user:add");
        info.addStringPermission("user:list");
        return info;
    }
}
简单测试
随便写个controller:
import com.txn.common.ResponseObject;
import org.apache.shiro.SecurityUtils;
import org.apache.shiro.authc.UsernamePasswordToken;
import org.apache.shiro.subject.Subject;
import org.springframework.util.StringUtils;
import org.springframework.web.bind.annotation.RequestMapping;
import org.springframework.web.bind.annotation.RequestMethod;
import org.springframework.web.bind.annotation.RestController;

/**
 * @author <a href="mailto:15268179013@139.com">yida</a>
 * @Version 2020-01-01 15:42
 * @Version 1.0
 * @Description IndexController
 */
@RestController
public class IndexController {

    @RequestMapping(value = "/login", method = {RequestMethod.POST, RequestMethod.GET})
    public ResponseObject login(String username, String password) {
        ResponseObject responseObject = new ResponseObject();
        if (StringUtils.isEmpty(username) || StringUtils.isEmpty(password)) {
            responseObject.success("登录失败");
            return responseObject;
        }
        UsernamePasswordToken usernamePasswordToken = new UsernamePasswordToken(username, password);
        SecurityUtils.getSubject().login(usernamePasswordToken);
        responseObject.success("ok");
        return responseObject;
    }

    @RequestMapping(value = "/getUser", method = RequestMethod.GET)
    public ResponseObject getUser() {
        ResponseObject responseObject = new ResponseObject();
        responseObject.success(true);
        return responseObject;
    }

    @RequestMapping(value = "/user", method = RequestMethod.GET)
    public ResponseObject user() {
        ResponseObject responseObject = new ResponseObject();
        Subject subject = SecurityUtils.getSubject();
        boolean permitted = subject.isPermitted("user:list");
        responseObject.success(permitted);
        return responseObject;
    }


}
就没写页面了,随便测试一下:
首先访问:http://localhost:8080/getUser,会跳转到登录页面,因为我们没有登录;
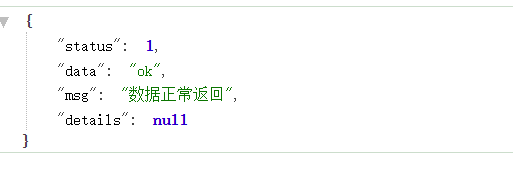
然后进行登录:http://localhost:8080/login?username=admin&password=admin

然后在访问http://localhost:8080/getUser但是并不会进入授权方法,就是doGetAuthorizationInfo方法,
然后访问http://localhost:8080/user然后在调用isPermitted方法的时候就进入到了doGetAuthorizationInfo方法证明了我们上篇介绍的.
通过java配置的方式整合spring
前面是通过xml的方式,改成通过配置类的方式:
import org.apache.shiro.realm.Realm;
import org.apache.shiro.spring.web.ShiroFilterFactoryBean;
import org.apache.shiro.web.mgt.DefaultWebSecurityManager;
import org.springframework.context.annotation.Bean;
import org.springframework.context.annotation.Configuration;

/**
 * @author <a href="mailto:15268179013@139.com">yida</a>
 * @Version 2020-01-01 15:05
 * @Version 1.0
 * @Description ShiroConfig
 */
@Configuration
public class ShiroConfig {

    @Bean
    public DefaultWebSecurityManager securityManager() {
        DefaultWebSecurityManager defaultWebSecurityManager = new DefaultWebSecurityManager();
        defaultWebSecurityManager.setRealm(realm());
        return defaultWebSecurityManager;
    }

    @Bean
    public Realm realm() {
        ShiroRealm shiroRealm = new ShiroRealm();
        return shiroRealm;
    }

    @Bean
    public ShiroFilterFactoryBean shiroFilter() {
        ShiroFilterFactoryBean shiroFilterFactoryBean = new ShiroFilterFactoryBean();
        shiroFilterFactoryBean.setSecurityManager(securityManager());
        shiroFilterFactoryBean.setLoginUrl("/login");
        shiroFilterFactoryBean.setSuccessUrl("/index");
        shiroFilterFactoryBean.setFilterChainDefinitions(" /login = anon\n" +
                "                /logout = logout\n" +
                "                /** = authc");

        return shiroFilterFactoryBean;
    }

}


