
模板引擎:第二章:Thymeleaf
Thymeleaf 是个什么?
Thymeleaf 是一个跟 Velocity、FreeMarker 类似的模板引擎,它可以完全替代 JSP。
它有什么优势?我们为什么要用它?
1.Thymeleaf 在有网络和无网络的环境下皆可运行,即它可以让美工在浏览器查看页面的静态效果,也可以让程序员在服务器查看带数据的动态页面效果。这是由于它支持 html 原型,然后在 html 标签里增加额外的属性来达到模板+数据的展示方式。
2.可以直接套用模板实现JSTL、 OGNL表达式效果,避免每天套模板、该jstl、改标签的困扰。同时开发人员也可以扩展和创建自定义的方言。
3.可以快速的实现表单绑定、属性编辑器、国际化等功能。
我们怎么快速的进行简单的使用?
1.简单的 Thymeleaf 应用
1)只需加入thymeleaf-2.1.4.RELEASE.jar(http://www.thymeleaf.org/download.html )包,若用maven,则加入如下配置
<dependency>
    <groupId>org.thymeleaf</groupId>
    <artifactId>thymeleaf</artifactId>
    <version>2.1.4</version>
</dependency>
2)然后增加头文件(如下)
<!DOCTYPE html>
<html xmlns="http://www.w3.org/1999/xhtml"
      xmlns:th="http://www.thymeleaf.org">
3)就可以用th标签动态替换掉静态数据了。后台传出的message会将静态数据“Red Chair”替换掉,若访问静态页面,则显示数据“Red Chair”。
<td th:text="${message}">Red Chair</td>实例演示:


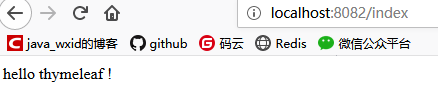
访问静态页面


4)使用循环
实例演示:
controller:
    @RequestMapping("index")
    public String replace(ModelMap map){
        map.put("hello","hello thymeleaf !");

        List<String> list = new ArrayList<>();
        List<String> list2 = new ArrayList<>();
        for (int i = 0; i < 5; i++) {
            list.add("元素"+i);
            list2.add("成员"+i);
        }
        map.put("list",list);
        map.put("list2",list2);
        return "index";
    }
index页面:
<body>
<!-- 取值 -->
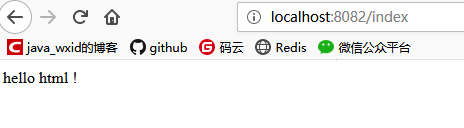
<div th:text="${hello}">hello html !</div>
<!-- 循环 -->
<div th:each="str:${list}">
<div th:text="${str}"></div>
</div>
<div th:each="str:${list2}" th:text="${str}"></div>
</body>结果:
hello thymeleaf !
元素0
元素1
元素2
元素3
元素4
成员0
成员1
成员2
成员3
成员4
说明:它循环主要看你把循环元素放在那
5)判断
实例演示:
index页面:
    <!-- 判断 -->
    <div th:if="1==1">该元素存在</div>
    <div th:text="(1==0)?'该元素存在':'该元素不存在'"></div>
结果:
该元素存在
该元素不存在
6)页面引入
实例演示:
第一种方式:
index页面:
<!-- 页面引入 -->
<div th:include="a"></div>
a页面:
<!DOCTYPE html>
<html lang="en"  xmlns="http://www.w3.org/1999/xhtml" xmlns:th="http://www.thymeleaf.org">
<head>
    <meta charset="UTF-8">
    <title>Title</title>
</head>
<body>
        被引入的页面a
        <div th:fragment="b">
            被引入的页面a的片段b
        </div>
</body>
</html>
结果:
被引入的页面a
被引入的页面a的片段b
第二种方式:
<!-- 页面引入 -->
<div th:include="a::b"></div>
a页面一样,结果:
被引入的页面a的片段b 7)函数调用
实例演示:
index页面:
<!DOCTYPE html>
<html lang="en" xmlns="http://www.w3.org/1999/xhtml" xmlns:th="http://www.thymeleaf.org">
<head>
    <meta charset="UTF-8">
    <title>Title</title>
</head>
<body>


    <!-- 循环 -->
    <div th:each="str:${list}">
        <div th:text="${str}"></div>
    </div>
    <div th:each="str:${list2}" th:text="${str}"></div>
    <!-- 判断 -->
    <div th:if="1==1">该元素存在</div>
    <div th:text="(1==0)?'该元素存在':'该元素不存在'"></div>
    <!-- 页面引入 -->
    <div th:include="a::b"></div>

    <!-- 取值 -->
    <div th:text="${hello}">hello html !</div>
    <!-- js函数调用 -->
    <!--    函数调用    -->
    <a th:href="'javascript:a(\''+${hello}+'\');'">调用函数测试</a>
    <script language="JavaScript">
        function a(hello) {
            alert(hello);
        }
    </script>
</body>
</html>
controller:
    @RequestMapping("index")
    public String replace(ModelMap map){
        map.put("hello","hello thymeleaf !");

        List<String> list = new ArrayList<>();
        List<String> list2 = new ArrayList<>();
        for (int i = 0; i < 5; i++) {
            list.add("元素"+i);
            list2.add("成员"+i);
        }
        map.put("list",list);
        map.put("list2",list2);
        return "index";
    }
结果:

8)其他情况
实例演示:
第一种情况:userInfos有值的情况
controller:
        List<UserInfo> userInfos = new ArrayList<>();
        for (int i = 0; i < 5; i++) {
            UserInfo userInfo = new UserInfo();
            userInfo.setName("小"+i);
            userInfos.add(userInfo);
        }
        map.put("userInfos",userInfos);
index页面:
<!-- 其他情况 -->
<div th:each="user:${userInfos}" th:text="${user.name}" ></div>
结果:
小0
小1
小2
小3
小4
第二种情况:userInfos没有值的情况
controller:
        List<UserInfo> userInfos = new ArrayList<>();
        for (int i = 0; i < 5; i++) {
            UserInfo userInfo = new UserInfo();
            userInfo.setName("小"+i);
            userInfos.add(userInfo);
        }
        map.put("userInfos",null);
页面不变,结果无,没有输出
第三种情况:
controller:
        UserInfo userInfo = new UserInfo();
        userInfo.setName("老王");
        map.put("userInfo",null);
index页面:
<div th:text="${userInfo.name}" ></div>这种情况会报空指针异常。
怎么解决这个问题?
index页面:
<div th:text="${userInfo?.name}" ></div>

<!-- thymeleaf中如果使用了数字格式化函数,数字不允许为空,否则会报类型转化错误-->
不为空则调,为空不调,也不报错。
Freemarker入门小DEMO
工程引入依赖
|
<dependency> <groupId>org.freemarker</groupId> <artifactId>freemarker</artifactId> <version>2.3.23</version> </dependency> |
创建模板文件
模板文件中四种元素
1、文本,直接输出的部分
2、注释,即<#--...-->格式不会输出
3、插值(Interpolation):即${..}部分,将使用数据模型中的部分替代输出
4、FTL指令:FreeMarker指令,和HTML标记类似,名字前加#予以区分,不会输出。
我们现在就创建一个简单的创建模板文件test.ftl
|
<html> <head> <meta charset="utf-8"> <title>Freemarker入门小DEMO </title> </head> <body> <#--我只是一个注释,我不会有任何输出 --> ${name},你好。${message} </body> </html> |
这里有文本、插值和注释
生成文件
使用步骤:
第一步:创建一个 Configuration 对象,直接 new 一个对象。构造方法的参数就是 freemarker的版本号。
第二步:设置模板文件所在的路径。
第三步:设置模板文件使用的字符集。一般就是 utf-8.
第四步:加载一个模板,创建一个模板对象。
第五步:创建一个模板使用的数据集,可以是 pojo 也可以是 map。一般是 Map。
第六步:创建一个 Writer 对象,一般创建一 FileWriter 对象,指定生成的文件名。
第七步:调用模板对象的 process 方法输出文件。
第八步:关闭流
代码:
创建Test类 main方法如下:
|
//1.创建配置类 Configuration configuration=new Configuration(Configuration.getVersion()); //2.设置模板所在的目录 configuration.setDirectoryForTemplateLoading(new File("D:/work/freemarkerDemo/src/main/resources/")); //3.设置字符集 configuration.setDefaultEncoding("utf-8"); //4.加载模板 Template template = configuration.getTemplate("test.ftl"); //5.创建数据模型 Map map=new HashMap(); map.put("name", "张三 "); map.put("message", "欢迎来到神奇的世界!"); //6.创建Writer对象 Writer out =new FileWriter(new File("d:\\test.html")); //7.输出 template.process(map, out); //8.关闭Writer对象 out.close(); |
执行后,在D盘根目录即可看到生成的test.html ,打开看看

