使用SpringSecurityOAuth2默认实现OAuth2授权示例
本文记录一下使用SpringSecurityOAuth2实现授权的步骤。
1、相关知识
OAuth协议简介:https://www.cnblogs.com/javasl/p/13054133.html
OAuth 2.0官网:https://oauth.net/2/
2、构建项目
本文使用的springboot版本是2.0.4.RELEASE,不同版本可能会有所区别。下面是主要的配置文件和类:
1)pom依赖
<dependency>
    <groupId>org.springframework.boot</groupId>
    <artifactId>spring-boot-starter-security</artifactId>
</dependency>
<dependency>
    <groupId>org.springframework.security.oauth.boot</groupId>
    <artifactId>spring-security-oauth2-autoconfigure</artifactId>
    <version>2.1.3.RELEASE</version>
</dependency>
2)application.properties
security.oauth2.client.client-id = MyProject
security.oauth2.client.client-secret = MyProject_123
security.oauth2.client.registered-redirect-uri = www.baidu.com
指定应用的ID和秘钥,redirect-uri暂时没用到,但必须有,否则无法演示授权效果。
3)主配置类
@EnableWebSecurity
@Configuration
public class WebSecurityConfig extends WebSecurityConfigurerAdapter{
    @Override
    protected void configure(HttpSecurity http) throws Exception {
        http.httpBasic().and().csrf().disable();
    }
    @Bean
    public PasswordEncoder passwordEncoder() {
        return new BCryptPasswordEncoder();
    }
}
4)用户认证类
@Component
public class MyUserDetailsService implements UserDetailsService{

    @Autowired
    private PasswordEncoder passwordEncoder;

    @Override
    public UserDetails loadUserByUsername(String username) throws UsernameNotFoundException {
        System.out.println("登录用户名:"+username);
        String  password = passwordEncoder.encode("123456");
        return new User(username,password,true,true,true,true,
                AuthorityUtils.commaSeparatedStringToAuthorityList("admin,ROLE_USER"));
    }
}
5)认证服务器类
@Configuration
@EnableAuthorizationServer
public class AuthorizationServerConfig {
}
6)启动类
@SpringBootApplication
public class App {
    public static void main(String[] args) {
        SpringApplication.run(App.class, args);
    }
}
3、OAuth 2.0协议相关参数讲解
登录官网 访问:https://tools.ietf.org/html/rfc6749,里面第4章详解介绍了4种授权模式。
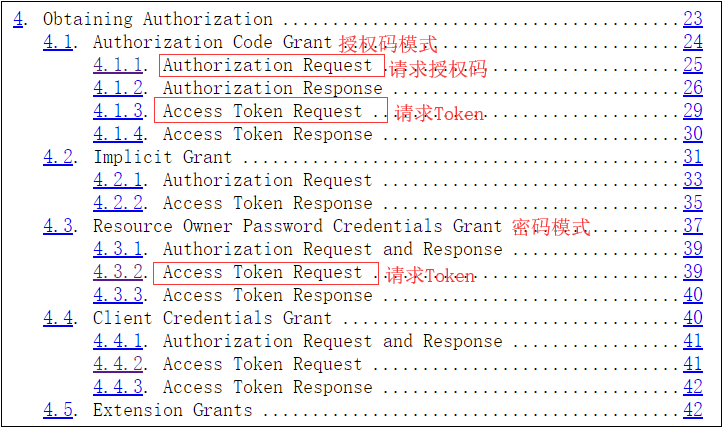
1)授权码模式下,请求授权码所需参数:
response_type:------必填,值是固定的常量code
client_id:-------------必填,值是应用ID,配置文件中定义的MyProject
redirect_uri:---------非必填,值是回调地址
scope:----------------非必填,值是范围
state:-----------------非必填,值是状态
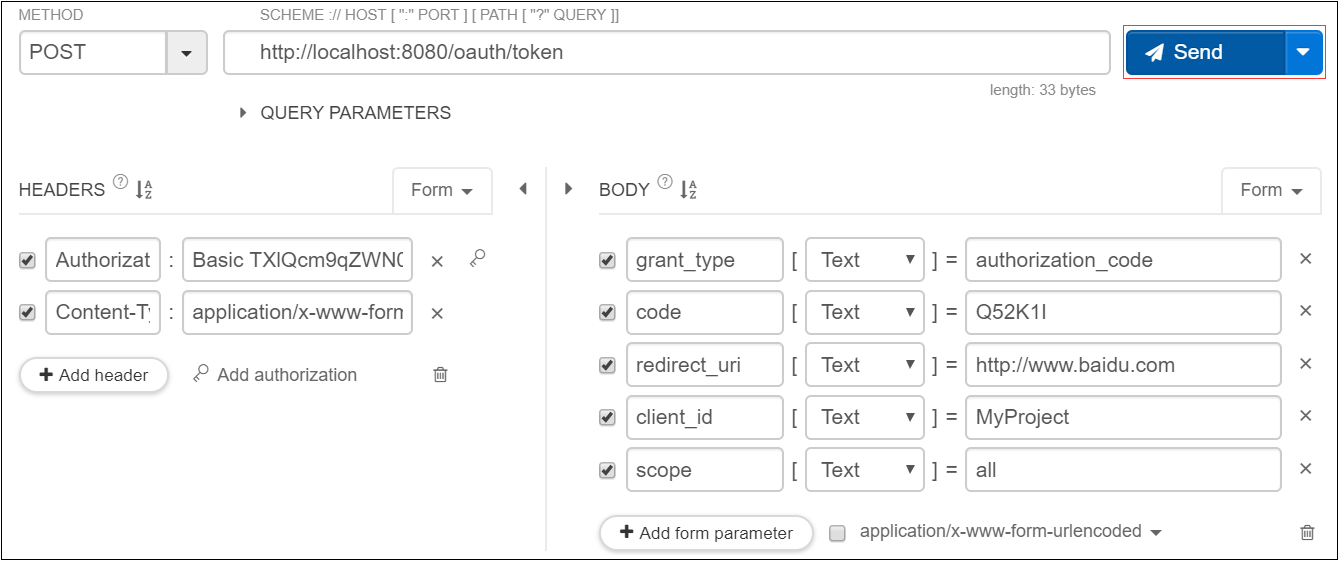
2)授权码模式下,请求Token所需参数:
grant_type:---------必填,值是固定的常量authorization_code
code:----------------必填,值是上面一步请求返回的授权码
redirect_uri:--------必填,值是回调地址
client_id:------------必填,值是应用ID,配置文件中定义的MyProject
3)密码模式下,请求Token所需参数:
grant_type:---------必填,值是固定的常量password
username:----------必填,值是用户名
password:-----------必填,值是用户密码
scope:---------------非必填,范围
4、演示OAuth2授权
启动项目,使用Restlet Client-REST API Testing插件测试
1)测试授权码模式
浏览器输入:http://localhost:8080/oauth/authorize?response_type=code&client_id=MyProject&scope=all
弹出认证页面,输入用户名密码,用户名随意,密码是123456,参考MyUserDetailsService.java。
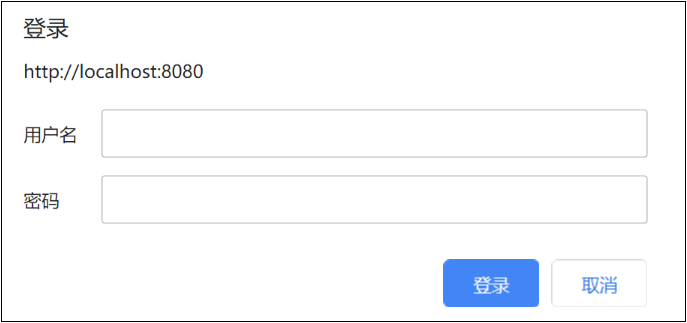
认证成功后,跳转到授权页面。

选择同意授权,跳转到配置的回调url,浏览器中显示:https://www.baidu.com/?code=Q52K1I。其中Q52K1I就是获取的授权码。
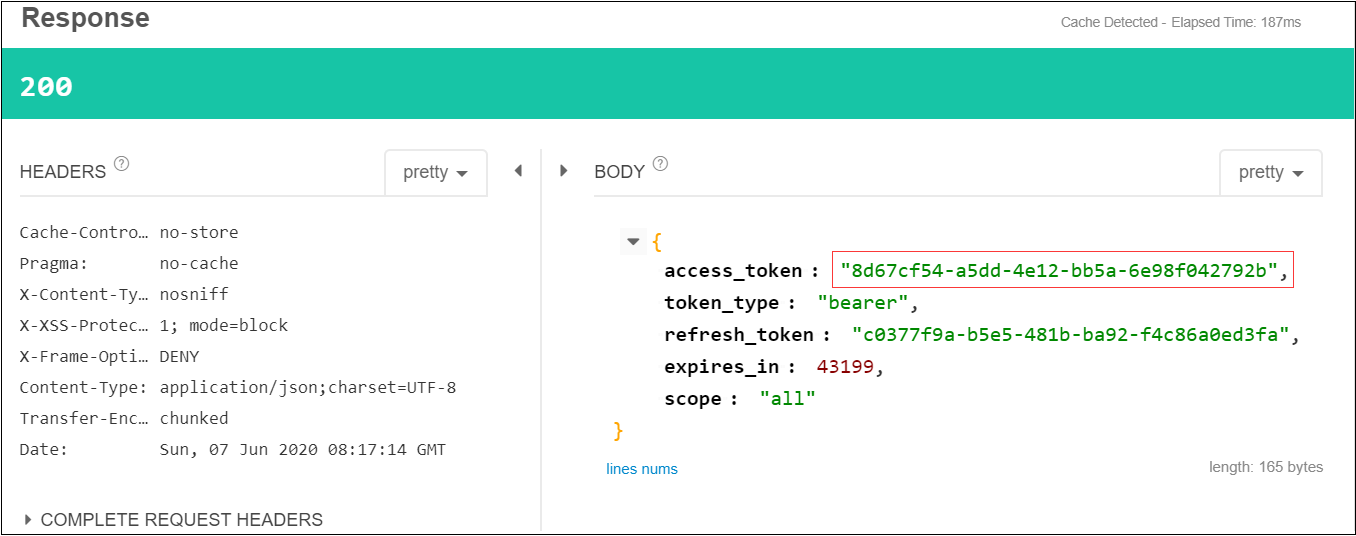
使用插件发送POST请求,获取Token
2)测试密码模式
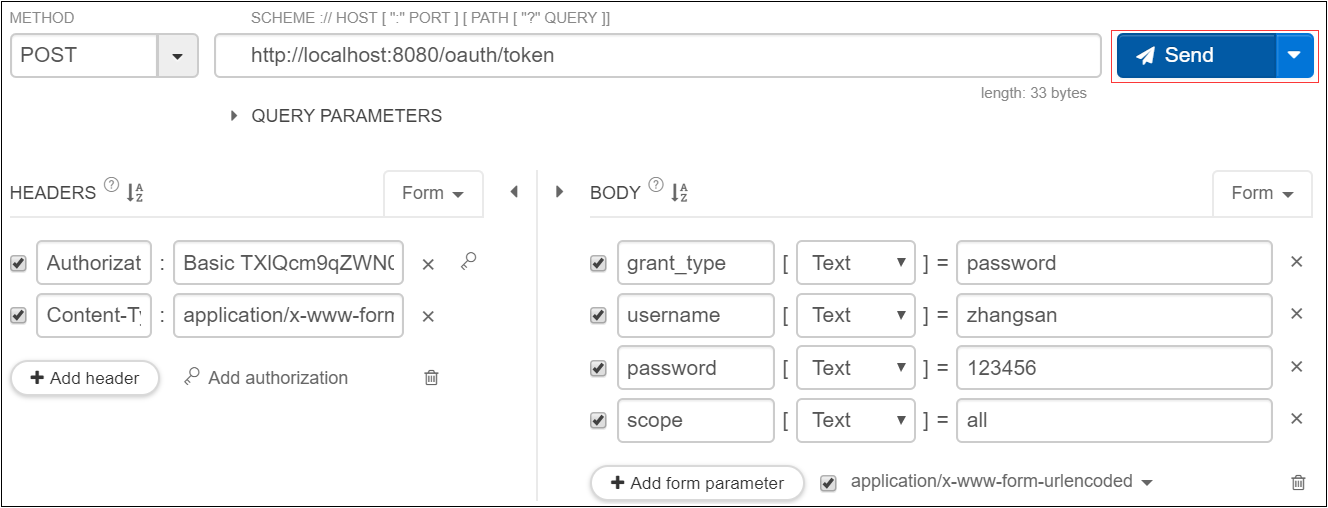
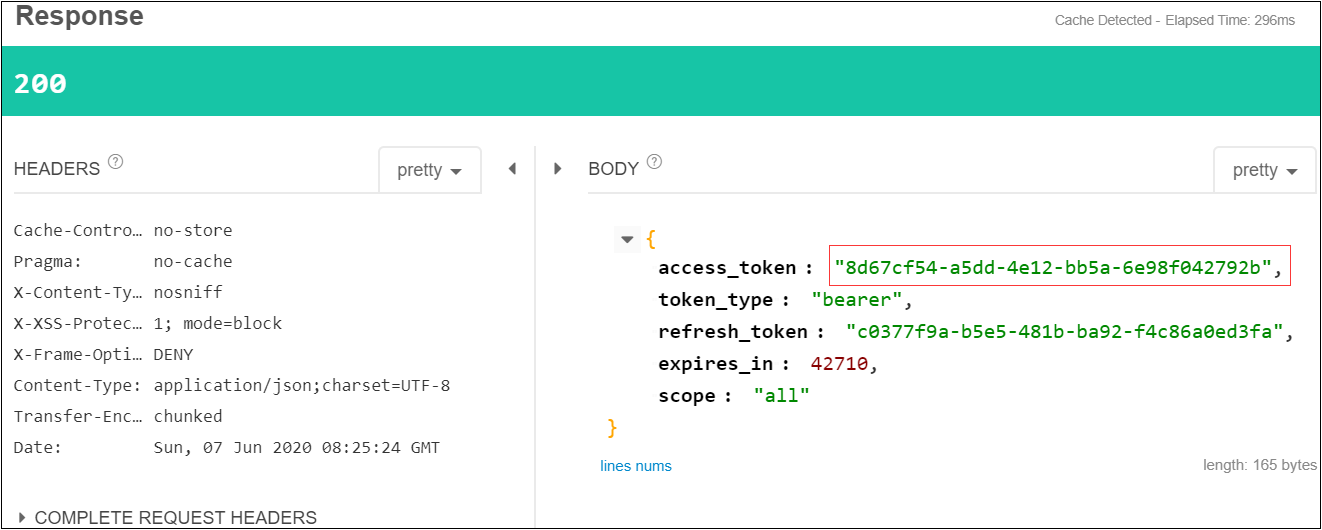
说明:
1)可以看到两种方式获取的Token是一样的,因为同一个用户在系统中已经存在Token了,就不会再创建,直接返回。
2)HEADERS第一个参数Authorization,点击Add authorization创建,弹出如下框,用户名、密码分别是应用的ID和秘钥。
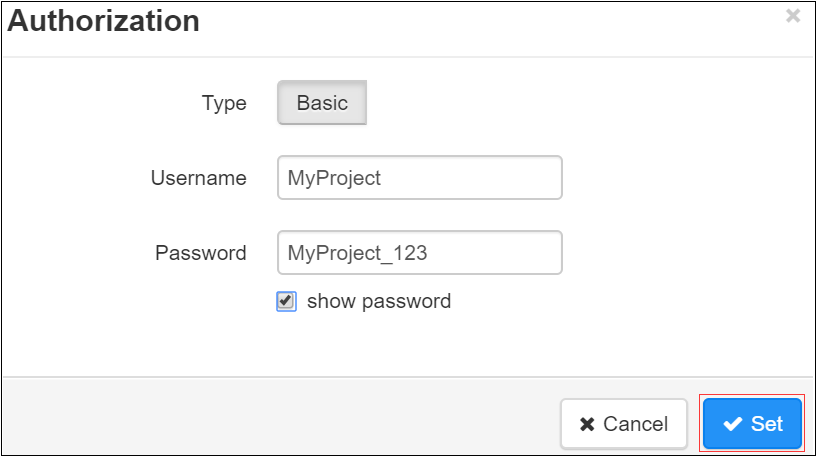
3)HEADERS第二个参数Content-Type,值为application/x-www-form-urlencoded,创建body参数时自动生成的。
5、演示获取资源
1)新增资源服务类
@Configuration
@EnableResourceServer
public class ResourceServerConfig {
}
2)新增测试类
@RestController
public class UserController {

    @GetMapping("/currentUser")
    public Object getCurrentUser(@AuthenticationPrincipal UserDetails user) {
        return user;
    }
}
3)启动服务,用密码模式获取Token,如上。

4)访问资源,获取当前用户信息

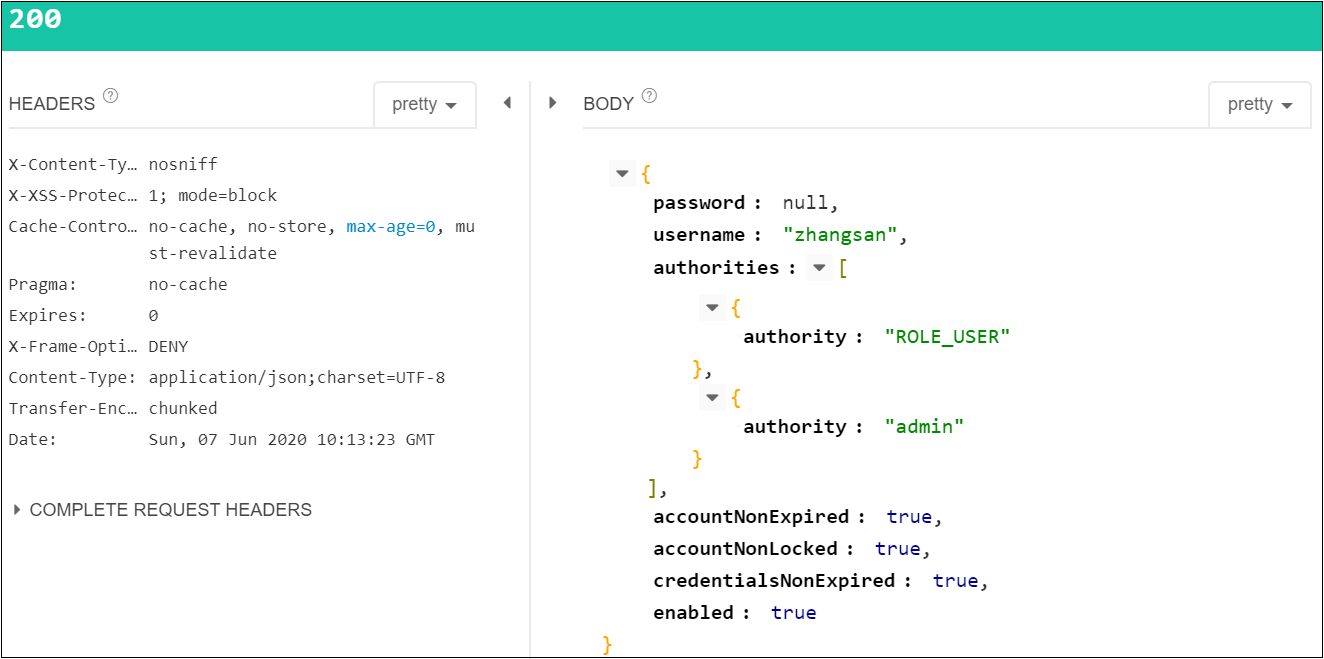
注意:参数名是Authorization,参数值是bearer e9c07170-fb16-4c20-a4cb-71fd623ccffb(token_type + access_token)

