超简单部署ELK附安装包
一、ELK部署
安装包下载地址:链接: https://pan.baidu.com/s/1QMrGFpv1QyOSwN-AsXGrLA 提取码: rbn1
1. 安装logstash
1.解压logstash2.4.0
2.在解压目录下新建config目录,新建logstash.conf(建配置文件)
3.配置文件编解内容
input {
        file {
                type => "log"
                path => ["/usr/local/logs/*.out"]
                start_position => "end"
		ignore_older => 0
		codec=> multiline {             //配置log换行问题
                        pattern => "^%{TIMESTAMP_ISO8601}"
                        negate => true
                        what => "previous"
                }
        }
        beats {
            port => 5044
        }
}
output {
        if [type] == "log" {
		elasticsearch {
			hosts => ["http://127.0.0.1:9200"]
			index => "log-%{+YYYY.MM}"
		}
	}
}
4.启动
nohup ./bin/logstash -f config/logstash.conf > log.log &
5.生成日志
上面配置的日志目录是/usr/local/logs/*.out,可以生成一些日志到指定目录下就能被收集到啦。
2. 安装Elasticsearch
1.解压开 tar -zxvf elasticsearch-2.4.6.tar.gz
2.进入config目录,修改配置文件vim elasticsearch.yml
cluster.name: my.elk	#集群名称,如果有多个集群,那么每个集群名就得是唯一的
node.name: node-1	#节点名称
node.master: true		#该节点是否是master,true表示是的,false表示否,默认是true
node.data: true			#该节点是否存储数据,默认true表示是的
http.port: 9200			#http访问端口,默认是9200,通过这个端口,调用方可以索引查询请求
transport.tcp.port: 9300	#节点之间通信的端口,默认为9300
network.host: 0.0.0.0		#访问地址 配置外网访问
#discovery.zen.ping.unicast.hosts: ["127.0.0.1:9300", "127.0.0.1:8300"]
#node.max_local_storage_nodes: 2		#设置一台机子能运行的节点数目,一般采用默认的1即可,因为我们一般也只在一台机子上部署一个节点
3.启动,需要新建个用户再启动
useradd es
chown -R es elasticsearch-2.4.6/
su es  //切换用户

./bin/elasticsearch -d  //-d代表后台启动
4.访问地址验证是否启动成功
5.安装插件
cd bin

./plugin install mobz/elasticsearch-head
访问 http://192.168.1.21:9200/_plugin/head/
3. 安装Kibana
1.解压kibana
2.配置文件kibana.yml
 server.host: "0.0.0.0"
 elasticsearch.url: "http://localhost:9200"
3.启动
(注意切回root用户)
nohup ./bin/kibana &
4.配置索引库
进入网址http://192.168.1.21:5601/,填入索引名,跟es的索引名规则对应上
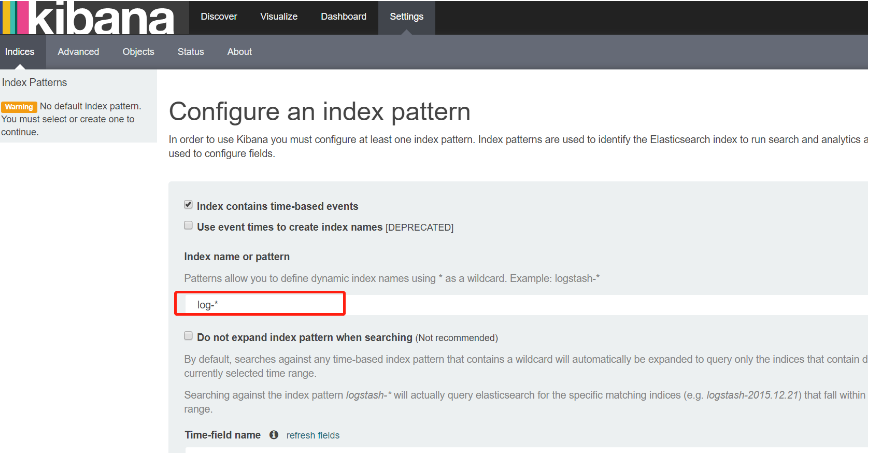
然后切换到Discover导航页下面进行搜索啦。注意搜索条件哦,默认是搜最近15分钟的

大功告成!!!
书山有路勤为径,学海无涯苦作舟
